
How to Install Harbor Docker Image Registry on Ubuntu 22.04
Harbor is an open-source cloud-native registry that provides a secure and scalable platform for storing, signing, and distributing container images. Developed by VMware, Harbor offers enterprises and developers a comprehensive solution for managing container artifacts, ensuring compliance, and promoting collaboration across the software development lifecycle.
In this guide, we will show you how to install the Harbor registry on Ubuntu 22.04.
Step 1 – Install Docker CE
By default, the latest Docker version is unavailable in the Ubuntu default repo, so you will need to install it from their official repo.
First, install all the necessary dependencies:
apt update -y
apt install ca-certificates curl gnupg lsb-release -y
Next, create a directory to store the Docker GPG key.
mkdir -p /etc/apt/keyrings
Next, download the GPG key:
curl -fsSL https://download.docker.com/linux/ubuntu/gpg | gpg --dearmor -o /etc/apt/keyrings/docker.gpg
Next, add the Docker repository to the APT source file.
echo "deb [arch=$(dpkg --print-architecture) signed-by=/etc/apt/keyrings/docker.gpg] https://download.docker.com/linux/ubuntu $(lsb_release -cs) stable" | tee /etc/apt/sources.list.d/docker.list > /dev/null
Next, update the repository cache:
apt update -y
Finally, install Docker CE and other required tools using the following command:
apt install docker-ce docker-ce-cli containerd.io docker-compose-plugin -y
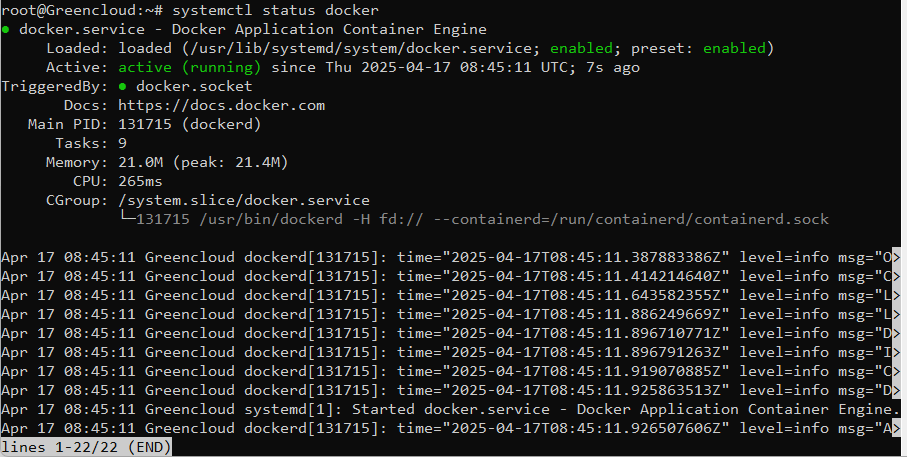
You can verify the status of the Docker service using the following command:
systemctl status docker
Output:
Step 2 – Install Harbor
First, download the latest version of Harbor from the Git repository.
curl -s https://api.github.com/repos/goharbor/harbor/releases/latest | grep browser_download_url | cut -d '"' -f 4 | grep '\.tgz$' | wget -i -
Once the download is completed, extract the downloaded file using the tar command:
tar -xzvf harbor-online-installer-v2.14.2.tgz
Next, move the extracted directory to the /opt directory.
mv harbor /opt/
Next, navigate to the Harbor directory and copy the Harbor configuration file.
cd /opt/harbor
cp harbor.yml.tmpl harbor.yml
Next, edit the Harbor configuration file.
nano harbor.yml
Change the following lines:
hostname: greencloud.example.com

harbor_admin_password: Green@1234
Remove the following lines:
https:
  # https port for harbor, default is 443
  port: 443
  # The path of cert and key files for nginx
certificate: /etc/letsencrypt/live/domain/fullchain.pem
private_key: /etc/letsencrypt/live/domain/privkey.pem
Save and close the file when you are done.
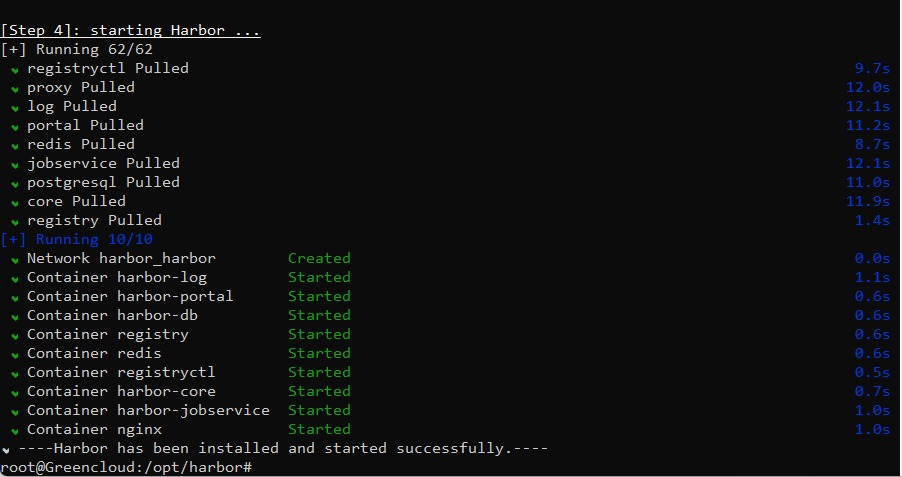
Next, run the following command to install Harbor:
./install.sh
You will see the following output:
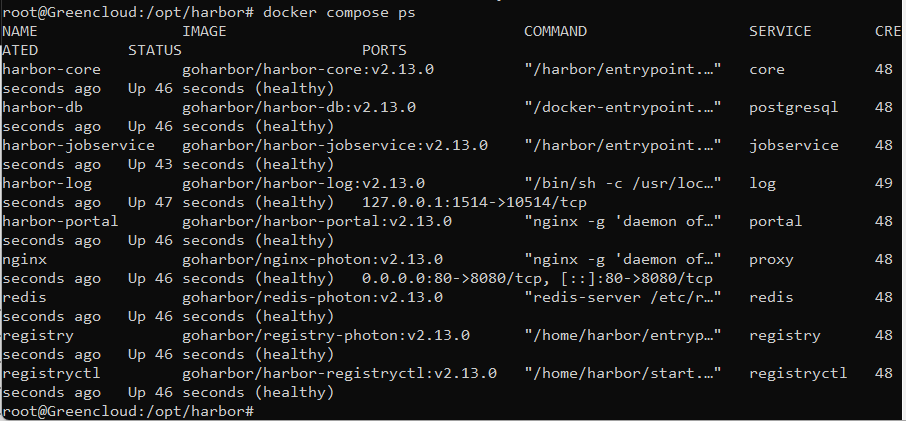
You can verify all running containers using the following command:
docker compose ps
Output:
Step 3 – Access Harbor Web UI
At this point, the Harbor registry is installed in the Docker container. You can now access it using the URL http://greencloud.example.com. You will see the Harbor login page:
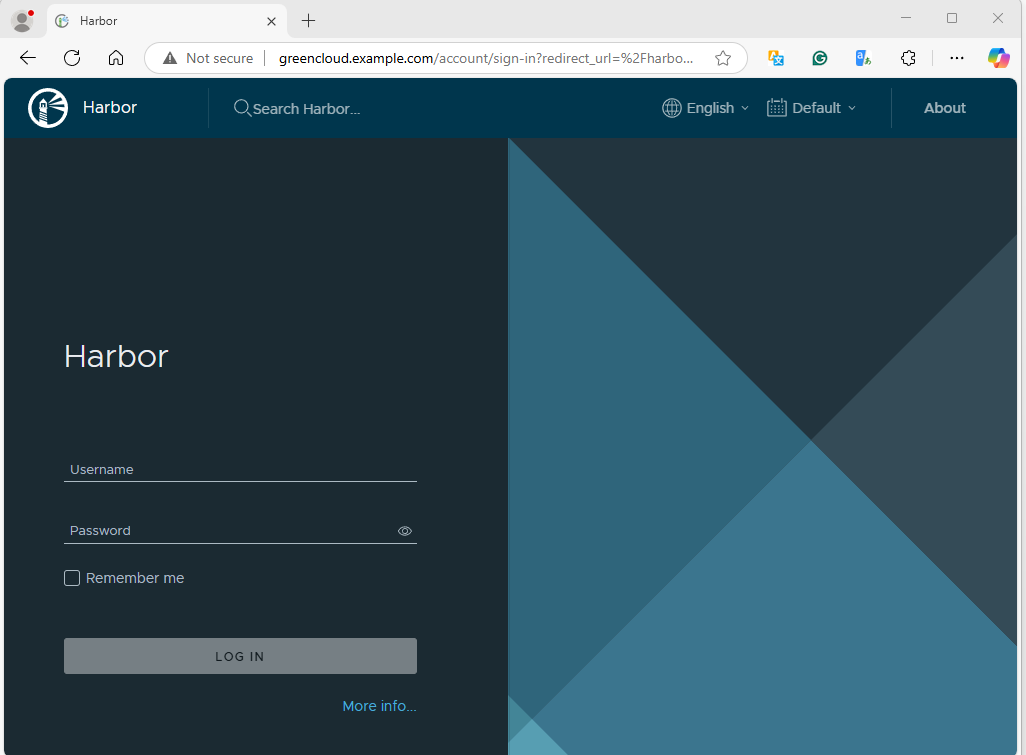
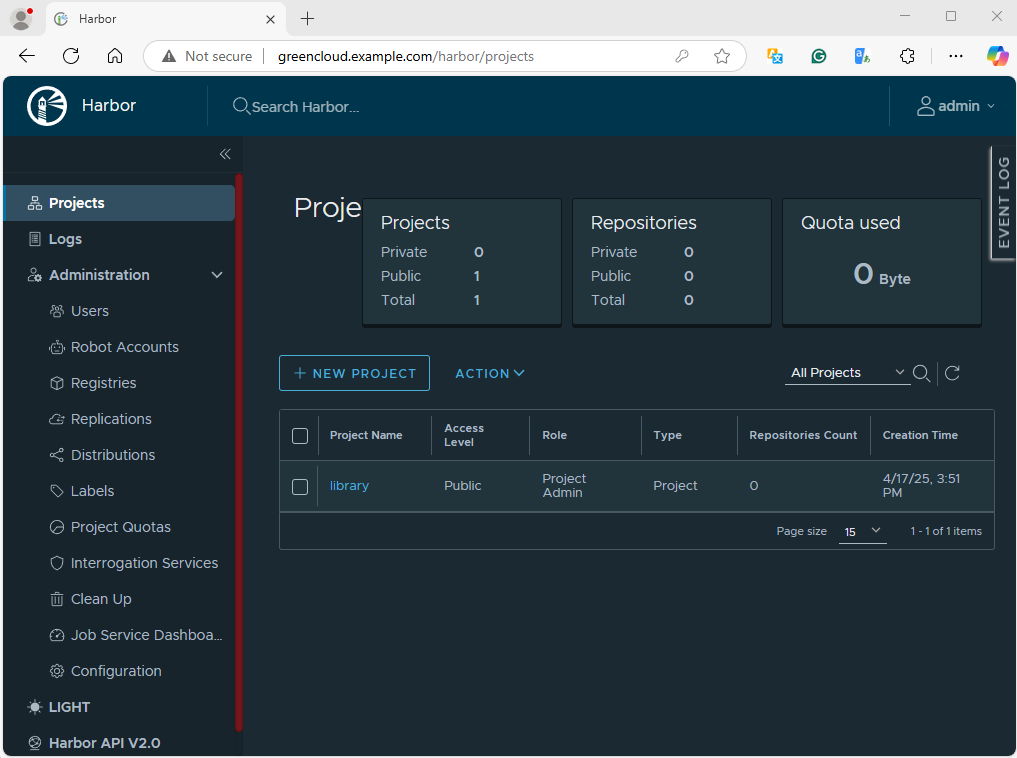
Provide the default username admin and the password that you have configured via the configuration file harbor.yml, then click on the LOG IN button. You will see the Harbor dashboard on the following page.
Conclusion
By deploying Harbor, you gain control over your container image lifecycle, ensuring compliance with security policies, regulatory requirements, and best practices for containerized application development and deployment. Harbor’s intuitive user interface, RESTful API, and integration capabilities enable seamless integration with your existing infrastructure, CI/CD pipelines, and identity providers, fostering collaboration and accelerating software delivery cycles. You can now try to host your image hosting registry using Harbor on dedicated server hosting from GreenCloud!
