
How to Install Graylog on Ubuntu 24.04
Graylog is a free and open-source log-management platform for capturing, storing, and enabling real-time analysis of your data and logs. It’s written in Java and built on top of other open-source software like MongoDB and Elasticsearch.
Graylog provides one of the most efficient, fast, and flexible centralized log management platforms. With Graylog, you can send and analyze both structured and unstructured data from almost any data source.
In this tutorial, you’ll learn how to install the Graylog server on Ubuntu 24.04. You’ll be installing Graylog with MongoDB and Elasticsearch.
Prerequisites
To complete this tutorial, make sure you have the following:
- An Ubuntu 24.04 server with at least 4 or 8 GB of memory
- A non-root user with administrator privileges
Installing MongoDB
To install Graylog, you must have MongoDB installed first. At this time, Graylog only supports MongoDB v5.x-7.x, and in this section, you’ll be installing MongoDB 7.x on your Ubuntu server.
First, run the command below to install some dependencies.
sudo apt install apt-transport-https gnupg2 uuid-runtime pwgen curl dirmngr -y
Now add the MongoDB GPG key and repository with the following command. In this example, you’ll be using MongoDB 7.0 for the previous Ubuntu version.
curl -fsSL https://www.mongodb.org/static/pgp/server-7.0.asc | \
sudo gpg -o /usr/share/keyrings/mongodb-server-7.0.gpg \
--dearmor
echo "deb [ arch=amd64,arm64 signed-by=/usr/share/keyrings/mongodb-server-7.0.gpg ] https://repo.mongodb.org/apt/ubuntu jammy/mongodb-org/7.0 multiverse" | \
sudo tee /etc/apt/sources.list.d/mongodb-org-7.0.list

Once the repository is added, run the ‘apt’ command below to update your Ubuntu package index and install MongoDB on your system.
sudo apt update && sudo apt install mongodb-org
Enter ‘Y‘ to confirm the installation.
After the installation is complete, start and enable the ‘mongod‘ service with the command below.
sudo systemctl enable --now mongod
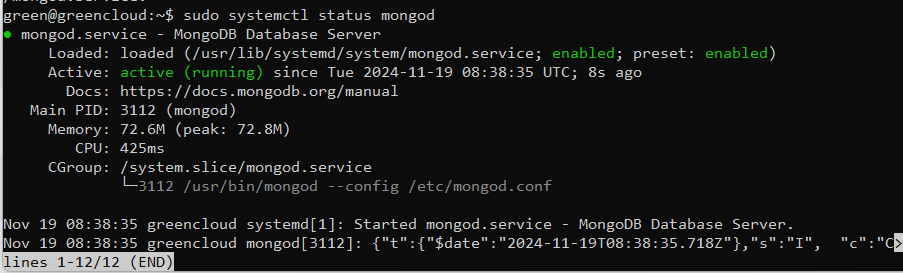
Lastly, verify the ‘mongod‘ service to ensure that the service is running. You should see MongoDB is running on your system.
sudo systemctl status mongod
Installing Elasticsearch
After you’ve installed MongoDB, you need to install Elasticsearch. And before that, you must install Java OpenJDK first, and then install Elasticsearch. As for now, the Graylog server only supports Elasticsearch v7.x.
To install Java OpenJDK, run the ‘apt‘ command below. Enter ‘Y‘ to proceed with the installation.
sudo apt install openjdk-11-jre-headless
Now, check the Java version with the following. You should see that Java OpenJDK 11 has been installed.
java --version
After Java is installed, you’re ready to install Elasticsearch.

Run the command below to add the GPG key and repository for Elasticsearch. In this example, you’ll be installing Elasticsearch 7.x.
curl -fsSL https://artifacts.elastic.co/GPG-KEY-elasticsearch | sudo gpg --dearmor -o /usr/share/keyrings/elastic.gpg
echo "deb [signed-by=/usr/share/keyrings/elastic.gpg] https://artifacts.elastic.co/packages/7.x/apt stable main" | sudo tee -a /etc/apt/sources.list.d/elastic-7.x.list
Now run the command below to update your Ubuntu repository and install the ‘elasticsearch’ package. Input ‘Y‘ to confirm.
sudo apt update
sudo apt install elasticsearch
After the installation, open the Elasticsearch config file ‘/etc/elasticsearch/elasticsearch.yml‘ with the ‘nano‘ editor.
sudo nano /etc/elasticsearch/elasticsearch.yml
Change the default ‘cluster.name‘ and set the ‘action.auto_create_index‘ to ‘false‘ like the following:
cluster.name: graylog
action.auto_create_index: false
Save the file and exit the editor.
Now run the ‘systemctl‘ command below to reload the systemd manager, start, and enable the Elasticsearch service.
sudo systemctl daemon-reload
sudo systemctl enable --now elasticsearch
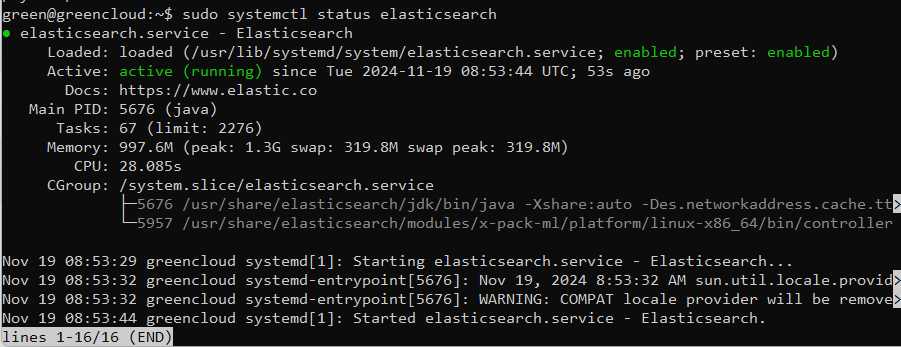
With Elasticsearch running, you can verify it with the command below.
sudo systemctl status elasticsearch
The following output confirms that Elasticsearch is running.
You can also check Elasticsearch with the ‘curl‘ command below.
curl -X GET http://localhost:9200
If Elasticsearch is running, you can see its version number and the cluster name like the following.

Installing Graylog
Now that you’ve installed MongoDB and Elasticsearch, you’re ready to install Graylog on your server. In this section, you’ll install Graylog and set up password authentication for your installation.
Download the Graylog repository package using the ‘wget‘ command and install it with the ‘dpkg‘ command like the following:
wget https://packages.graylog2.org/repo/packages/graylog-6.1-repository_latest.deb
sudo dpkg -i graylog-6.1-repository_latest.deb
Now run the ‘apt‘ command below to update your Ubuntu package index and install the ‘graylog-server‘ package. Enter ‘Y‘ to confirm the installation.
sudo apt update
sudo apt install graylog-server
After the installation, you need to generate two passwords, ‘password_secret’ and ‘root_password_sha2‘, for Graylog.
To generate the ‘password_secret‘, run the command below. Make sure to copy the generated password.
< /dev/urandom tr -dc A-Z-a-z-0-9 | head -c${1:-96};echo;
For the ‘root_password_sha2‘ password, run the following command. Enter your password when prompted and copy the generated SHA password.
echo -n "Enter Password: " && head -1 </dev/stdin | tr -d '\n' | sha256sum | cut -d" " -f1
Now that you’ve generated Graylog passwords, you’ll modify the Graylog configuration file.

Open the file ‘/etc/graylog/server/server.conf‘ with the following ‘nano‘ editor.
sudo nano /etc/graylog/server/server.conf
Paste your generated password for both ‘password_secret‘ and ‘root_password_sha2‘. And then, change the default ‘http_bind_address‘ to your local IP address.
password_secret = lzjvtV62vIGIVAbrAElzoYzwtUx3f0-O6KAIYlPHvBtDLALhQ51mwAa71coOU2Wcw6e9pEQ2Hp8GO63N51fwEC3gRnvo33NZ
root_password_sha2 = 7f9fc65bb7893d9eacfcbf3a96f9c5b91cce6651208ded2b1f2884a53a5f4cae
http_bind_address = 127.0.0.1:9000
elasticsearch_hosts = http://localhost:9200
mongodb_uri = mongodb://localhost:27017/graylog
Save the file and exit the editor.
Next, run the following ‘systemctl‘ command to reload the systemd manager, start and enable the ‘graylog-server‘ service.
sudo systemctl daemon-reload
sudo systemctl enable --now graylog-server
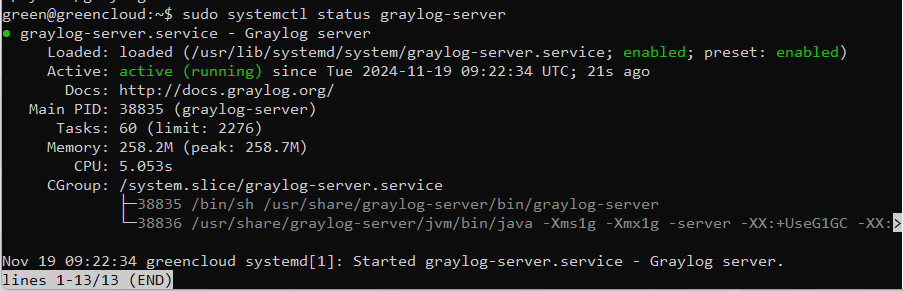
Lastly, check the ‘graylog-server‘ status using the command. If your installation is successful, you’ll see Graylog is running on your Ubuntu server.
sudo systemctl status graylog-server
Configure Nginx as a reverse proxy
On its own, Graylog can act as a frontend and does not require a web server. However, you can configure a web server as a reverse proxy for port 80 to port 9000, on which Graylog listens. This also simplifies configuring an SSL certificate for Graylog.
In our case, we will use Nginx as our preferred web server option. To install Nginx, run the command:
sudo apt install nginx
sudo nano /etc/nginx/sites-available/graylog.conf
Add these lines of code, and make sure to specify your server’s IP for the proxy_pass attribute.
server {
    listen 80;
    server_name Your_domain;

location /
    {
      proxy_pass http://localhost:9000;
      proxy_set_header Host $http_host;
      proxy_set_header X-Forwarded-Host $host;
      proxy_set_header X-Forwarded-Server $host;
      proxy_set_header X-Forwarded-For $proxy_add_x_forwarded_for;
      proxy_set_header X-Graylog-Server-URL http://$server_name/;
    }
}
Save the changes and exit the configuration file. Then, run the following command to verify that your web server’s configuration syntax is okay.
sudo nginx -t
If all looks good, enable the Nginx virtual host file.
sudo ln -s /etc/nginx/sites-available/graylog.conf /etc/nginx/sites-enabled/
Remember to delete the default virtual host file, as this will override the newly enabled virtual host configuration.
sudo rm -rf /etc/nginx/sites-enabled/default
To apply the changes made, restart the Nginx web service
sudo systemctl restart nginx
And ensure that it is running as expected.
sudo systemctl status nginx
Allow the firewall port to connect
sudo ufw allow 9000
sudo ufw allow 9200
sudo ufw allow 80
Access the Graylog web interface
To access the Graylog web interface, visit the following URL on your web browser.
http://server-ip or http://your-domain
Now you’ll be redirected to the Graylog login page. Enter the default user ‘admin‘ with the password within the ‘root_password_sha2‘ option.

If you have the correct username and password, you’ll get the Graylog dashboard like the following:

Conclusion
Congratulations! You’ve completed the installation of Graylog on the Ubuntu 24.04 server. You’ve Graylog up and running with the MongoDB 7.x and Elasticsearch 7.x. From here, you can now create new Graylog inputs so you can send logs to your Graylog server.
