
How to Install Rancher on Debian 12 Server
Rancher is an open-source container management platform designed to facilitate the deployment, management, and governance of Kubernetes clusters. Unlike a Kubernetes distribution that replaces Kubernetes itself, Rancher acts as a management solution that sits above one or more Kubernetes clusters, providing a centralized platform from which administrators can oversee their entire container infrastructure.
In this tutorial, you’ll learn how to install Rancher on a Debian 12 server. You’ll install Rancher as a single node via Docker, which also deploys the Kubernetes single node on top of it.
Prerequisites
To begin with this guide, make sure you have the following:
- A Debian 12 server with a minimum of 4GB of RAM or memory
- A non-root user with administrator privileges
Installing Docker
Before installing Rancher, you need to ensure that Docker is installed on your system. In this section, you’ll install Docker Engine via the official Docker repository on the Debian system.
First, run the command below to update your package index and install packages such as ‘ca-certificates’ and ‘curl’.
apt update && apt install ca-certificates curl -y
Now execute the following command to add the GPG key for the Docker repository.
install -m 0755 -d /etc/apt/keyrings
curl -fsSL https://download.docker.com/linux/debian/gpg -o /etc/apt/keyrings/docker.asc
chmod a+r /etc/apt/keyrings/docker.asc
Next, run the following command to add the Docker repository to your Debian system. This will automatically detect your Debian version.
echo \
"deb [arch=$(dpkg --print-architecture) signed-by=/etc/apt/keyrings/docker.asc] https://download.docker.com/linux/debian \
$(. /etc/os-release && echo "$VERSION_CODENAME") stable" | \
tee /etc/apt/sources.list.d/docker.list > /dev/null

Now that you’ve added the Docker repository and GPG key, execute the command below to refresh your package index and install Docker Engine to your system. In this example, you’ll install Docker Engine with additional packages such as Docker Compose and the Docker Buildx plugin.
apt update && apt install docker-ce docker-ce-cli containerd.io docker-buildx-plugin docker-compose-plugin
Enter ‘Y’ to proceed with the installation.
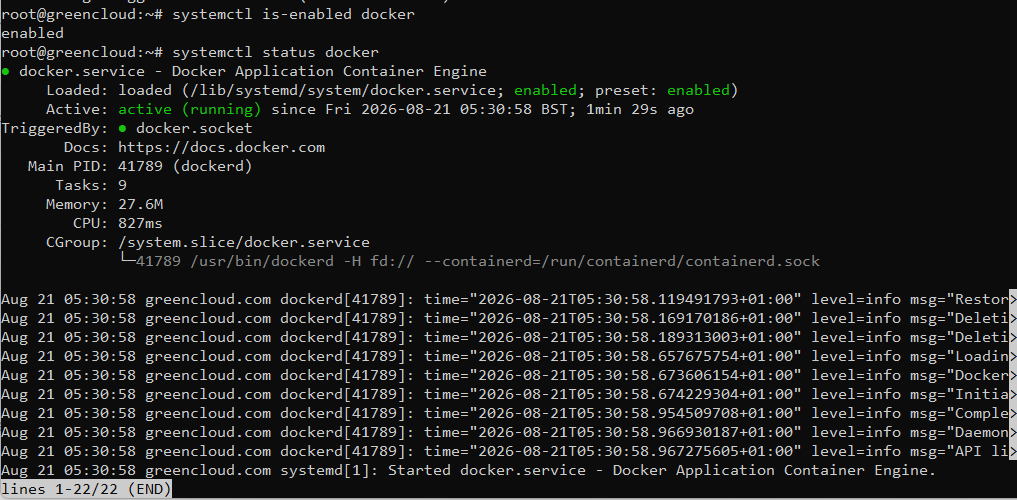
Once the installation is finished, check the Docker service status using the ‘systemctl’ command below. You’ll see that Docker is running and enabled on your Debian machine.
systemctl is-enabled docker
systemctl status docker
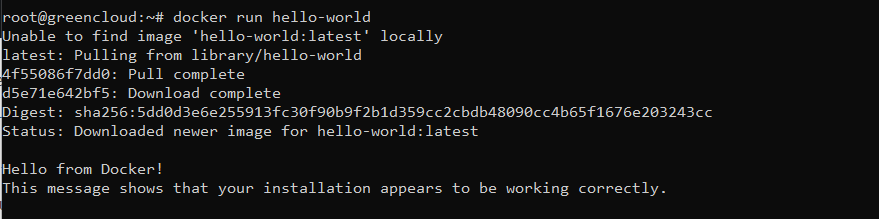
Lastly, you can execute the ‘docker’ command below to run the ‘hello-world’ container.
docker run hello-world
If successful, you’ll get the following ‘Hello World‘ message from Docker.
Installing Rancher
Now that Docker is installed, you’re ready to install Rancher. In this section, you’ll download the Rancher image, and then run the Rancher container via Docker. In this example, we’ll be using the self-signed certificates that are automatically generated by the Rancher container. We’ll also use the latest version of the Rancher image.
Download the Rancher image using the ‘docker pull’ command below. In this example, we’ll be using the Rancher Latest version.
docker pull rancher/rancher:latest
Once the Rancher image is downloaded, execute the ‘docker run’ command to run Rancher. With this, the Rancher container will be running in the background and will expose ports 80 and 443 on the host Debian server.
docker run -d --restart=unless-stopped \
-p 80:80 -p 443:443 \
--privileged \
rancher/rancher:latest
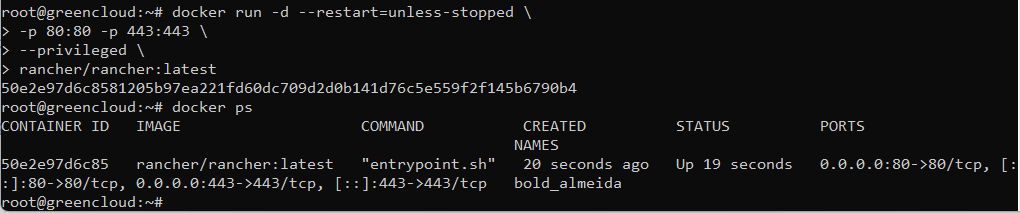
Check the container status using the command below.
docker ps
In the output below, you can see that Rancher is running on port 443. Also, you can see the container ID and the names of the containers.
Additionally, if you have an error, you can check the Racher log with the following ‘docker’ command.
docker ps -a
docker log container-name or container id
The ‘ps -a’ option will show you containers that are running and exited, and the ‘docker log’ command is used to check the logs of the container.
Configuring Rancher
At this point, Rancher is running on your Debian system as a container. For the next step, you’ll log in to the Rancher dashboard to see the Kubernetes single node that is running on top of your Rancher installation.
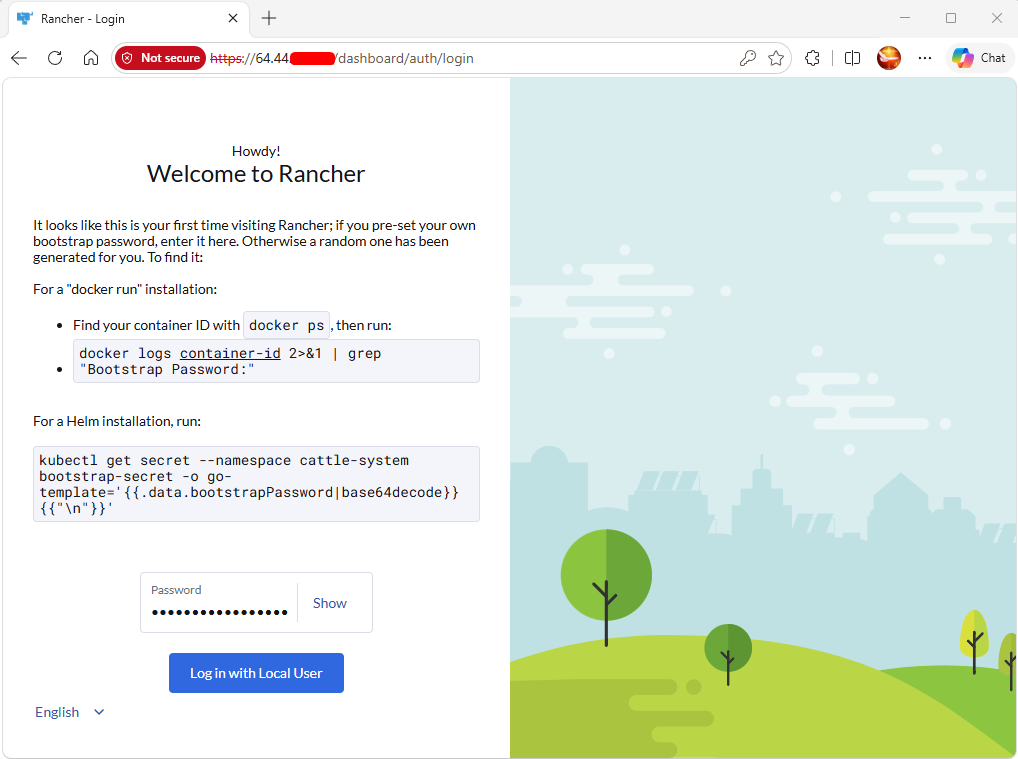
Open the web browser and visit your Debian server IP address, such as https://64.44.x.x/. If your installation is successful, you’ll get the following Rancher login page
Back to your terminal and run the command below to get the Rancher password. Make sure to change the container ID with your installation and copy your password.
docker ps
CONTAINER ID IMAGE COMMAND CREATED STATUS PORTS NAMES
50e2e97d6c85 rancher/rancher:latest "entrypoint.sh" 9 minutes ago Up 9 minutes 0.0.0.0:80->80/tcp, [::]:80->80/tcp, 0.0.0.0:443->443/tcp, [::]:443->443/tcp bold_almeida
docker logs CONTAINER ID 2>&1 | grep "Bootstrap Password:"

Now enter your password and click Login with Local User.
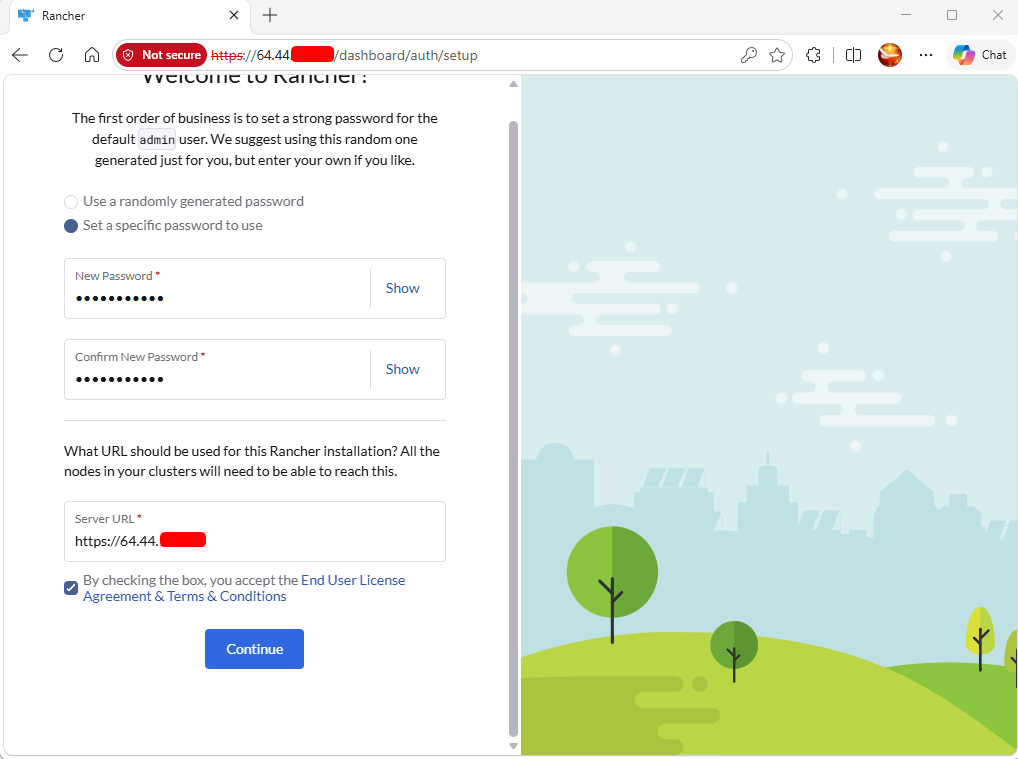
Next, copy the generated password for your Rancher and make sure to accept the terms and license.
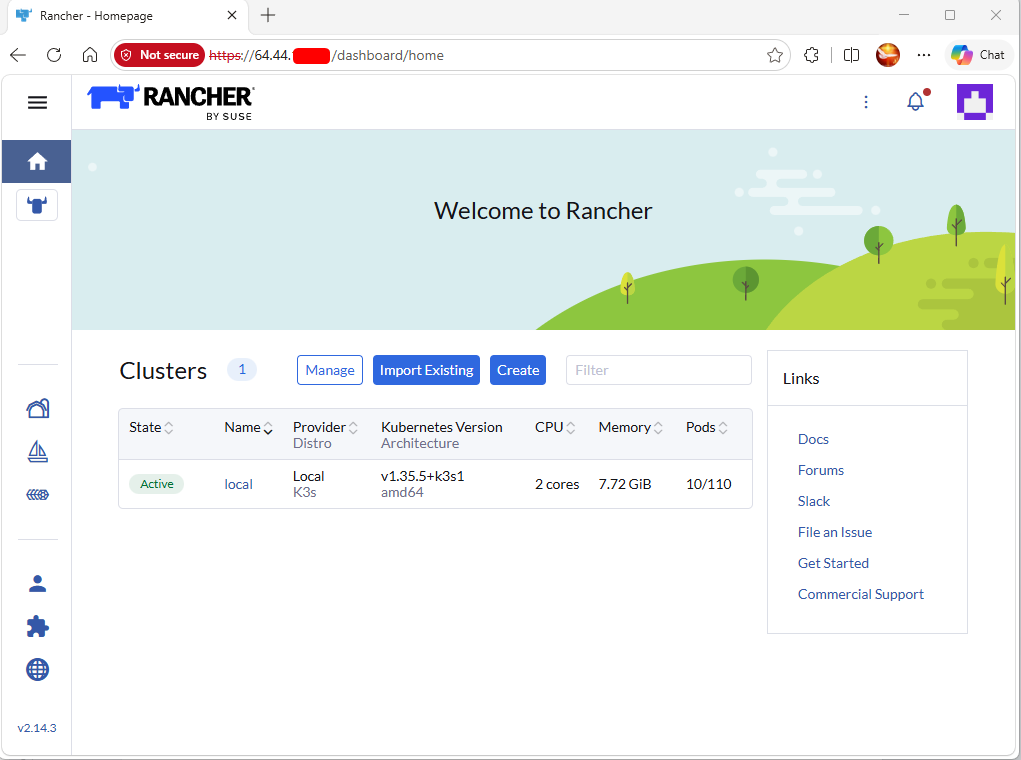
Now you’ll see the following Rancher Dashboard. In the example below, you can see the single-node Kubernetes cluster created with K3s.
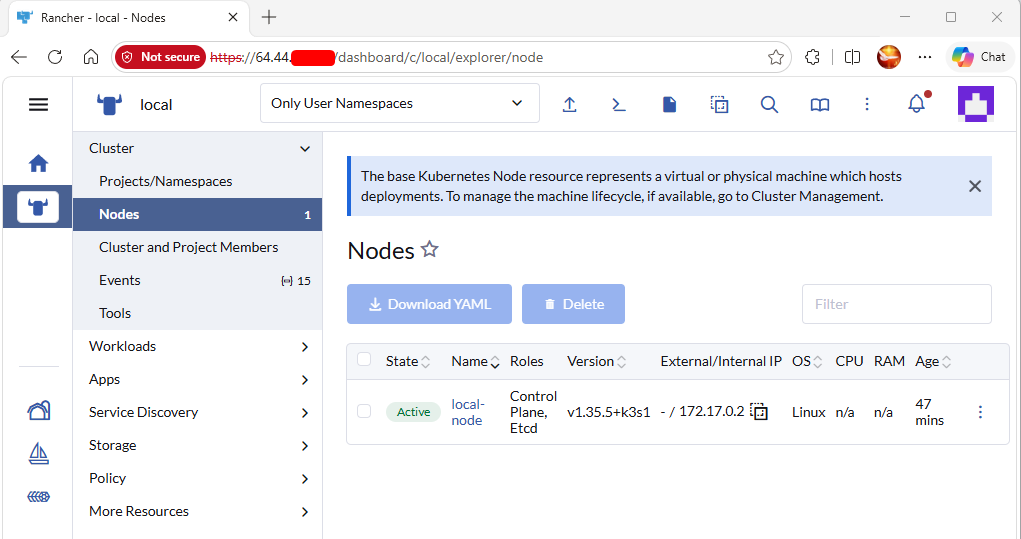
Click on the local Kubernetes cluster, and you’ll get more information about your Kubernetes cluster.
Conclusion
Congratulations! You’ve completed the installation of Rancher with Docker on the Debian 12 server. You’ve learned how to set up Rancher and create a Kubernetes cluster on top of it. Lastly, you’ve also learned how to interact with your Kubernetes cluster via Kubernetes client ‘kubectl’. Furthermore, you can deploy your containerized applications to the Kubernetes cluster via ‘kubectl’.
