
How to Install Tinyproxy on Fedora
Tinyproxy is a lightweight, free, and open-source proxy solution for the Linux operating system. It is designed for embedded devices where a full-featured HTTP proxy is required, but the system resources for a larger proxy are unavailable. It is easy to install and configure and requires a small amount of space on operating systems. It offers a filtering capability to block or allow a certain domain by creating a blacklist and a whitelist.
This post will show you how to install Tinyproxy on Fedora.
Step 1 – Install Tinyproxy
By default, the Tinyproxy package is included in the Fedora default repository. You can install it using the following command.
dnf update -y
dnf install tinyproxy -y
Once the installation is completed, you can verify the Tinyproxy version using the following command.
tinyproxy -v
Output.

Step 2 – Configure Tinyproxy
Next, you will need to edit the Tinyproxy main configuration file and modify some default settings.
nano /etc/tinyproxy/tinyproxy.conf
Change the following configurations.
User tinyproxy
Group tinyproxy

Port 8888
Listen 103.199.x.x

LogFile "/var/log/tinyproxy/tinyproxy.log"
PidFile "/var/run/tinyproxy/tinyproxy.pid"

BasicAuth tinyproxy Green@12345
Allow 127.0.0.1
Allow 0.0.0.0/0
Save and close the file, then create a log file for Tinyproxy.
Recreate the folder.
mkdir -p /run/tinyproxy
mkdir -p /var/log/tinyproxy
Set the correct permissions for the tinyproxy user.
Check the running user:
grep User /etc/tinyproxy/tinyproxy.conf
User tinyproxy
Group tinyproxy
chown tinyproxy:tinyproxy /run/tinyproxy
chmod 755 /run/tinyproxy

chown tinyproxy:tinyproxy /var/log/tinyproxy
chmod 755 /var/log/tinyproxy
Create the log file first (best practice).
touch /var/log/tinyproxy/tinyproxy.log
chown tinyproxy:tinyproxy /var/log/tinyproxy/tinyproxy.log
Step 3 – Start Tinyproxy Service
Now, start and enable the Tinyproxy service using the following command.
systemctl start tinyproxy
systemctl enable tinyproxy
You can now check the status of Tinyproxy with the following command.
systemctl status tinyproxy
You will see the following output.
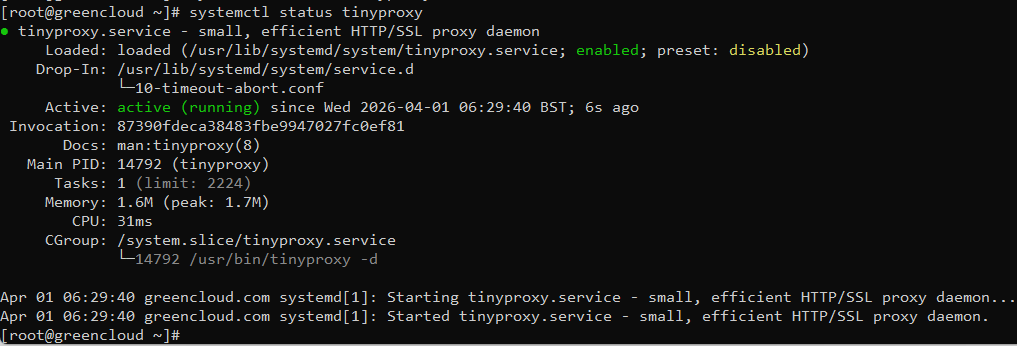
By default, Tinyproxy listens on port 8888. You can check it with the following command.
ss -antpl | grep tinyproxy
Output.

Step 4 – Define Proxy Settings on Web Browser
Next, you will need to edit your browser settings and define your proxy server on the client machine. First, open your web browser and open the settings windows.
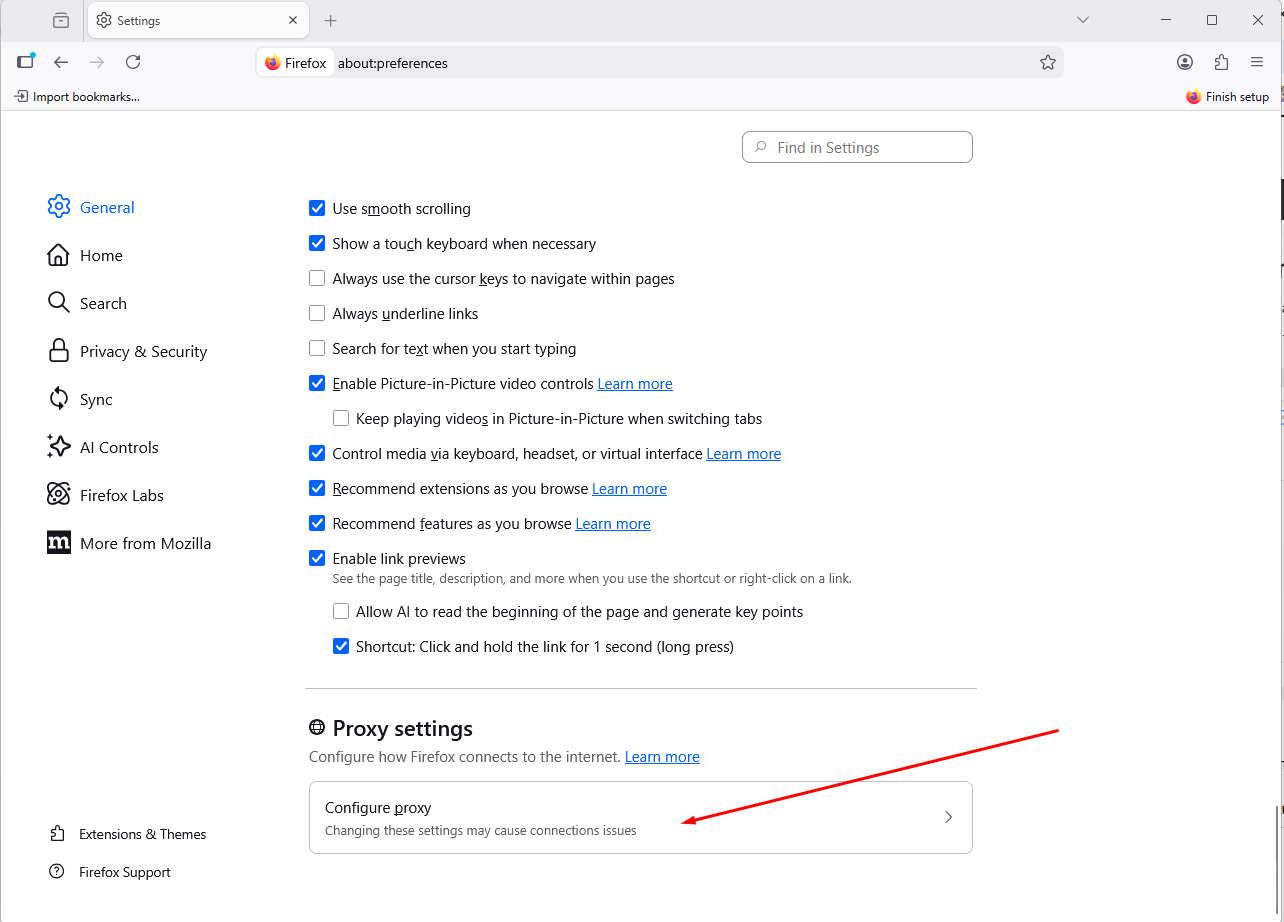
Scroll down the page and click on Configure proxy. You should see the following screen.
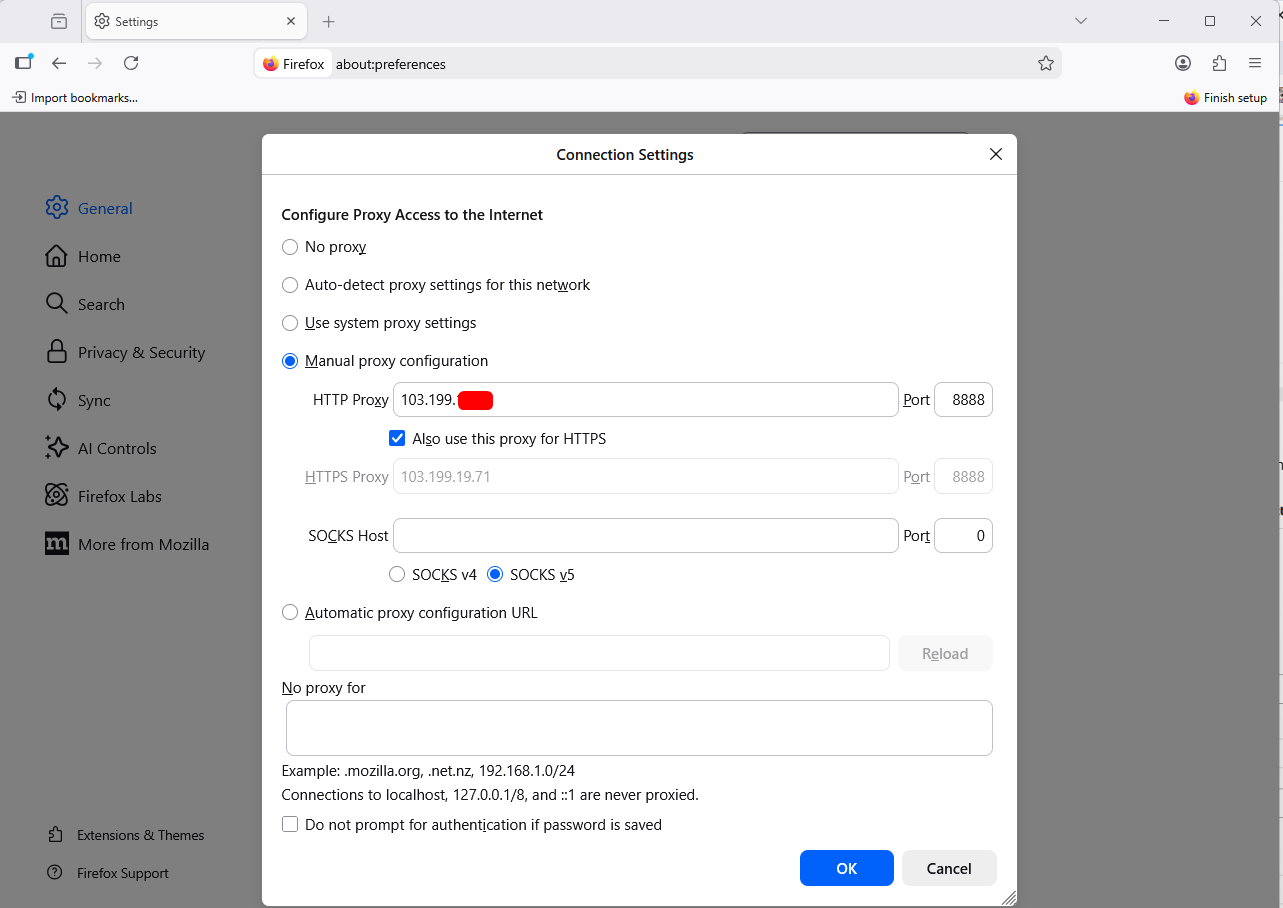
Define your proxy server IP, Port, and click on the OK button to save the changes.
Now, open another tab on your web browser and try to access https://google.com. You will be asked to provide your proxy username and password as shown below.
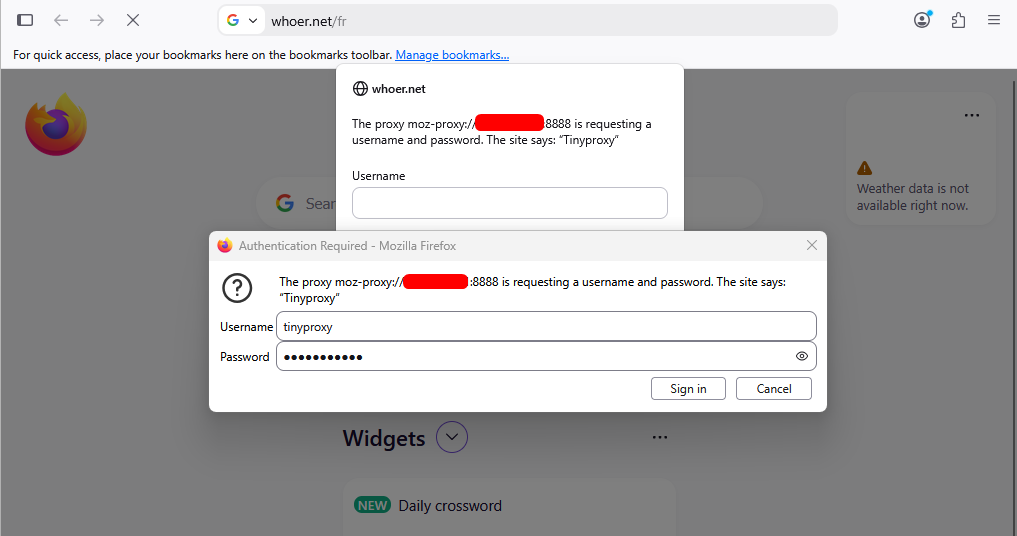
Provide your username and password and click on the Sign in button. After successful authentication, you will be able to access the Google website.
Conclusion
In this tutorial, we have explained how to install Tinyproxy on Fedora. We also showed you how to configure Tinyproxy and verify it from the client machine. You can use Tinyproxy on dedicated server hosting from Greencloud!
