How to install and Configure Cacti on Ubuntu 20.04
Cacti is an open-source web-based network monitoring and system monitoring graphing tool. It is a frontend to RRDTool – a Time Series Database (TSDB).
Using Cacti you can monitor servers and network devices such as servers, routers, and switches. It gathers and monitors network traffic using the SNMP protocol. It can monitor various system metrics such as CPU, memory disk space, and bandwidth utilization. You can also set up alerts to receive email notifications during a system outage. Furthermore, it enables a faster response time when a problem arises.
You can use the LAMP stack to install Cacti on Linux Distribution. It also supports Nginx and IIS Webserver. The data collected is then stored in a MySQL or MariaDB database. The Data Collection framework is fully distributed, fault-tolerant, and scalable.
In this guide, we will go through how to install and configure Cacti on Ubuntu 20.04.
Step 1: Getting Started
Start by updating your system packages with the following command:
# apt-get update -y
Once all the packages are updated, install other required dependencies by running the following command:
# apt-get install snmp php-snmp rrdtool librrds-perl unzip curl git gnupg2 -y
Once all the dependencies are installed, you can proceed to the next step.
Step 2:Install LAMP Server
Next, you will need to install the Apache web server, MariaDB, PHP and other required PHP extensions to your server. You can install all of them by running the following command:
# apt-get install apache2 mariadb-server php php-mysql libapache2-mod-php php-xml php-ldap php-mbstring php-gd php-gmp -y
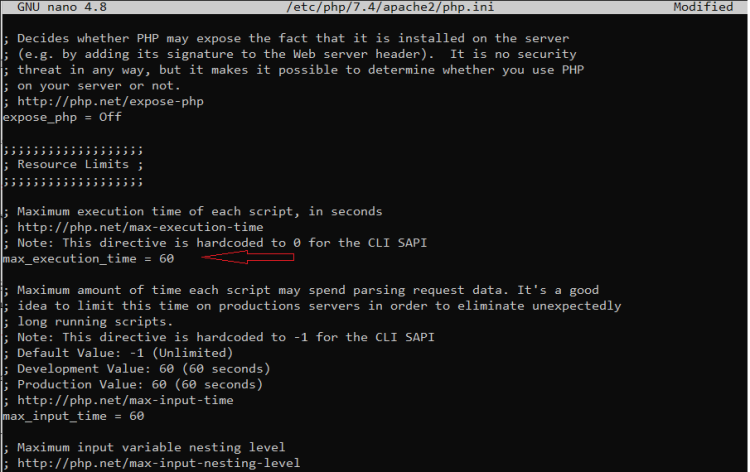
After installing all the packages, edit the php.ini file and make some changes:
# nano /etc/php/7.4/apache2/php.ini
Change the following lines: and time zone according to your country’s timezone date and time
memory_limit = 512M

max_execution_time = 60

date.timezone = America/Los_Angeles
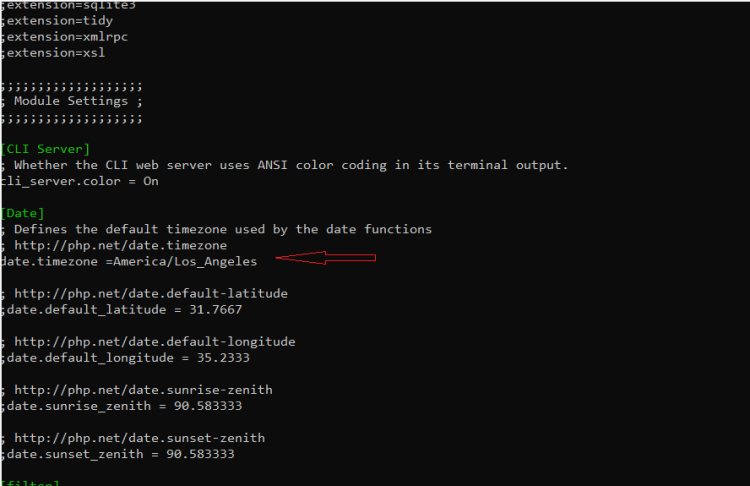
Save and close the file then edit another php.ini file and make some changes:
# nano /etc/php/7.4/cli/php.ini
Change the following lines:
memory_limit = 512M

max_execution_time = 60

date.timezone = America/Los_Angeles
-Save and close the file when you are finished. Then, restart the Apache service to apply the changes:
# sudo systemctl restart apache2
Once you are finished, you can proceed to the next step
Step 3: Configure MariaDB Server
Cacti uses MariaDB as a database backend. So you will need to create a database and user for Cacti.
First, edit the MariaDB default configuration file and tweak some settings:
# nano /etc/mysql/mariadb.conf.d/50-server.cnf
Add / Modify the following lines inside the [mysqld] section:
collation-server = utf8mb4_unicode_ci
max_heap_table_size = 128M
tmp_table_size = 64M
join_buffer_size = 4M
sort_buffer_size = 4M
innodb_file_format = Barracuda
innodb_large_prefix = 1
innodb_buffer_pool_size = 1G
innodb_flush_log_at_timeout = 3
innodb_read_io_threads = 32
innodb_write_io_threads = 16
innodb_io_capacity = 5000
innodb_io_capacity_max = 10000
innodb_doublewrite = OFF
Save and close the file then restart the MariaDB service to apply the changes:
# systemctl restart mariadb
Next, log in to the MariaDB shell with the following command:
# mysql -u root -p
Once login, create a database and user for Cacti with the following command:
MariaDB [(none)]> create database cacti;
MariaDB [(none)]> GRANT ALL ON cacti.* TO cactiuser@localhost IDENTIFIED BY 'cactiuser';
Next, flush the privileges and exit from the MariaDB shell with the following command:
MariaDB [(none)]> flush privileges;
MariaDB [(none)]> exit;
Next, you will need to import timezone data to the MySQL database. You can import it with the following command:
# mysql mysql < /usr/share/mysql/mysql_test_data_timezone.sql
Next, log in to the MariaDB shell and grant the required privileges on MySQL timezone with the following command:
# mysql -u root -p
MariaDB [(none)]> GRANT SELECT ON mysql.time_zone_name TO cactiuser@localhost;
Next, flush the privileges and exit from the MariaDB shell with the following command:
MariaDB [(none)]> flush privileges;
MariaDB [(none)]> exit;
Once you are finished, you can proceed to the next step.
Step 4: Install and Configure Cacti
First, you will need to download the latest version of Cacti from its official website. You can download it with the following command:
# wget https://www.cacti.net/downloads/cacti-latest.tar.gz
Once the download is completed, extract the downloaded file with the following command:
# tar -zxvf cacti-latest.tar.gz
Next, move the extracted directory to the Apache root directory with the following command:
# mv cacti-1* /var/www/html/cacti
Next, import the database to the cactidb with the following command:
# mysql cacti < /var/www/html/cacti/cacti.sql
Next, edit the Cacti config.php file and define your database settings:
# nano /var/www/html/cacti/include/config.php
verifying cacti database name, username, and password in the following lines:
$database_type  = 'mysql';

$database_default  = 'cacti';

$database_hostname = 'localhost';

$database_username = 'cactiuser';

$database_password = 'cactiuser';

$database_port = '3306';
It’s a default parameter.
Save and close the file then create a log file for Cacti.
# touch /var/www/html/cacti/log/cacti.log
Next, set the full access/ownership and permission of the cacti directory with the following command:
# chown -R www-data:www-data /var/www/html/cacti/
# chmod -R 775 /var/www/html/cacti/
Next, create a new Cacti cron job file with the following command:
# nano /etc/cron.d/cacti
Add the following line:
*/5 * * * * www-data php /var/www/html/cacti/poller.php > /dev/null 2>&1
Save and close the file when you are finished.
At this point, Cacti is installed and configured. You can now proceed to the next step.
Step 5: Configure Apache for Cacti
Next, you will need to create an Apache virtual host configuration file for Cacti. You can create it with the following command:
# nano /etc/apache2/sites-available/cacti.conf
Add the following lines:
Alias /cacti /var/www/html/cacti

<Directory /var/www/html/cacti>
Options +FollowSymLinks
AllowOverride None
<IfVersion >= 2.3>
Require all granted
</IfVersion>
<IfVersion < 2.3>
Order Allow,Deny
Allow from all
</IfVersion>

AddType application/x-httpd-php .php

<IfModule mod_php.c>
php_flag magic_quotes_gpc Off
php_flag short_open_tag On
php_flag register_globals Off
php_flag register_argc_argv On
php_flag track_vars On
# this setting is necessary for some locales
php_value mbstring.func_overload 0
php_value include_path .
</IfModule>

DirectoryIndex index.php
</Directory>
Save and close the file then enable the virtual host file with the following command:
# a2ensite cacti
Next, restart the Apache service to apply the configuration changes:
# systemctl restart apache2Great. The only thing remaining now is to wind up with Cacti set up on a browser.
Step 6: Setting Up Cacti on a browser
We have completed all of the Cacti configurations at this time. Now we have to finish the Cacti installation in a web browser. The Cacti setup wizard will lead you through the process step by step.
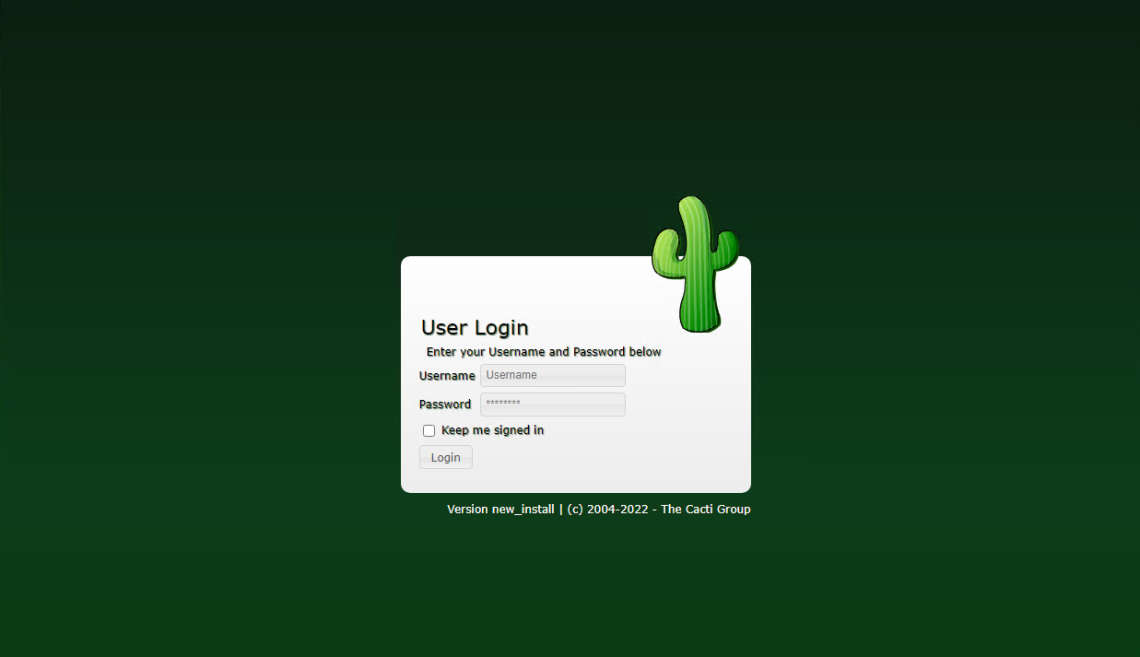
Access cacti using the following address:
http://server-ip-address/cactiA login page will be displayed as shown below. Login with the default credentials:
Username: admin

Password: admin
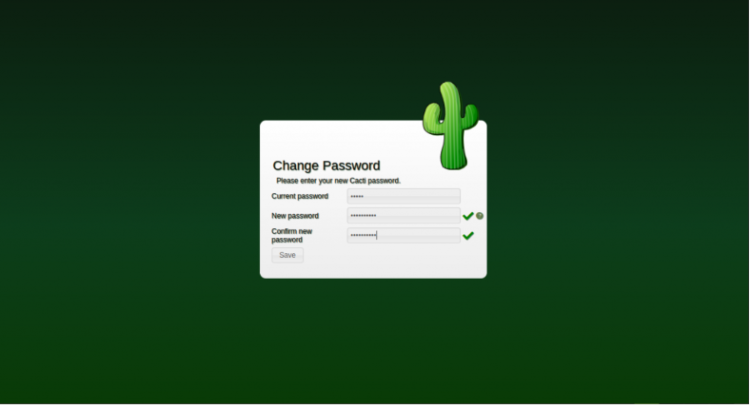
Next, you will be prompted to reset your password. Make sure you set a strong password for security reasons and click on the ‘Save’ button.
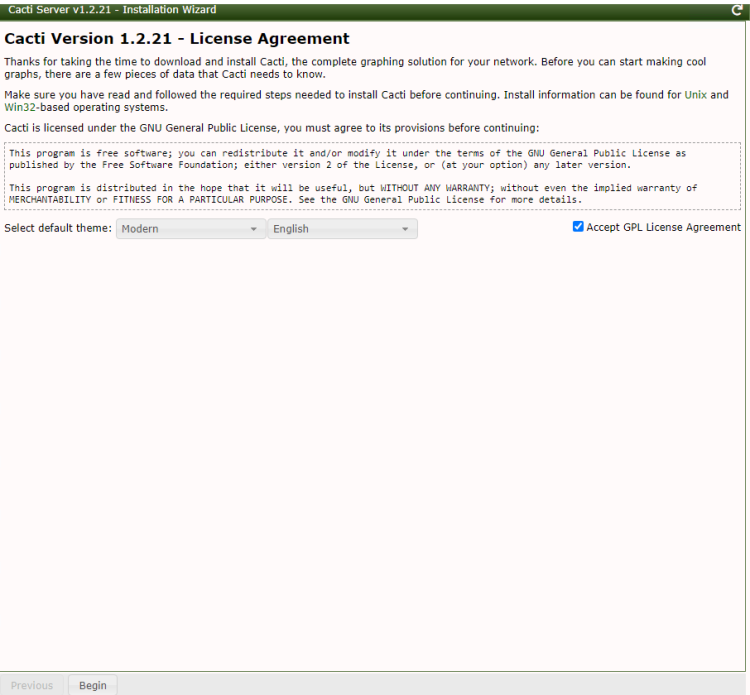
Next, agree to the GPL license in the checkbox. Click on ‘Begin’ to continue with the installation.
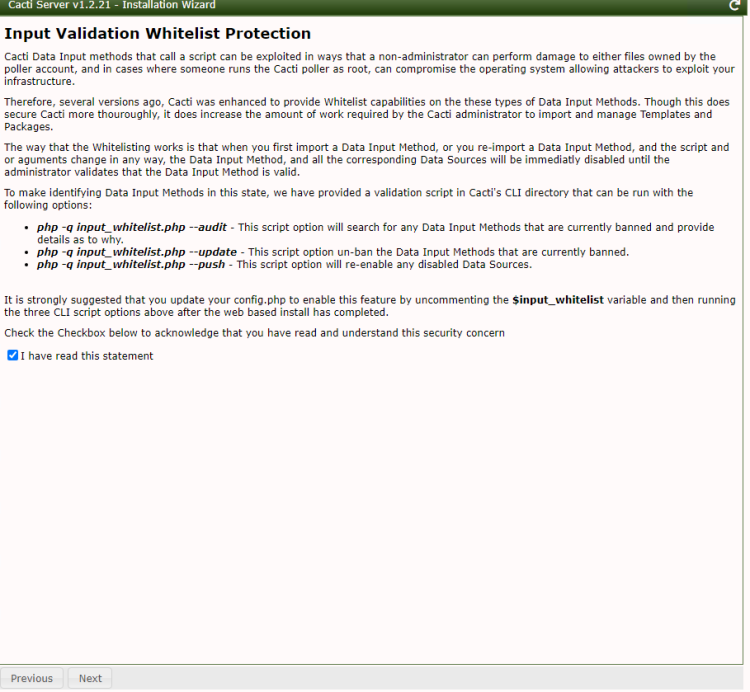
Cacti will then run pre-installation checks to ensure that your system has the necessary PHP modules and database settings for cacti to function properly. If all the configurations are in order, click Next>Next>Next.Next
The next step lets you select the data source profiles for polling sources. You can also change the network range to correspond to your subnet.

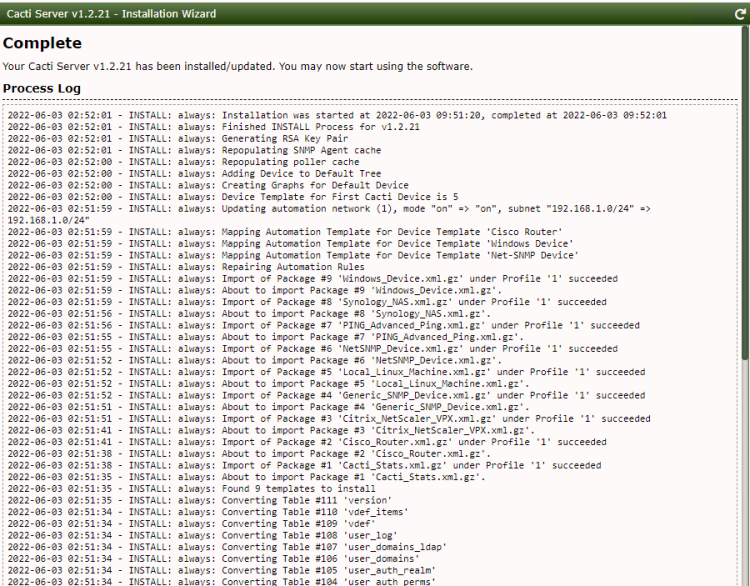
Then click Next>Next> Confirm installation
If the installation is completed, the following screen will be displayed.
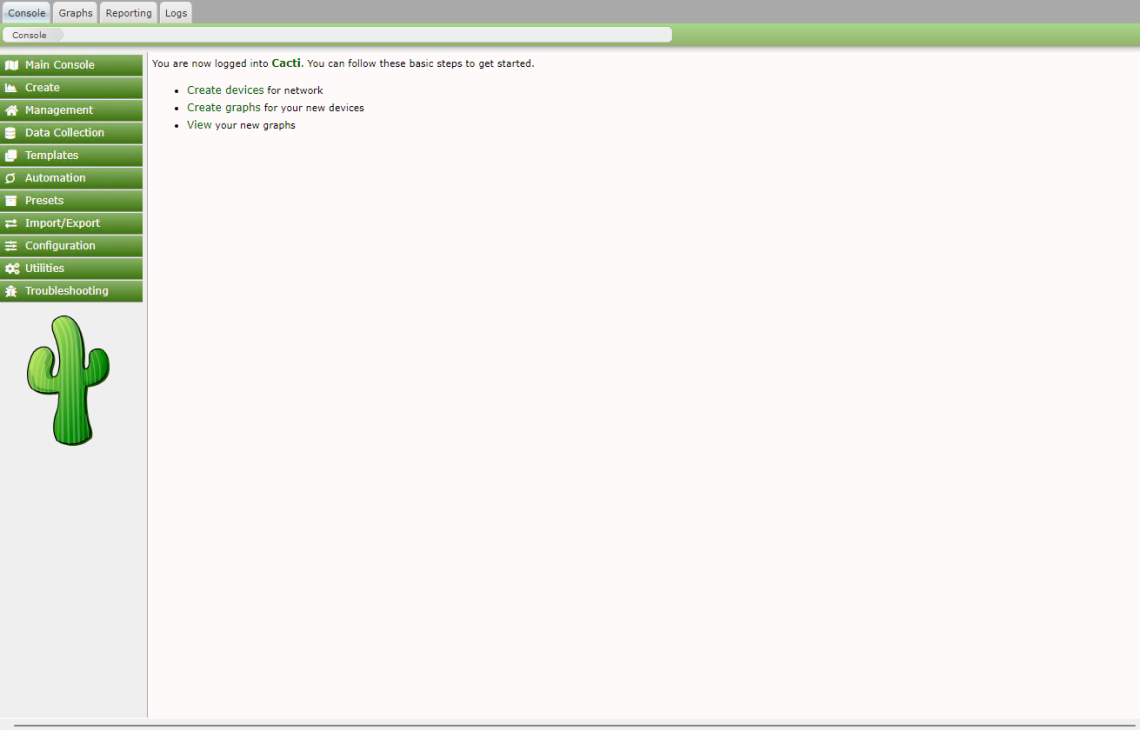
Click on the ‘Get Started‘ button. Cacti is now up and running. The Cacti dashboard is displayed as shown below:
6. Conclusion
You have now successfully installed and configured Cacti on Ubuntu 20.04. You can now start adding your devices and monitoring them.
Good Luck

