How to Install Laravel 9 on Ubuntu 22.04
Introduce
For many years Laravel has been one of the most popular PHP web application frameworks. It is free and open-source. Using it you can create simple, modern, complex full-stack web applications with expressive, elegant syntax. Many developers prefer Laravel for its fast development, performance, and high speed. It uses some components of Symfony.
In the past Laravel releases happen every six months and going forward it will be every 12 months. Laravel 9 is the current LTS version as of writing this guide.
In this guide, you learn how to install Laravel 9 on Ubuntu 22.04 LTS.
Prerequisites
- A system running Ubuntu 22.04
- Laravel 9 requires minimum PHP v8.0 version
- MySQL or MariaDB database
- Composer
Step 1: Install Apache web server on Ubuntu
In order to host the web application, we require a web server. You may use the Apache or Nginx webserver to host the Laravel application. Here we will use the Apache2 webserver.
First, update the Ubuntu local package lists:
sudo apt updateNext, install the prerequisite packages
sudo apt install unzip curl software-properties-commonNow, install the Apache2 web server using the apt package manager:
sudo apt install apache2The above command installs all the Apache webserver packages, libraries, and additional packages. Once the installation is complete, you might want to confirm if the webserver is running.
By default, the Apache service starts automatically upon installation. To confirm this, run the following command:
sudo systemctl status apache2The output showing active (running) confirms that the Apache service is up and running.

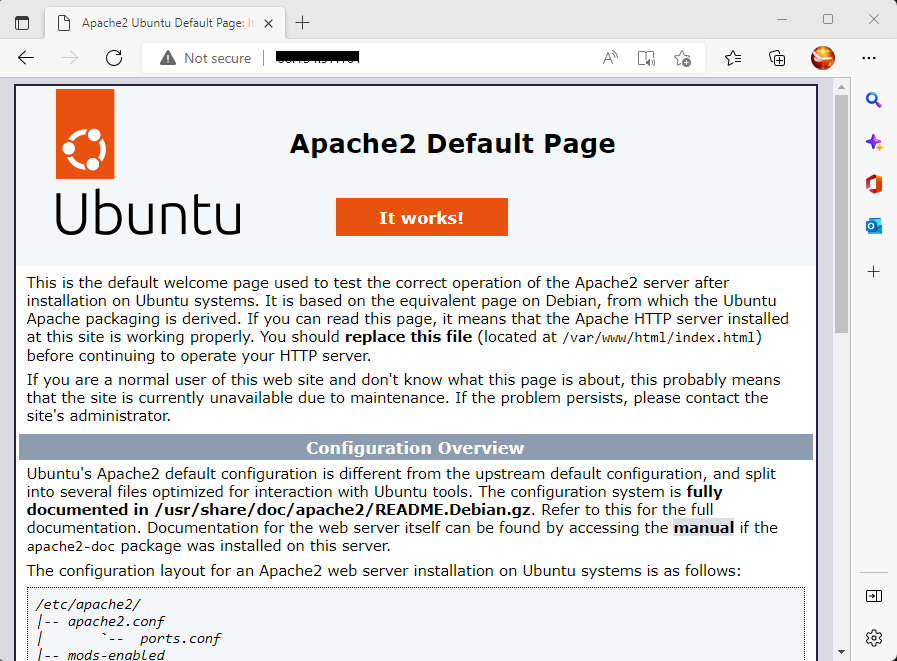
Additionally, you can verify the Apache webserver from a web browser by browsing the IP address of the server.
http://server-ip-addressThis displays the default Apache webpage.
It’s also recommended to enable Apache to start on system startup/ Therefore, run the following command.
sudo systemctl enable apache2Step 2: Install PHP and additional PHP extensions
Laravel is a PHP web framework, so we require PHP installed on the webserver. PHP is a server-side general-purpose scripting language widely used for web development.
Laravel 8 requires PHP 7.3 and later versions of PHP. Laravel 9 requires a minimum of PHP 8.0 since some of its components such as Symphony 6.0 require 8.0. or higher.
The default PHP version that is currently hosted or provided by Ubuntu 22.04 repositories is PHP 8.1.
To install PHP from the default repositories:
sudo apt install phpCheck PHP version using the following command:
php -v
Next, install the required PHP 8 modules required by Laravel 9 installation.
sudo apt install php-mbstring php-mysql php-curl php-cli php-dev php-imagick php-soap php-zip php-xml php-imap php-xmlrpc php-gd php-opcache php-intlTo apply the changes and make Apache work with PHP software simply restart the webserver. To restart apache2, type:
sudo systemctl restart apache2Step 3: Create Database for Laravel Application
The next step is to create a database for Laravel. It supports MySQL (or MariaDB), Postgres, SQLite, and SQL Server.
Here we are using the MariaDB server which is a free and open-source relational database and a fork of the MySQL database server.
To install the MariaDB server on Ubuntu, run the following command.
sudo apt install mariadb-serverWith the database server in place, log into the MariaDB prompt:
sudo mysql -u root -pNext, create a database for Laravel:
CREATE DATABASE laravel_db;Create a database user using the following commands:
CREATE USER 'laravel_user'@'localhost' IDENTIFIED BY 'secretpassword';Then grant all privileges to the database user on the Laravel database:
GRANT ALL ON laravel_db.* TO 'laravel_user'@'localhost';Now request the server to reload the grant tables:
FLUSH PRIVILEGES;Now you can exit from the MariaDB terminal by typing:
EXIT;Step 4: Install Composer
Composer is a dependency manager tool used for managing dependencies for the PHP programming language. It helps users to create a project by incorporating all the PHP libraries and dependencies. It enables you to declare the libraries that your project depends on and manages them for you.
To download the composer, run the following curl command. This downloads a file named composer.phar to your current directory.
curl -sS https://getcomposer.org/installer | phpNext, move the composer.phar to the /usr/local/bin/composer directory.
sudo mv composer.phar /usr/local/bin/composerBe sure to assign execute permissions using the chmod command shown.
sudo chmod +x /usr/local/bin/composerTo check composer version, run the following command.
composer --versionFrom the output, you can see that we are installed Composer version 2.3.5.

You can also verify composer using the following composer command.
composerStep 5: Install Laravel on Ubuntu
Once you have composer and PHP installed, you are all good to install Laravel using Composer directly. You can create a new Laravel project using it.
First, navigate to the /var/www directory which is the webroot directory.
cd /var/www/htmlThereafter, install Laravel using the composer create project command where my_laravelapp is the directory that will contain all the files needed by Laravel.
sudo composer create-project laravel/laravel my_laravelappRunning the command outputs a flurry of output to the terminal.
Once the installation is over, head over to the Laravel directory.
cd my_laravelappThen check the Laravel version.
php artisan | lessOutputLaravel Framework 9.38.0
For more verbose output, press the ‘ENTER’ key and continue scrolling all the way down.
Next, configure the required ownership of the Laravel directory to www-data user and group and assign proper permissions.
sudo chown -R www-data:www-data /var/www/html/my_laravelappsudo chmod -R 775 /var/www/html/my_laravelappStep 6: Configure Apache to serve the Laravel site
The last step is to configure Laravel. For this, we will create a virtual host file that will point the client requests to the Laravel directory.
So, create the host file as follows.
sudo nano /etc/apache2/sites-available/laravel.confPaste the following lines of code. Be sure to replace example.com with your server’s IP address of a registered domain name.
<VirtualHost *:80>
ServerName example.com
ServerAdmin [email protected]
DocumentRoot /var/www/html/my_laravelapp/public
<Directory /var/www/html/my_laravelapp>
AllowOverride All
</Directory>
ErrorLog ${APACHE_LOG_DIR}/error.log
CustomLog ${APACHE_LOG_DIR}/access.log combined
</VirtualHost>
Save the changes and exit. Next, enable the Laravel virtual host file.
sudo a2ensite laravel.confThen enable the Apache rewrite module.
sudo a2enmod rewriteTo apply the changes, restart the Apache web server.
sudo systemctl restart apache2Be sure that the syntax is ok by running the following command.
apachectl configtestOutputSyntax OK
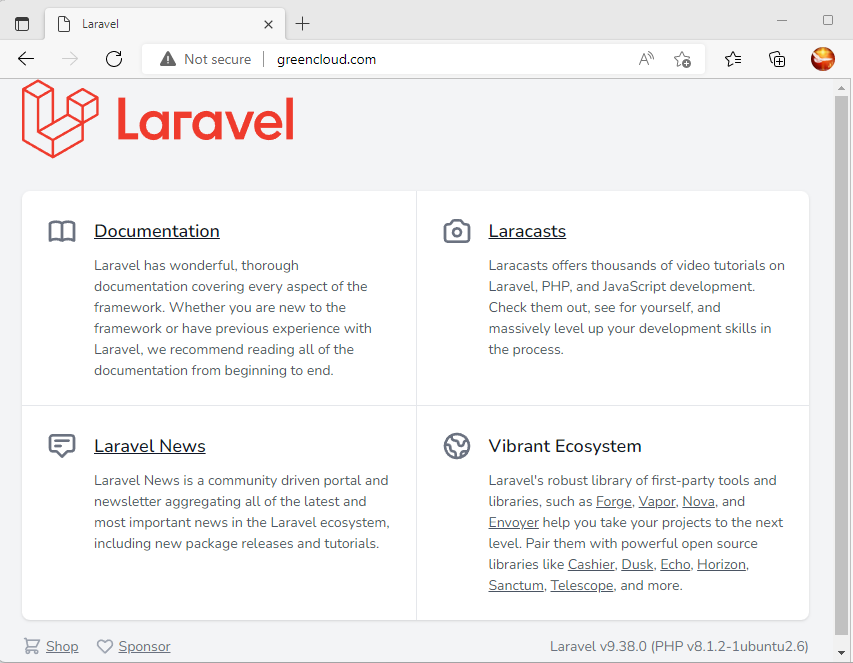
Step 7: Access Laravel from a web browser
Everything is now configured. To access Laravel, simply launch your preferred browser and head over to your server’s IP address or registered domain name.
http://server-ipOR
http://domain-name
You should be able to see the default Laravel web page.
Conclusion
In this guide, we learned how to install Laravel 9 on Ubuntu 22.04.
Laravel has made web application development easier, especially for large and complex applications. It’s fast, and flexible and simplifies the creation of mobile and web apps.

