How to Fix ‘The action cannot be completed because the file is open in another program’ on Windows server 2019, 2022
When you try to rename, delete, or move a file or folder, you might receive the message, “The action cannot be completed because the file is open in another program.”
The message gives no information regarding the program that has the file or folder open and might be displayed even if you have closed the programs that were previously accessing the file.
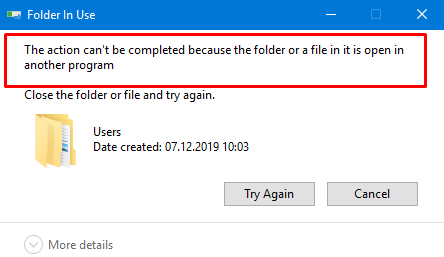
This error message can be very frustrating if you cannot move or delete the file or folder you are working with. This error message is generated when the folder or files within the folder are locked because they are being used by Windows or another program running in Windows.
The “The action cannot be completed because the file is open in another program” error message can cause many problems since it prevents access to and removal of specific files.
In this article, we will guide you on how to fix the above problem.
Restart File Explorer
The Windows File Explorer operates in the background of your computer’s system, and it can get in the way of file modifications.
Restarting File Explorer will make it more efficient so that it doesn’t interfere with your attempts to delete or rename a file.
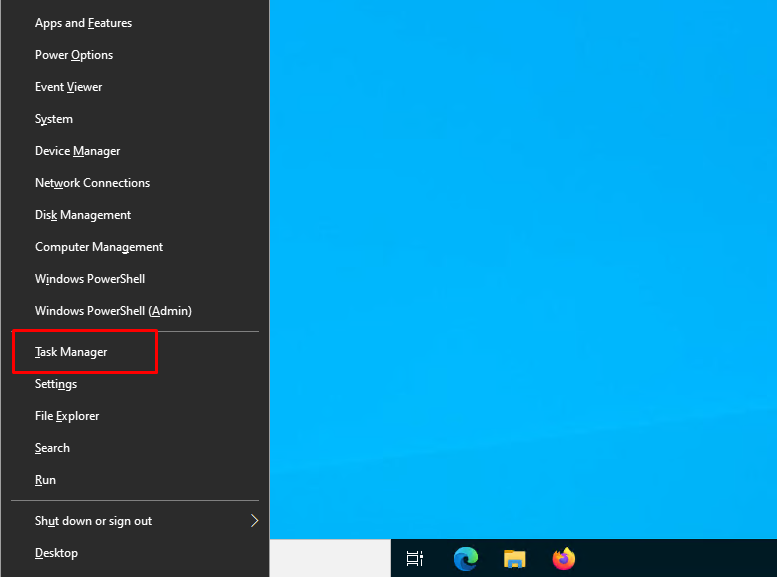
1. To open Task Manager, press Window + X on your keyboard or right-click the Start menu and select “Task Manager.”
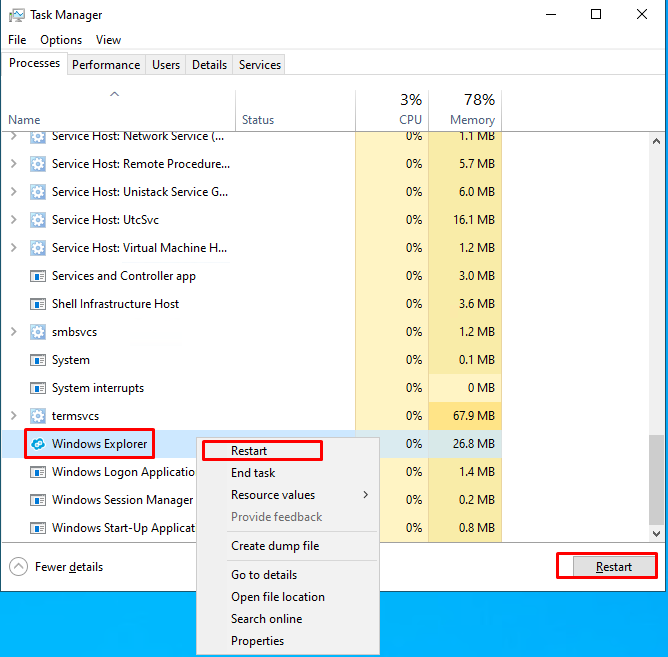
2. Press Processes, scroll down to find “Windows Explorer,” right-click on it and select “Restart” from the drop-down menu, or simply select it (by clicking it) and click “Restart” on the bottom-right corner.
Wait for about a minute before attempting to manipulate the file again.
Clean Up Your Thumbnails
“The action cannot be completed because the file is open in another program” error can be caused by thumbnails. Windows keeps a copy of all of your picture, video, and document thumbnails so they can be displayed quickly when you open a folder.
If you delete these thumbnails, they will be automatically recreated when needed. You can fix this problem by removing thumbnails with Disk Cleanup
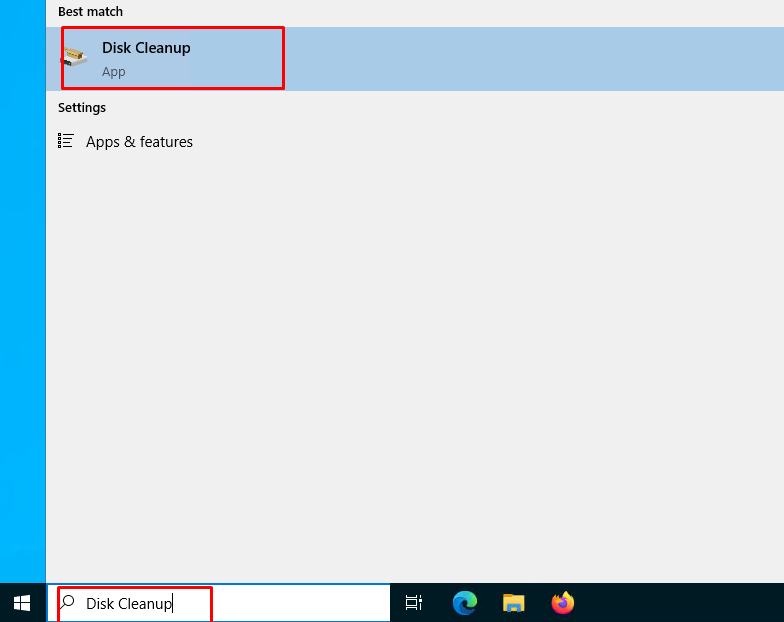
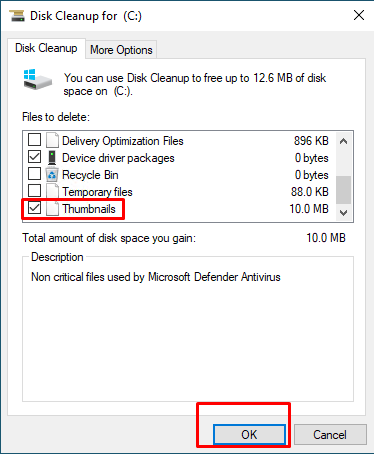
1. To run Disk Cleanup, type “disk cleanup” in Search and click the “Disk Cleanup” result.
2. You will see a list of files to be deleted. Find “Thumbnails” and mark the checkbox near it. Click “OK.” Disk Cleanup will remove thumbnails and other selected files. The problem should now be fixed. If it appears again, try to remove thumbnails using Disk Cleanup again.
Disable Thumbnails Using File Explorer Options
This thumbnail cache is used to store thumbnail images for Windows Explorer’s thumbnail view on Microsoft Windows operating systems. This speeds up the display of images, as these smaller images do not need to be recalculated every time the user views the folder. Windows stores thumbnails of graphics files and certain document and movie files, in the Thumbnail Cache file, including the following formats: JPEG, BMP, GIF, PNG, TIFF, AVI, PDF, PPTX, DOCX, HTML, and many others.
You can disable thumbnails entirely by adjusting File Explorer options.
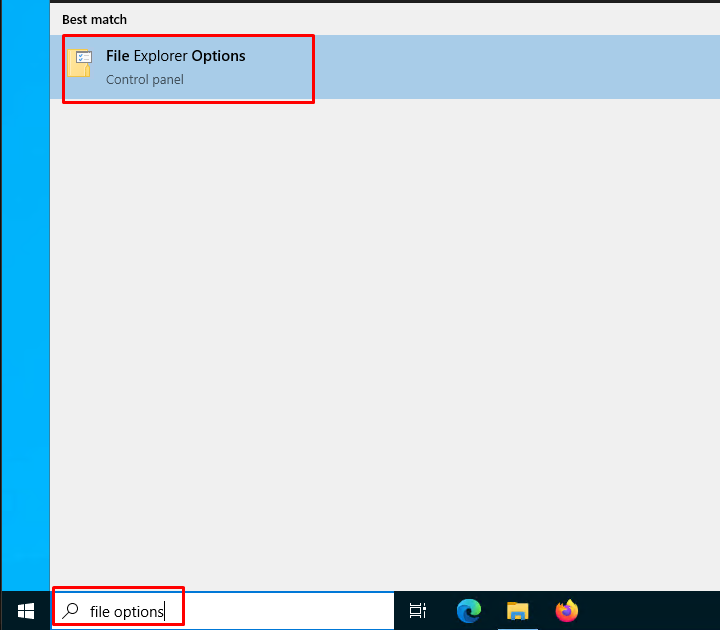
1. Type “file options” in Search and click the “File Explorer Options” result to open it.
2. Go to the “View” tab and check the “Always show icons, never thumbnails” checkbox. Then Click “Apply” and then “OK” to exit File Explorer Options and save the changes.

Disable Thumbnails Using Group Policy Editor
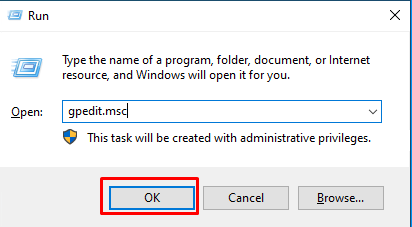
1. Simultaneously press the Windows + R keys and enter gpedit.msc
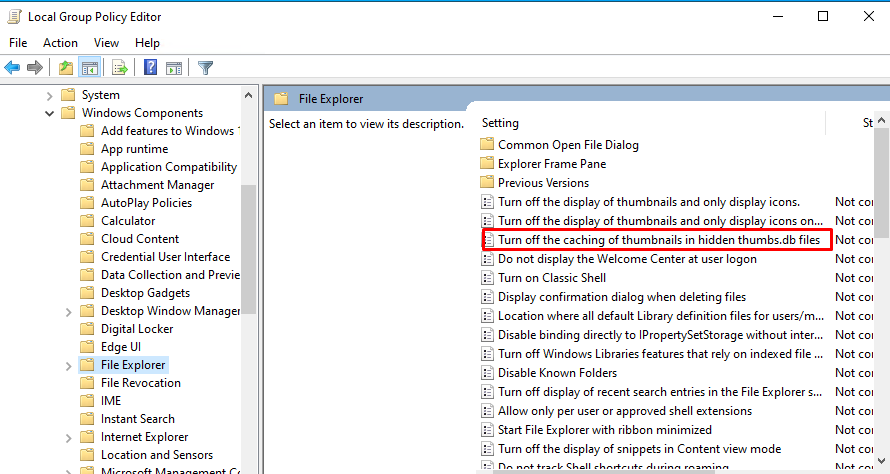
2. In Group Policy Editor, follow this path:
User Administration => Administrative Templates => indows Components => File Explorer

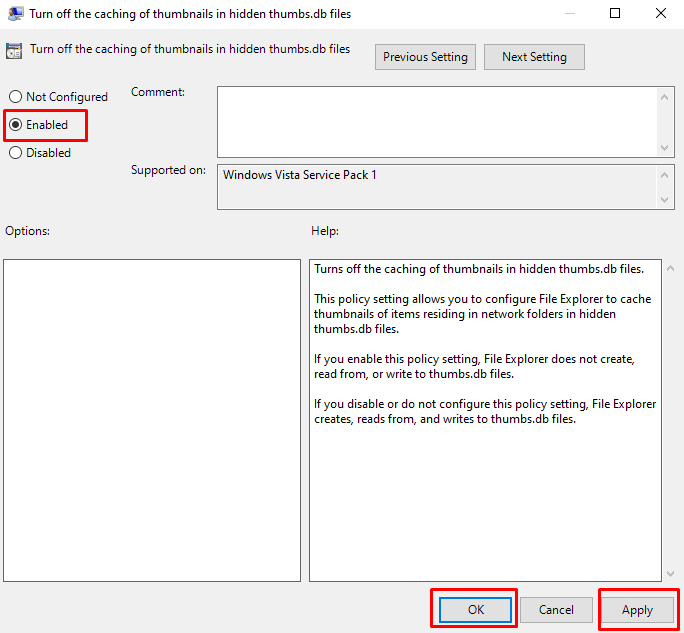
3. Double-tap the “Turn off caching of thumbnails in hidden thumbs.db files” option
4. Change its setting to Enabled. Then click Apply and press OK. The PC will now implement the changes.
Enable File Explorer to Read Files as Different Processes
The File Explorer registers all opened files as a single process which can overload the program and result in occasional errors. However, enabling the Explorer to read each file as a separate process will bypass the problem. The steps are as follows:
1. Select This PC and click View
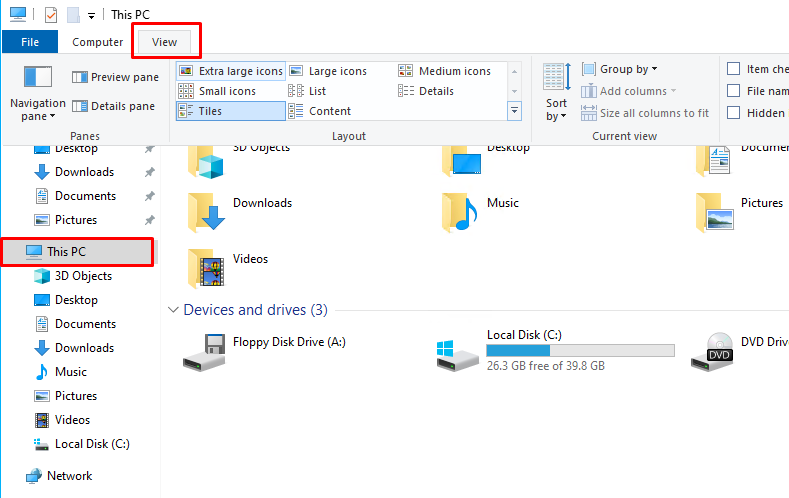
2. Choose Options from the drop-down bar.
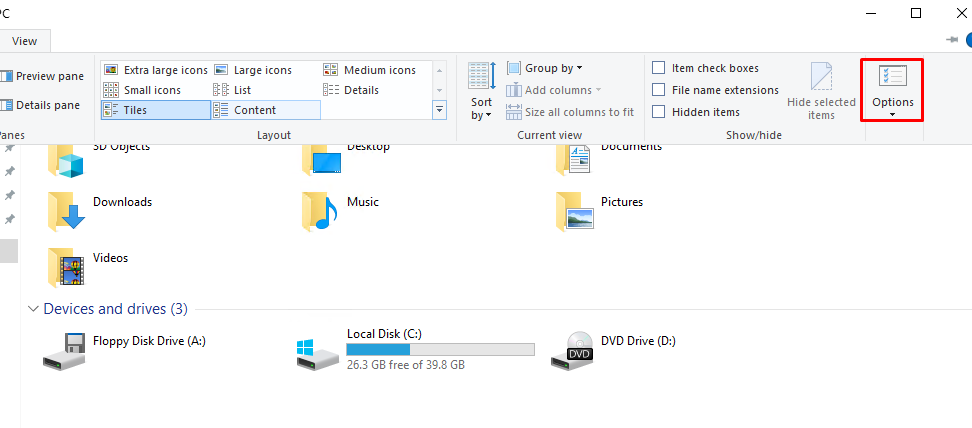
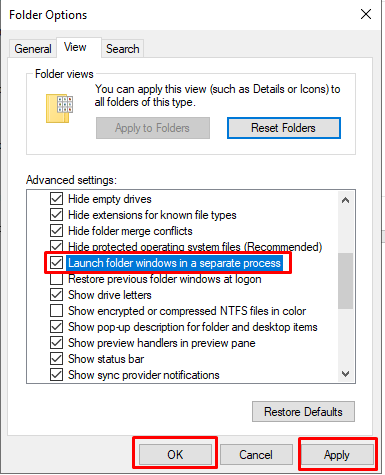
3. Press View in the new window and tap ” Launch folder windows in a separate process “. Then click Apply and hit the OK button to turn on the adjustments.
Conclusion
In our case after performing the above steps, we did not see the error again.
Hopefully, this article will be helpful for you. Good luck!

