
How to Install VNC Server on AlmaLinux 9
Virtual Network Computing (VNC) is a desktop sharing protocol that enables remote control of a computer using VNC client software. VNC is working on GUI (Graphical User Interface) environments, it transmits movements of your mouse and keyboard input over the network using the Remote Frame Buffer (RFB) protocol.
Commonly, VNC is used for technicians to control client desktops or by someone who needs to access their Desktops in the office from their home. VNC can be used securely through a VPN network or SSH tunneling connection.
The following guide will walk you through installing a VNC Server on an AlmaLinux 9 server. You will set up a VNC Server with TigerVNC and XFCE on your AlmaLinux server.
Prerequisite
To complete this guide, ensure you have the following:
- An AlmaLinux 9 server – This demo will be using an AlmaLinux 9 server with hostname greencloud and IP address 64.44.x.x.
- A non-root user with administrator privileges.
Installing the Desktop Environment
The first step you need to take before installing VNC Server is to decide which Desktop Environment you want to use. On Linux, there are multiple Desktop Environments that you can use; each DE has pros and cons.
The rest of this guide will show you how to set up VNC Server with XFCE as the default DE, which is suitable for any resources that you have. It can run lightweight with a small memory on your server.
First, run the dnf command below to add the EPEL repository to your system. When prompted, input y to confirm and press ENTER.
sudo dnf install epel-release
Now, run the following command to install your system’s XFCE Desktop and Xorg packages. Input y to confirm the installation, then press ENTER to proceed.
sudo dnf groupinstall "Xfce" "base-x"
Furthermore, if prompted to confirm the GPGP key for the EPEL repository, input y, and press ENTER again.
Once XFCE and Xorg are installed, run the following command to set up the default startup of your server to use a GUI or a graphical environment.
sudo systemctl set-default graphical

If you prefer to use another Desktop Environment, use the following command to install it:
Install the Gnome Desktop Environment.
sudo dnf groupinstall "Server with GUI"
Installing the KDE Desktop Environment.
sudo dnf groupinstall "KDE Plasma Workspaces"
Installing and Configuring TigerVNC Server
After installing the Desktop Environment, the next step is to install the VNC Server on your AlmaLinux server. In this example, you will be using TigerVNC Server to create your VNC Server.
Below are some steps that you must follow:
- Adding New User
- Installing TigerVNC Server
- Configuring VNC Server with TigerVNC Server
Adding New User
First, you need to create a new user who will be used to run the VNC Server. The following example demonstrates how to create a new user and configure sudo privileges on your system.
Run the following command to create a new user and password. In this demo, you will create a new user, greencloud.
sudo useradd -m -s /bin/bash greencloud
sudo passwd greencloud
Now, execute the following command to add user greencloud to the group wheel. This action allows the user greencloud to run and manage the sudo command to get the root privileges.
sudo usermod -aG wheel greencloud
Installing TigerVNC Server
With the new user created, you will now be installing the TigerVNC Server package on your system. The package is available by default on the appstream repository, you can install it via the DNF package manager.
Next, run the dnf command below to install the TigerVNC Server package on your system.
sudo dnf install tigervnc-server
Input y to confirm the installation and press ENTER.
With the new user created and the TigerVNC Server installed, you’re now ready to set up the VNC Server via the TigerVNC Server.
Configuring VNC Server with TigerVNC Server
In the following section, you will set up VNC Server on your AlmaLinux server with TigerVNC and XFCE Desktop.
Execute the following command to log in as the user greencloud.
su - greencloud
Run the following command to create a new directory ~/.vnc/ and a new VNC configuration file ~/.vnc/config.
mkdir -p ~/.vnc/
sudo nano ~/.vnc/config
Insert the following configuration. In the session parameter, you can specify the Desktop Environment that will be used. Check the list of files within the /usr/share/xsessions directory to get the list of available Desktop Environments on your system.
session=xfce
securitytypes=vncauth,tlsvnc
geometry=1920x1200
localhost
alwaysshared
Save and close the file when you’re done.
Next, run the vncpasswd command below to create a new password for your VNC Server.
vncpasswd
Input the new password and repeat. When asked to set up a view-only password, input n to disable it or y to configure it.
Now run the following command to set up the SELinux context for the /home/greencloud/.vnc directory.
restorecon -RFv /home/greencloud/.vnc

After that, open the file /etc/tigervnc/vncserver.users using the following nano editor command.
sudo nano /etc/tigervnc/vncserver.users
Add the following line to the file. With this, you will create the VNC Server for display :1 for the user greencloud.
:1=greencloud
Save the file and close the editor when finished.
Next, run the systemctl command below to reload the systemd manager.
sudo systemctl daemon-reload
Then start and enable the VNC Server for display :1 using the command below. At the end of the service name is the display number of the VNC Server, and it allows you to create multiple displays on a single server such as vncserver@:2 for VNC Server display :2 and so on.
sudo systemctl start vncserver@:1
sudo systemctl enable vncserver@:1
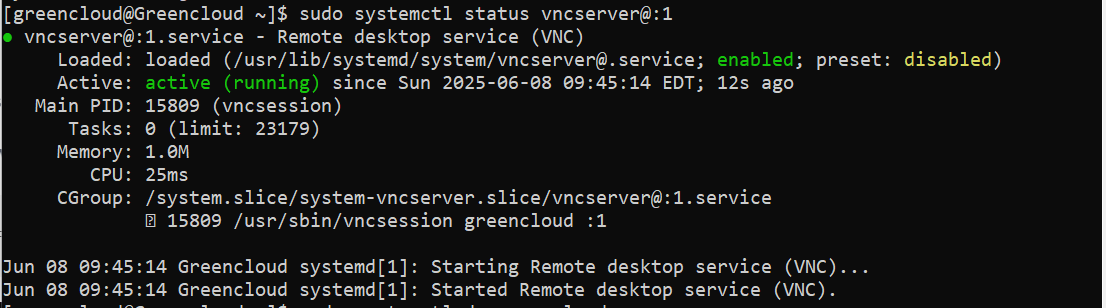
Lastly, run the following command to verify the VNC Server status for display :1.
sudo systemctl status vncserver@:1
If everything goes well, you should see the VNC Server display :1 status active (running).
Configuring Firewalld
If you followed this guide so far, you have finished the configuration of the VNC Server with TigerVNC and XFCE Desktop. The next step that you must do is to open the VNC Server port on firewalld.
Be sure that the firewalld is activated, or you can run the following command to start it.
sudo systemctl start firewalld
Now run the firewall-cmd commands below to add the VNC server to the firewalld and reload the firewalld to apply the changes.
sudo firewall-cmd --add-service=vnc-server --permanent
sudo firewall-cmd --reload
Then, verify the list of enabled services on firewalld using the command below. The output should indicate that the VNC server is added to firewalld.
sudo firewall-cmd --list-all
Accessing VNC Server via SSH Tunneling
In this section, you will learn how to connect to the VNC Server securely via SSH tunneling. So, before you begin, ensure that the VNC Client software is installed on your local machine. You can use VNC Clients like UltraVNC for Windows or RealVNC if you are using Linux or macOS.
On your local machine, run the SSH command below to create an SSH tunnel to the VNC Server. In this demo, the VNC Server has an IP address of 64.44.x.x, and we’ll be using the user greencloud to create the tunneling.
ssh -L 5901:127.0.0.1:5901 -N -f -l greencloud 64.44.x.x
When the password for the user is green, when prompted.
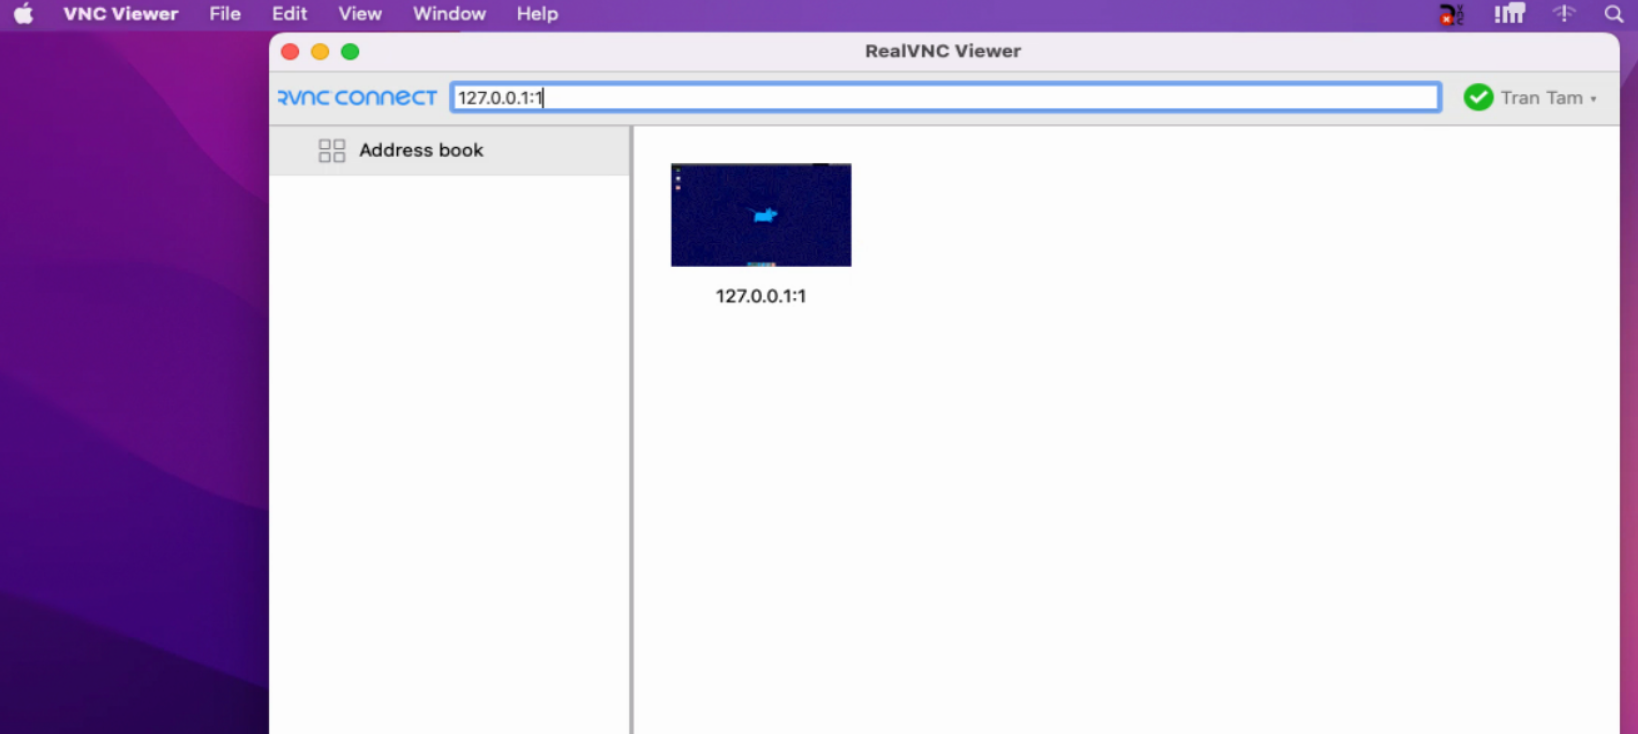
Now, open the VNC client application on your local machine and connect to 127.0.0.1 with port 5901. You can access the VNC Server via localhost because you have created a secure SSH tunnel to the VNC Server with port 5901.
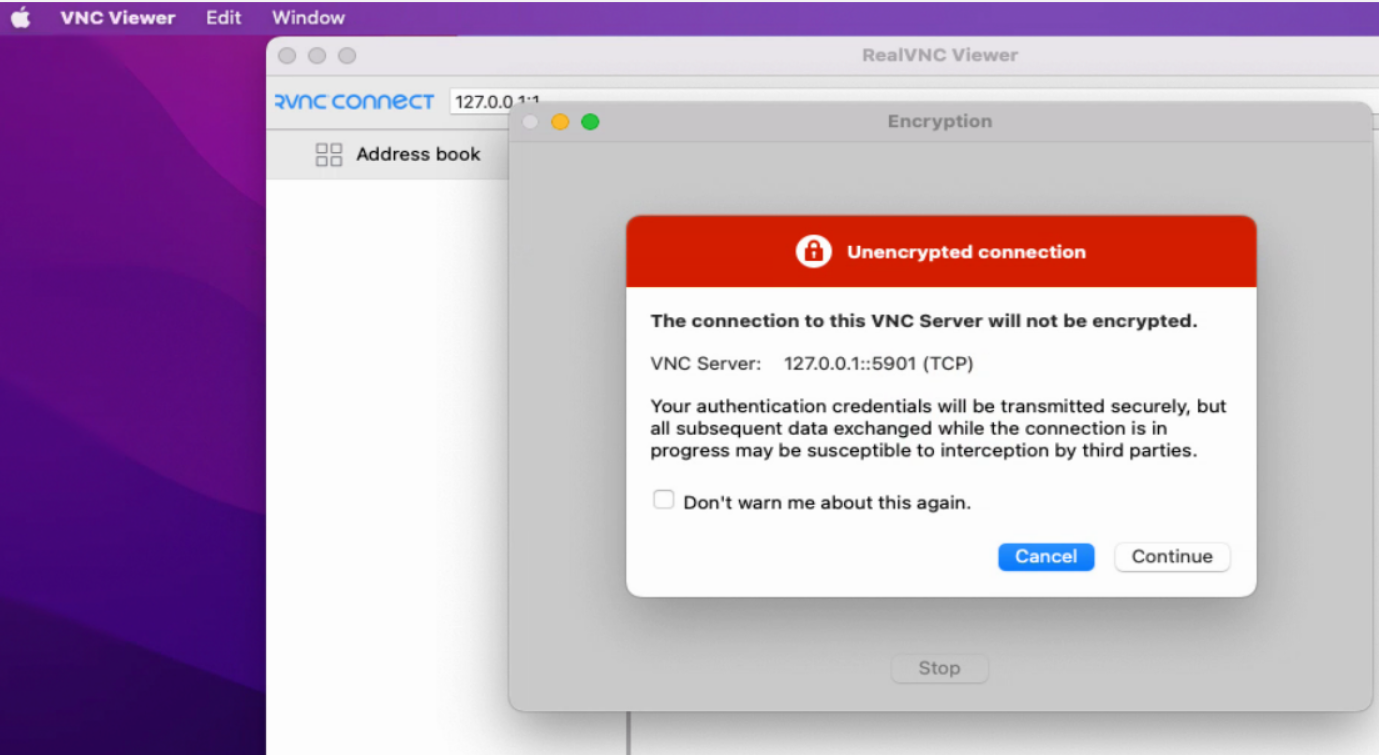
When you get the warning about unencrypted connections, click Continue.
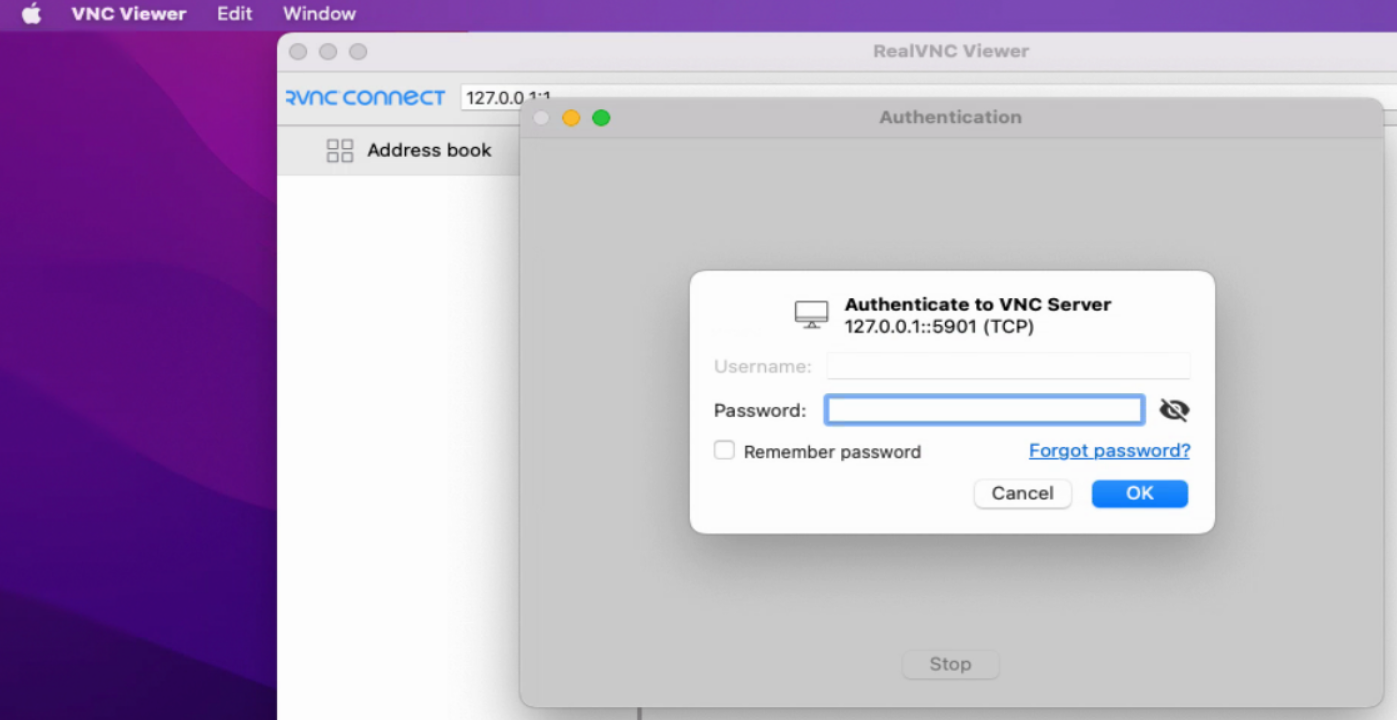
Input the VNC Server password when prompted and click OK to confirm.
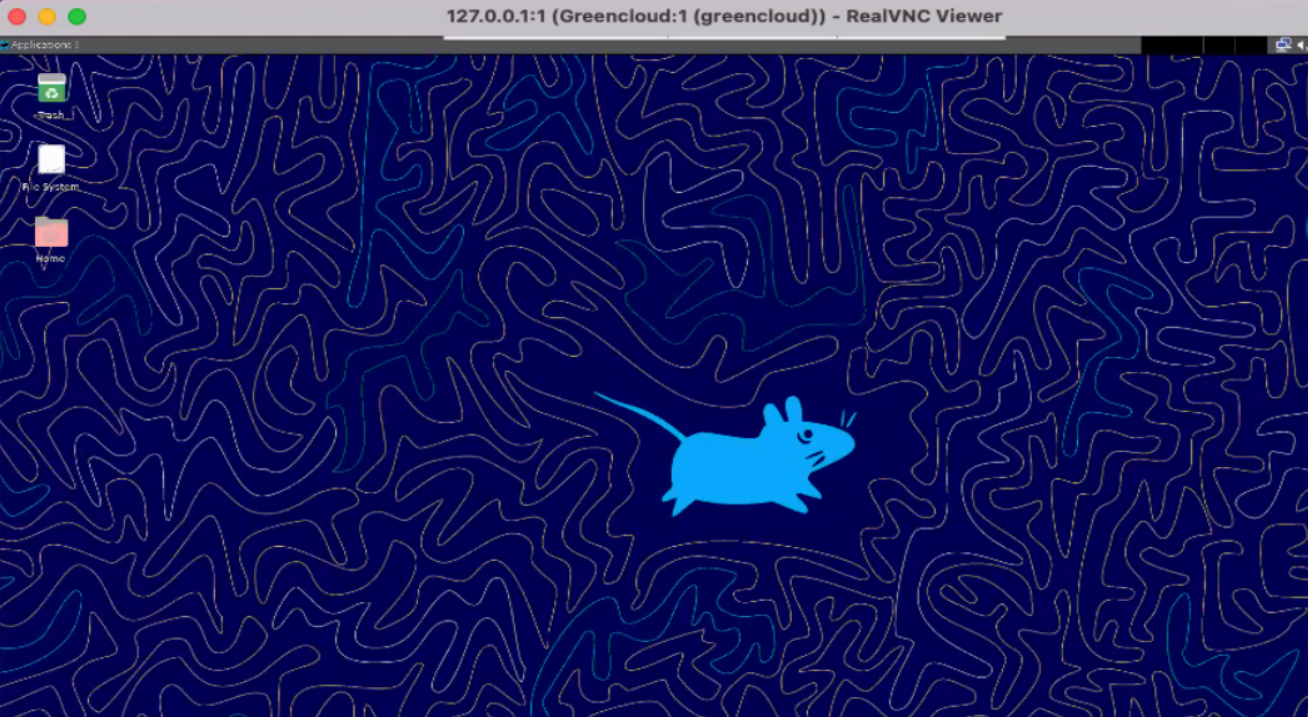
If you have the correct password for your VNC Server, you should get the default Desktop Environment that you’re using. In this demo, the default Desktop Environment is XFCE.
Conclusion
And with that, you’ve successfully installed VNC Server with TigerVNC Server and XFCE Desktop on your AlmaLinux 9 machine. You have also learned how to connect to the VNC Server securely with SSH Tunneling from your local machine. You can now start using your VNC Server for your main working space.
