
How to Install Jitsi Meet on Debian 12
Introduction
Jitsi Meet is an open-source video conferencing platform that allows you to host secure online meetings on your own infrastructure. Self-hosting Jitsi gives you full control over privacy, scalability, and system configuration.
This tutorial shows how to install Jitsi Meet on Debian 12, following a clear, linear flow that matches the recorded video, with every command explained so viewers understand what is happening at each step.
Prerequisites
-
Debian 12 server
-
Root SSH access
-
A domain/subdomain pointing to your server (e.g.
meet.example.com)
Step 1: Connect to the Server (Linux, macOS & Windows)
Linux / macOS
Connects to the server using SSH as the root user.
Windows (PowerShell / Windows Terminal)
Uses the built-in OpenSSH client on Windows.
Windows (PuTTY)
-
Host Name: YOUR_SERVER_IP
-
Port:
22 -
Connection type: SSH
-
Username: root
After connecting successfully, you should see a root shell prompt, confirming root access.
Step 2: Update the Operating System
-
Refreshes the local package index
-
Ensures Debian knows about the latest available packages
-
Installs all available system and security updates
-
Prevents dependency issues during Jitsi installation
Note:
If you encounter the error “dpkg was interrupted”, fix it by running:Then repeat apt update and apt upgrade -y.
Step 3: Set the Hostname (Mandatory for Jitsi)
Jitsi requires a fully qualified domain name (FQDN) to work correctly.
-
Sets the system hostname permanently
-
Required for Prosody and Jitsi components
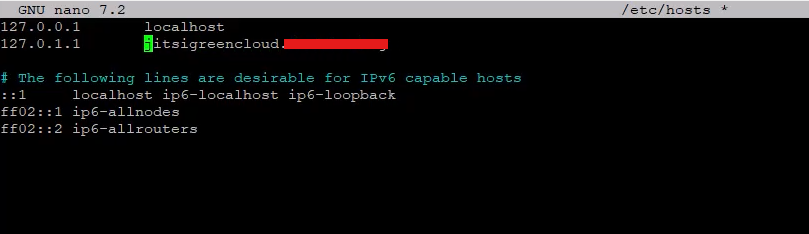
Update local hostname resolution
Add or update the following lines:
-
Ensures the system can resolve its own hostname locally
-
Prevents Prosody and Jicofo errors
Verify hostname
hostname
Displays the current hostname to confirm the change.
Update packages again
Ensures the system is fully updated after hostname changes.
Reboot the server
reboot
Applies hostname changes system-wide.
Reconnect via SSH after reboot.
Step 4: Install and Configure Firewall (UFW)
Jitsi requires multiple ports for signaling, media, and NAT traversal.
apt install ufw
Installs the Uncomplicated Firewall.
Allow required ports
Allows SSH access so you don’t lock yourself out.
ufw allow 80/tcp
Allows HTTP traffic (used by Nginx and Jitsi).
Allows HTTPS traffic.
ufw allow 10000/udp
Main Jitsi video/audio media port.
ufw allow 3478/udp
STUN/TURN (UDP) for NAT traversal.
TURN over TCP (fallback for restricted networks).
Enable the firewall
Activates firewall rules.
Verify firewall status
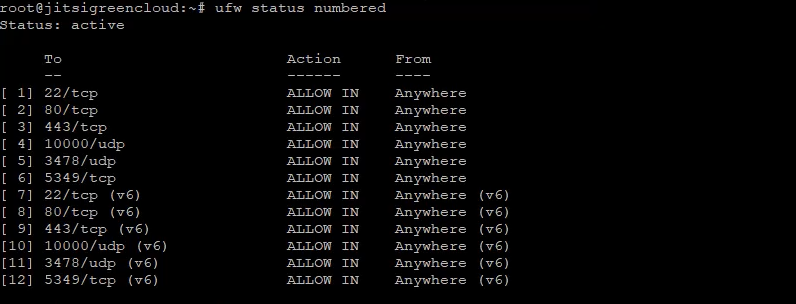
Confirms all required ports are allowed.
Step 5: Install Java Runtime Environment
Jitsi components require Java to run.
-
Installs Java 17 runtime
-
Recommended version for Debian 12
Verify Java installation
Confirms Java is installed and working.
Select Java 17 (if multiple versions exist)

Ensures Jitsi uses Java 17.
Step 6: Add Jitsi Package Repository
apt install gnupg
Installs GPG for verifying package signatures.
Download and store the Jitsi signing key
-
Downloads the official Jitsi GPG key
-
Stores it securely in the keyring
Verify the key
Ensures the key file exists.
Add the Jitsi repository
echo "deb [signed-by=/usr/share/keyrings/jitsi-keyring.gpg] https://download.jitsi.org stable/" \
> /etc/apt/sources.list.d/jitsi-stable.list
Registers the official Jitsi repository.
Update package lists
apt update
Loads package metadata from the new repository.
Step 7: Install Jitsi Meet
During installation:
-
Hostname: meet.example.com
-
SSL: Choose Generate a new self-signed certificate
The self-signed certificate is temporary and suitable for testing or internal use.
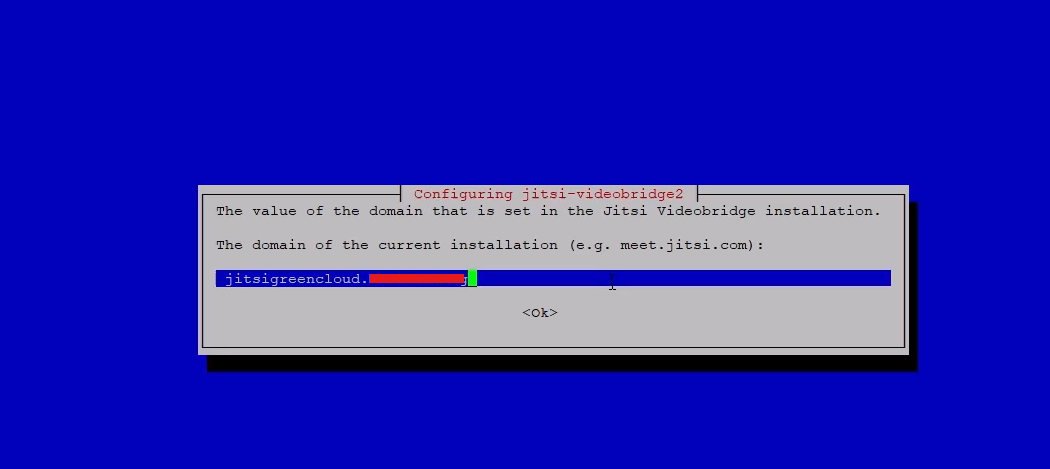
Step 8: Restart Jitsi Services
Ensures all Jitsi components load correctly.
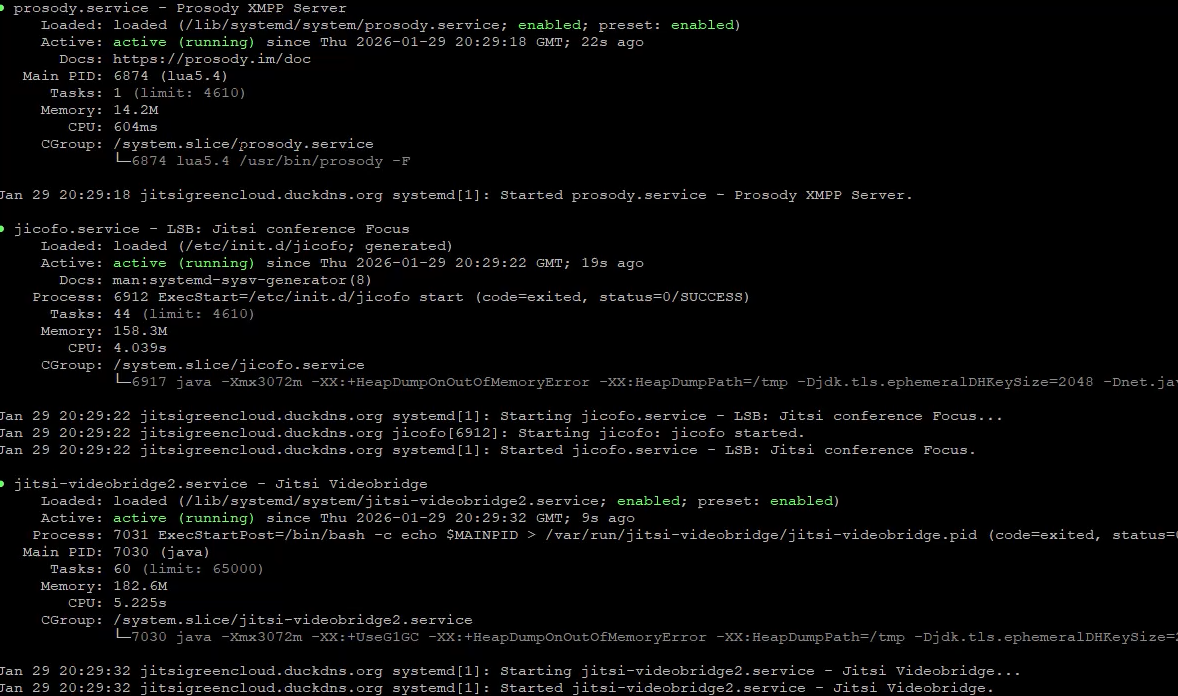
Check service status
All services should show active (running).
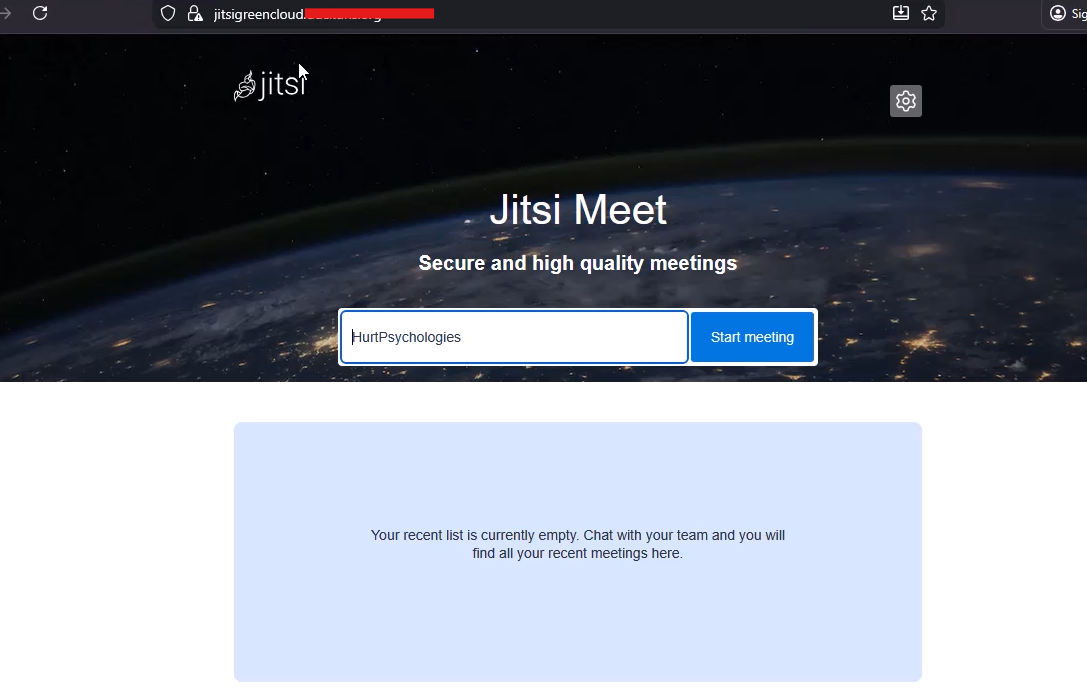
Step 9: Access Jitsi Meet
Open your browser and visit:
https://meet.example.com
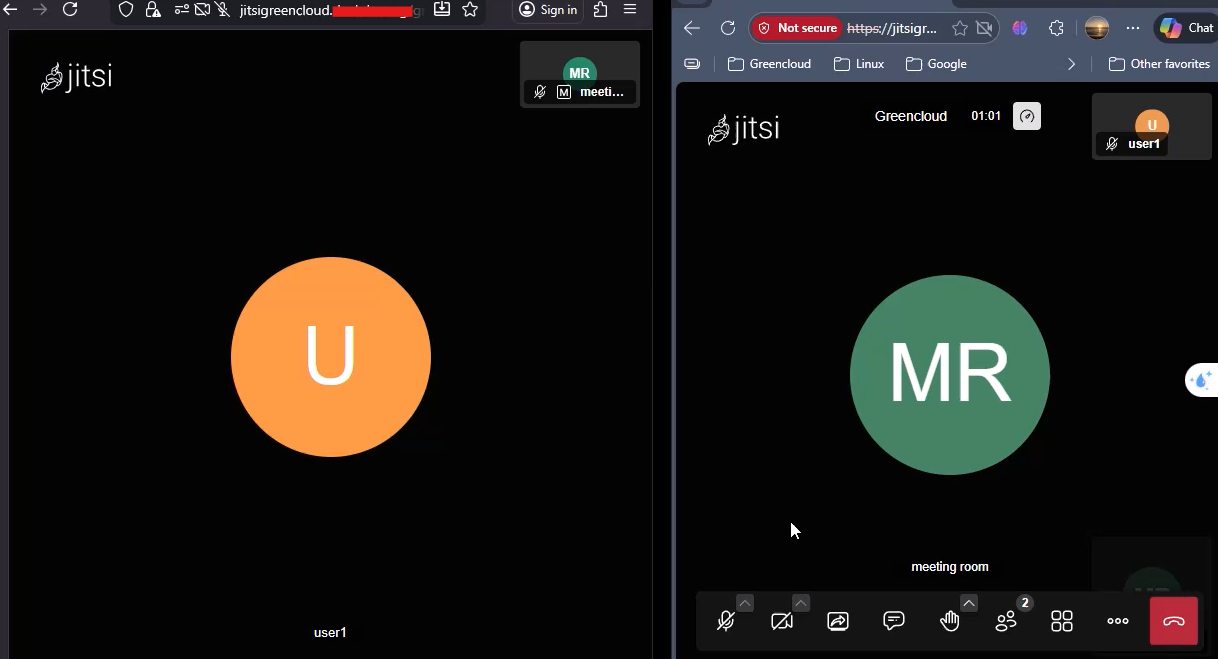
You now have:
-
A self-hosted Jitsi Meet server
-
Running on Debian 12
-
Ready for private or internal video conferencing
Conclusion
You have successfully installed Jitsi Meet on Debian 12, configured the required hostname and firewall rules, installed all dependencies, and verified that all core services are running correctly.
This setup is suitable for:
-
Private meetings
-
Internal company communication
-
Self-hosted conferencing without third-party providers
