How to manage multiple VPS with RDCMan
How to manage multiple VPS windows in the easiest and most convenient way ? Surely you have searched the word too “manage multiple vps” on google before reading this article, right. Congratulations, now you can do it after read this thread. Now I will show you how to manage multiple VPS with Remote Desktop Connection. If you don’t know how to manage VPS with RDC, you can read my old post here
Step 1 : Download and Install Remote Desktop Connection Manager (RDCMAN)
We can download this lightweight tool as an MSI file from the following URL.
You can go here : https://docs.microsoft.com/en-us/sysinternals/downloads/rdcmanhttps://www.microsoft.com/en-us/download/details.aspx?id=44989
Installation is easy as most of the other Windows applications. Just Next-Next-Next. By the way do not forget to accept the License Agreement.
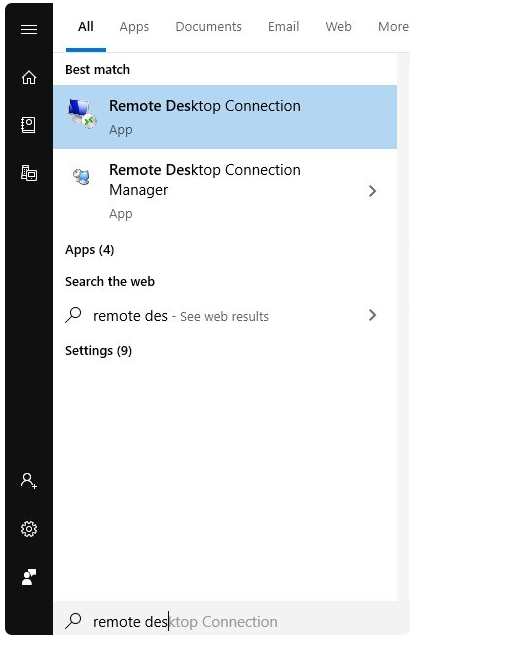
Step 2 : We can find the RDCM applications from the start menu just typing Remote
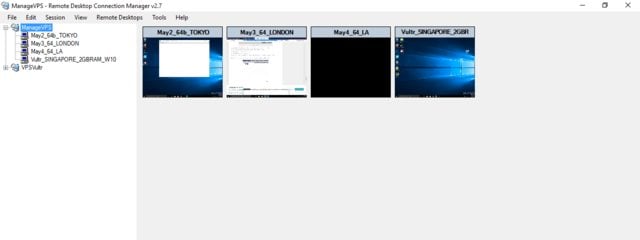
RDCMan consist of a menubar, a left side menu and the main part
- Menubar is used to configure RDCMan
- Left Side Menu is used to list saved sessions and connections.
- Main part is used to show remote session desktop
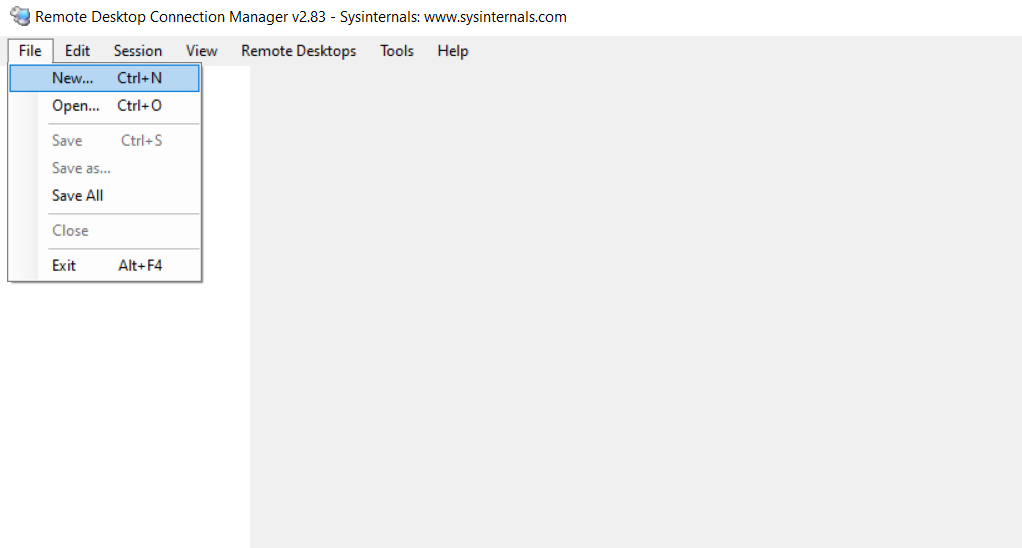
Step 3 : Select File -> New menu (or press Ctrl + N) to create a new Group, Select Save to save the file in * .rdg format.This step is create a new file to use for next time when you want manage multiple VPS.
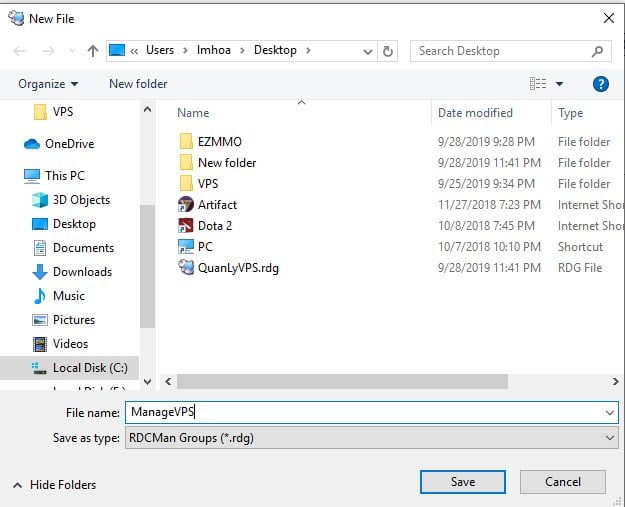
We name the database file name ,here I name it is ManageVPS and put it on Desktop.
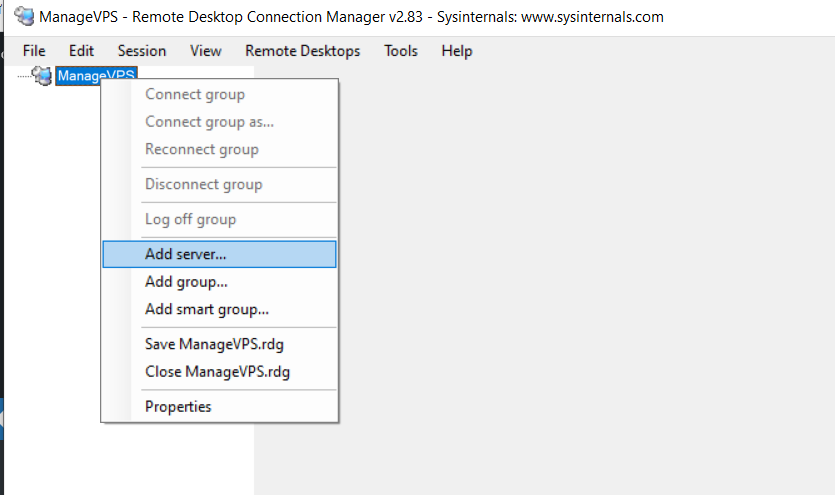
Step 4 : After having the Group, right-click on the group name, select Add Server
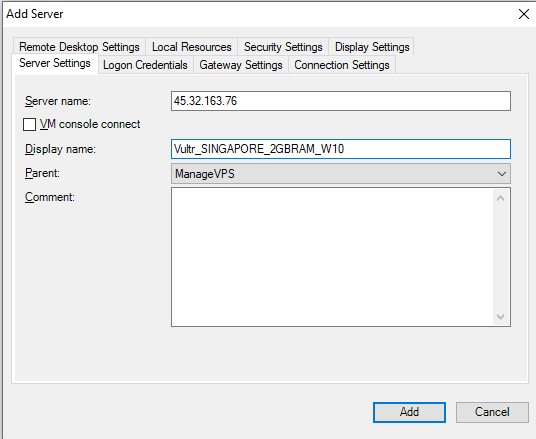
Step 5 : In the interface of Add Server window, you customize as follows:
At the tab Server Settings:
Server name: Enter the VPS IP address or Domain VPS address (if any)
Display name: Enter the VPS display name in the list as you want
Step 6 : On the Logon Credentials tab, uncheck “lnherit from parent” to display the custom.
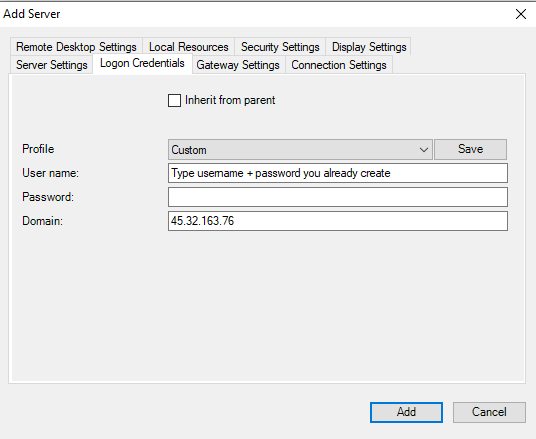
Username: Enter the username of the VPS
Password: Enter the password to access the VPS
Domain: To default or enter the IP address of VPS, Domain VPS
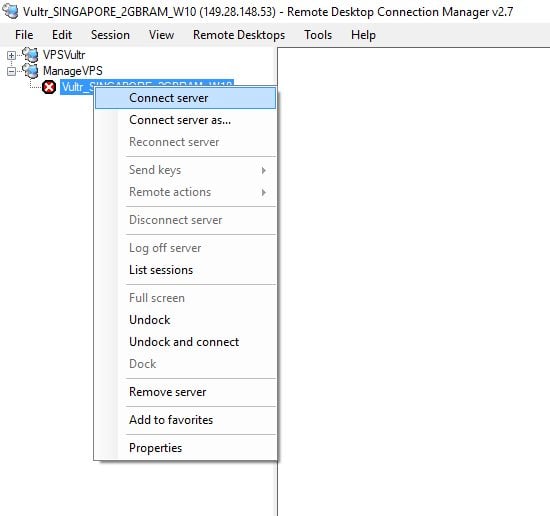
Step 7 : VPS list you displayed on the group, right-click and select connect. Now you can manage multiple VPS easily
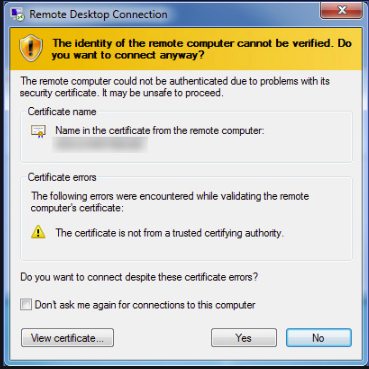
The first time you access VPS you will see the notification of Remote Desktop Connection. Check the box “Do not ask me again for connection to this computer” and press YES. Next time you access VPS via RDCMan, you will not receive this notice.
You can add more VPS, that’s all step how to manage multiple VPS with RDCMan
Step 8 : Press Ctrl + S to save all information. The next time you turn on the computer to open the Remote desktop connection manager select File -> Open (or Ctrl + O) and navigate to the file group * .rdg. Then right-click on the group name and select Connect group, you can connect the entire VPS in the list without having to press each VPS in turn.
Now you know how to create a Group and add a VPS, right? The above method is suitable for you with many VPS, but for you with a lot of VPS (for example, 50-500 VPS for example), adding each VPS to the Group also takes quite a lot of time. If this is the case, please read the instructions below.
1. First you create a Group and add 1 more VPS as the above steps. Ctrl + S to save.
2. Then open the * .rdg group file with notepad (or use notepad ++). Copy the code from <server> to </server> then paste the code as much as you want (eg 100 vps add 99 more: D).
3. Edit each piece of code, replace the following code
<displayName> Display name </displayName>
<name> VPS IP Address </name>
<userName> Administrator (VPS username) </userName>
<password> VPS password </password>
4. Just like that, you replace each turn, when finished, save it. It only takes you about 10 minutes to add 80-100 VPS.
The above is one of the ways to manage multiple vps more easily, do you know how to manage multiple VPS with RDCMan after read this post ? If you have any questions please leave your comment below. Goodluck.
