How to Install and Configure SMTP Server on Windows
SMTP (Simple Mail Transfer Protocol) is a service that enables email exchange on the Internet and within a local network. To achieve that, SMTP interacts with the Mail Transfer Agent (MTA) and ensures the messages reach the intended recipients.
Mail servers and other message transfer agents usually use SMTP to send and receive email messages.
In this tutorial, you will learn to install and configure the SMTP server on Windows.
Install SMTP on Windows
SMTP installation is a straightforward process on Windows Server operating systems. Use the Server Manager management console and follow the steps below to install SMTP.
Step 1: Add Roles and Features in the Server Manager Dashboard
Open the Server Manager management console and select Dashboard in the left pane.
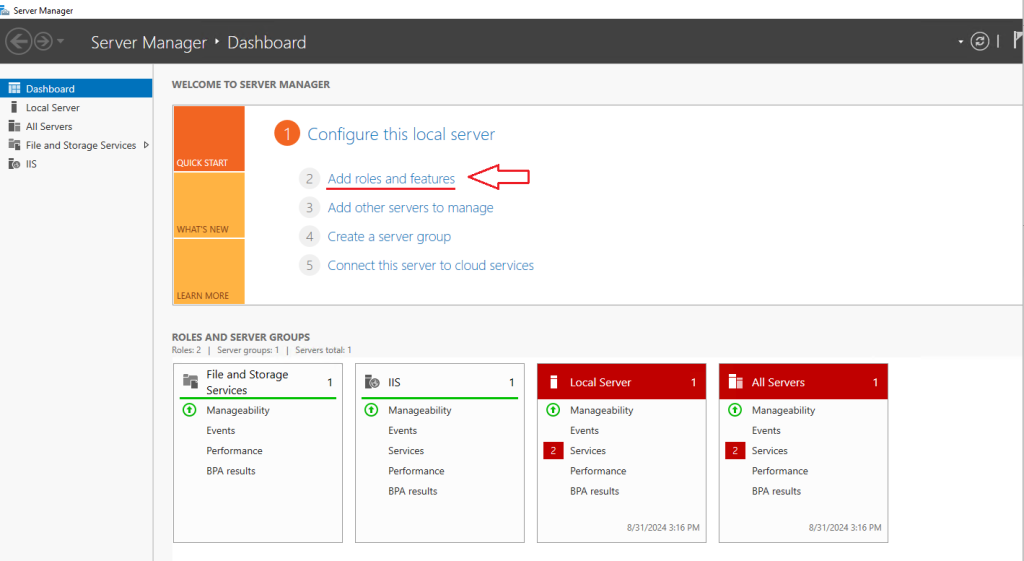
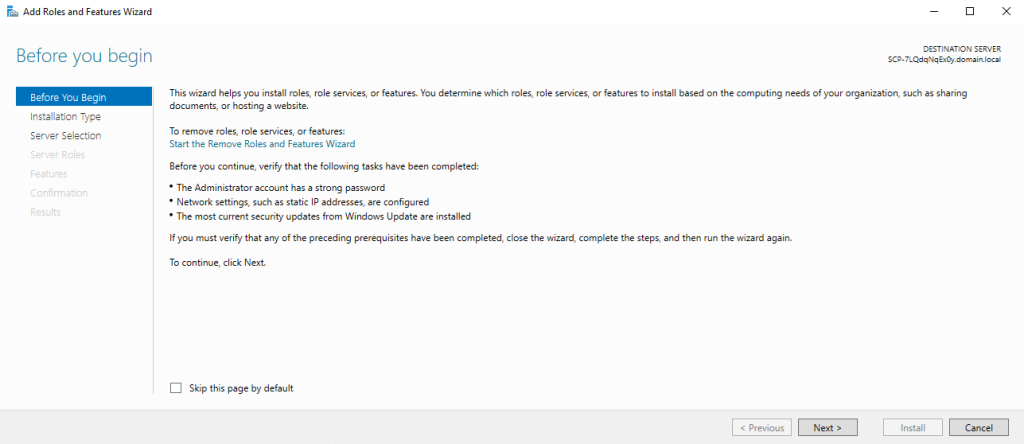
Click the “Add Roles and Features” button. Now you will observe the “before you start”.
Step 2: Select Installation Type
In the Installation type window, select Role-based or Feature-based Installation. Click Next to continue.
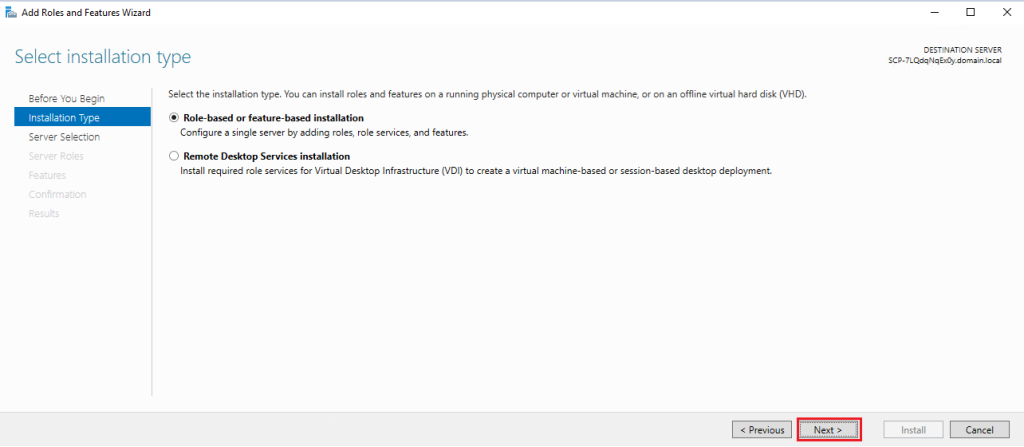
Click the Next button after choosing between role-based and feature-based installation. You should now be at the page where you can select your final server.
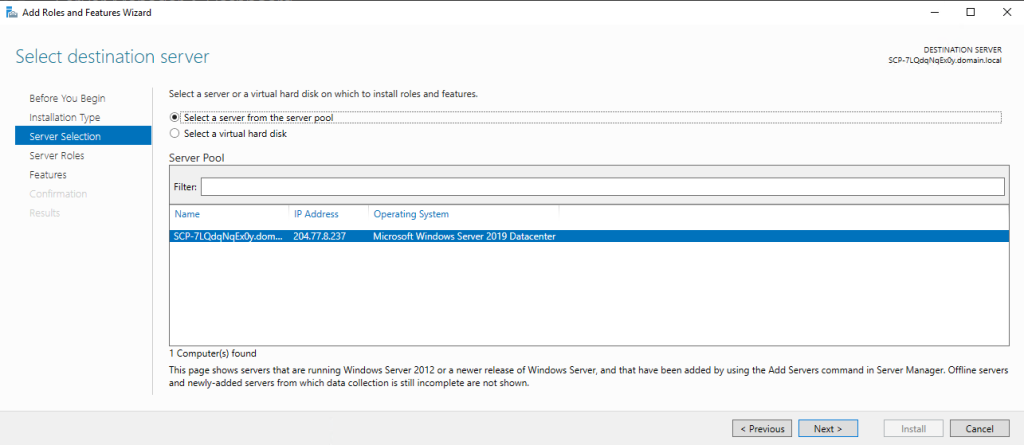
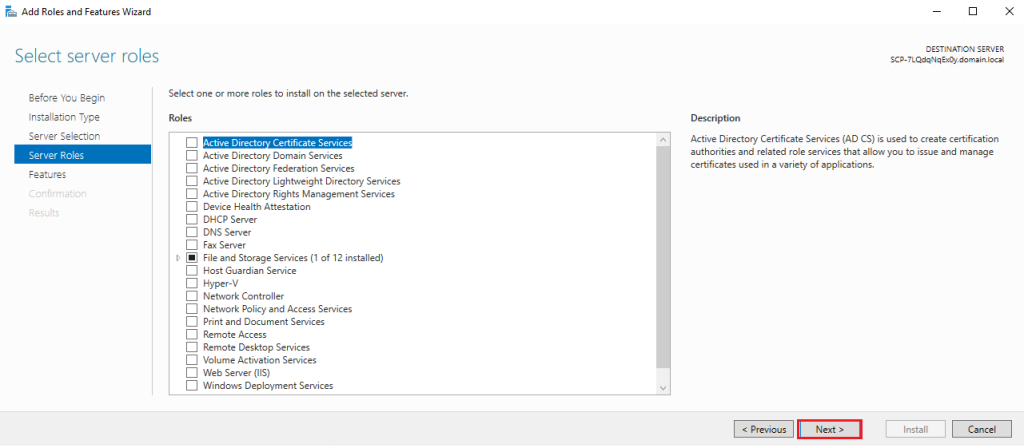
Step 3: Select Server Role
Click the Next button after selecting a server from the server pool. The Choose server roles screen needs to load.
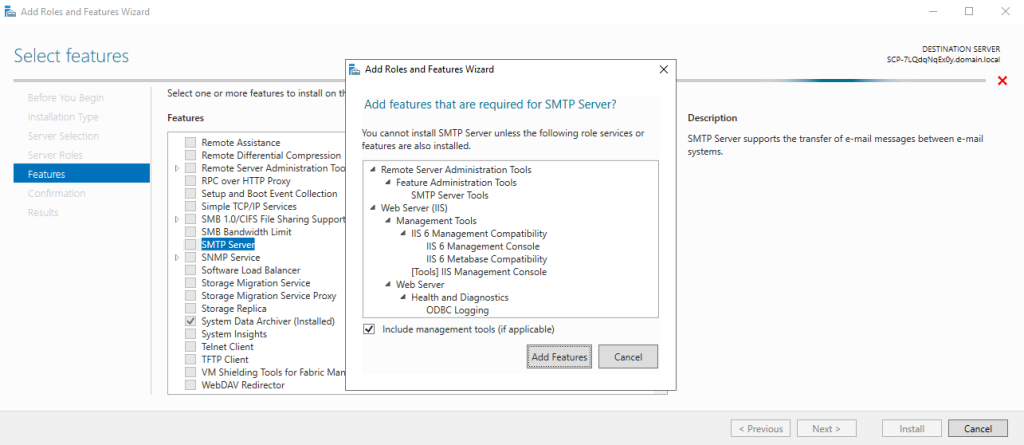
Click the Next button after selecting the Web Server (IIS) role. The choose features screen must now be visible.
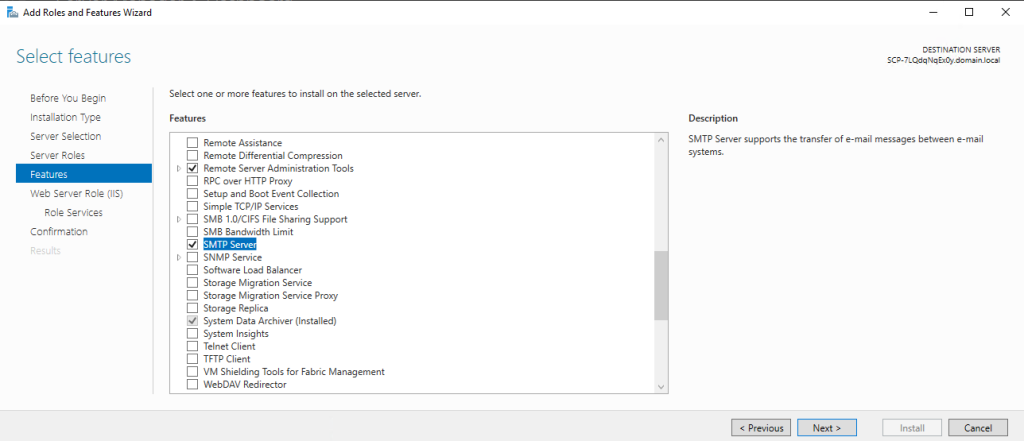
Click the Next button after choosing the SMTP server options. The screen for the web server role must now be visible.
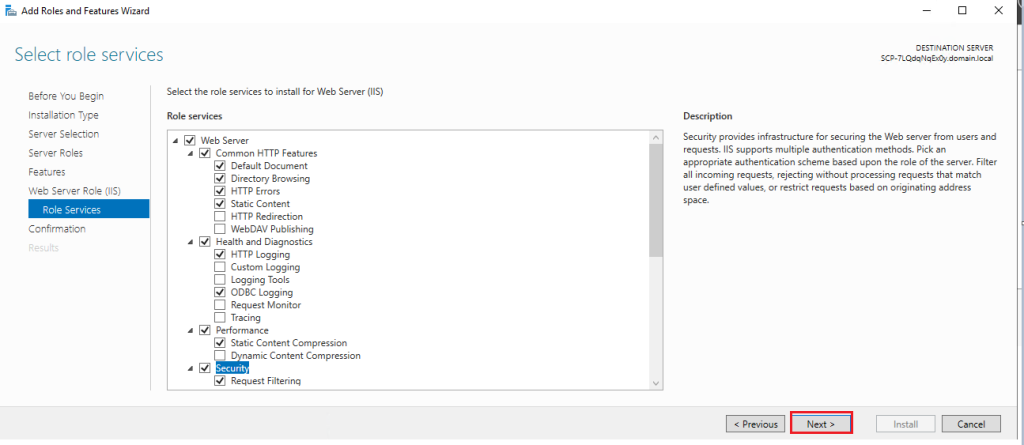
Select the Next option. Now “Select Role Services” is in front of you.
Select the Next option. The screen to verify the installation should appear.
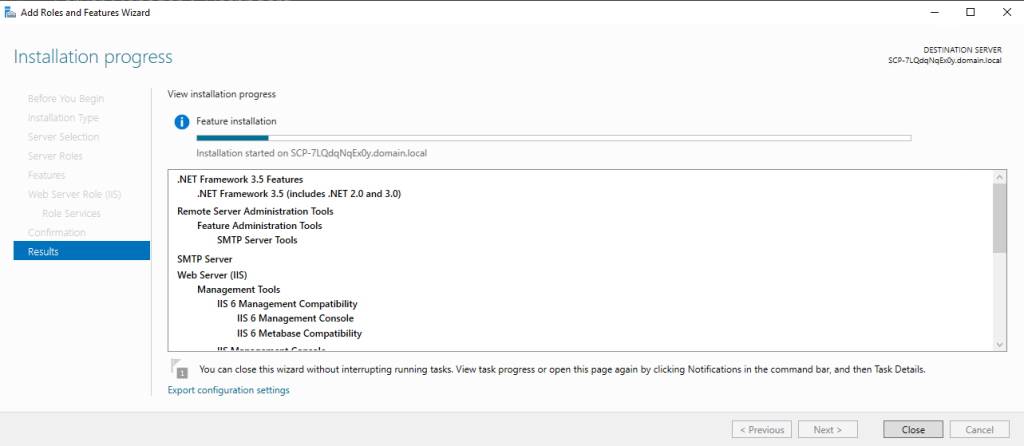
Hit the Install button to begin the setup. You’ll need to give the installation some time to complete. Restarting the server after installation is complete is required.
Configure SMTP on Windows
Configure the SMTP server using the Internet Information Services (IIS) Manager 6.0. Follow the steps in the chapters below.
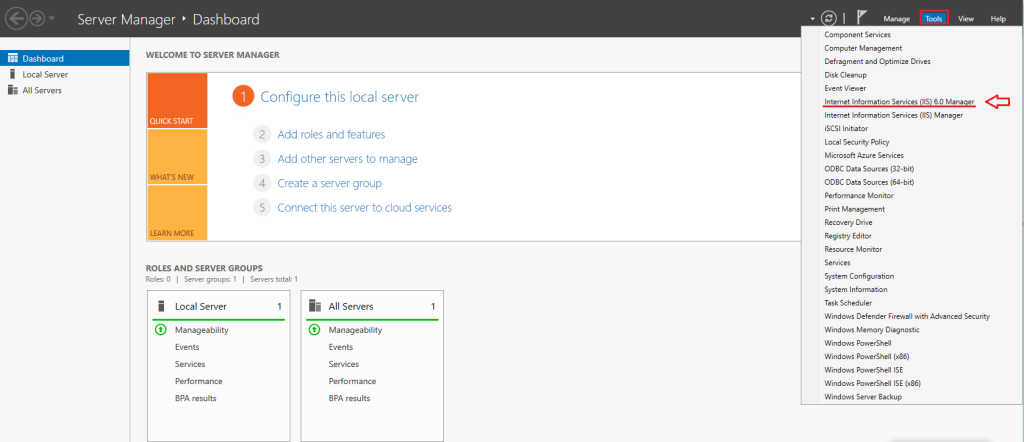
Step 1: Open IIS 6.0
Select the Tools option, and locate Internet Information Services (IIS) 6.0 Manager from the dropdown menu:
Step 2: Configure SMTP Virtual Server
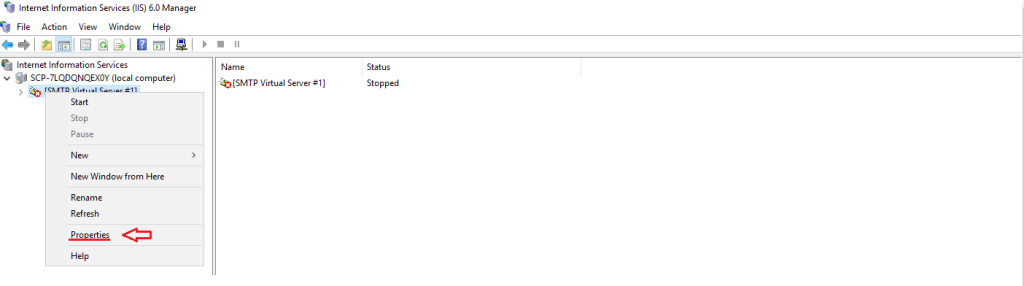
In IIS Manager 6.0, expand the computer name and right-click [SMTP Virtual Server #1].
Select Properties from the dropdown menu.
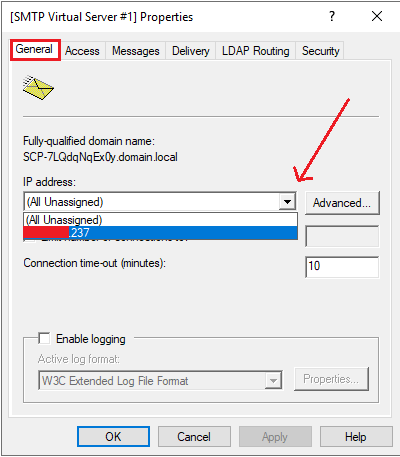
- General Tab: Set the IP Address to the server’s IP address.
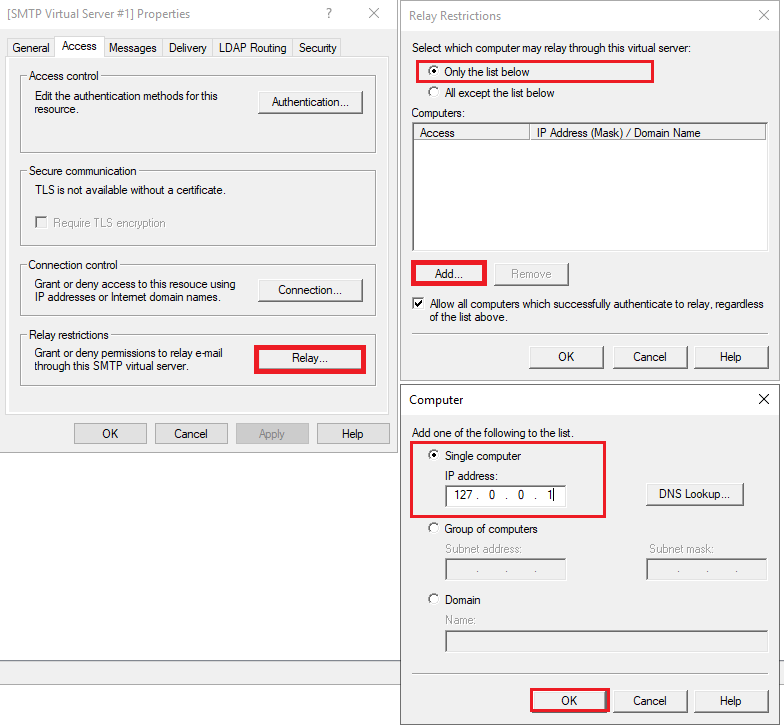
- Access Tab: In the connection button, set the IP address for the internal devices. Add the same IP address to the Relay list.
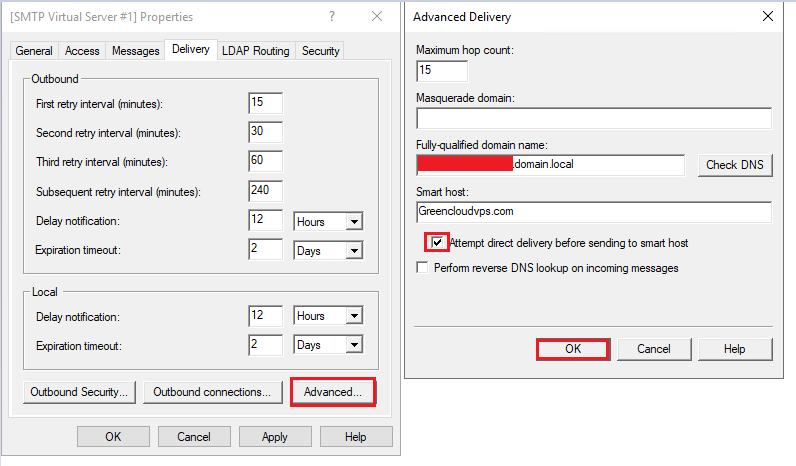
- Delivery Tab: Select an external domain, you can add a Smart host if necessary or use the free customized domain from Microsoft. Tick the Attempt direct delivery box if you want the server to try to deliver the email directly first before using the Smart host.
Set up a Firewall in Windows
The next step is to open the SMTP port on the Windows firewall to access it from outside hosts. To set up the firewall, please refer to the instructions below.
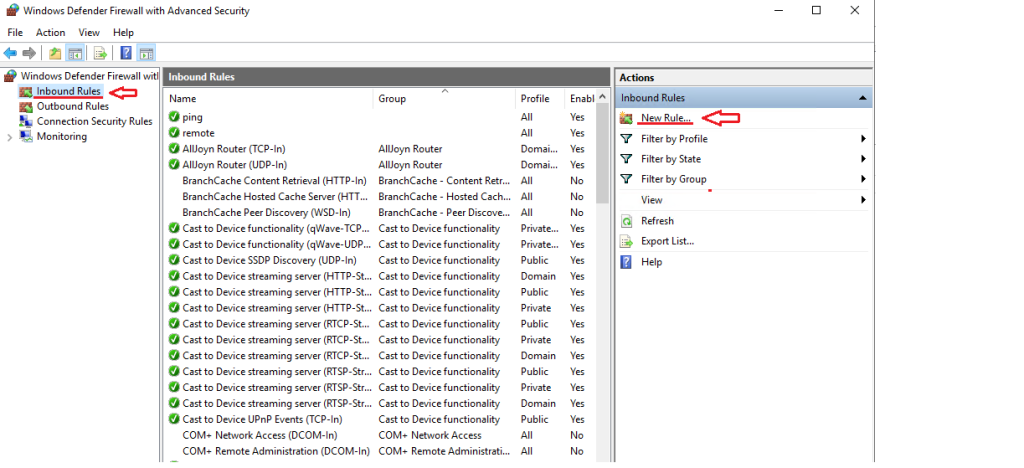
Select “New Rule” from the Inbound Rule context menu. The Rule Type screen needs to load
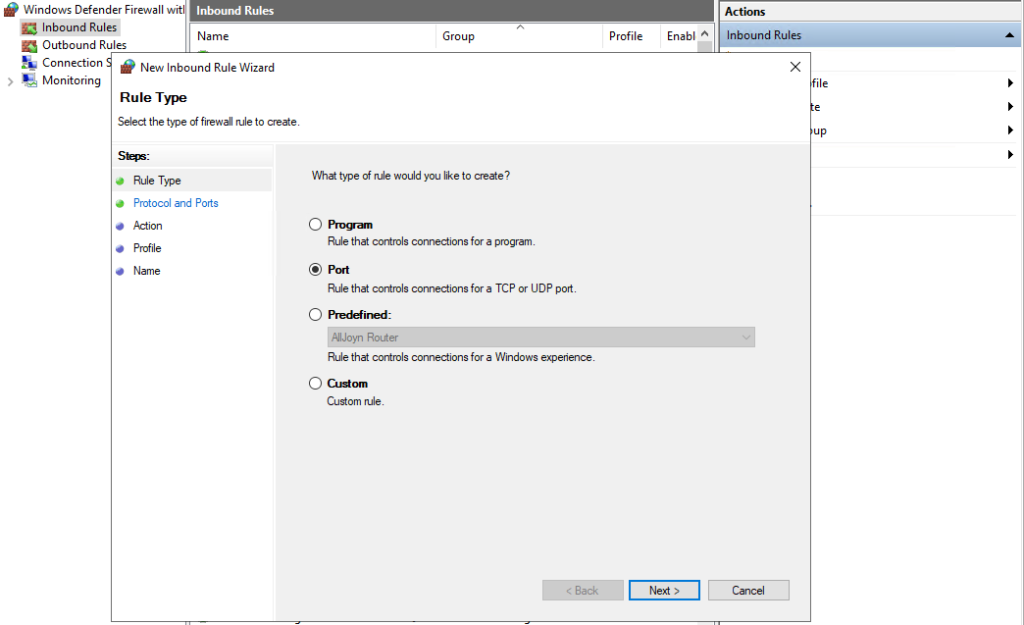
Choose the port you want to use, then press the Next button. Now you will see the “Protocol and Ports”
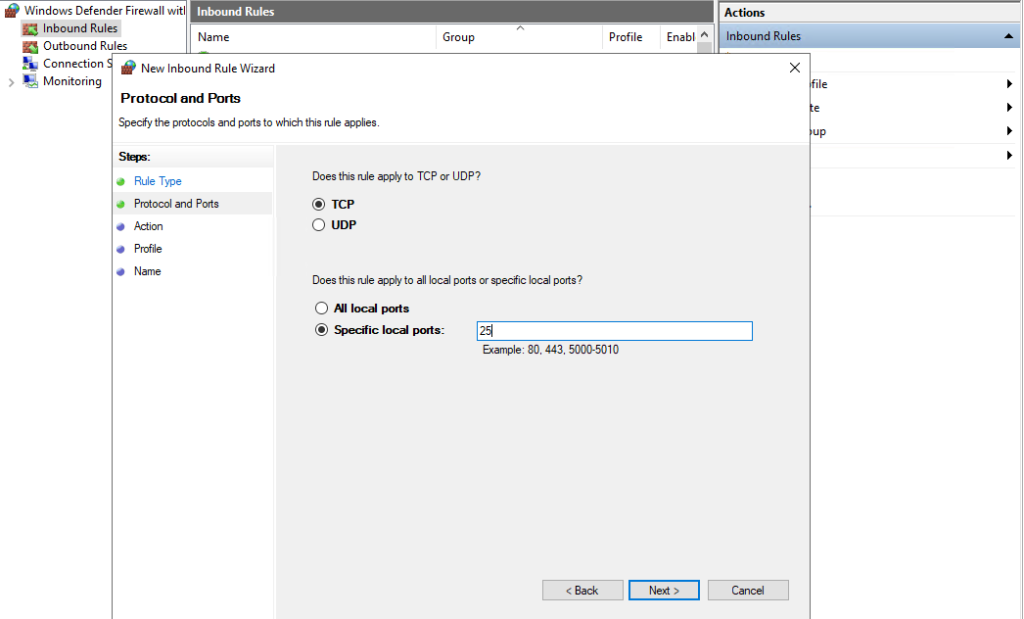
The fourth step is to specify the protocol and port number before proceeding. The Action screen should load.
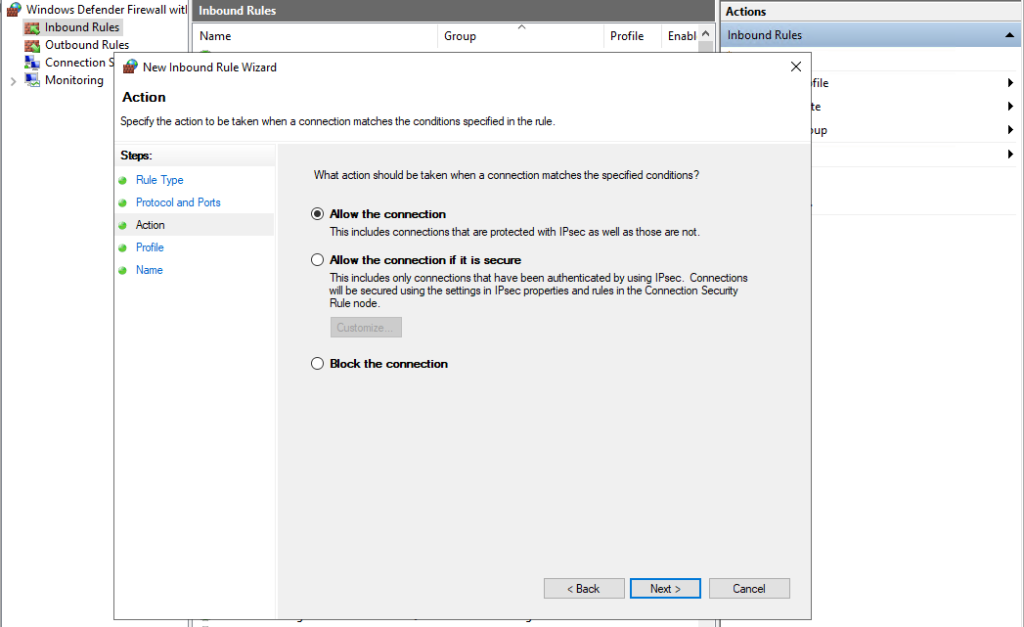
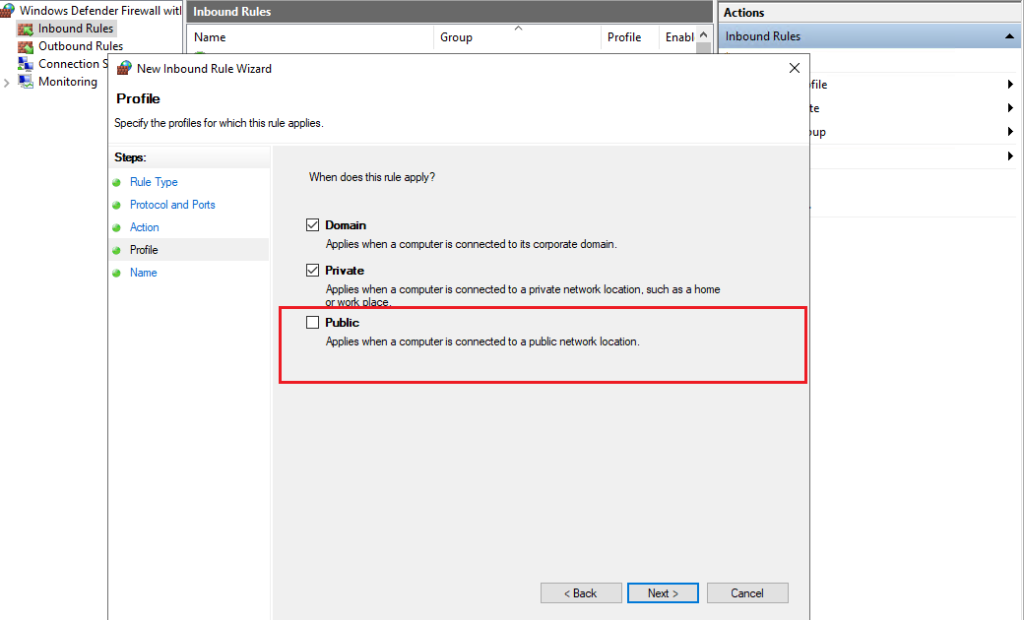
The fifth step is to click the Next button after choosing to allow the connection. The profile-selection screen will appear.Uncheck Public. (Prevent outside access to the server)
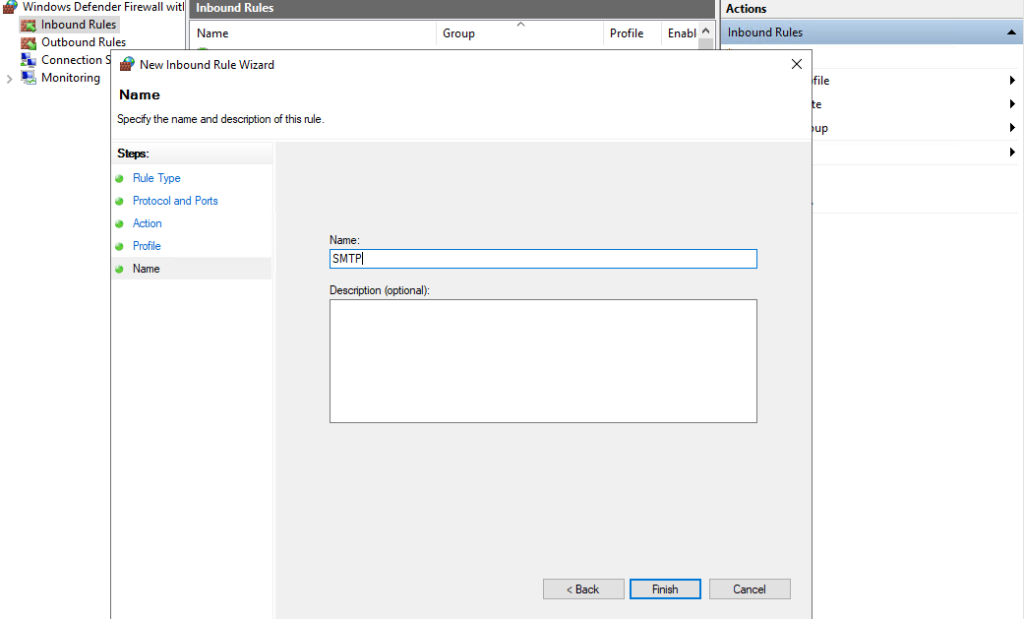
Name the rule and click Finish to create the rule.
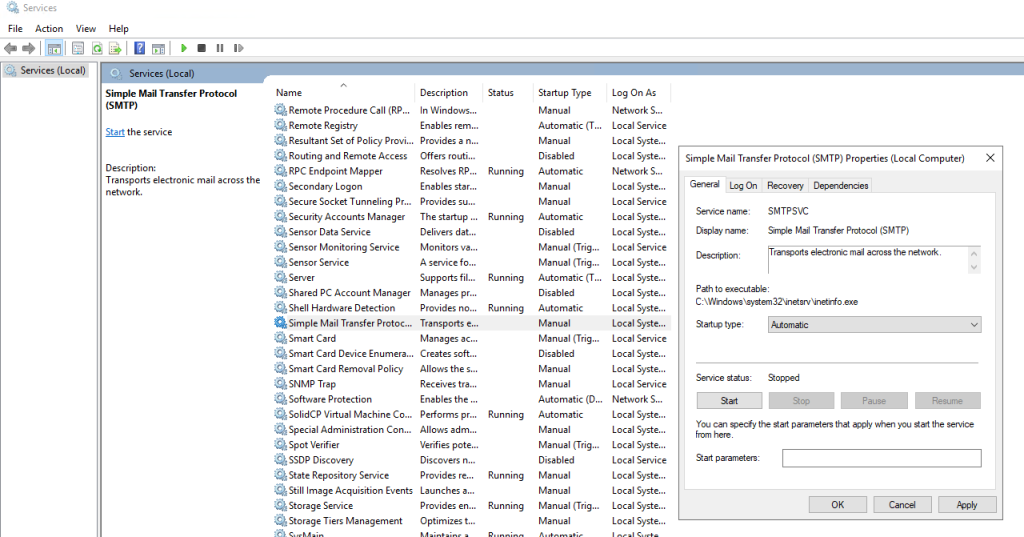
Set the SMTP Service to Automatic Start and restart it. the Services Management Console should be opened. The Simple Mail Transfer Protocol service should be double-clicked. Start the service first, then stop it. Select Automatic as the Startup type.
The final step in setting up your SMTP rule is to give it a descriptive name and then hit the Finish button.
You may now tailor email delivery with your Windows server to meet your needs.
Test SMTP Server
Test the SMTP server configuration by sending an email message using the SMTP server. One of the ways to do that is to use telnet. Follow the steps below:
Using Telnet
You can test if the SMTP server is working by using Telnet:
Open the Command Prompt and type:
telnet [SMTP Server IP] 25If you receive a response starting with “220”, your SMTP server is working.

Send a Test Email: Use a simple email client or command line to send a test email to ensure the server can send emails successfully.
Conclusion
This tutorial showed how to install and configure the SMTP server on Windows Server operating systems. An SMTP server allows you to exchange emails using the MTA, making it a great solution when you want to set up your own mail serve

