How To Use Rsync to Sync Local and Remote Directories
Introduction
Rsync, which stands for remote sync, is a remote and local file synchronization tool. It uses an algorithm to minimize the amount of data copied by only moving the portions of files that have changed.
In this tutorial, we’ll define Rsync, review the syntax when using rsync, explain how to use Rsync to sync with a remote system, and other options available to you.
Prerequisites
To practice using rsync to sync files between a local and remote system, you will need two machines to act as your local computer and your remote machine, respectively. These two machines could be virtual private servers, virtual machines, containers, or personal computers as long as they’ve been properly configured.
If you plan to follow this guide using servers, it would be prudent to set them up with administrative users and configure a firewall on each of them.
Regardless of what types of machines you use to follow this tutorial, you will need to have created SSH keys on both of them. Then, copy each server’s public key to the other server’s authorized_keys file as outlined in that guide.
This guide was validated on machines running Ubuntu 20.04, although it should generally work with any computers running a Linux-based operating system that have rsync installed.
Defining Rsync
Rsync is a very flexible network-enabled syncing tool. Due to its ubiquity on Linux and Unix-like systems and its popularity as a tool for system scripts, it’s included on most Linux distributions by default.
Install Rsync in the Linux System
We can install the rsync package with the help of the following command in your Linux distribution
$ sudo apt-get install rsync   [On Debian/Ubuntu & Mint]
$ pacman -S rsync              [On Arch Linux]
$ emerge sys-apps/rsync        [On Gentoo]
$ sudo yum install rsync       [On Fedora/CentOS/RHEL and Rocky Linux/AlmaLinux]
$ sudo zypper install rsync    [On openSUSE]
Understanding Rsync Syntax
The syntax for rsync operates similarly to other tools, such as ssh, scp, and cp.
First, change into your home directory by running the following command:
Then create a test directory:

You also have an empty directory called green2. To sync the contents of green1 to green2 on the same system, you will run rsync and use the -r flag, which stands for “recursive” and is necessary for directory syncing:
Another option is to use the -a flag, which is a combination flag and stands for “archive”. This flag syncs recursively and preserves symbolic links, special and device files, modification times, groups, owners, and permissions. It’s more commonly used than -r and is the recommended flag to use. Run the same command as the previous example, this time using the -a flag:
Please note that there is a trailing slash (/) at the end of the first argument in the syntax of the previous two commands and highlighted here:
This trailing slash signifies the contents of green1. Without the trailing slash, green1including the directory, would be placed within green2. The outcome would create a hierarchy like the following:
~/green2/green1/[files]
Another tip is to double-check your arguments before executing an rsync command. Rsync provides a method for doing this by passing the -n or --dry-run options. The -v flag, which means “verbose”, is also necessary to get the appropriate output. You’ll combine the a, n, and v flags in the following command:
Now compare that output to the one you receive when removing the trailing slash, as in the following:
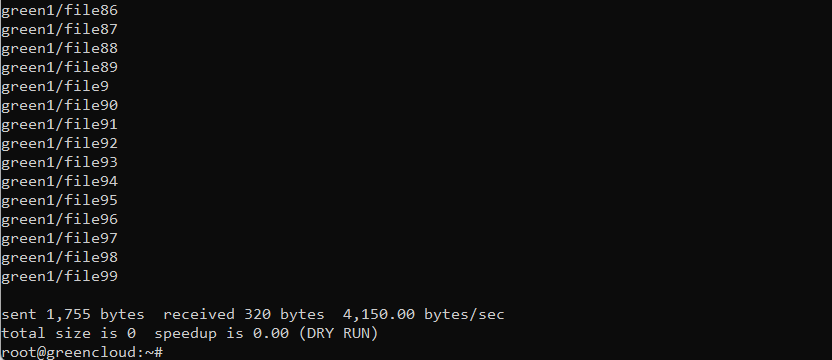
This output now demonstrates that the directory itself was transferred, rather than only the files within the directory.
Using Rsync to Sync with a Remote System
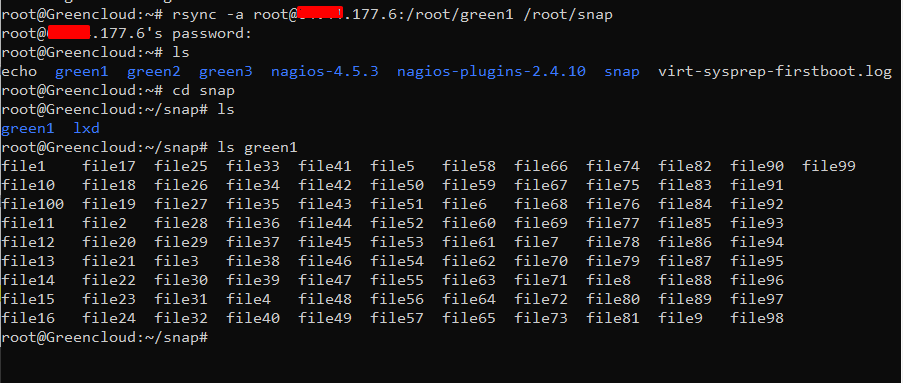
To use rsync to sync with a remote system, you only need SSH access configured between your local and remote machines, as well as rsync installed on both systems. Once you have SSH access verified between the two machines, you can sync the green1 folder from the previous section to a remote machine by using the following syntax. Please note in this case, that you want to transfer the actual directory, so you’ll omit the trailing slash:
This process is called a push operation because it “pushes” a directory from the local system to a remote system. The opposite operation is pull and is used to sync a remote directory to the local system. If the green1 directory was on the remote system instead of your local system, the syntax would be the following:
Like cp and similar tools, the source is always the first argument, and the destination is always the second.
Using Other Rsync Options
Rsync provides many options for altering the default behavior of the utility, such as the flag options you learned about in the previous section.
If you’re transferring files that have not already been compressed, like text files, you can reduce the network transfer by adding compression with the -z option:
The -P flag is also helpful. It combines the flags --progress and --partial. This first flag provides a progress bar for the transfers, and the second flag allows you to resume interrupted transfers:

If you run the command again, you’ll receive a shortened output since no changes have been made. This illustrates Rsync’s ability to use modification times to determine if changes have been made:

Say you were to update the modification time on some of the files with a command like the following:
Then, if you were to run rsync with -azP again, you’ll notice in the output how Rsync intelligently re-copies only the changed files:

Also, To keep two directories truly in sync, it’s necessary to delete files from the destination directory if they are removed from the source. By default, rsync does not delete anything from the destination directory.
You can change this behavior with the --delete option. Before using this option, you can use -n, the --dry-run option, to perform a test to prevent unwanted data loss:
If you prefer to exclude certain files or directories located inside a directory you are syncing, you can do so by specifying them in a comma-separated list following the --exclude= option:
Rsync can streamline file transfers over networked connections and add robustness to local directory syncing. The flexibility of Rsync makes it a good option for many different file-level operations.
A mastery of Rsync allows you to design complex backup operations and obtain fine-grained control over how and what is transferred.

