How do I add an SSH key to my VPS? (SolusVM)
What is an SSH key?
SSH is a widely used protocol for interacting with remote servers for configuration and general use. An SSH key is a special type of credential for logging into SSH services and encrypting information. They can be used to log into the server without using a password, which is what will be covered in this tutorial.
I. How to Generate SSH Key
1. For Windows
If you use Windows, you will use PuTTY-Gen software to create SSH, you can download PuTTY-Gen
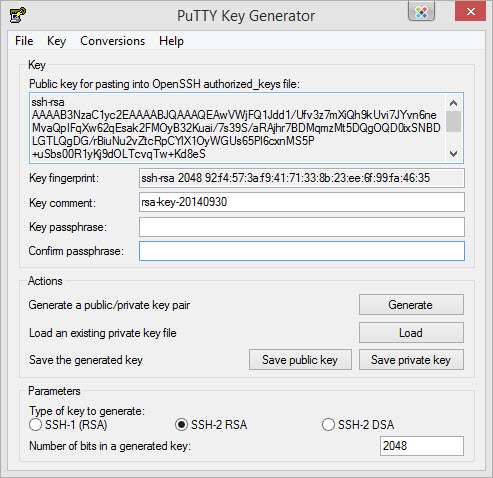
After downloading, open it, choose the options as shown in the image below, and then press Generate.
While creating, move your mouse around the screen until it finishes creating.
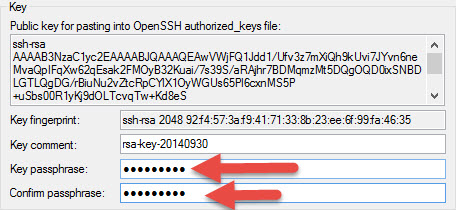
Once created, you will see it appear like this.
Now set the key phrase for it by filling in the key phrase above.
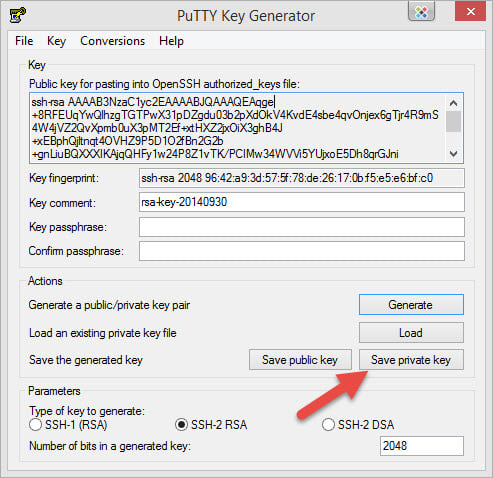
Then press Save Private Key and save it in a safe place, it’s best to upload a copy to Dropbox if you use it.
Please login to Server/VPS with password root credentials via Bitvise ssh client
Create an authorized_keys file in ~/.ssh and copy your public key there (If on Windows the key should still be located in your clipboard):
Exit this SSH session and open a new one to test if the passwordless login is working correctly.
If you are already logged in and not prompted for a password, your VPS is correctly set up for passwordless login.
2. For Linux (Mac/Ubuntu/LinuxMint,..)
If you are using Linux/MacOS then no software is needed but will use Terminal to create. Open up Terminal and type:
ssh-keygen -t rsa
It will ask where you want to save this private key, by default it will be saved to /home/user/.ssh. You can leave it blank and Enter.
Continue it will ask if you want to set up the key phrase, if you want, enter the key phrase you need to set up and then Enter.
Once created, by default it will appear like this:
Your identity is stored in /root/.ssh/id_rsa.
Your public key is already stored in /root/.ssh/id_rsa.pub.
In there you can see it has the path to save the private key file (id_rsa) and the public key file (id_rsa.pub). To see the public key, just open the file and read it.
cat ~ / .ssh/id_rsa.pub
And this public key you will bring to VPS.
Now log in to the VPS with the user for which you need to add the key (usually root, but if your VPS has multiple users, you will need to add a key for all of those users).
Next, create the ~/.ssh directory as well as the authorized_keys file:mkdir -p ~/.ssh && touch ~/.ssh/authorized_keys
Use the chmod command to change the file permission:
chmod 700 ~/.ssh && chmod 600 ~/.ssh/authorized_keys
When you’ve created the authorized_keys file, open this file with the following command:
vi ~/.ssh/authorized_keys
Then copy the entire public key character string created.
Using SSH Key with Linux/MacOS
With Linux/MacOS to use the SSH key, you open Terminal and use the following command to SSH.
ssh -i .ssh/authorized_keys <username>@<IP or hostname> -p port_ssh
II. Disable password login (optional)
Some users choose to disable password login for added security. While this may not be suitable for all use cases, we recommend doing so.
On your server, run:
sudo vi /etc/ssh/sshd_config
String search:
PasswordAuthentication yes
Uncomment the line # and change the line to the following:
PasswordAuthentication no
Restart the sshd . service
systemctl restart sshd
Congratulation! You have successfully set up passwordless login via key pair on your VPS. If you’re using Windows, consider using Pageant, a tool included with PuTTY, to store your private key in memory to avoid having to assign keys to individual users on the remote server and enter clusters password after each authentication.
