How to connect to the MacOS VPS from MAC
Introduction
Enjoy the core features of high-quality macOS VPS with incredible support from multiple locations around the world. You can connect to the macOS VPS from any devices to develop iOS and XCode applications, run any MAC software, and much more!
Connecting from the Mac
There are a few ways to connect to the macOS VPS from MAC, such as: VNC, ScreenSharing, Teamviewer, etc.
Option 1: Using Screen Sharing
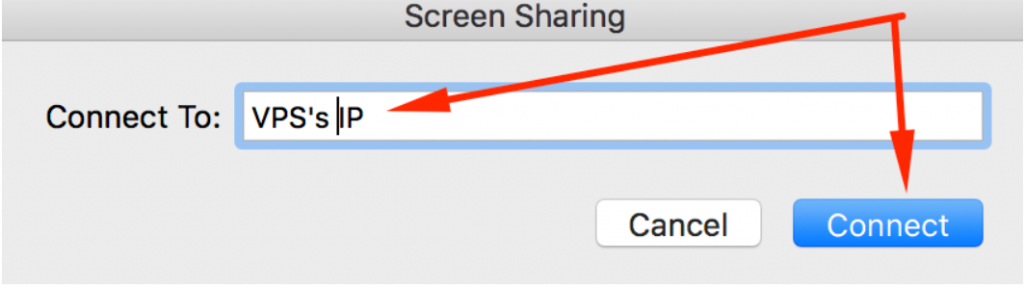
1. Open Screen Sharing from your app list then put in the VPS’s IP then hit Connect:
2. A window will pop up, use “CloudXMAC” as the username and provided password in the information email we sent, then click on Connect:

3. Enter the password one more time:

4. Then you will see the VPS’s Desktop.

Option 2: Using VNC
1. Download and install a VNC Viewer, we would suggest RealVNC: https://www.realvnc.com/en/connect/download/viewer/
2. Open RealVNC, put in the VPS’s main IP in the information email we sent, then hit Enter:

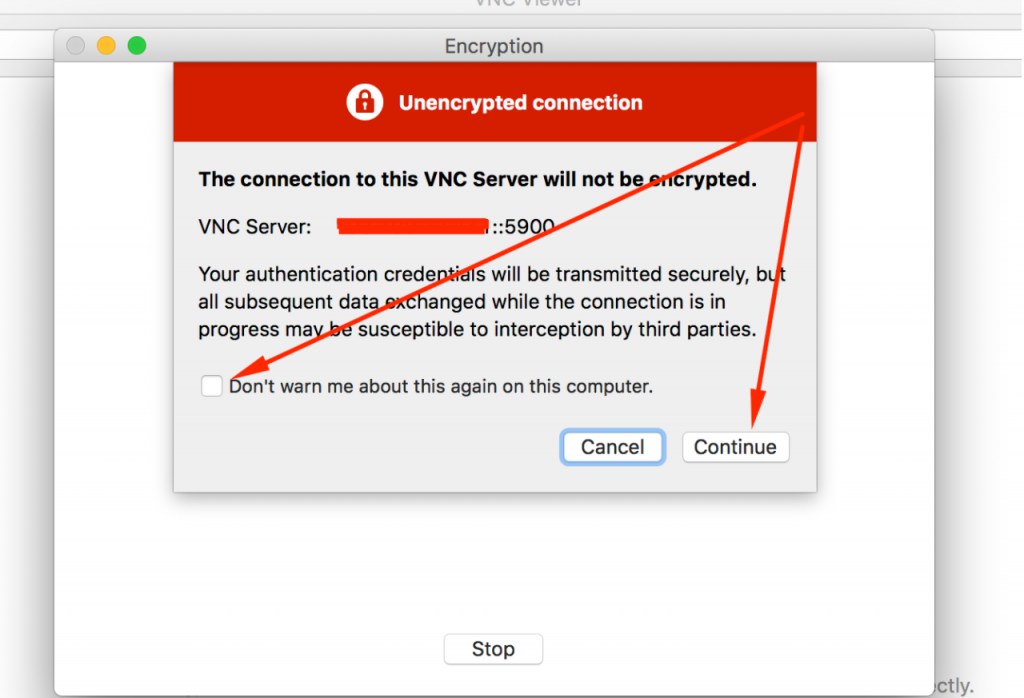
3. A pop-up will appear, choose “Don’t warn me about this again on this computer” then click on “Continue”
4. Enter the VPS’s password, click on “Remember password” then OK:
 5. Enter the password again:
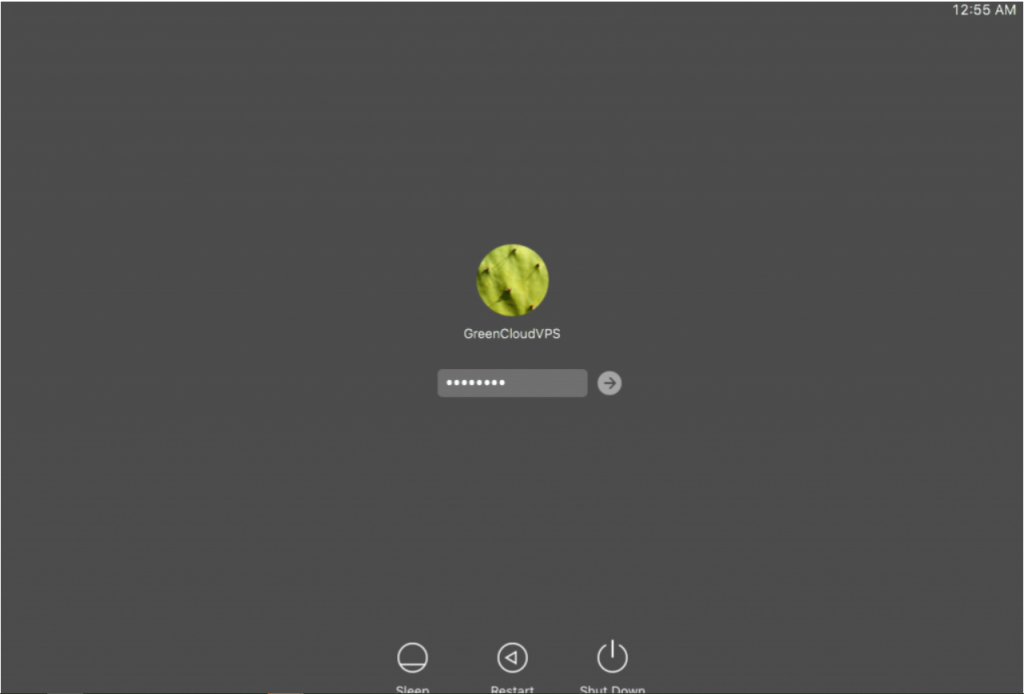
6. Then you will see the macOS VPS’s desktop:

Option 3: Using Teamviewer
1. Install Teamviewer on your MAC: https://download.teamviewer.com/download/TeamViewer.dmg
2. Log in to the macOS VPS via Screen Sharing or VNC, install the Teamviewer Host version onto the VPS: https://download.teamviewer.com/download/TeamViewerHost.dmg

3. After the installation is done, you will be asked to setup a password so you can use it to access the VPS later:

4. A pop-up will appear with Review System Access:

- In “Screen Recording” tab , choose “Request Access” –> Click on “Click the lock to make changes” and enter the VPS’s password –> Unlock –> tick on “TeamViewer Host”

- In the “Accessibility” tab, choose “Request Access” -> Click on “Click the lock to make changes” and enter the VPS’s password –> Unlock –> Tick on “TeamViewer Host”
- In the “Full Disk Access” tab, choose “Open Full Disk…” -> Click on “Click the lock to make changes” and enter the VPS’s password –> Unlock –> Tick on “TeamViewer Host

- Then click on “+” –> Applications –> Choose Teamviewer Host –> Open

5. A pop-up will appear with the ID:

6. Open Teamviewer on your MAC, enter the ID to the Partner ID then hit Connect, you will be asked for a password that was set on Step 3.
The VPS’s desktop on the macOS VPS will look like this:

7. Then you can use it normally just like while using VNC.

