How to Install Django on CentOS 7
Django is a popular Python framework for writing web applications. With Django, you can build applications faster, without reinventing the wheel.
If you want to install Django on a CentOS 7 machine, there are several methods from which you can choose. However, the most flexible choice is to install Django with pip in a virtual environment created by virtualenv. This guide demonstrates how to install Django using pip and virtualenv.
Prerequisites
To get started, you will need to:
- Deploy a CentOS 7 server instance.
- Log into this server over SSH, using a non-root user with sudo privileges.
Step 1: Update the system
yum install epel-release
yum update -y && sudo reboot
After the reboot finishes, log in with the same sudo user.
Step 2: Install pip and necessary dependencies
Use the commands below to install the latest version of pip:
yum install python-devel python-setuptools python-pip
 pip install --upgrade pip
Step 3: Install virtualenv
You can use pip to install virtualenv:
pip install virtualenvStep 4: Create a virtual environment using virtualenv
Say that you want to create a dedicated virtual environment to contain the Django framework:
cd ~
virtualenv djangoenv
The command above will create the directory ~/djangoenv that contains your virtual environment.
Step 5: Install Django in the virtual environment
First, activate the virtual environment:
source ~/djangoenv/bin/activate![]()
The prompt of your SSH terminal will resemble the following:
(djangoenv) [user@hostname ~]$This means that you have stepped into the virtual environment “djangoenv”. Install Django in the virtual environment:
pip install django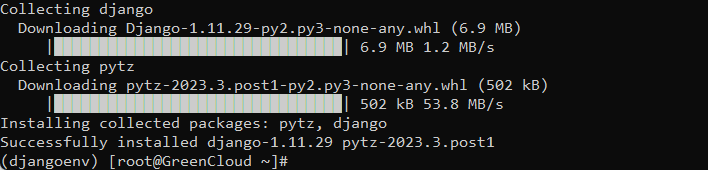
Be aware that you are installing Django locally, so you don’t need to use the sudo command.
Step 6: Create a sample Django project
Now that the Django framework has been installed, you can to give it a test drive by creating a sample project.
cd ~
django-admin startproject prj1
The command above will create a directory prj1 in your working directory ~, and store all necessary files within.
Run the commands below in sequence to get your application started. Follow the instructions on screen to provide the superuser’s credentials.
cd prj1/
python manage.py migrate
python manage.py createsuperuser
python manage.py runserver 0.0.0.0:8000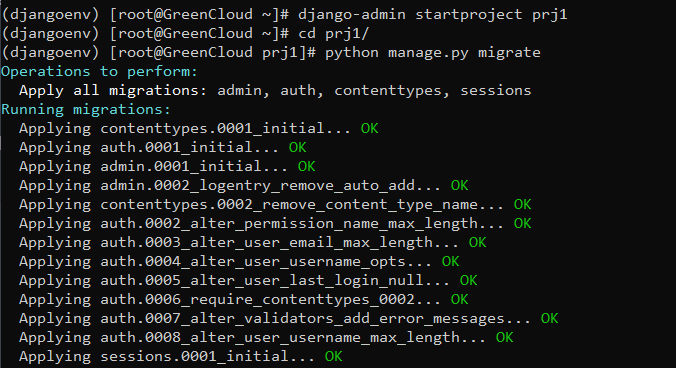

In order to allow access to port 8000, you need to modify firewall rules in a new SSH connection:
firewall-cmd --zone=public --permanent --add-port=8000/tcp
firewall-cmd --reload
Use a web browser to visit your application:
http://<your-server-IP>:8000
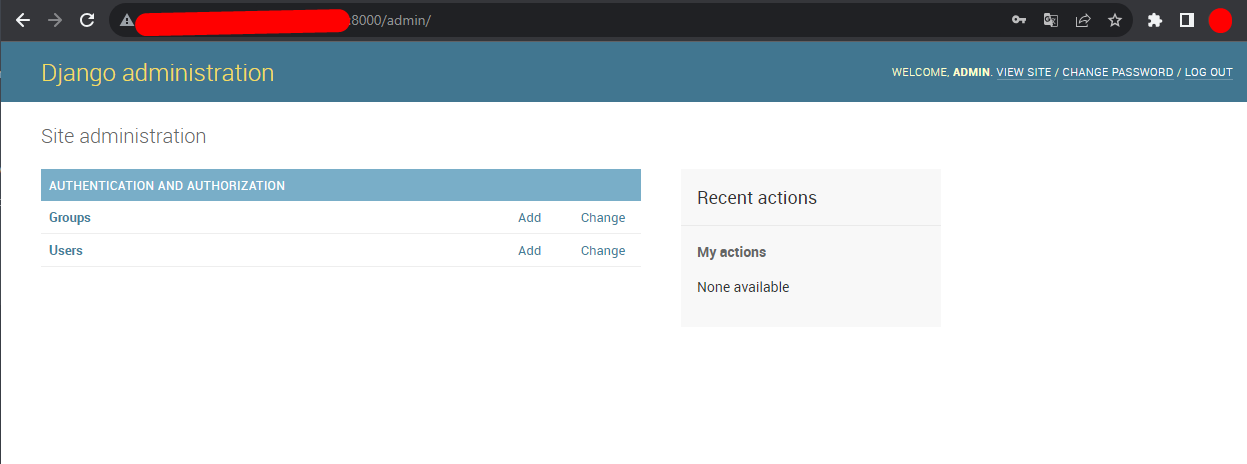
http://<your-server-IP>:8000/adminUpon success, you will see a Django page with the following output:
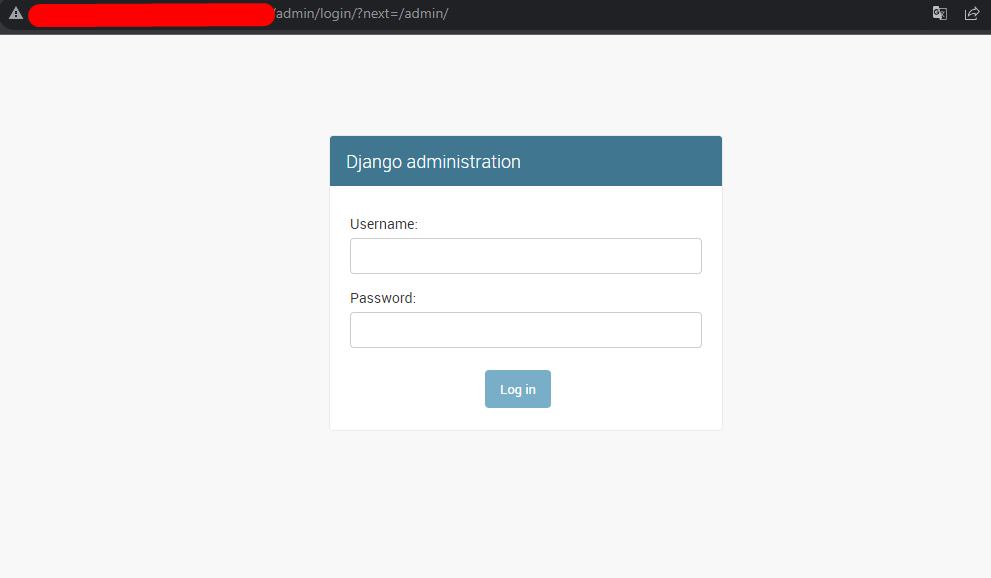
Log in with the username and password you set
Having finished the test, press Ctrl + C to quit your application.
Finally, use the “deactivate” command to leave your virtual environment:
deactivateThe prompt of your SSH terminal will now return to the ordinary status:
[user@hostname prj1]$
