How to install and Configure VNC Server on Ubuntu 22.04
VNC works in a client/server model. The VNC client is installed on the local computer while the VNC server is installed on the remote system to be managed. The server transmits a duplicate of the remote computer’s display screen to the viewer(client).
Install and Configure VNC Server on Ubuntu 22.04
We install with user: green
Install the VNC server on Ubuntu by running the commands below in your terminal.
sudo apt update
sudo apt -y install tightvncserver
Install Desktop Environment
Ensure you have a Desktop Environment installed on your Ubuntu. For this guide, we’ll install the Xfce desktop environment.
sudo apt install xfce4 xfce4-goodiesYou can choose to use other Desktop environments.
Configure VNC Server
Once you’ve finished the installation of the Desktop environment and VNC server. Configure the VNC server on Ubuntu as follows.
1. Set a secure access password
Run the vncpasswd command to set a password for your VNC server.
$ vncpasswd
Password:
Verify:
When prompted, enter and verify your password to set.
2. Start the VNC server
Start VNC Server on Ubuntu 22.04 using the command:
$ vncserver :1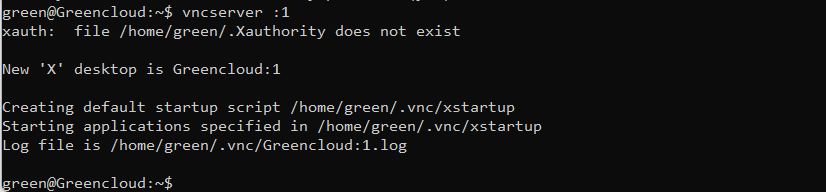
3.Kill VNC Server
Kill the VNC Server using the command:
$ vncserver -kill :1
Killing Xtightvnc process ID 14357
4. Set VNC Server Desktop Environment
The VNC configuration file is located on ~/.vnc/xstartup. Edit it with your favorite text editor.
sudo nano ~/.vnc/xstartupAdd the following line at the end of the file.
exec /usr/bin/startxfce4 &Finally, start VNC Server with ;
- Display number [1]
- Screen resolution [800×600]
- Color depth [24]
$ vncserver :1 -geometry 800x600 -depth 24 
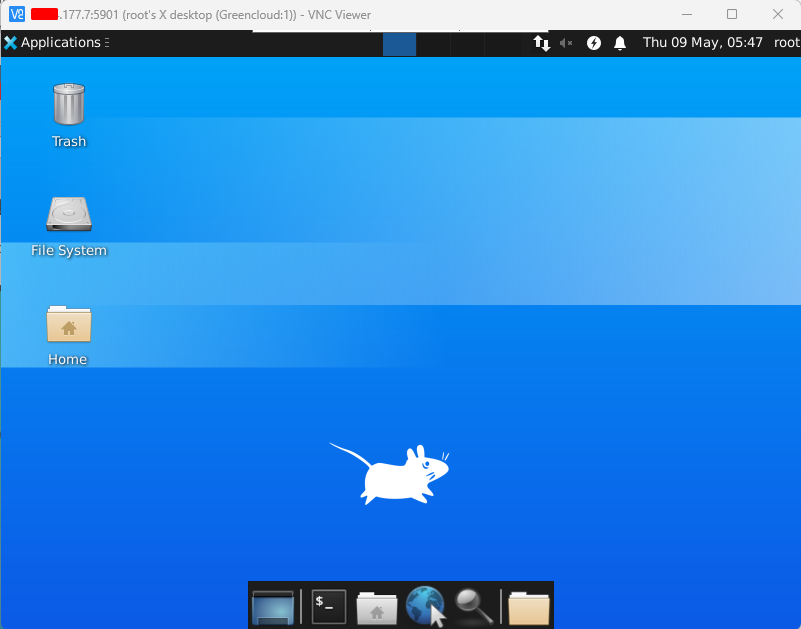
Connect to the VNC Desktop
You can connect to a remote desktop using a VNC client and SSH tunneling.
You need to install ufw firewall and enable port 5901 before connecting.
sudoapt install ufwsudoufw allow 5901
Then install the vncviewer client
sudo apt install tigervnc-viewerOn Arch Linux, install it with:
sudo pacman -S tigervncOnce your SSH tunnel is running, connect to localhost:5901 using VNC client. When prompted for the password, enter the password created during the VNC server configuration.

Once connected, you’ll see the default Xfce Desktop environment
Configure Systemd
By setting up the VNC server to run as a systemd service you can start, stop, and restart it as needed, like any other service. You can also use Systemd’s management commands to ensure that VNC starts when your server boots up.
First, create a new unit file called /etc/systemd/system/[email protected]:
sudo nano /etc/systemd/system/[email protected]Add:
[Unit]
Description=Start TightVNC server at startup
After=syslog.target network.target

[Service]
Type=forking
User=green
Group=green
WorkingDirectory=/home/green

PIDFile=/home/green/.vnc/%H:%i.pid
ExecStartPre=-/usr/bin/vncserver -kill :%i > /dev/null 2>&1
ExecStart=/usr/bin/vncserver -depth 24 -geometry 1280x800 :%i
ExecStop=/usr/bin/vncserver -kill :%i

[Install]
WantedBy=multi-user.target
Don’t forget to replace Greencloudwith your actual remote user username. Save the file and exit when done.
Reload systemd and start VNC
sudo systemctl daemon-reload
sudo systemctl enable --now vncserver@1
Stop the current instance of the VNC server if it’s still running:
vncserver -kill :1
Then start it as you would start any other systemd service:
sudo systemctl start vncserver@1
Check status:
$ systemctl status vncserver@1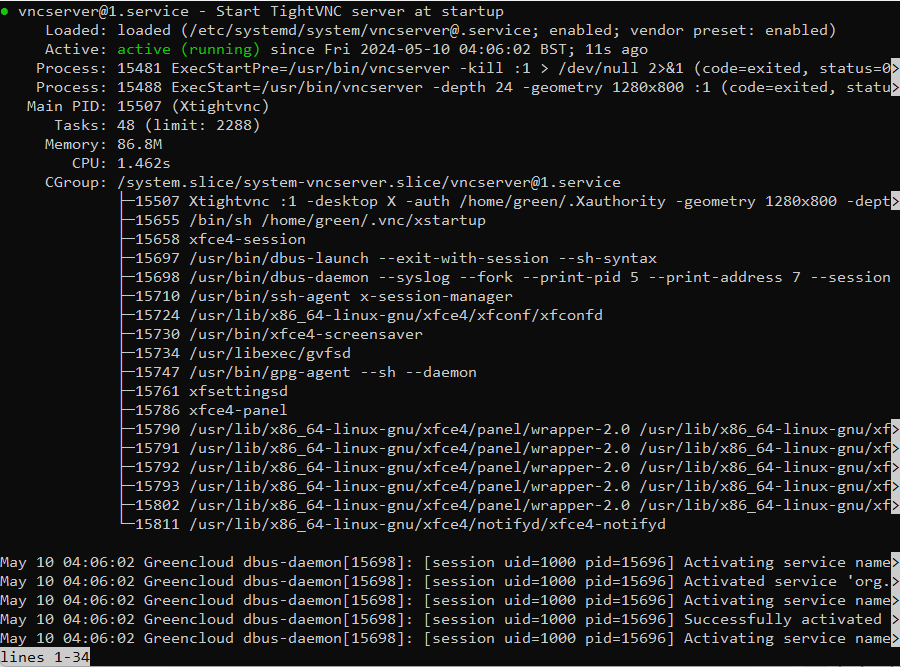
Conclusion
You now have a secured VNC server up and running on your Ubuntu 22.04 server. Now you’ll be able to manage your files, software, and settings with a user-friendly graphical interface, and you’ll be able to run graphical software like web browsers remotely.
