How to Install VestaCP control panel on CentOS 7
Introduction
VestaCP is an open-source web hosting control panel that you can install on machines running RHEL, CentOS, Debian, or Ubuntu. It is popular for having a very clean and clear graphical interface that’s perfect for inexperienced users looking to change and adjust the configurations of their hosted services.
In this article, we will show you how to install the VestaCP control panel on a CentOS 7 server/VPS instance.
Prerequisites
- an active KVM VPS
- root user
1. Update the system
Let’s begin with a standard clean and up-to-date CentOS 7 installation.
yum -y update && shutdown -r now
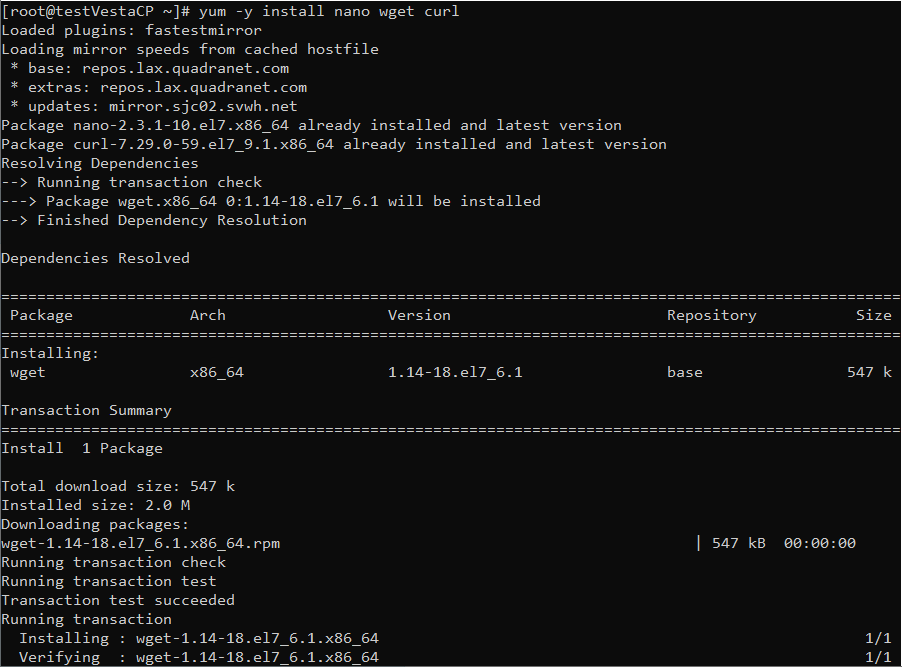
Install the basic default packages.
yum -y install nano wget curl
Follow by disabling SELinux.
setenforce 0
sed -i 's/enforcing/disabled/' /etc/sysconfig/selinux
2. Download and install VestaCP
Before installing VestaCP, you will need to have:
• A valid hostname that will resolve on the IP used for the control panel
• An email address and a password to set during the install
curl -O http://vestacp.com/pub/vst-install.sh

Run the script
bash vst-install.sh
If this command does not work for some reason, then use the following command.
bash vst-install-rhel.sh --force
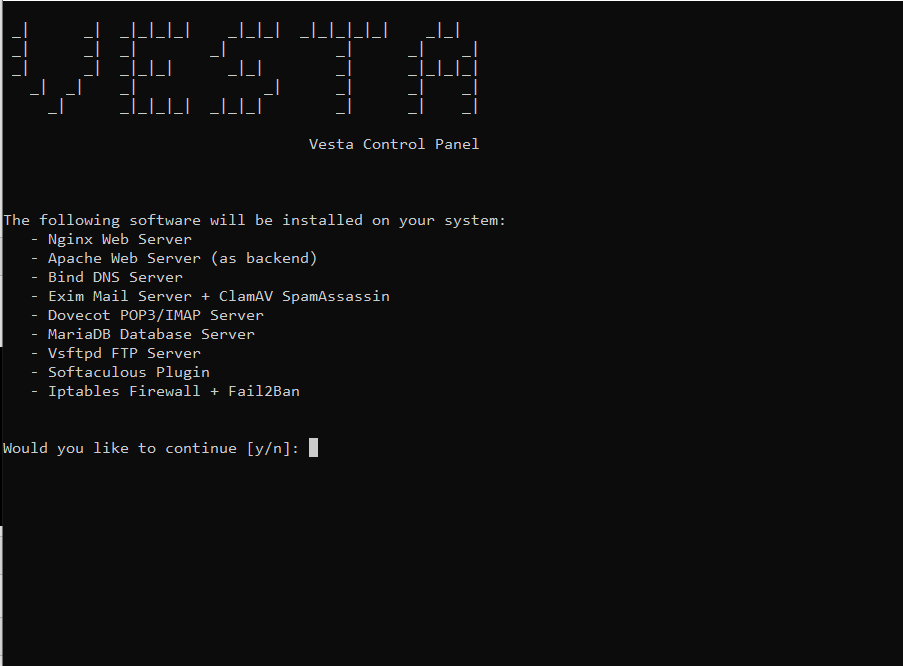
Would you like to continue [y/n]: (press “y” hit enter to install VestaCP)
Please enter the admin email address: (your email address)
Please enter FQDN hostname [demo]: (your domain name)
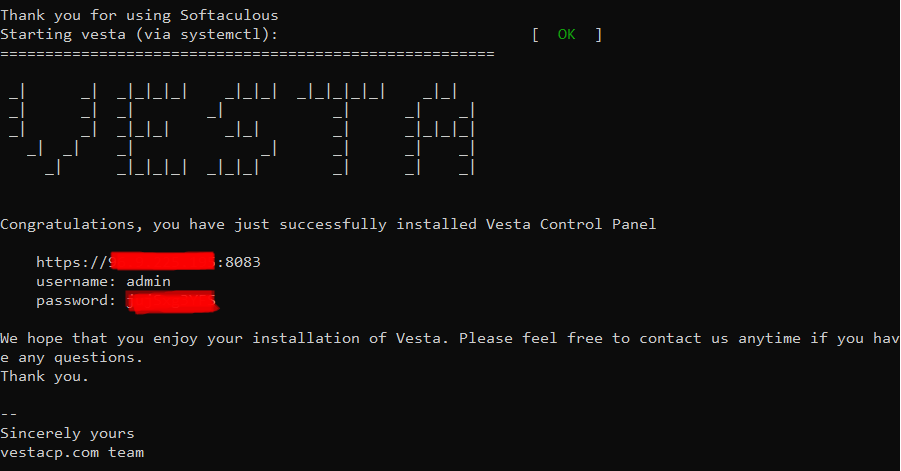
The installation process can take some time depending on the speed of your network connection, so please be patient. At the end of the installation, you should see the URL, the username and the password for logging into the panel written to STDOUT.
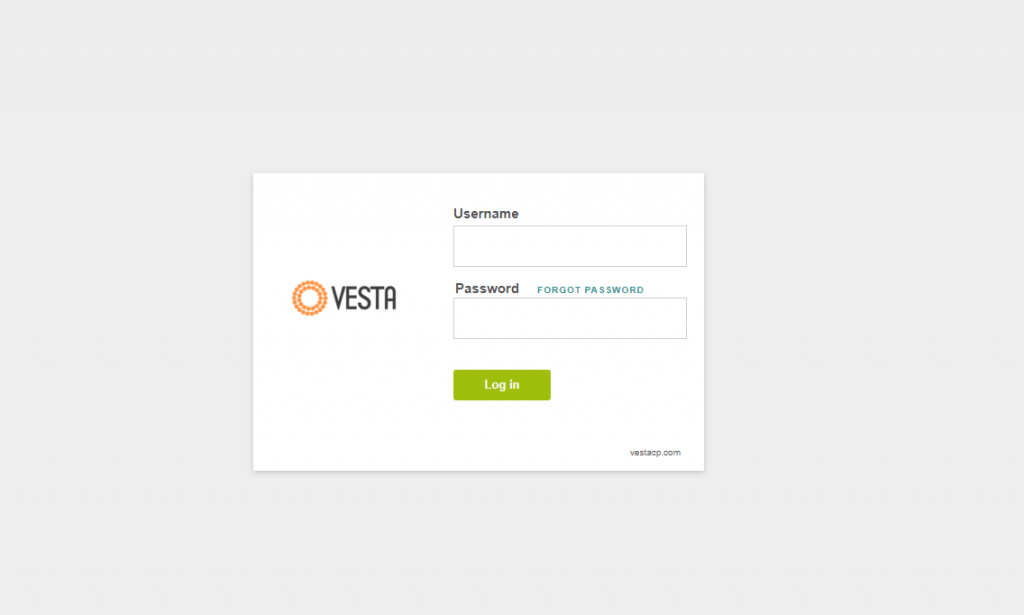
3. Loggin VestaCP
Go to the URL in your web browser and enter the username and password. You should be logged in.
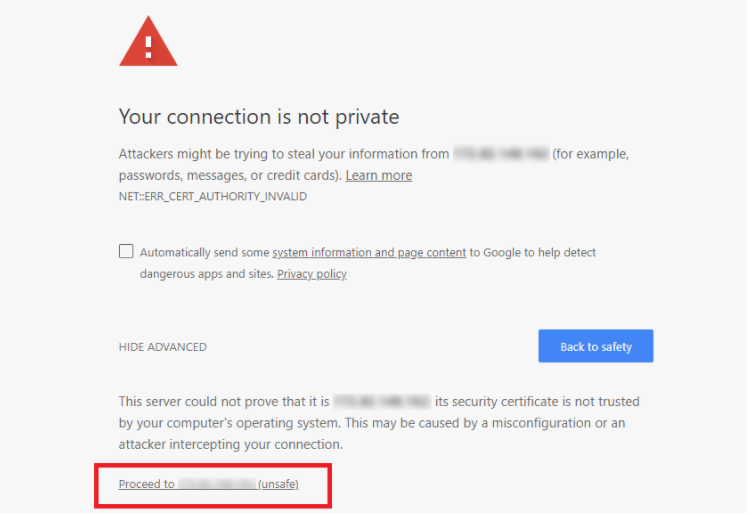
When you go to log in to VestaCP for the first time, the website will look insecure, you will have to go ahead by clicking Proceed to unsafe.
Now you will get your login screen and login there with login information from your VPS.
If you log in properly with your login information, you will see the VestaCP dashboard as in the image below.

That’s all! Enjoy GreenCloudVPS services!

