Install and Configure FTP Server on Windows Server 2019
Introduction
File transfer protocol is a set of rules that define how files can be shared (sent and received) and manipulated (create, rename and delete) over a TCP/IP Network. FTP works in two modes, passive and active. From Stackoverflow: “In active mode, the client establishes the command channel but the server is responsible for establishing the data channel. In passive mode, the client establishes both channels then requests the server (on the command channel) to start listening on a port (at the server’s discretion) rather than trying to establish a connection back to the client. The server also returns to the client the port number it has selected to listen on so that the client knows how to connect to it.”.
Step 1: Start Server Manager
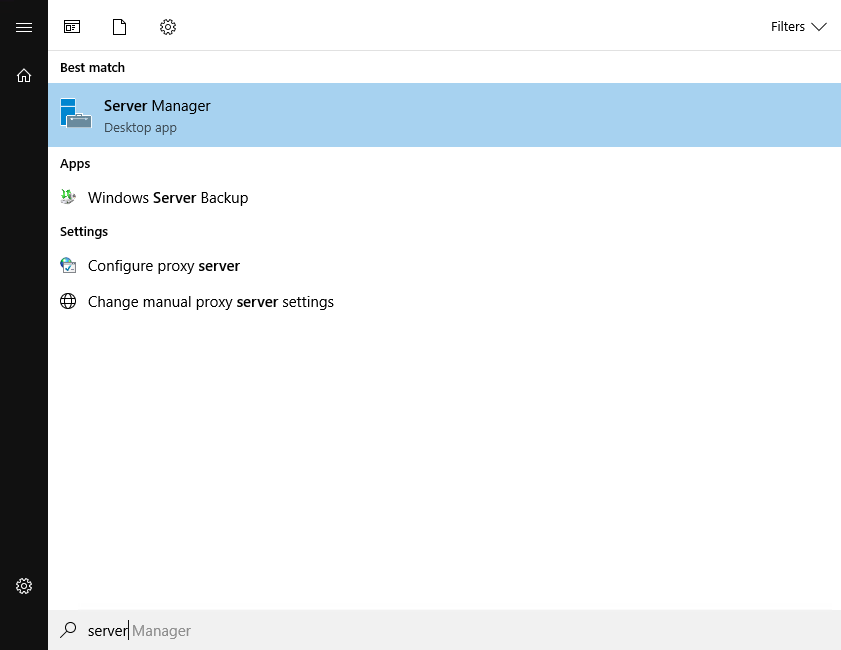
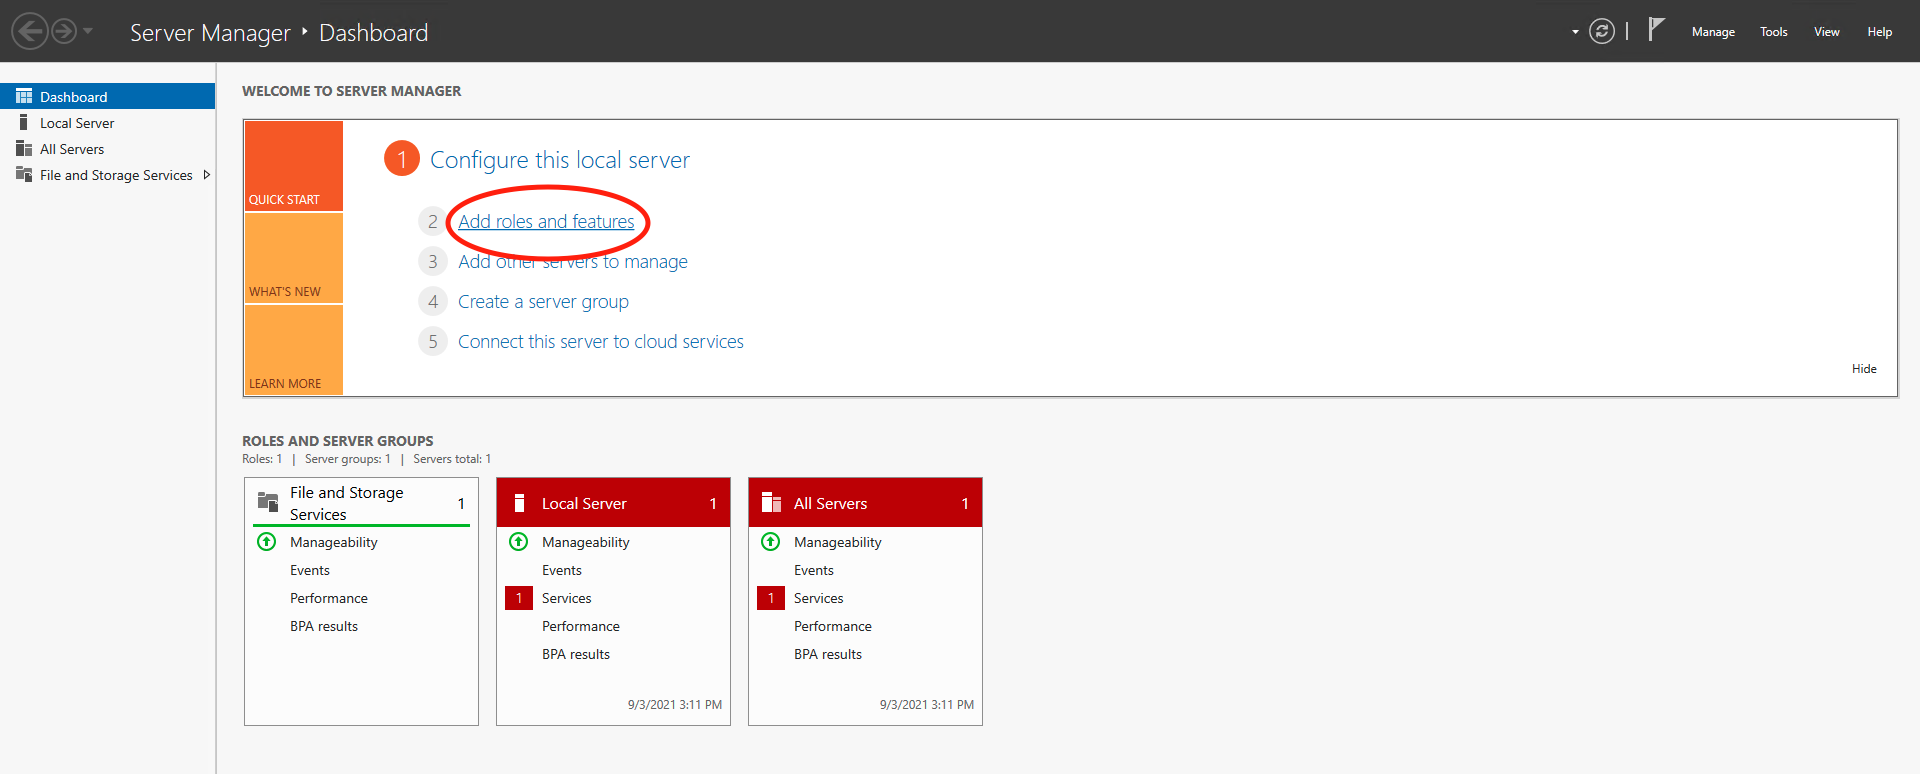
As with all Windows Server roles, we have to go to the Server Manager to begin the installation. Hit your “Windows” key and search for “Server Manager” if it is not already opened. Once open, click on “Add Roles and Features“.
Step 2: Click Next on Wizard
Step 3: Select Installation Type
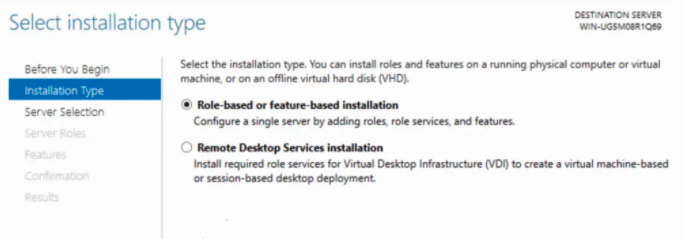
In the “Select Installation type page“, select “Role-based or feature-based-installation” and click “Next“
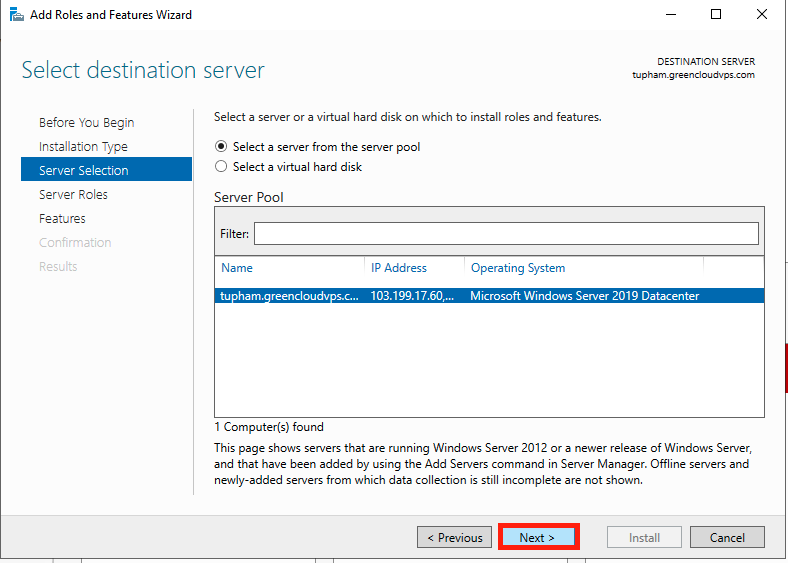
Step 4: Choose Destination Server
Select the server you will install NFS on and click “Next“
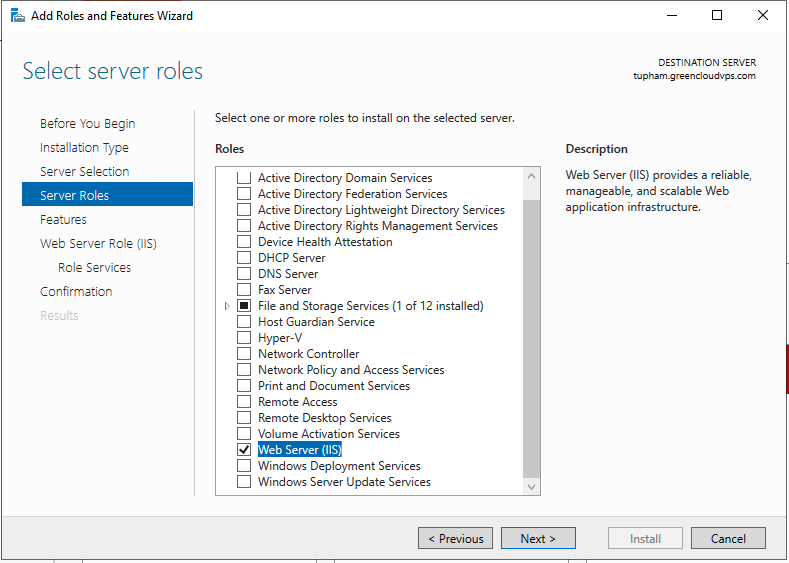
Step 5: Select Roles to install
Select “Web Server (IIS)” checkbox and click on “Add Features” in the pop-up that will come up as shown below. Click “Next” after that is done.
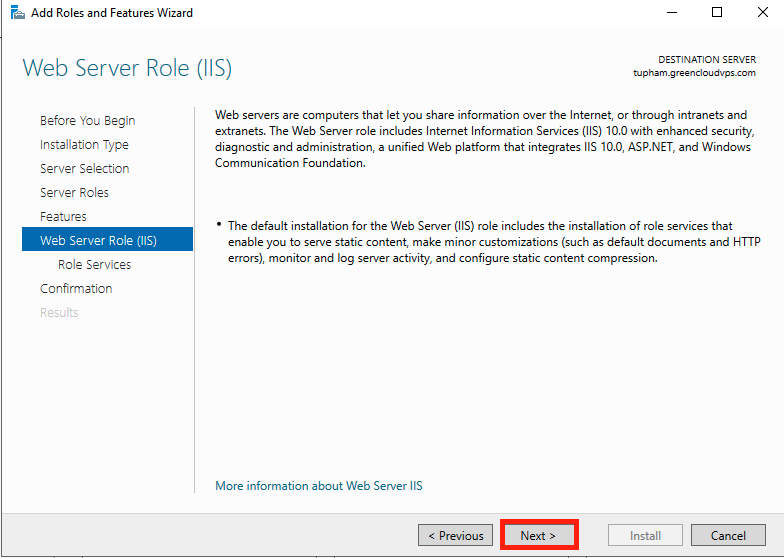
Step 6: Select Features
In the “Select Features” stage simply click on “Next” and click on “Next” again in the “Web Server Role (IIS)” stage as well.
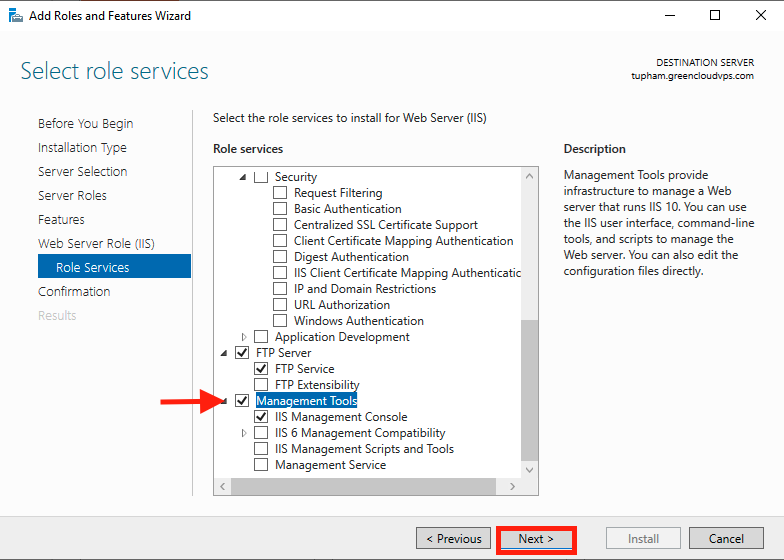
Step 7: Select role services
This is the step we have been waiting for. Among the many checkboxes, select “File Server ” one and hit “Next“. After that, happily click on “Install” and wait for your server to finish up installing.
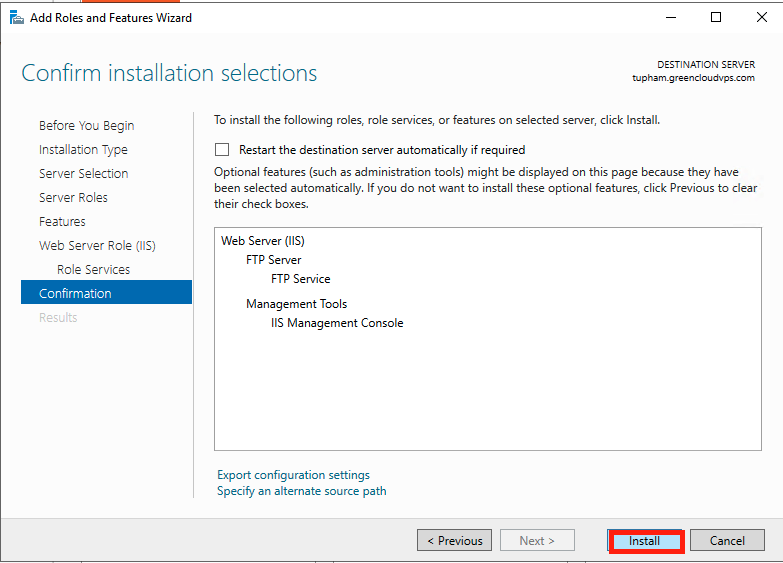
Confirm installation selections and hit “Install”
If you like Powershell, the following one command will do as well
# Install-WindowsFeature Web-FTP-Server -IncludeManagementTools
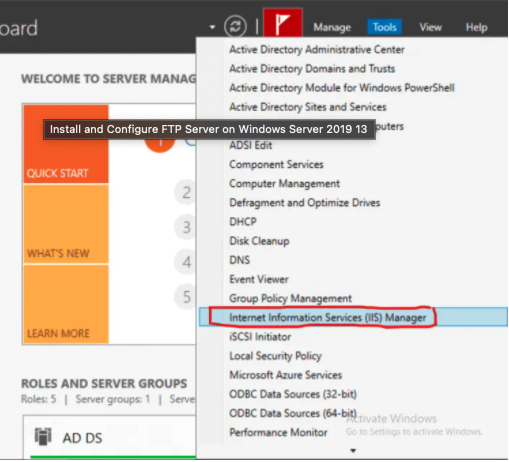
Step 8: Configure your FTP in passive mode
Let us now configure our FTP Server in Passive Mode as described in the introduction section.
Open Server Manager >Tools > Internet Information Services (IIS) Manager
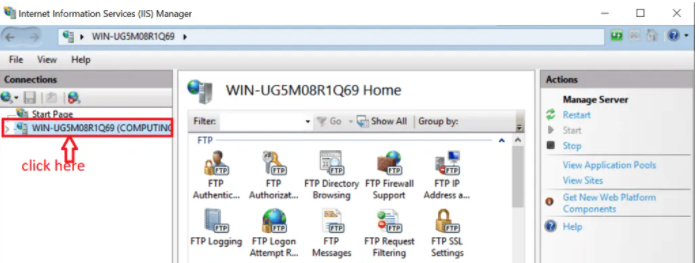
Once open, proceed as below. Click on your server to expose the middle pane.
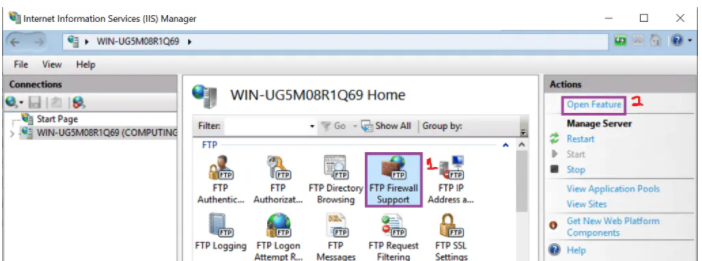
Step 9: Open Feature
Select “FTP Firewall Support” and click on “Open Feature” on the right pane as illustrated. Alternatively, you can just double-click on “FTP Firewall Support“. That will open a small pop-up. Proceed to step 11.
Step 10: FTP Firewall Support
Input the port range for passive mode in this pop-up as shown below then click “Apply” on the right pane.
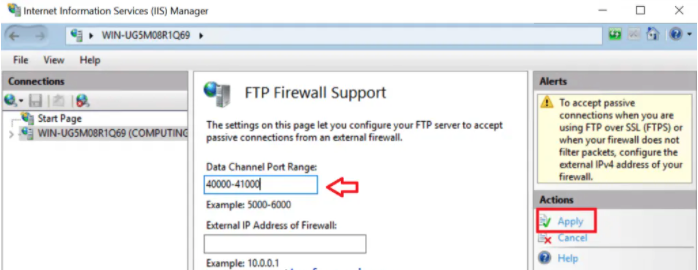
The pop-up below will appear making you aware that you need to allow the port range we configured in the firewall. Click “OK“. After that, restart, FTP Server to make the changes applied.
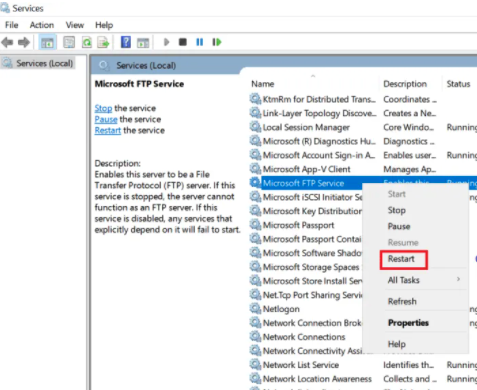
Step 11: Restart FTP Server
Open Services App, look for “Microsoft FTP Server“, right-click on it and select restart.
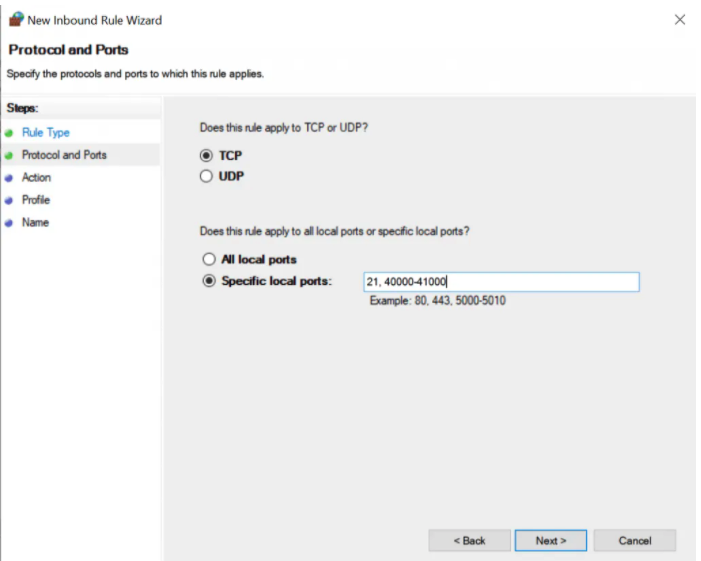
Step 12: Add the ports in Firewall
Use How To open a port in Windows Server Firewall to add the ports in your Firewall. Also, include port 21. It should look like below: