How to install an FTP server (vsftpd) on Ubuntu 20.04
Introduce
FTP stands for File Transfer Protocol, this is a protocol that helps us easily exchange data between the client and the server and vice versa. With FTP, we will have the right to manage all file and directory data on the server except the database.
In this article, I will show you how to install an FTP server with vsftpd on Ubuntu 20.04 using SSL/TLS.
1.System update
To ensure that all vsftpd dependencies are up to date, execute the command below:
$ apt update
$ apt upgrade
2. Install vsftpd
We execute the command below to install vsftpd:
$ apt install vsftpdAfter successful installation we can check the version of vsftpd as follows:
$ vsftpd -v
We proceed to execute the following command so that vsftpd can start with the system.
$ systemctl start vsftpd && systemctl enable vsftpd
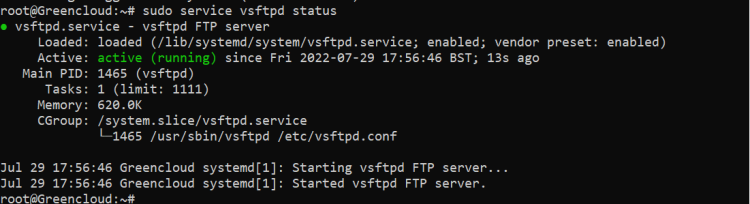
Check the status of vsftpd:
$ systemctl status vsftpd
2. Configure Firewall
If you haven’t already done so, it is recommended that you enable the ufw firewall for Ubuntu 20.04. Before enabling ufw firewall, make sure you add a rule for SSH, otherwise you may get locked out of your server if you’re connected remotely. If you don’t want to set up a firewall, skip to Step 3.
If your server does not have ufw available you can install it with the command:
$ apt install ufw
Now, enable the firewall if it isn’t already. Press y and ENTER if warned about disrupting the SSH connection.
$ ufw enable$ufw allow OpenSSH
Let’s open ports 20 and 21 for FTP, and ports 40000-50000 for passive FTP. We’ll also open port 990 for TLS, which we will set up later.
$ ufw allow 20/tcp$ ufw allow 21/tcp
$ ufw allow 40000:50000/tcp$ufw allow 990/tcp
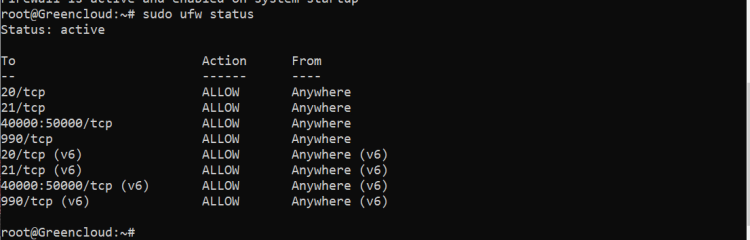
To check the status of the firewall, run:
$ ufw statusIf the firewall is running, you should see Status: active and the firewall rules we just added.
3. Create FTP User
We will now create a new user that we will use to log into FTP. In this example, we will create a new user called ftpuser.
$ adduser ftpuserGenerate a strong password and keep it safe.
You may also be asked to enter some contact information. You can just press ENTER to each of these.If you only want ftpuser to log in via FTP, you should disable their SSH access by blacklisting their username in the SSH config file. Otherwise, skip to Step 4.
Open the SSH config in nano.
$ nano /etc/ssh/sshd_configAdd the following to the bottom of the file replacing ftpuser with the user you want to deny SSH and SFTP access. You can add multiple users here separated by a single space. (To paste in nano, press the right mouse button). /etc/ssh/sshd_config
DenyUsers ftpuser
To save file and exit, press CTRL + X, press Y and then press ENTER.
Restart the SSH service.
$ service sshd restart4. Upload to a Home Folder
If instead you want this user to upload files to the home directory, create a new directory called ftp in the user’s home directory and another within it called files. In this example below our user is called ftpuser.
$ mkdir /home/ftpuser/ftp
Set the ownership of the ftp directory to no nobody:nogroup
$ chown nobody:nogroup /home/ftpuser/ftpSet permissions for the ftp directory using chmod so that it is not writable by anyone, otherwise vsftpd will not allow you to log in. a-w means a = all/everyone - = remove w = write permission, so, remove write permissions for everyone.
$ chmod a-w /home/ftpuser/ftpNext we will create a new directory within /ftp where the user can view and upload files.
$ mkdir /home/ftpuser/ftp/filesAssign ownership of this directory to our new FTP user otherwise they will not be able to write to it.
$ chown ftpuser:ftpuser /home/ftpuser/ftp/files5. Configure vsftpd
There are a few changes we have to make to the vsftpd configuration file before you can start using FTP on Ubuntu 20.04/20.10.
Rename the config file.
$ mv /etc/vsftpd.conf /etc/vsftpd.conf.bakCreate a new config file with nano editor.
$ nano /etc/vsftpd.confPaste in the following:
listen=NO
listen_ipv6=YES
anonymous_enable=NO
local_enable=YES
write_enable=YES
local_umask=022
dirmessage_enable=YES
use_localtime=YES
xferlog_enable=YES
connect_from_port_20=YES
chroot_local_user=YES
secure_chroot_dir=/var/run/vsftpd/empty
pam_service_name=vsftpd
force_dot_files=YES
pasv_min_port=40000
pasv_max_port=50000
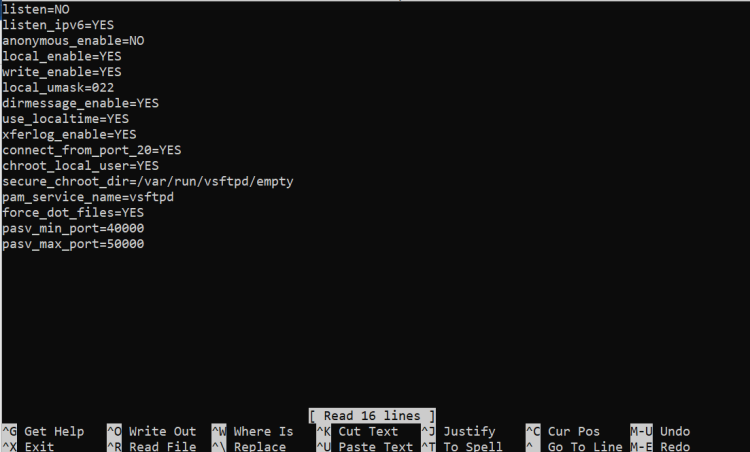
To save file and exit, press CTRL + X, press Y and then press ENTER.
Restart vsftpd.
$ systemctl restart vsftpd6. Test FTP
We can now test vsftpd to see if we can log in as the user we created earlier. We recommend FileZilla, which works on Windows, Mac and Linux.
Enter your server’s IP, your FTP username and password you created earlier, and click Quickconnect.
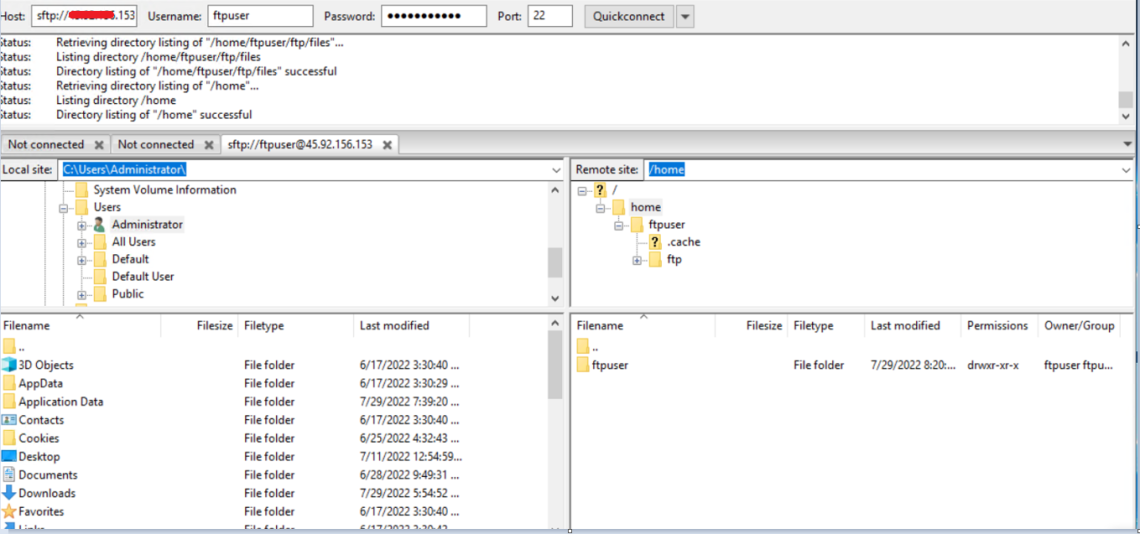
Above we can see we have connected successfully and the web root directory ” home “ is displayed, though this may be different on your server.
Try uploading, creating and editing folders and files within the web root directory to ensure permissions are working correctly.
You will notice we have a warning in FileZilla “Status: Insecure server, it does not support FTP over TLS.” It is highly recommended that you now configure TLS so that login credentials and traffic are encrypted over the FTP connection.
If you are having problems logging in to the FTP server, try checking the vsftpd log. To view the last 200 entries using tail
$ tail /var/log/vsftpd.log -n 200Good luck!

