How to Install Froxlor Server Management on AlmaLinux 9
This tutorial intends to teach you to Install and Configure Froxlor Server Management on AlmaLinux 9. The Froxlor official site describes it as an open-source lightweight server management control panel to manage web hosting, domain names, FTP accounts, email accounts, etc.
To install the Froxlor server management panel on AlmaLinux, you can follow these steps:
Step 1: Update System Packages
# yum update
Step 2: Install Required Packages
Install Apache, MariaDB, PHP 8.0, and other necessary packages:
-Install Apache and MariaDB
# yum install httpd mariadb mariadb-server
-Install PHP 8.0:
# yum module install php:8.0
Install dependent PHP packages
# yum install php php-process php-cli php-mysqlnd php-gd php-json php-mbstring php-xml php-bcmath php-zip php-gmp php-curl
Step 3: Start and Enable Apache and MariaDB
# systemctl start httpd
# systemctl enable httpd
# systemctl start mariadb
# systemctl enable mariadb
Step 4: Secure MariaDB Installation
Run the MySQL/MariaDB secure installation script to set a root password, remove anonymous users, disallow remote root login, and remove test databases:
# mysql_secure_installation
Step 5: Create a Database & Privileged Database User
Log in to MariaDB as root and create a database and user for Froxlor.
# mysql -u root -p
Then, create a new user for Froxlor with a strong password:
MariaDB [(none)]> CREATE USER 'froxloruser'@'localhost' IDENTIFIED BY 'password';
Grant all the privileges to this user with the following command:
MariaDB [(none)]> GRANT ALL PRIVILEGES ON *.* TO 'froxloruser'@'localhost' WITH GRANT OPTION;
Next, flush the privileges and exit from MariaDB:
MariaDB [(none)]> FLUSH PRIVILEGES;
MariaDB [(none)]> EXIT;
Step 6: Install Froxlor
We’ll download and install Froxlor in the /var/www/html/ directory. Change directory:
# cd /var/www/html
Download Froxlor:
# wget https://files.froxlor.org/releases/froxlor-latest.tar.gz
Extract files:
# tar -xzf froxlor-latest.tar.gz -C /var/www/html/
Step 7: Set Permissions
Set appropriate permissions for the Froxlor directory:
# chown -R apache:apache /var/www/html/froxlor
Step 8: Configure Apache
Create a new virtual host configuration file for Froxlor:
nano /etc/httpd/conf.d/froxlor.conf
<VirtualHost *:80>
ServerAdmin webmaster@localhost
DocumentRoot "/var/www/html/froxlor"
ServerName your_domain.com
ErrorLog "/var/log/httpd/froxlor_error_log"
CustomLog "/var/log/httpd/froxlor_access_log" combined
</VirtualHost>
Save the file and exit the editor.
Step 9: Restart Apache: Restart Apache to apply the changes:
# systemctl restart httpd
Step 10:Firewall configuration
Before we can proceed, we need to open up ports 80 and 443 in the firewall.
Open port 80:
# firewall-cmd --zone=public --add-service=http --permanent
Open port 443:
# firewall-cmd --zone=public --add-service=https --permanent
Reload firewall:
# firewall-cmd --reload
Step 11: Finish Installation In Browser
Open your web browser and navigate to http://IP address/froxlor to start the Froxlor installation process.

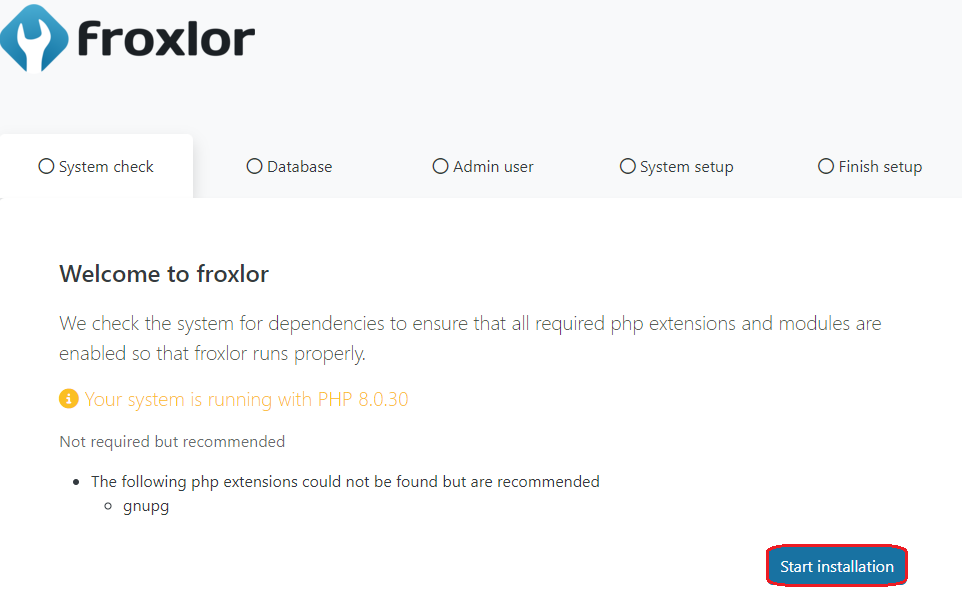
Then, from the system check, when everything is ok, click start installation.
At this point, you must enter your Froxlor privileged user that you have created in step 2. Also, the given database and unprivileged user will be created here. Weh you are done, click Next.

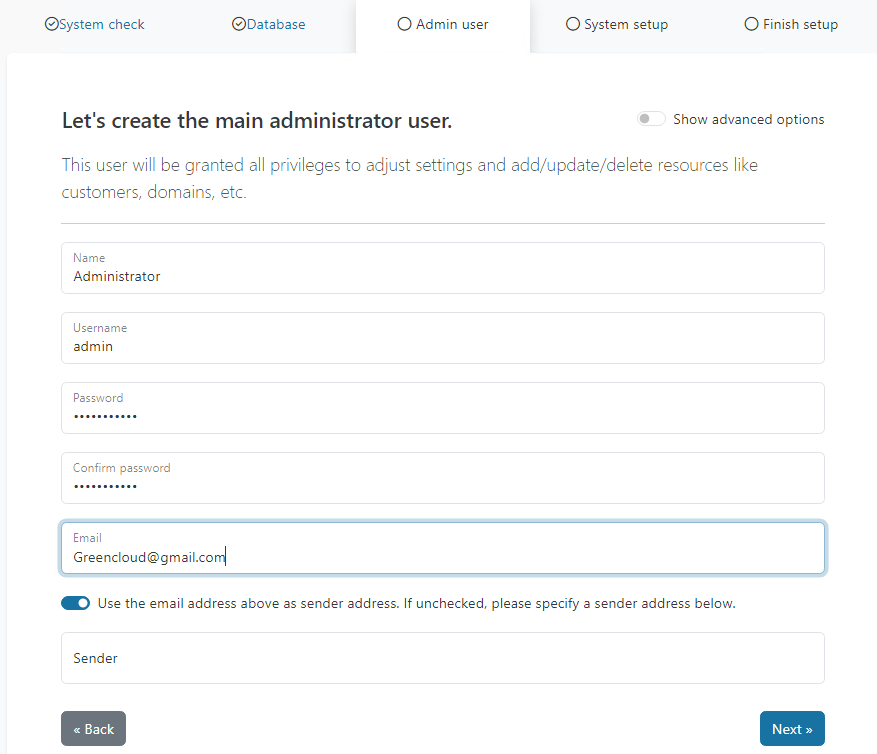
Now you must create an admin user to access your Froxlor dashboard on AlmaLinux 9 and click Next.
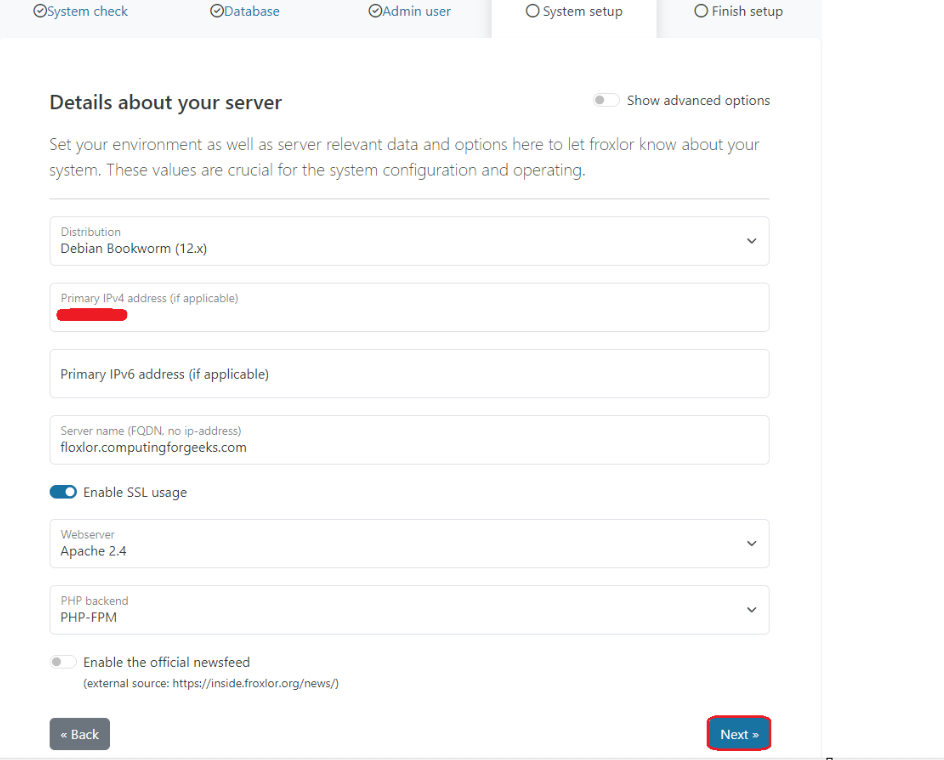
Here you need to enter your server details like the server’s IP address and hostname. For the distribution, you can choose Debian 12 because it doesn’t have AlmaLinux in the list.
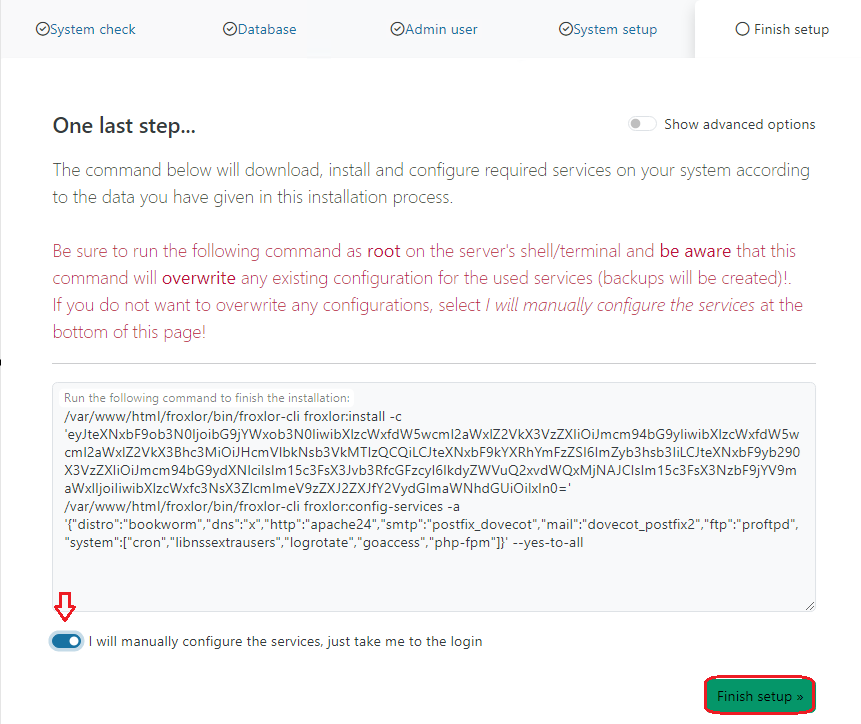
Now you will see a command. You can wait to automatically finish or do it manually and click Finish setup.
Follow the Installation Wizard
Follow the on-screen instructions to complete the installation. You’ll need to provide database information, administrator credentials, and other settings during this process.
Once the installation is complete. You will be redirected to a login page. Now login using the created admin user:

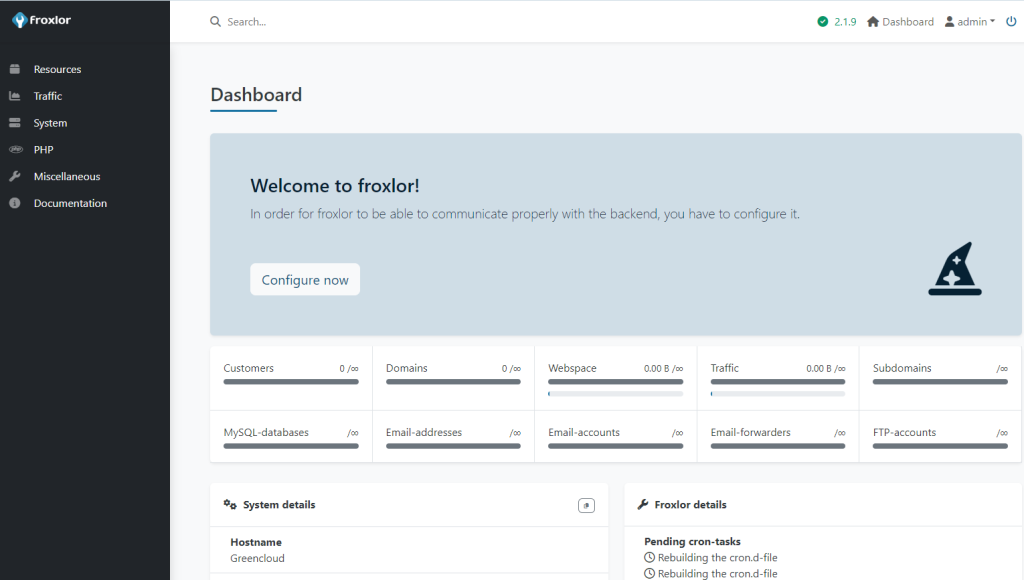
You will gain access to the below dashboard.
Once the installation is complete, delete the install directory for security purposes
# rm -rf /var/www/html/froxlor/install/
That’s it! You’ve successfully installed the Froxlor server management panel on AlmaLinux.
Good Luck!

