How to Fix code 0xc0000135 error on Windows 11
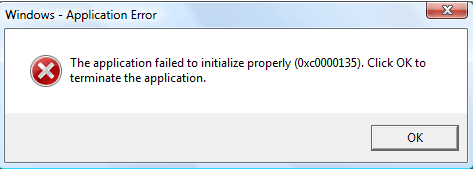
After receiving the recent updates on Windows 11 devices, a handful of users seem to be experiencing Error Code 0xc0000135 while opening or running apps. This Error Code 0xc0000135 signifies that the associated app has failed to initiate due to the absence of a dependency file or component. This error occurs due to the .NET Framework system. So, make sure the.NET Framework is enabled on your computer.
In this article, we will guide you through some methods to fix the above error.
Solution 1. Enable the .NET Framework
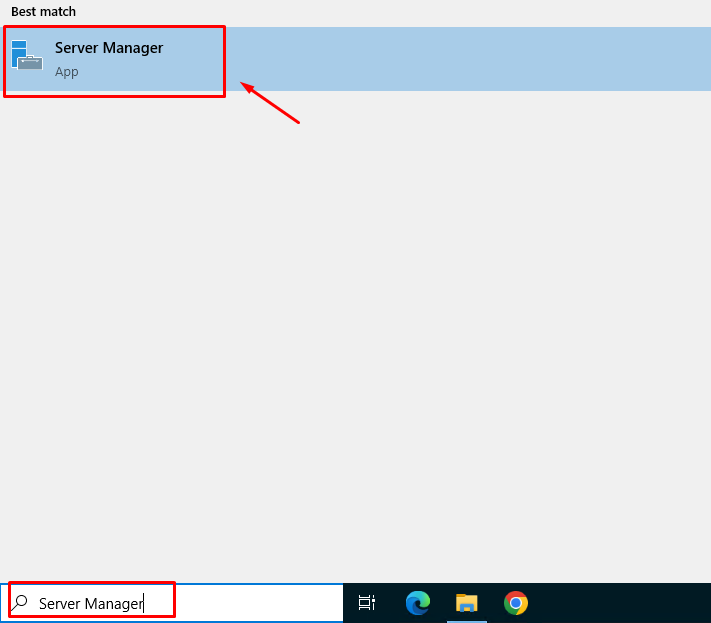
Step 1. Press the Windows key and type Server Manager
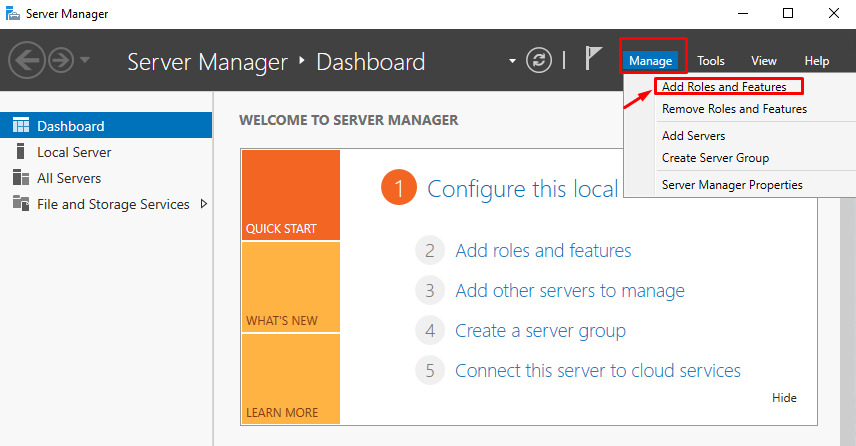
Step 2. In Manage select Add roles and Features.
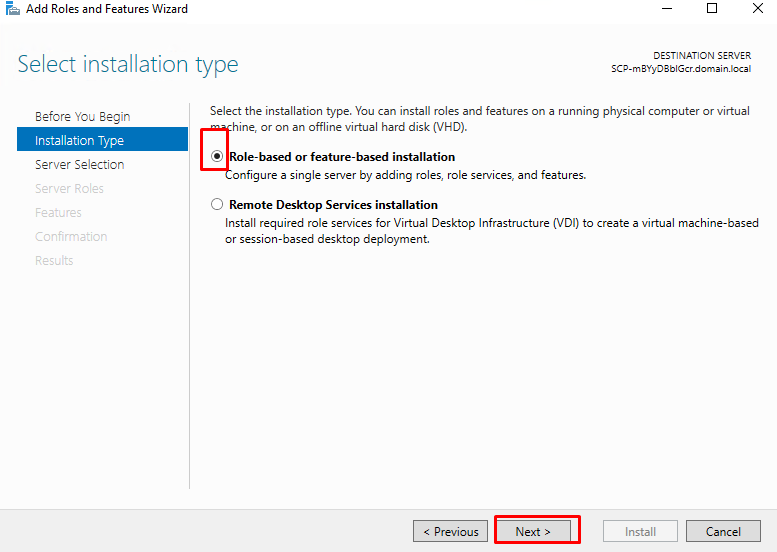
Step 3. Step forward to “Installation Type” and select “Role-based or feature-based installation”
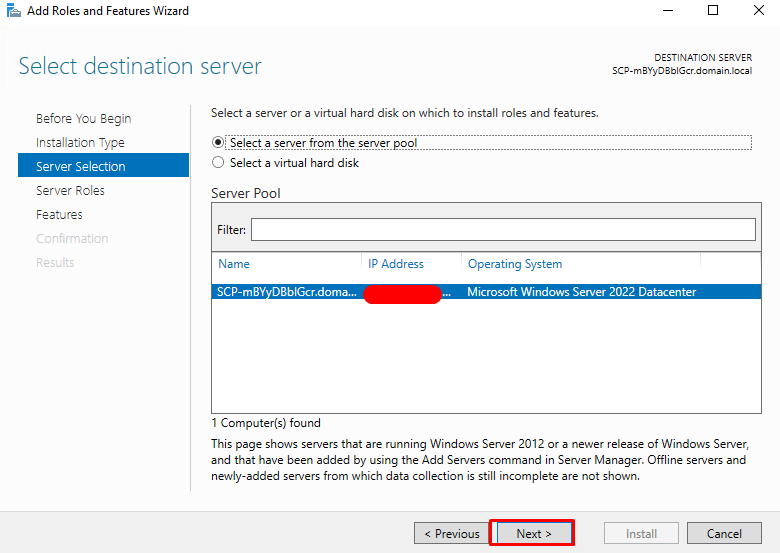
Step 4. Select the destination server for installation.
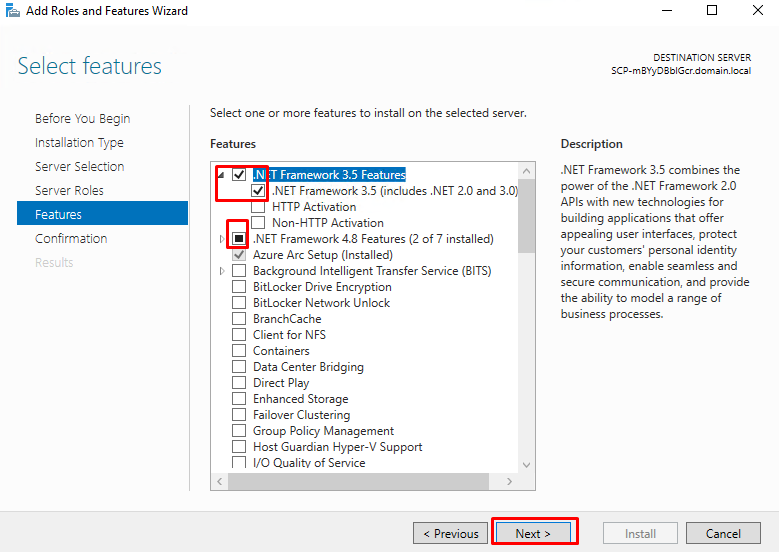
Step 5. Click on “Features”, select the sub-feature ” .NET Framework 3.5 (includes 2.0 and 3.0)” under .NET Framework 3.5 Features and .NET Framework 4.8
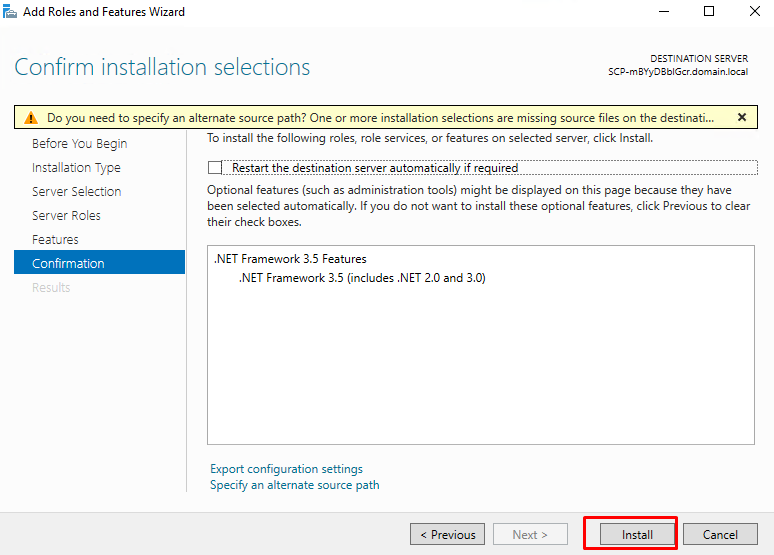
Step 6. Now, we get to the “Confirmation” step. Click “Install” to begin the installation.
Step 7. Step Once completed, restart your Windows then try again.
Solution 2. Re-enable .NET from CMD
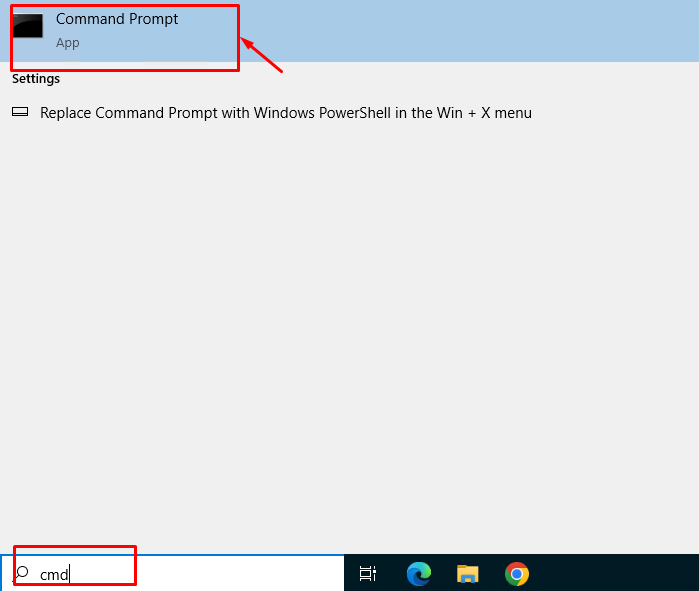
Step 1. Click the Windows Start button in the bottom left corner of your screen. In the search bar, type “cmd“.
Step 2. We are going to use DISM to enable the .NET and HTTP activation feature for all users. So, paste these commands, and use the Enter key to run it.
dism /online /enable-feature /featurename:netfx3 /all
dism /online /enable-feature /featurename:WCF-HTTP-Activation
dism /online /enable-feature /featurename:WCF-NonHTTP-Activation
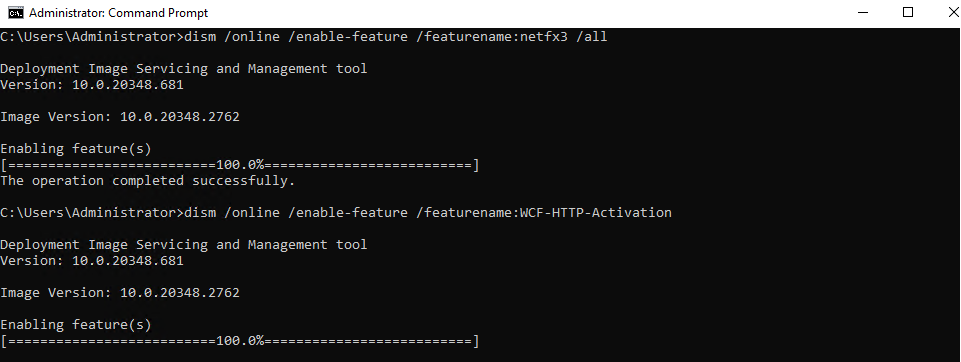
Once you have enabled all these features, go ahead and exit the terminal. Then, restart your computer.
Solution 3: Clear the Cache
If enabling .Net Framework 3.5 does not fix the 0xc0000135 error code on Windows 11, you can try clearing cache files.
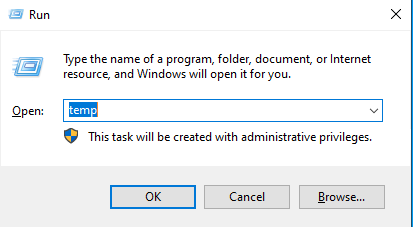
Step 1. Press the Windows key + R to open the Run dialog box. Type “temp” in the Run dialog box and press Enter.
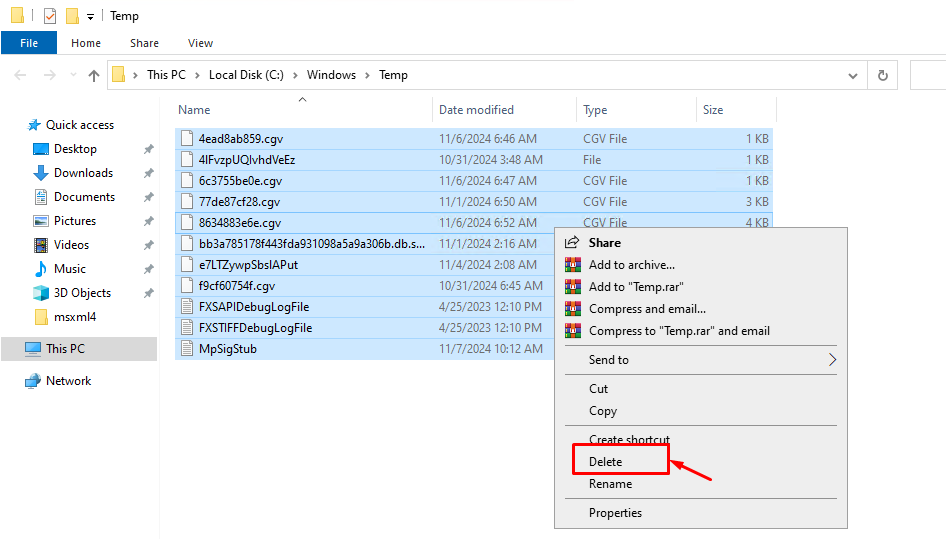
Step 2. Once the Temp folder opens, press Ctrl + A to select all files in the folder. Right-click on the selected files and click “Delete” to delete them.
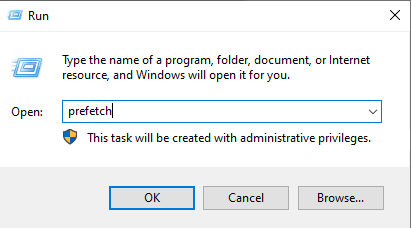
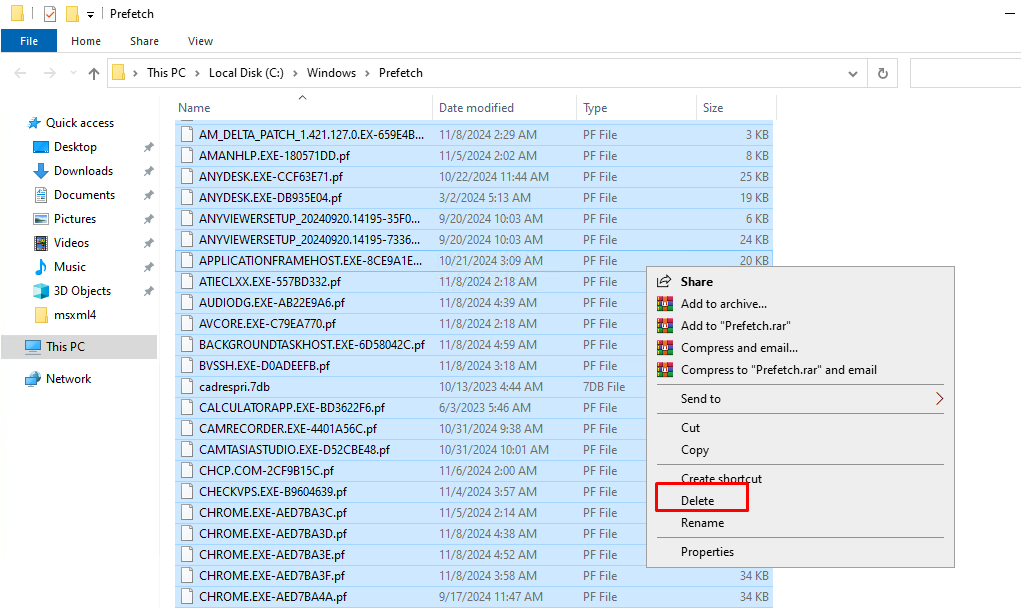
Step 3. Next, press the Windows key + R to open the Run dialog box again. Type “prefetch“ in the Run dialog box and press OK.
Step 4. Once the Prefetch folder opens, press Ctrl + A to select all files in the folder. Right-click on the selected files and click “Delete” to delete them.
Solution 4: Perform an SFC Scan
The error 0xc0000135 probably occurs if there are some missing system files in your Windows 11. On this occasion, you are supposed to run the SFC scan to repair files.
Step 1. Hold down the Windows+R keys to open Run.

Step 2. Then, type in SFC /ScanNow and press Enter.
SFC /ScanNow
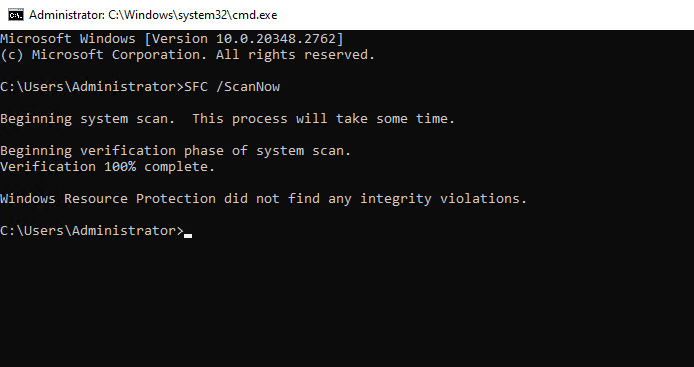
Step 3: After the scan is completed, restart your computer to check again.
Conclusion
In our case after performing the above steps, we did not see the error again.
Hopefully, this article will be helpful for you. Good luck!

