How to Enable Photo Viewer on Windows Server
As a sysadmin, I’ve become really proficient with Windows operating systems, Powershell, Hyper-V, PFsense, etc, so I figured moving to a known OS would simplify things for me in the long run. However, I soon learned that there are a few things I wasn’t aware of on Server 2019. In particular, one of the things I learned was that the default “photo viewer” is set to Paint.
Fortunately, this was a quick fix. Follow the steps below if you’ve ran into the same issue.
How to Enable Photo Viewer in Windows Server 2019
By default, Photo Viewer isn’t installed or active. The first thing we need to do is check whether or not the DLL’s exist on the server.
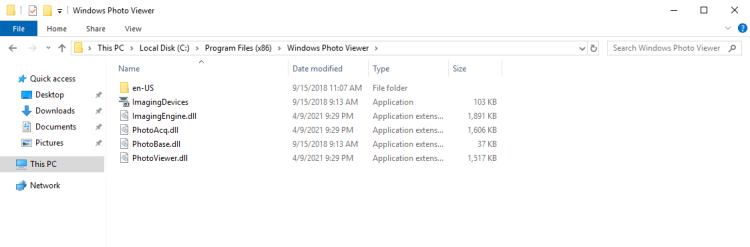
Step 1: Check if Photo Viewer DLL’s Exist
Browse to C:Program Files (x86)Windows Photo Viewer on the server. If you see .dll files there, that means the files exist but aren’t registered. It should look like this:
If you don’t see those files, simply browse to the path above from a Windows PC & copy the folder contents to the same path on your server.
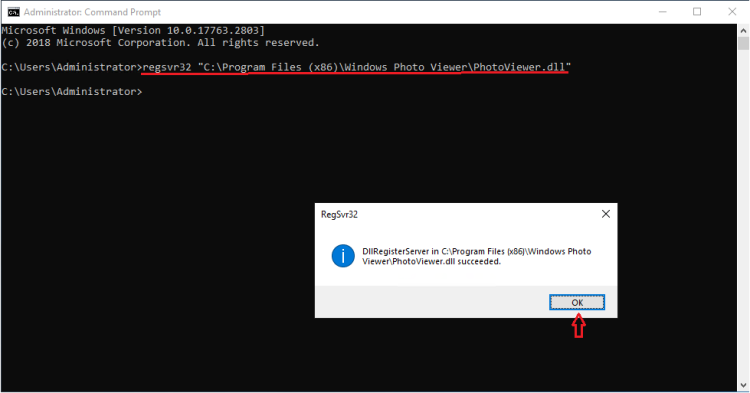
Step 2: Register the DLL’s
Now that we know the necessary files are present, we need to register them.
Open Command Prompt (type CMD into Start) and right-click to Run as Administrator. Then copy and paste the following code:
regsvr32 “C:Program Files (x86)Windows Photo ViewerPhotoViewer.dll”
Step 3: Download PhotoViewer Registry Keys
Now that the .dll’s are registered, we need to import the registry keys. This allows us to “Open With…” from File Explorer and choose Windows Photo Viewer, as well as set default file associations for various file types, such as .jpg, .jpe, or .jpeg.
Download registry files from here: MS Photoviewer Registry Files.zip
Once downloaded, right-click the .zip file and extract it to a temporary location.
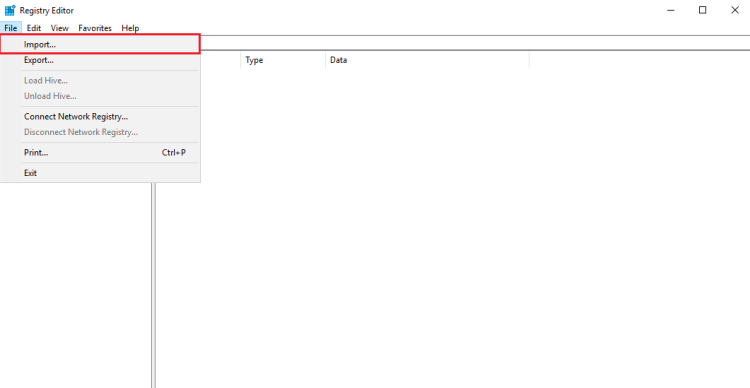
Step 4: Import Registry Keys
From Start, open Regedit.
File > Import > browse to the location you extracted the 4 registry files. You will need to import all 4 of them.
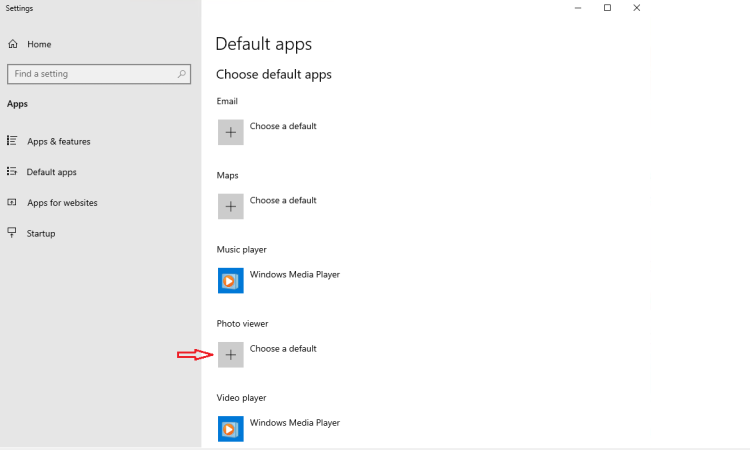
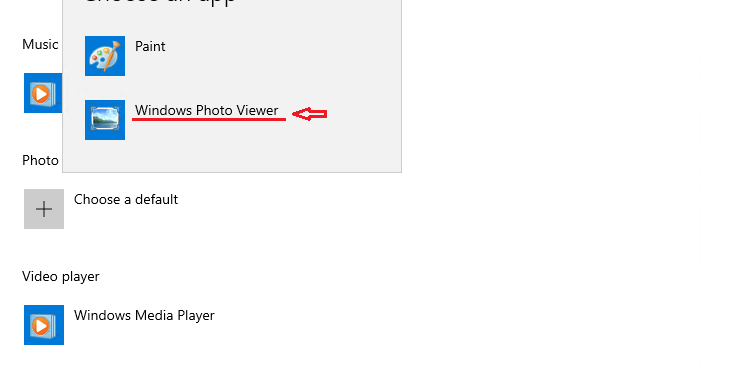
Step 5: Set Photo Viewer as Default App
If you’d like to make Photo Viewer your default photo viewing application, search Windows for “Default Apps” and then change Photos to Windows Photo Viewer.
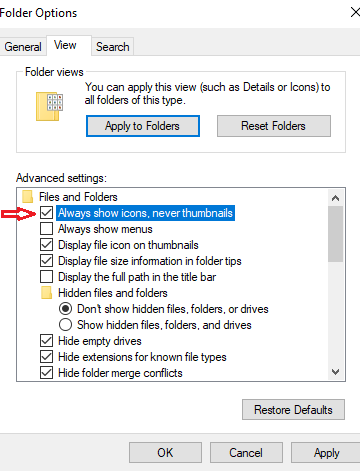
Step 6: Allow Images in Thumbnails
This step is optional, but if you’d like to see a preview of the images from File Explorer (instead of just icons), you can do that by changing the File Explorer options.
Search Windows for Folder Options. Change to the View tab and uncheck “Always show icons, never thumbnails”.
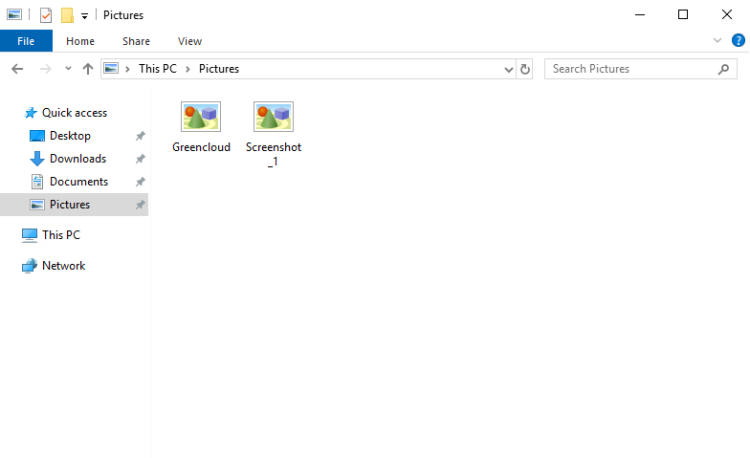
That will change it from looking like this:
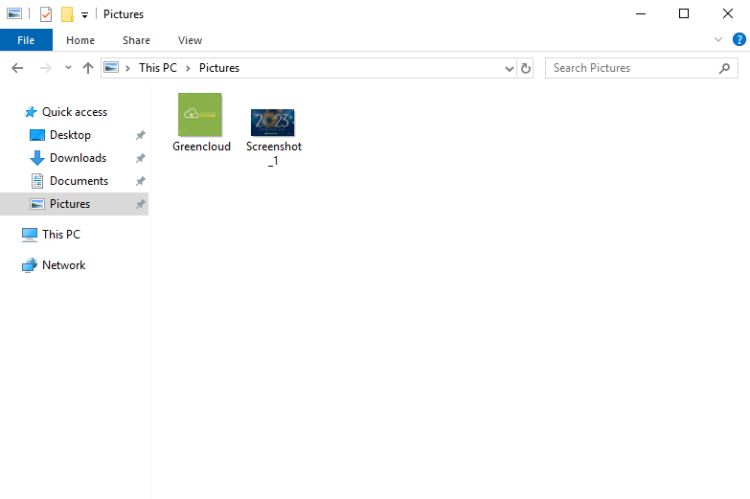
to looking like this:
That’s all there is to it! Hopefully this guide helped you out.
Good Luck!

