How To Install Rudder on Ubuntu 20.04 LTS
This article assumes you have at least basic knowledge of Linux, know how to use the shell, and most importantly, you host your site on your own VPS. The installation is quite simple and assumes you are running in the root account, if not you may need to add ‘sudo‘ to the commands to get root privileges. I will show you the step-by-step installation of the Rudder system configuration and auditing tool on Ubuntu 20.04 .You can follow the same instructions for Ubuntu 18.04, 16.04
Install Rudder on Ubuntu 20.04 LTS
Step 1 . First, make sure that all your system packages are up-to-date by running the following apt commands in the terminal.
sudo apt update
sudo apt upgrade
sudo apt install apt-transport-https ca-certificates wget dirmngr gnupg software-properties-common -y
Step 2. Installing Java.
Run the following command below to install java to your system:
sudo apt install default-jre
Step 3. Installing Rudder on Ubuntu 20.04.
By default, Rudder is available on Ubuntu 20.04 base repository. Now run the following command below to add the Rudder repositor on your Ubuntu system:
sh -c 'echo "deb http://repository.rudder.io/apt/6.0/ bionic main" > /etc/apt/sources.list.d/rudder.list'
Next, import the GPG key:
wget --quiet -O- "https://repository.rudder.io/apt/rudder_apt_key.pub" | apt-key add -

After adding the Rudder repository, update the local package database and install it:
sudo apt updatesudo apt install rudder-server-root

Click Enter -> enter ->enter
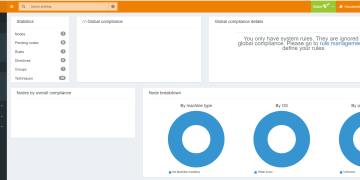
Step 4. Accessing Rudder Web Interface.
Once successfully installed, open your web browser and access the Rudder web interface using the URL https://your-server-ip-address/rudder. You should see the Rudder login screen:

You should see a loading screen, then a login prompt. The default login is:
- User: admin
- Password: admin
Congratulations! You have successfully installed Rudder

