How to Install NetBox IRM (Infrastructure Resource Modelling Tool) on Ubuntu 24.04 Server
Prerequisites
Before moving on, make sure you have the following:
- An Ubuntu 24.04 server
- A non-root user with administrator privileges
- A domain name pointed to a server IP address
Installing Dependencies
To install NetBox, you must ensure dependencies are installed on your Ubuntu server. This includes Python3, PostgreSQL server, Apache web server, Redis, and system libraries. In this section, you’ll install those packages with the APT package manager.
apt update
Once updated, install dependencies for NetBox with the following command. In this example, you’ll install PostgreSQL, Apache, Python, Redis, Certbot, build dependencies, and some libraries.
apt install apache2 postgresql postgresql-common libpq-dev redis-server git certbot python3 python3-pip python3-venv python3-dev build-essential libxml2-dev libxslt1-dev libffi-dev libssl-dev zlib1g-dev
Enter ‘Y‘ to confirm the installation.
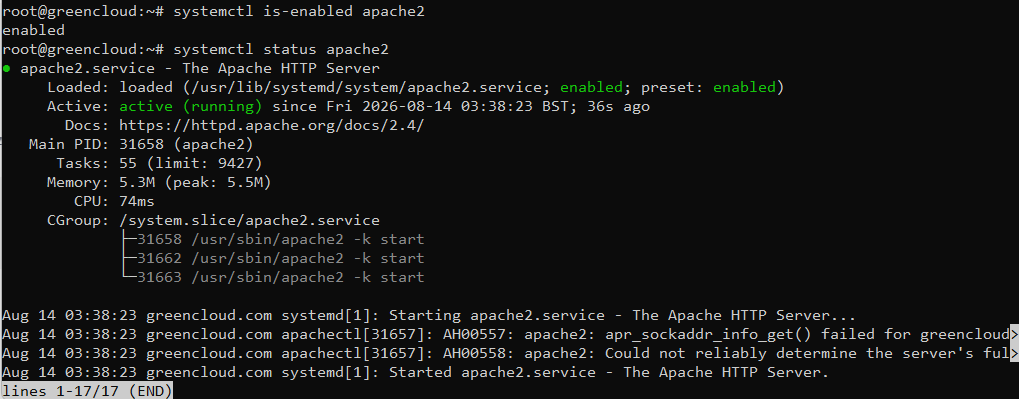
After the installation is finished, run the ‘systemctl’ command below to verify the Apache web server status.
systemctl is-enabled apache2
systemctl status apache2
In the following output, you can see that Apache is running and enabled.
Lastly, check the PostgreSQL server status with the following:
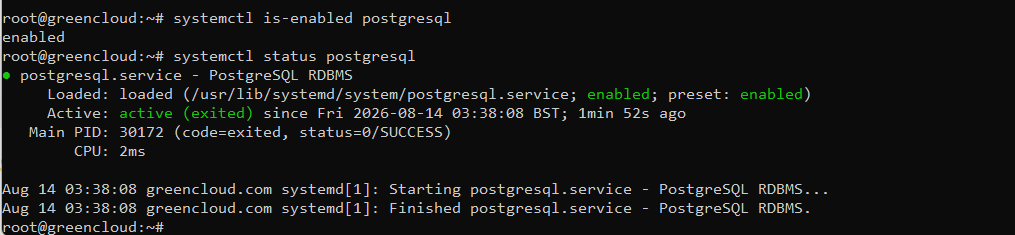
systemctl is-enabled postgresql
systemctl status postgresql
In the output below, you can see that PostgreSQL is enabled and running with the status exited (systemd cannot find the service to monitor).
Setting up PostgreSQL
After dependencies are installed, you need to set up the PostgreSQL server by creating a new user and database that NetBox will use.
Log in to the PostgreSQL server using the command below.
sudo -u postgres psql
Now run the following queries to create a new user ‘netbox‘ with the password ‘green12345‘ and the new database ‘netboxdb‘.
CREATE USER netbox LOGIN CREATEDB PASSWORD 'green12345';
CREATE DATABASE netboxdb OWNER netbox;
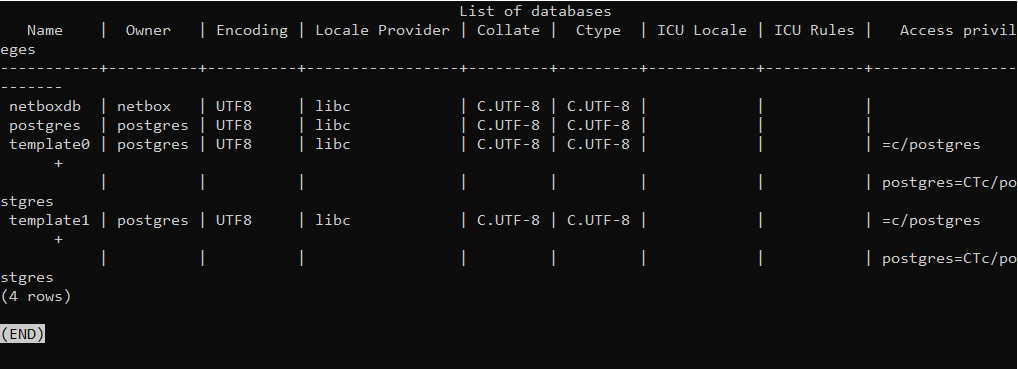
Once the database and user are created, verify the list of databases and users in PostgreSQL with the following.
\l
\du
You can see below that the database ‘netboxdb‘ and user ‘netbox‘ are created.
Type ‘quit‘ to exit from the PostgreSQL server.

Downloading Configuring Netbox
Now that the PostgreSQL database is ready, you’ll download and install NetBox on your Ubuntu machine. You’ll set up the domain name, secret key, and database for NetBox.
First, run the command below to create a new user ‘netbox’ on your Ubuntu machine.
useradd -r -d /opt/netbox -s /usr/sbin/nologin netbox
Now run the command below to download the NetBox source code with the ‘git‘ command, and change the ownership to the ‘netbox‘ user.
git clone -b main --depth 1 https://github.com/netbox-community/netbox.git /opt/netbox
chown -R netbox:netbox /opt/netbox
Move to the ‘/opt/netbox/netbox/netbox‘ directory and execute the ‘generate_secret_key.py‘ file. Copy the secret key to your note.
cd /opt/netbox/netbox/netbox
sudo -u netbox python3 ../generate_secret_key.py
8p6bK4B1bD2Q*2$r-gL70H=#-Z$tv*kMV=f=yaDDoiXbTW_gYx
Next, copy the ‘configuration.py‘ file and modify it using the ‘nano‘ editor.
sudo -u netbox cp configuration_example.py configuration.py
sudo -u netbox nano configuration.py
Add your local IP address and domain name to the ‘ALLOWED_HOSTS‘.
ALLOWED_HOSTS = ['netboxgreencloud.example.net', '64.44.x.x']
Enter your PostgreSQL database name, user, and password in the ‘DATABASE‘ section.
# database configuration
DATABASE = {
'NAME': 'netboxdb', # Database name
'USER': 'netbox', # PostgreSQL username
'PASSWORD': 'netboxpassword', # PostgreSQL password
'HOST': 'localhost', # Database server
'PORT': '', # Database port (leave blank for default)
'CONN_MAX_AGE': 300, # Max database connection age (seconds)
}
Paste your secret key into the ‘SECRET_KEY‘ section.
SECRET_KEY = '8p6bK4B1bD2Q*2$r-gL70H=#-Z$tv*kMV=f=yaDDoiXbTW_gYx'
Save the file and exit the editor when finished.
Migrating Netbox and setting up administrator
Now that you’ve configured NetBox with the PostgreSQL server, you’re ready to migrate the database and create an administrator user for the NetBox installation.
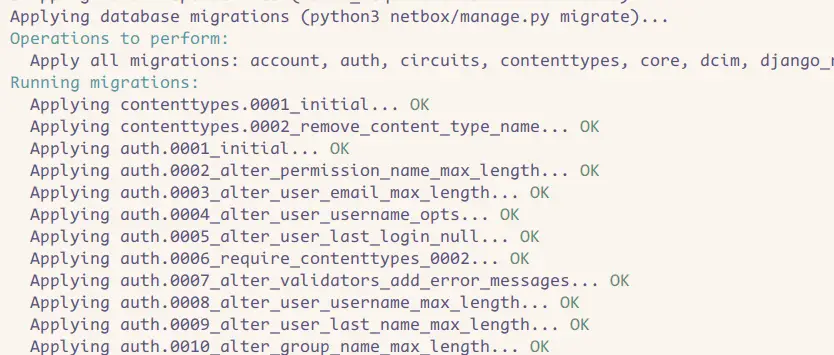
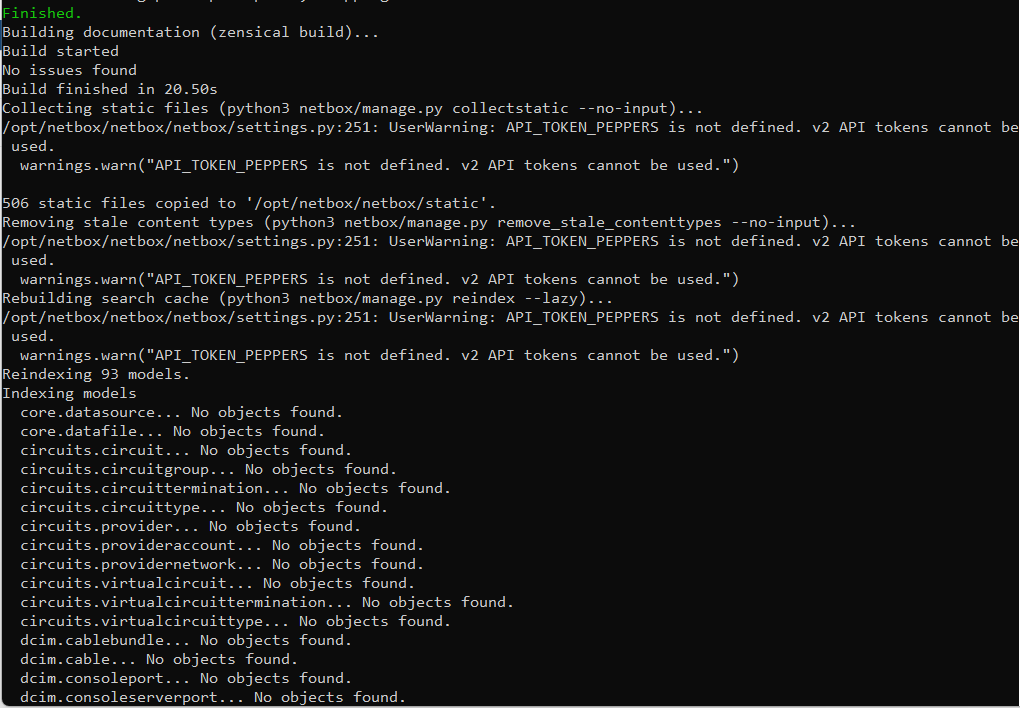
Execute the ‘upgrade.sh‘ script using the command below. This will create a Python environment, install dependencies for NetBox, migrate the NetBox database, connect to Redis, and then generate static files.
sudo -u netbox /opt/netbox/upgrade.sh
After the process is finished, you need to create a new admin user for NetBox through the ‘manage.py‘ script.
Run the following command to activate the NetBox virtual environment. Once activated, your shell will become such as ‘(venv) user@hostname‘.
source /opt/netbox/venv/bin/activate
Go to the ‘/opt/netbox/netbox‘ directory and execute the ‘manage.py‘ script like the following:
cd /opt/netbox/netbox
python3 manage.py createsuperuser
Enter your username, email address, and password for the NetBox administrator.
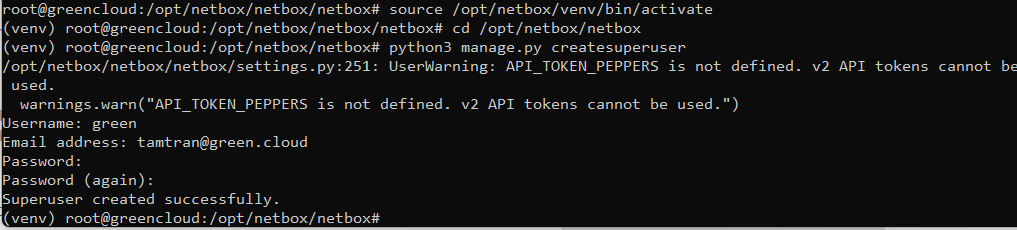
Once complete, execute the ‘deactivate‘ command to exit from the NetBox virtual environment.
Running NetBox as a service
In this section, you’ll copy NetBox configurations that will be used to run NetBox as a systemd service. You need to ensure that Netbox is running under Gunicorn, and then copy Netbox service files to the ‘/etc/systemd/system‘ directory.
First, copy the ‘gunicorn.py‘ script to the ‘/opt/netbox‘ directory. This script contains the configuration for NetBox to run under the Python WSGI server.
cp /opt/netbox/contrib/gunicorn.py /opt/netbox/gunicorn.py
Now run the command below to copy service files for Netbox to the ‘/etc/systemd/system‘ directory and reload the systemd manager.
cp -v /opt/netbox/contrib/*.service /etc/systemd/system/
systemctl daemon-reload
Once systemd is reloaded, run the ‘systemctl‘ command below to start and enable NetBox services.
systemctl enable --now netbox netbox-rq
Lastly, verify NetBox services to ensure it is running with the following command.
systemctl status netbox netbox-rq
Configuring Apache as a reverse proxy
At this point, Netbox is running in the background as a service under the Python WSGI server. To make it accessible from outside, you need to configure Apache as a reverse proxy. Before that, you also need to generate SSL certificates to secure Netbox installation.
First, run the command below to stop the ‘apache2‘ service.
systemctl stop apache2
Now generate SSL certificates from Let’s Encrypt with the ‘certbot‘ command below. Make sure to change the domain name and email address to your information.
certbot certonly --standalone --preferred-challenges http -d netboxgreencloud.example.net
After the process is finished, your SSL certificates will be available in the ‘/etc/letsencrypt/live/domain.com‘ directory.
Next, copy the Apache configuration for Netbox to the ‘/etc/apache2/sites-available/netbox.conf‘ file and modify it using the ‘nano‘ editor.
cp /opt/netbox/contrib/apache.conf /etc/apache2/sites-available/netbox.conf
nano /etc/apache2/sites-available/netbox.conf
Replace the domain name within the ‘ServerName‘ option and change the path of your SSL certificates.
<VirtualHost *:80>
# CHANGE THIS TO YOUR SERVER'S NAME
ServerName netboxgreencloud.example.net

...
</VirtualHost>

<VirtualHost *:443>
ProxyPreserveHost On

# CHANGE THIS TO YOUR SERVER'S NAME
ServerName netboxgreencloud.example.net

SSLEngine on
SSLCertificateFile /etc/letsencrypt/live/netboxgreencloud.example.net/fullchain.pem
SSLCertificateKeyFile /etc/letsencrypt/live/netboxgreencloud.example.net/privkey.pem
...
</VirtualHost>
Save the file and exit the editor when done.
Now run the command below to activate Apache modules and the virtual host file ‘netbox.conf‘.
a2enmod ssl proxy proxy_http headers rewrite
a2ensite netbox.conf
After the virtual host is activated, run the following command to restart Apache and apply your changes. With this, your Netbox installation should be running under the Apache reverse proxy with HTTPS enabled.
systemctl restart apache2
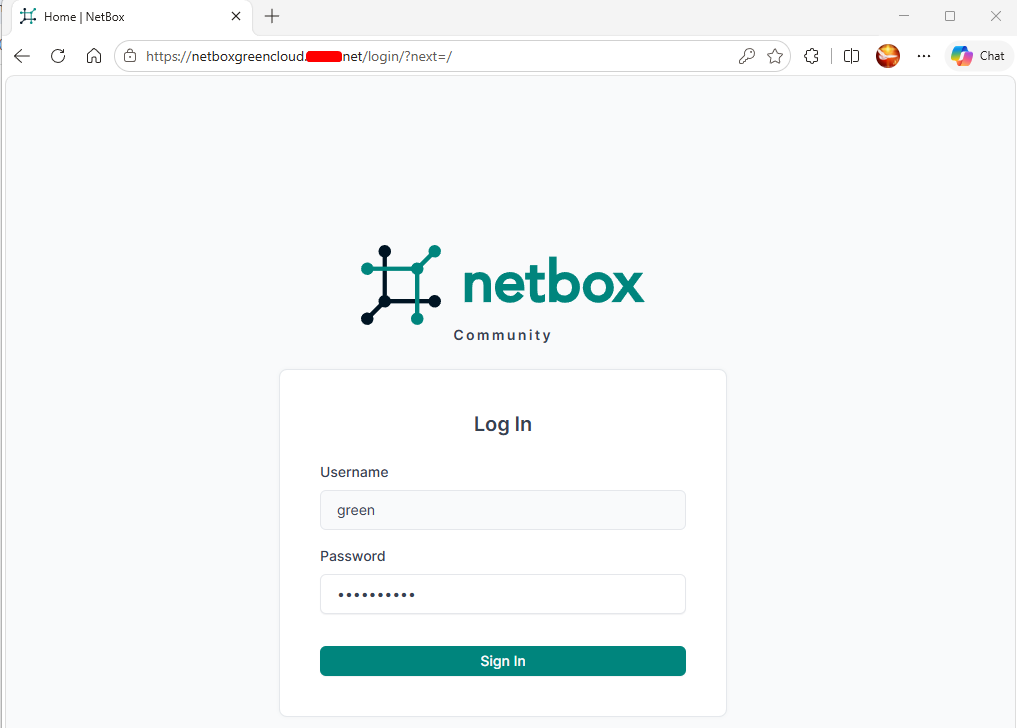
Lastly, visit https://netboxgreencloud.example.net/ with your web browser, and you’ll be redirected to the Netbox login page. Enter your admin username and password, then click Sign In.
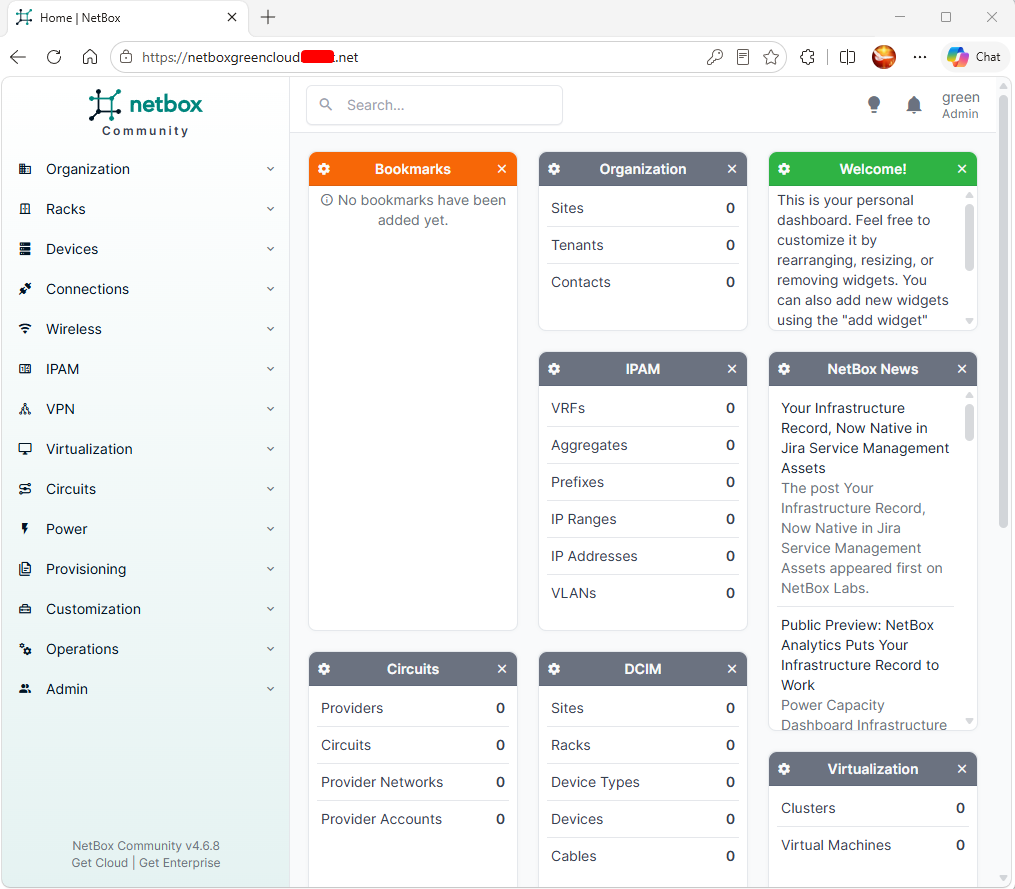
You’ll see the following NetBox dashboard if you’ve proper admin credentials.
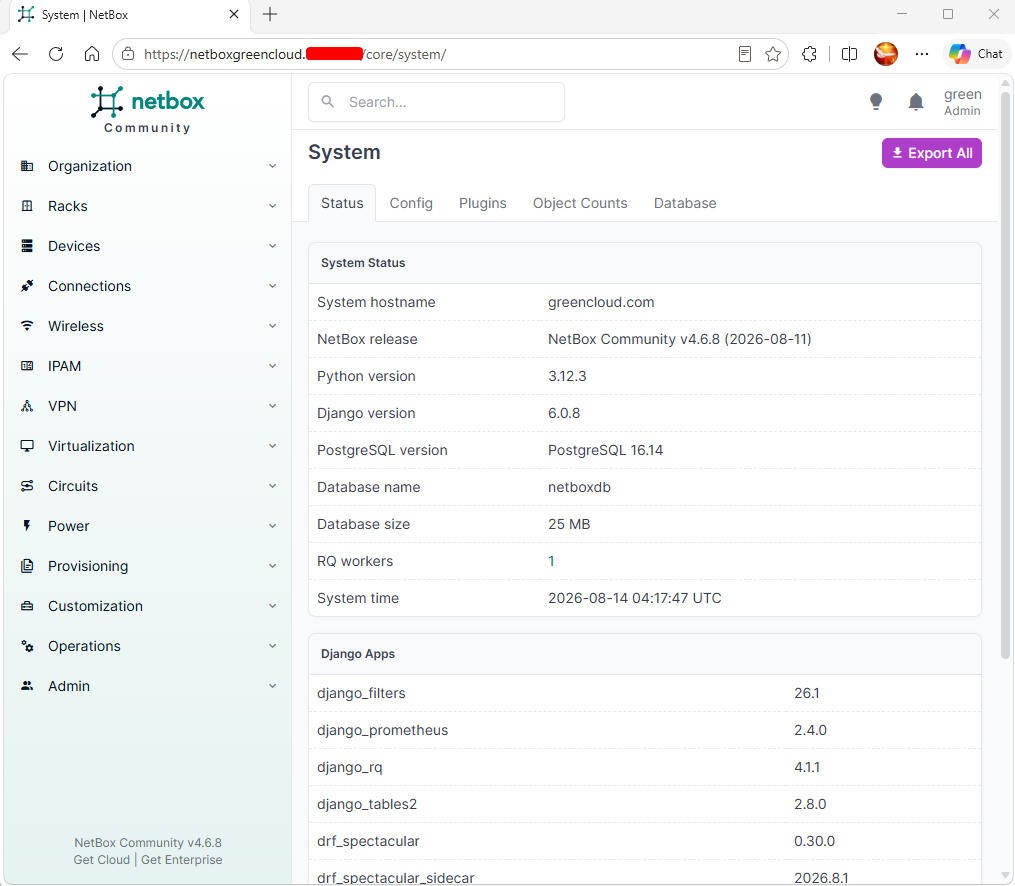
Click on the Admin > System menu to see information on your NetBox installation. In the following output, you can see NetBox v4.1.7 is installed with the PostgreSQL database.
Conclusion
Congratulations! You’ve finished the installation of Netbox IRM on the Ubuntu 24.04 server. You’ve got Netbox up and running with PostgreSQL as the database server and Apache as a reverse proxy. You’ve also secured Netbox with HTTPS through Certbot.