
How to Install OpenEMR on Ubuntu 24.04 Server
OpenEMR is an open-source health records and medical practice management solution. It is a fully integrated electronic health record and practice management, scheduling, electronic billing, and internationalization support. OpenEMR is ONC certified, which means that OpenEMR meets the standards of the Office of the National Coordinator for Health Information Technology (ONC).
This guide will show you how to install OpenEMR on the Ubuntu 24.04 server with the LEMP Stack (Linux, Nginx, MariaDB, and PHP-FPM). We’ll also show you how to secure OpenEMR with HTTPS from Let’s Encrypt and open HTTP and HTTPS ports via UFW (Uncomplicated Firewall).
Prerequisites
To get started with this guide, make sure you have:
- An Ubuntu 24.04 server
- A non-root user with administrator privileges
- A domain name that points to the server’s IP address
Installing LEMP Dependencies
OpenEMR is a web-based application written in PHP and MySQL. To install it, you must ensure that both PHP and MySQL are installed. In this guide, you’ll be running OpenEMR with the LEMP Stack (Linux, Nginx, MariaDB, and PHP). So for now, you’ll be installing those packages through the APT repository.
apt update && apt upgrade -y
apt install nginx mariadb-server php-fpm php-mysql php-bcmath php-xml php-zip php-curl php-mbstring php-gd php-tidy php-intl php-cli php-soap imagemagick libtiff-tools php-ldap
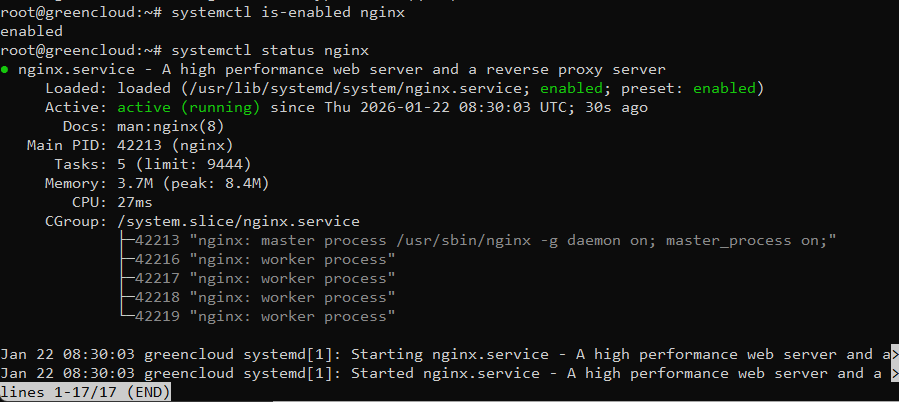
After the installation is complete, check the ‘nginx‘ service status with the ‘systemctl’ command below. Make sure that Nginx is running and enabled.
systemctl is-enabled nginx
systemctl status nginx
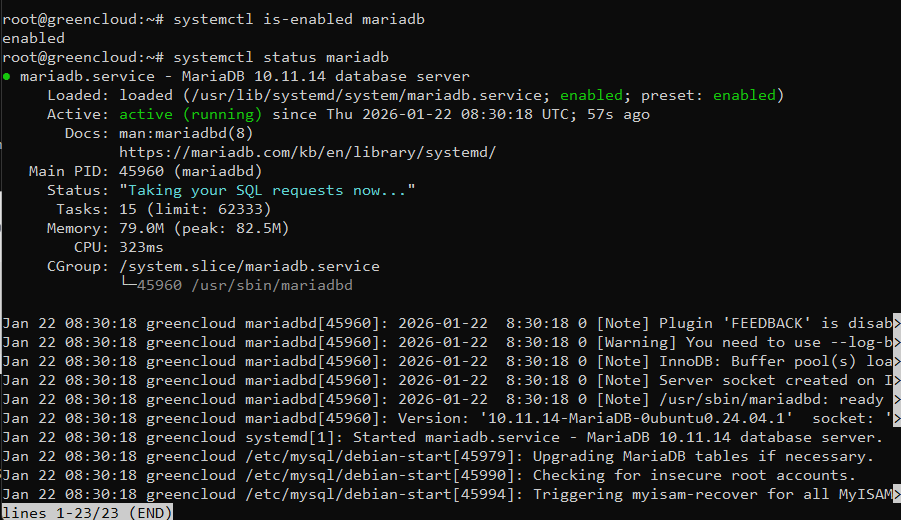
Now check the ‘mariadb‘ service using the following command. You’ll see that the MariaDB server is running and enabled on your Ubuntu server.
systemctl is-enabled mariadb
systemctl status mariadb
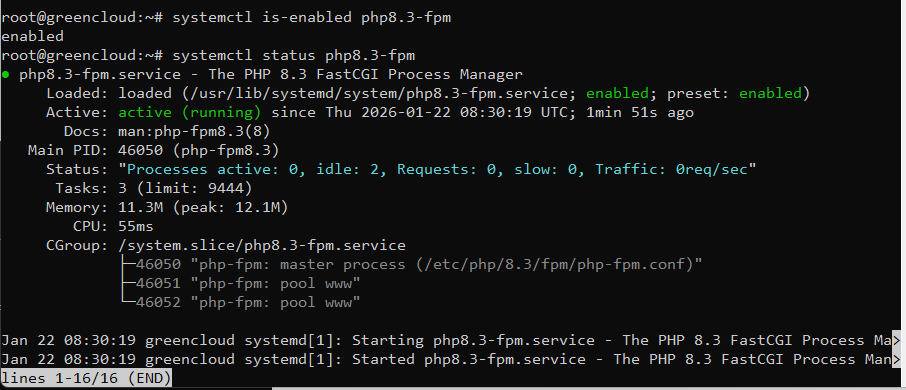
Lastly, check the ‘php8.3-fpm‘ service with the command below. You’ll see that the PHP-FPM service is up and running.
systemctl is-enabled php8.3-fpm
systemctl status php8.3-fpm
Configuring PHP-FPM
Once the LEMP Stack is installed, let’s configure the PHP-FPM installation by editing the ‘php.ini’, then restarting the PHP-FPM service and applying your changes.
Edit the ‘php.ini‘ file with the ‘nano‘ editor.
nano /etc/php/8.3/fpm/php.ini
Modify the default configuration as follows. Ensure that you adjust the ‘memory_limit‘ to match your current RAM.
max_execution_time = 60
max_input_time = -1
memory_limit = 512M
post_max_size = 30M
upload_max_filesize = 30M
max_input_vars = 3000
mysqli.allow_local_infile = On
Save the file and exit the editor when done.
Next, run the ‘chgrp’ command below to change the ownership of the ‘/var/lib/php/sessions‘ directory to the user ‘www-data‘.
chgrp -R www-data /var/lib/php/sessions
Lastly, restart the ‘php8.3-fpm‘ service with the command below. This will apply your changes to your PHP-FPM installation.
systemctl restart php8.3-fpm
Configuring MariaDB Server
Now that PHP is configured, let’s configure the MariaDB server and create a new database for OpenEMR. In this section, you’ll secure the MariaDB server with the ‘mariadb-secure-installation‘ utility and create a new database and user via the ‘mariadb‘ client.
First, run the ‘mariadb-secure-installation‘ command below to secure your MariaDB server.
mariadb-secure-installation
Now you’ll be asked about the following configurations:
- Press ENTER to continue and configure the MariaDB server
- Enter ‘Y‘ to set up the MariaDB root password, then type and repeat your password
- Enter ‘Y‘ to disable remote login for the ‘root‘ user
- Enter ‘Y‘ to delete the database ‘test‘ and its privileges
- Enter ‘Y‘ to complete the configuration
After securing the MariaDB server, you need to create a new database and user that will be used by the OpenEMR installation.
Log in to the MariaDB server with the ‘mariadb‘ command below. Enter your MariaDB root password when prompted.
mariadb -u root -p
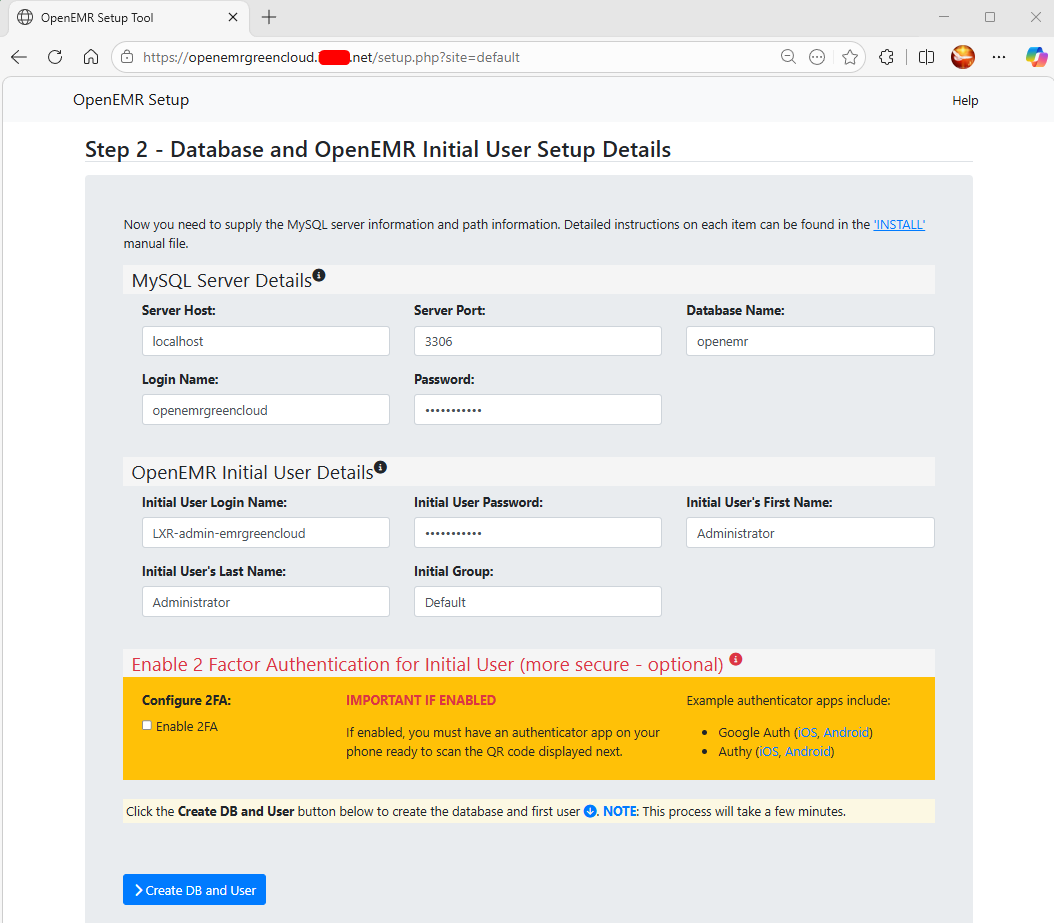
Run the following queries to create a new database and user for OpenEMR. In this example, you’ll create a new database ‘openemr‘ with the user ‘openemrgreencloud‘ and the password is ‘password‘. You can adjust the database details with your information.
CREATE DATABASE openemr;
CREATE USER 'openemrgreencloud'@'localhost' IDENTIFIED BY 'Green@12345';
GRANT ALL PRIVILEGES ON openemr.* TO 'openemrgreencloud'@'localhost';
FLUSH PRIVILEGES;
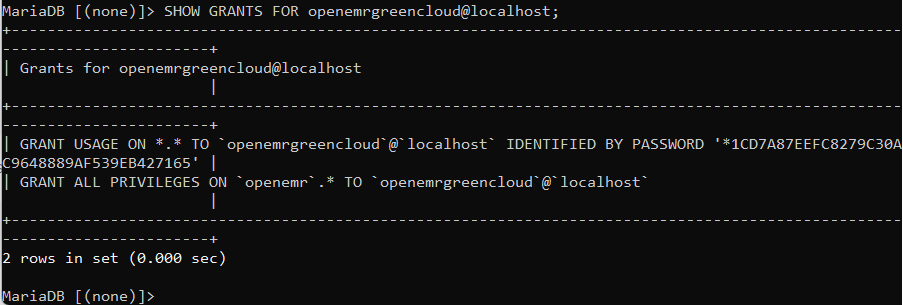
Now run the query below to check privileges for the ‘openemruser’. Make sure that the user can access the ‘openemr’ database.
SHOW GRANTS FOR openemrgreencloud@localhost;
Lastly, type ‘quit‘ to exit from the MariaDB server.
Downloading OpenEMR Source Code
Now that you’ve configured the PHP-FPM and MariaDB server, the next step is to download the OpenEMR source code and set up the installation with proper permissions and ownership.
Download the file (using the same command, but now in a location where you have write access):
curl -L -o openemr-7.0.2.tar.gz \
https://sourceforge.net/projects/openemr/files/OpenEMR%20Current/7.0.2/openemr-7.0.2.tar.gz/download
Move and extract into the web root using sudo to handle permissions:
mv openemr-7.0.2.tar.gz /var/www/
cd /var/www/
tar -xzvf openemr-7.0.2.tar.gz
mv openemr-7.0.2 openemr
Lastly, run the ‘chown’ command below to change the ownership of the ‘/var/www/openemr‘ directory to the user ‘www-data‘.
chown -R www-data:www-data /var/www/openemr
chmod -R 755 openemr
Setting up Nginx Server Block
After downloading the OpenEMR source code, you’ll create a new Nginx server block that will be used for running your OpenEMR installation. So make sure that you’ve your domain name ready and pointed to the server IP address.
Create a new Nginx server block configuration ‘/etc/nginx/sites-available/openemr‘ with the following ‘nano‘ editor command.
nano /etc/nginx/sites-available/openemr
Insert the configuration and ensure that you change the ‘server_name‘ option to your domain name.
server {
listen 80;
listen [::]:80;

server_name openemrgreencloud.example.net;

root /var/www/openemr;
index index.php index.html index.htm;

access_log /var/log/nginx/openemr.access.log;
error_log /var/log/nginx/openemr.error.log;

client_max_body_size 128M;

location ~* ^/(?:sites/[^/]+/(?:documents|edi|sign|letter|report|config|cache)|interface/main/left_nav|library|sql|tests)/ {
deny all;
return 403;
}

location ~* \.(?:git|svn|env|bak|dist|swp|ini|log|sh|sql|md|lock|yml|yaml)$ {
deny all;
return 403;
}

location / {
try_files $uri $uri/ /index.php?$query_string;
}

location ~ \.php$ {
include snippets/fastcgi-php.conf;
fastcgi_pass unix:/run/php/php8.3-fpm.sock;
fastcgi_param SCRIPT_FILENAME $document_root$fastcgi_script_name;
include fastcgi_params;
fastcgi_intercept_errors on;
}

location ~ /\.ht {
deny all;
}

add_header X-Content-Type-Options nosniff;
add_header X-Frame-Options SAMEORIGIN;
add_header X-XSS-Protection "1; mode=block";
add_header Referrer-Policy strict-origin-when-cross-origin;
}
Save the file and exit the editor.
Now run the command below to activate the ‘openemr’ server block and verify your Nginx syntax. If you’re using correct and proper Nginx syntax, you’ll see an output such as ‘test is successful – syntax is ok‘.
ln -s /etc/nginx/sites-available/openemr /etc/nginx/sites-enabled/
rm -f /etc/nginx/sites-enabled/default
nginx -t
systemctl reload nginx

Lastly, run the ‘systemctl‘ command below to restart the Nginx web server and apply your changes.
systemctl restart nginx
Securing OpenEMR with HTTPS
In this section, you’ll install Certbot and secure OpenEMR with HTTPS. This will work if you’re using a public domain name and server. On a local server or in development, you can use Self-Signed certificates.
Before setting up SSL, run the ‘ufw’ command below to open both HTTP and HTTPS services on your server. You’ll see an output such as ‘success’.
ufw allow 'Nginx Full'
Now install the ‘certbot‘ and ‘python3-certbot-nginx‘ plugins with the following ‘apt‘ command. Input ‘Y’ to confirm the installation.
apt install certbot python3-certbot-nginx -y
After the installation is complete, run the ‘certbot’ command below to generate SSL certificates and secure your OpenEMR installation.
certbot --nginx -d openemrgreencloud.example.net
Once the process is finished, your SSL certificates will be available in the ‘/etc/letsencrypt/live/domain.com‘ directory. Also, your OpenEMR installation will be secured with HTTPS.
Installing OpenEMR
Open your web browser and visit https://openemrgreencloud.example.net/ through a web browser.
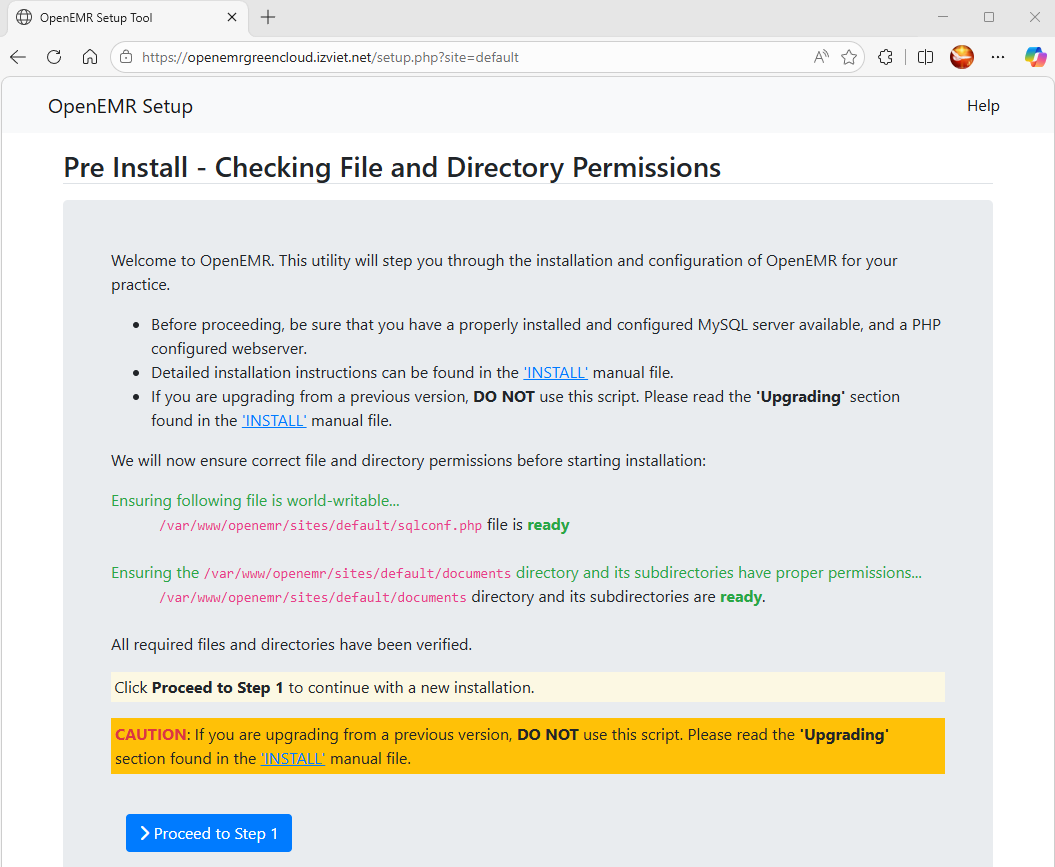
First, the installer will check the permissions of the OpenEMR source code, so make sure you have proper permissions.
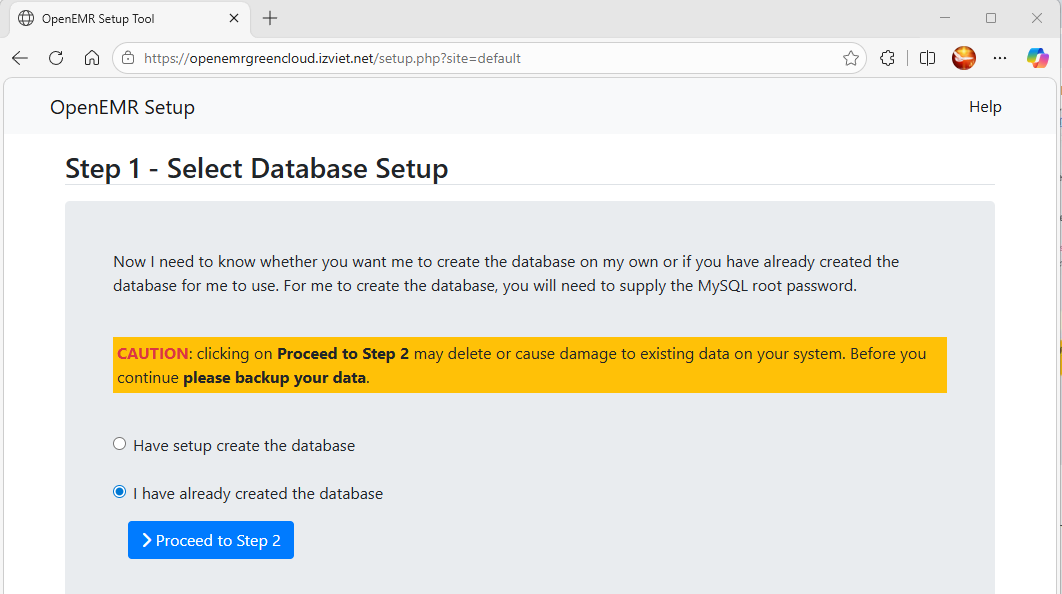
Select the ‘I have created the database‘ option to set up your database integration.
Enter your database details and the new administrator for OpenEMR.
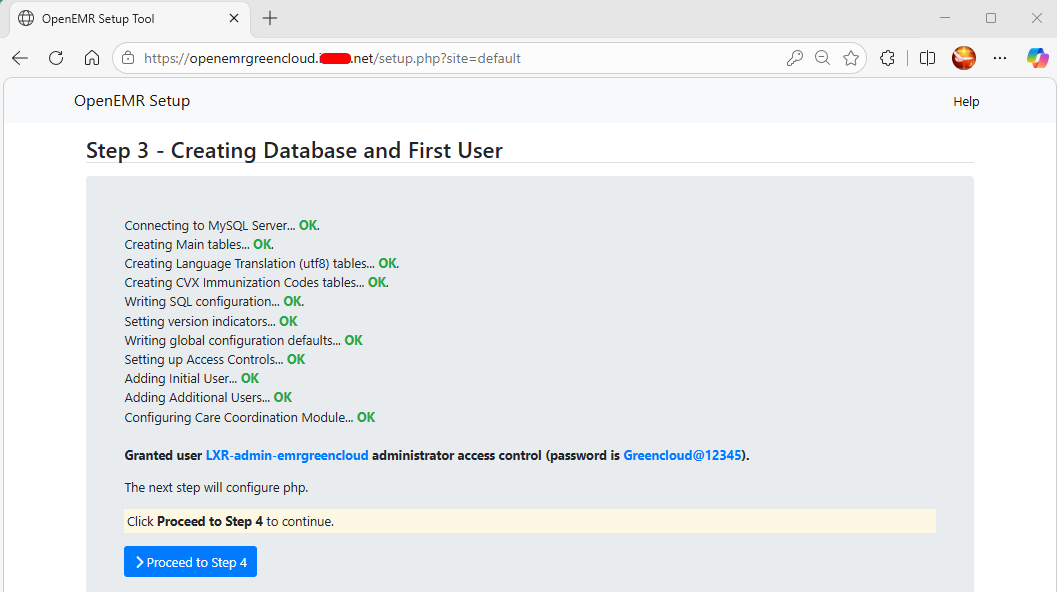
The database initialization will be running, and your admin user will be created.
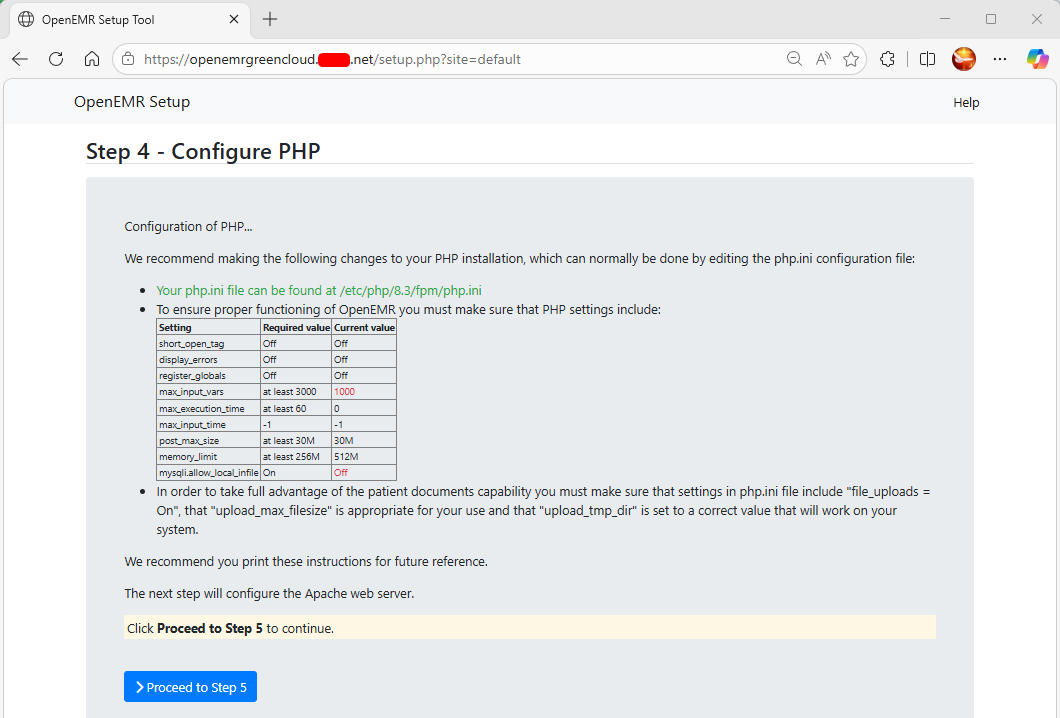
Next, make sure your PHP configuration meets the OpenEMR requirements.
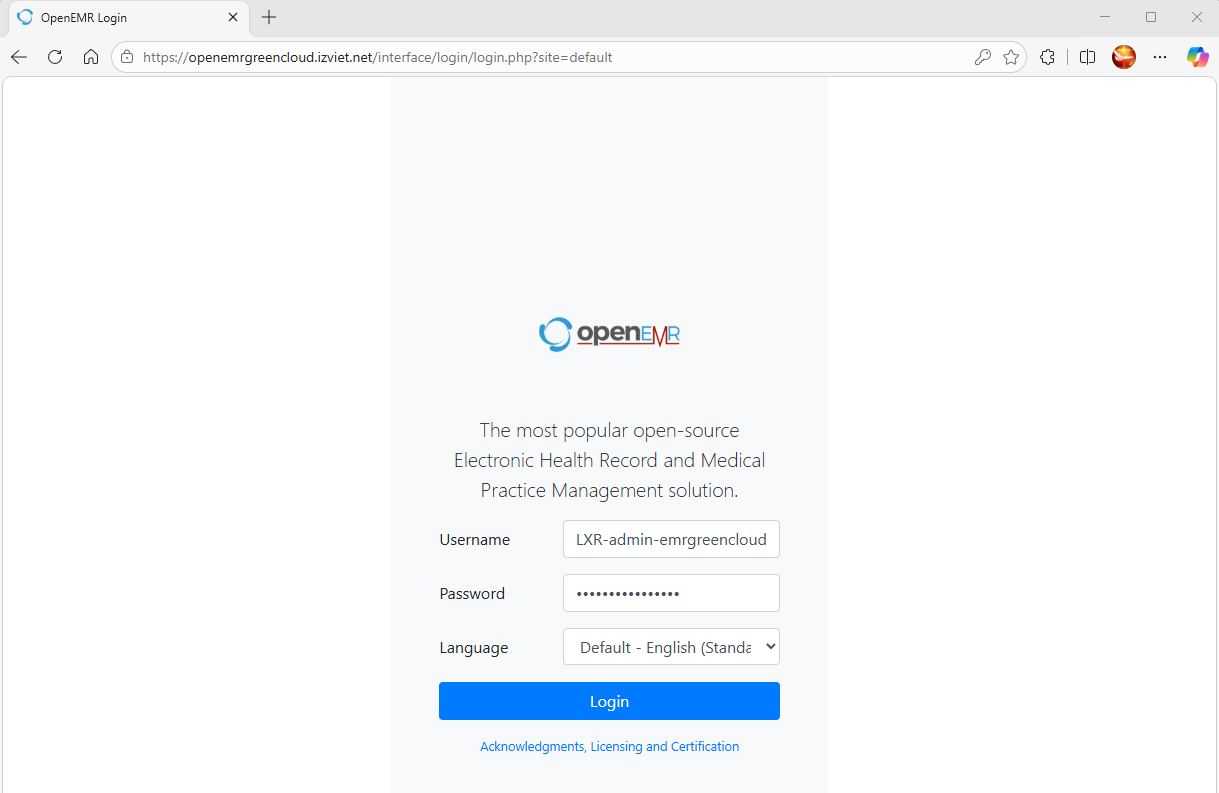
Once the installation is complete, you’ll be redirected to the OpenEMR login page. Type your admin user and password, then click Login.
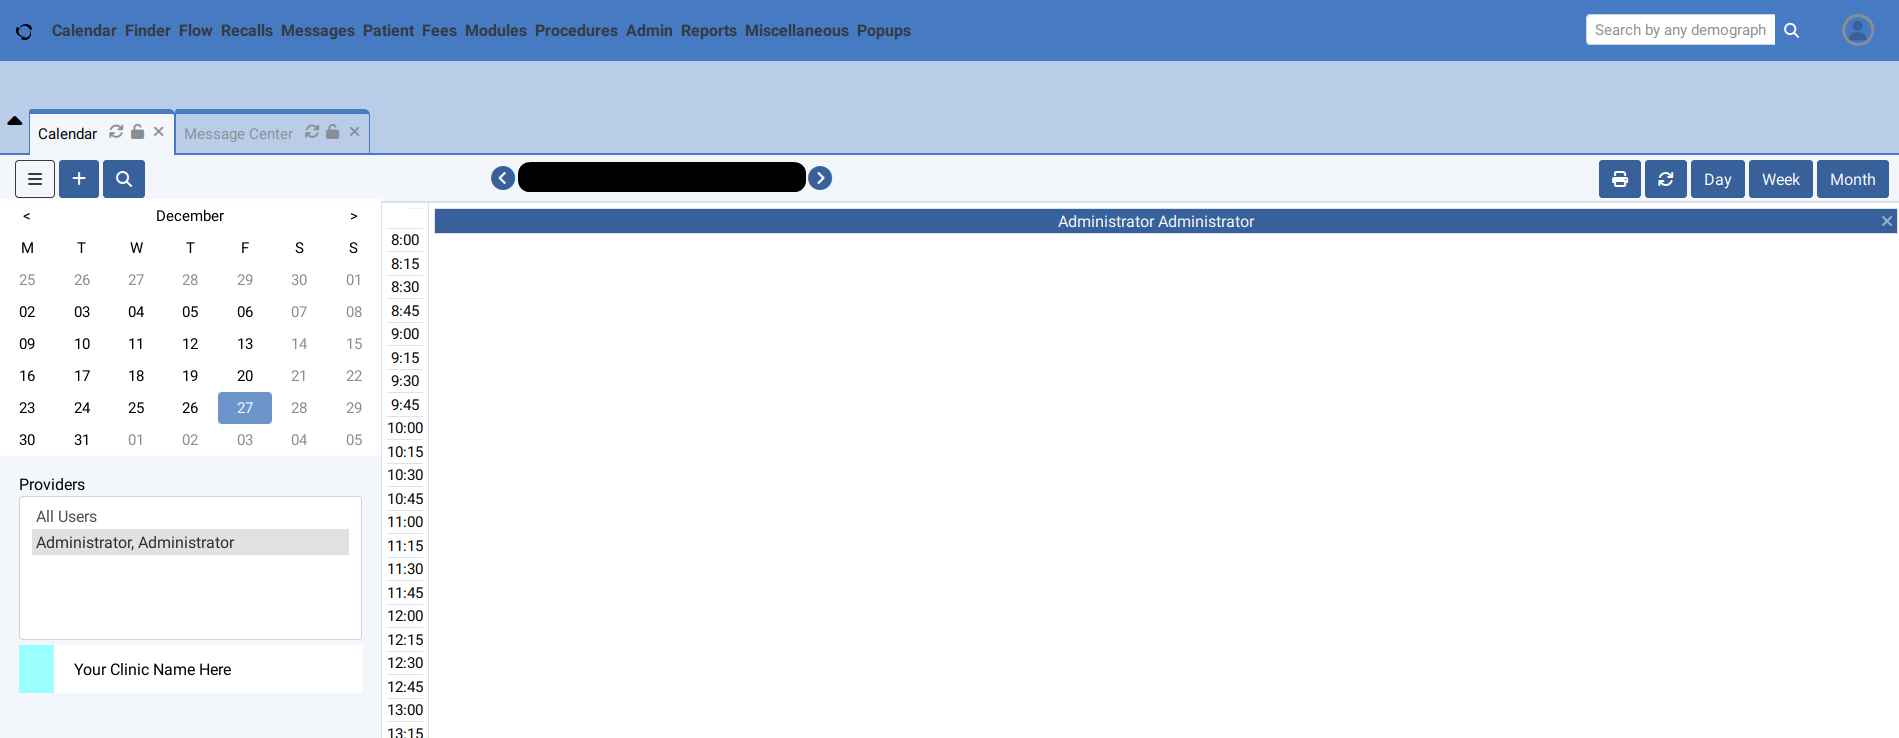
If successful, you’ll see the following OpenEMR dashboard.
Conclusion
Congratulations! You’ve completed the installation of OpenEMR on the Ubuntu 24.04 server. OpenEMR is up and running with the PHP-FPM, Nginx web server, and MariaDB server. You’ve also secured OpenEMR with HTTPS through Certbot and Let’s Encrypt.
