
How to Install LibreNMS on Debian 12 (Nginx + PHP-FPM + MariaDB)
Introduction
LibreNMS is a free and open-source network monitoring system that provides automatic discovery, performance graphing, alerting, and flexible API integration. It supports a wide range of network devices and protocols, making it an excellent choice for both enterprise and personal environments.
In this guide, you’ll learn how to install LibreNMS on Debian 12 using Nginx, PHP 8.2-FPM, MariaDB, and SNMP.
Follow each step carefully, and by the end, you’ll have a fully functional and secure network monitoring setup.
Step 1: Update Your System
Always start by updating your package lists and upgrading installed packages.

Explanation: apt update refreshes the package list,
and apt upgrade installs the latest available versions.
Step 2: Install All Required Packages
Install all dependencies, including Nginx, MariaDB, PHP 8.2 with required extensions, SNMP tools, and Python libraries.
apt install -y acl curl fping git graphviz imagemagick mariadb-server mariadb-client \
mtr-tiny nginx-full nmap php-cli php-curl php-fpm php-gd php-gmp php-json \
php-mbstring php-mysql php-snmp php-xml php-zip rrdtool snmp snmpd unzip \
python3-pymysql python3-dotenv python3-redis python3-setuptools \
python3-psutil python3-systemd python3-pip whois traceroute
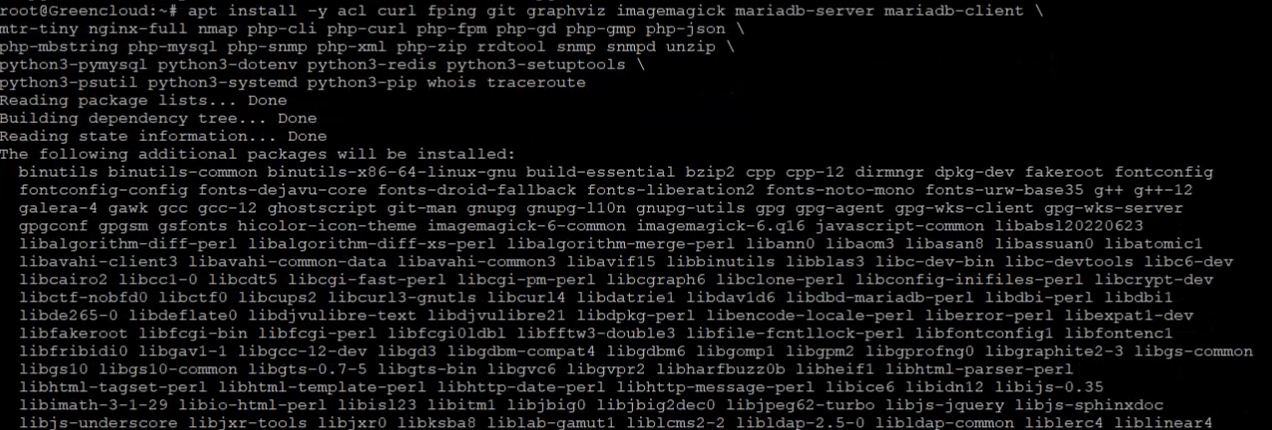
Explanation: This installs Nginx as the web server, MariaDB as the database, PHP-FPM to handle PHP requests, SNMP tools for device monitoring, and various Python modules required by LibreNMS.
Step 3: Create a LibreNMS User and Download the Source
Create a system user for LibreNMS and clone the source code from GitHub.
useradd librenms -d /opt/librenms -M -r -s "$(which bash)"
cd /opt
git clone https://github.com/librenms/librenms.git
chown -R librenms:librenms /opt/librenms
chmod 771 /opt/librenms

Explanation:
The user librenms will own the application. Permissions ensure security and proper file access.
Set ACLs for writable directories:
setfacl -d -m g::rwx /opt/librenms/{rrd,logs,bootstrap/cache,storage}
setfacl -R -m g::rwx /opt/librenms/{rrd,logs,bootstrap/cache,storage}
Explanation: This gives group write access to important directories for logs, caches, and RRD data.
Step 4: Install PHP Dependencies with Composer
LibreNMS requires several PHP libraries that are installed using Composer.
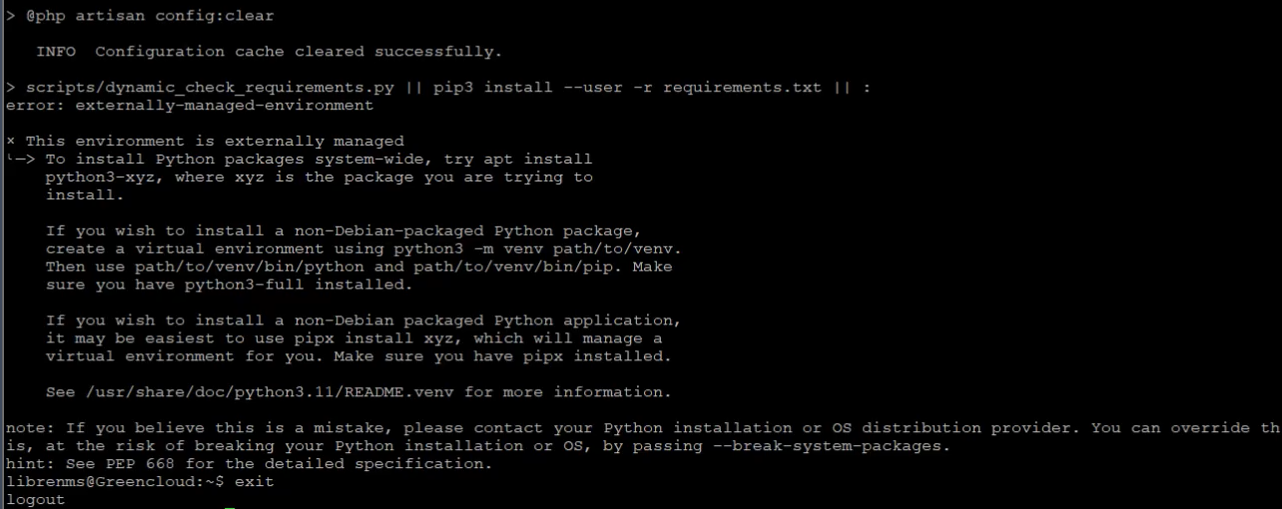
Explanation: This installs all PHP dependencies while skipping development packages (–no-dev).
Step 5: Configure PHP
Set your timezone in both PHP and the system, then restart PHP-FPM.

Explanation: Replace Europe/Bucharest with your region. This ensures logs and graphs show correct timestamps.
Step 6: Configure MariaDB
Edit the main MariaDB configuration file:
Add the following lines under [mysqld]:
innodb_file_per_table=1
lower_case_table_names=0
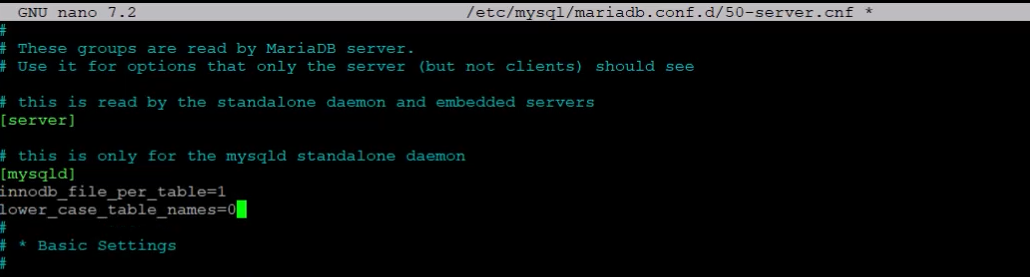
Enable and restart MariaDB:
Create the database and user for LibreNMS:
mysql -u root <<'SQL'
CREATE DATABASE librenms CHARACTER SET utf8mb4 COLLATE utf8mb4_unicode_ci;
CREATE USER 'librenms'@'localhost' IDENTIFIED BY 'StrongPassword123!';
GRANT ALL PRIVILEGES ON librenms.* TO 'librenms'@'localhost';
FLUSH PRIVILEGES;
SQL
Explanation: This creates a dedicated database and user for LibreNMS with full access permissions.
Step 7: Configure PHP-FPM Pool
Create a separate PHP-FPM pool configuration for LibreNMS.
cat >/etc/php/8.2/fpm/pool.d/librenms.conf <<'EOF'
[librenms]
user = librenms
group = librenms
listen = /run/php/php8.2-fpm-librenms.sock
listen.owner = www-data
listen.group = www-data
listen.mode = 0660
pm = dynamic
pm.max_children = 20
pm.start_servers = 3
pm.min_spare_servers = 2
pm.max_spare_servers = 5
php_admin_flag[log_errors] = on
php_admin_value[error_log] = /var/log/php8.2-fpm-librenms.log
env[HOSTNAME] = $HOSTNAME
env[PATH] = /usr/local/bin:/usr/bin:/bin
env[TMP] = /tmp
env[TMPDIR] = /tmp
env[TEMP] = /tmp
EOF
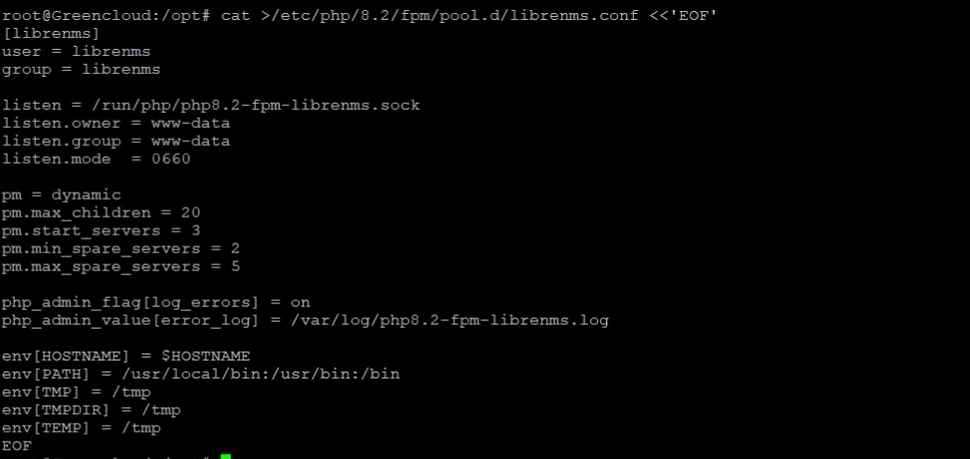
Test and restart PHP-FPM:
Explanation: The custom pool ensures isolation between LibreNMS and other PHP applications.
Step 8: Configure Nginx
Create the Nginx virtual host configuration for LibreNMS.
cat >/etc/nginx/conf.d/librenms.conf <<'EOF'
server {
listen 80;
server_name Your_IP_SERVER;
root /opt/librenms/html;
index index.php;charset utf-8;
gzip on;
gzip_types text/css application/javascript text/javascript application/x-javascript image/svg+xml text/plain text/xsd text/xsl text/xml image/x-icon;
location / {
try_files $uri $uri/ /index.php?$query_string;
 }
location ~ [^/]\.php(/|$) {
fastcgi_pass unix:/run/php/php8.2-fpm-librenms.sock;
include fastcgi.conf;
fastcgi_param SCRIPT_FILENAME $document_root$fastcgi_script_name;
}
location ~ /\.(?!well-known).* {
deny all;
}
}
EOF
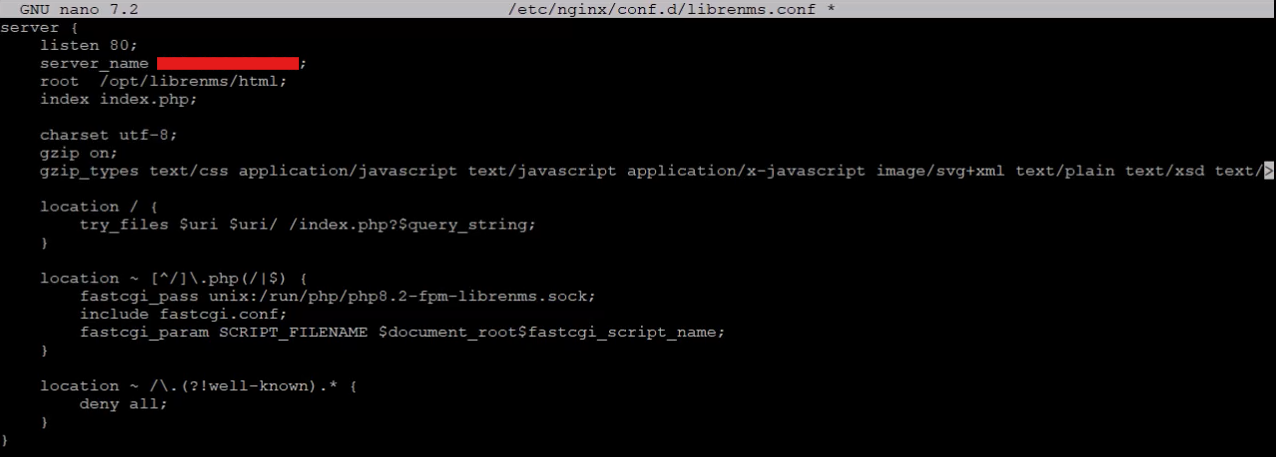
Explanation: This sets up Nginx to serve LibreNMS and process PHP requests via the FPM socket.
Step 9: Configure SNMP
SNMP is used by LibreNMS to collect data from network devices.
cp /opt/librenms/snmpd.conf.example /etc/snmp/snmpd.conf
sed -i 's/RANDOMSTRINGGOESHERE/public/' /etc/snmp/snmpd.conf
curl -o /usr/bin/distro https://raw.githubusercontent.com/librenms/librenms-agent/master/snmp/distro
chmod +x /usr/bin/distro
systemctl enable snmpd
systemctl restart snmpd
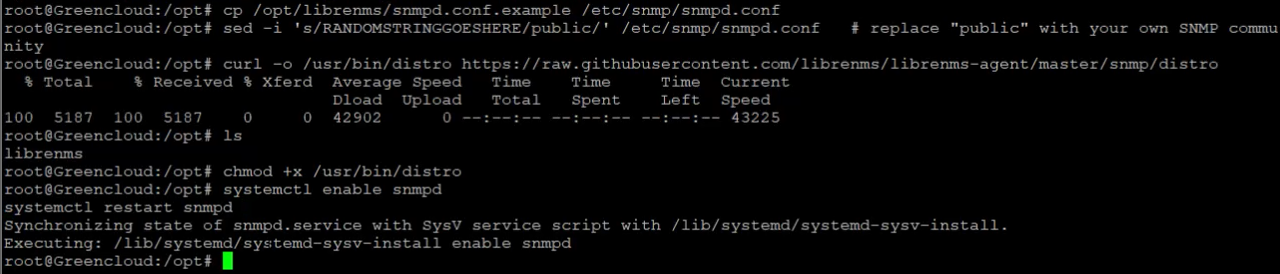
Explanation: Replace “public” with your own SNMP community string. The distro script helps identify the operating system when polling devices.
Step 10: Final LibreNMS Setup
Set up command shortcuts, cron jobs, and the scheduler.
Explanation:
lnms: Command-line utility for managing LibreNMS.
cron and scheduler: Automate polling and maintenance tasks.
logrotate: Automatically rotates and compresses old log files.
Step 11: Access the Web Installer
Now, open your browser and go to:
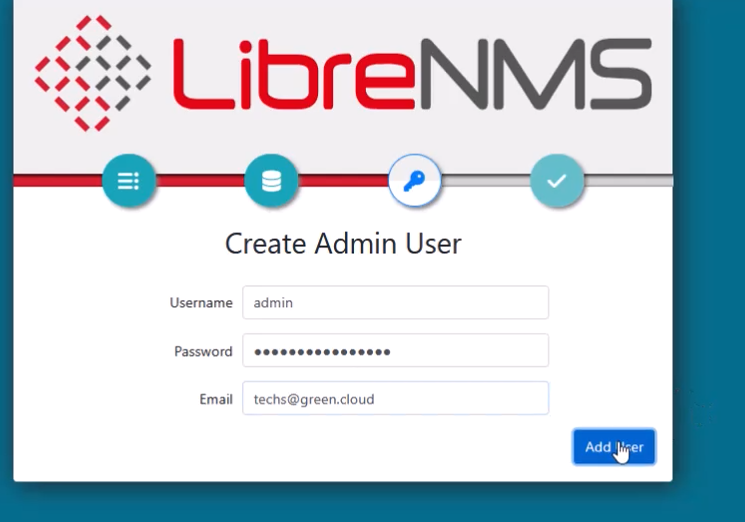
Then follow the on-screen wizard:
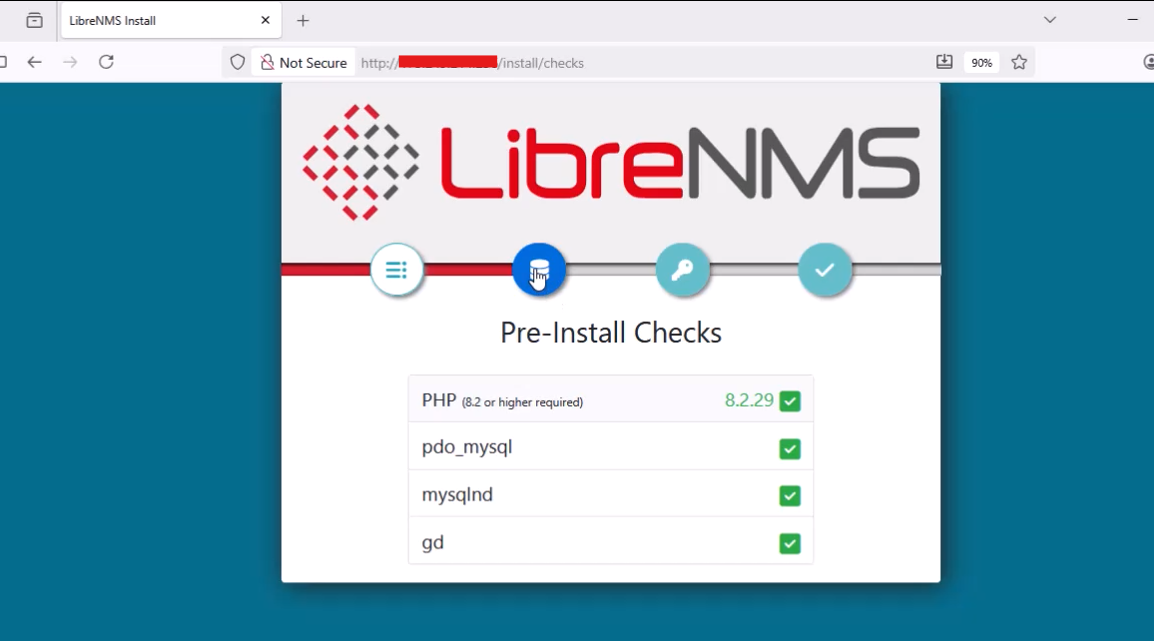
Pre-Install Checks – Confirm all PHP modules and permissions are OK.
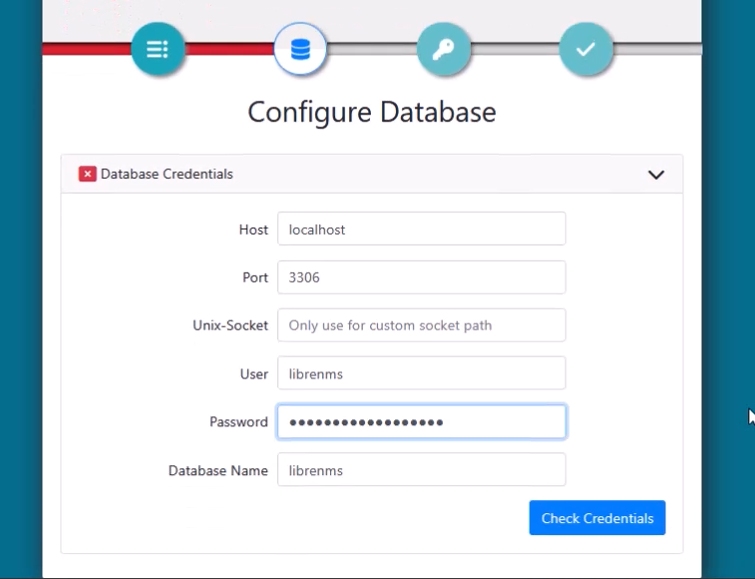
Database Configuration – Enter the credentials you created earlier (Step6).
Create Admin User – Set your admin username, password, and email.
 Finish Install – Choose the update channel and theme.
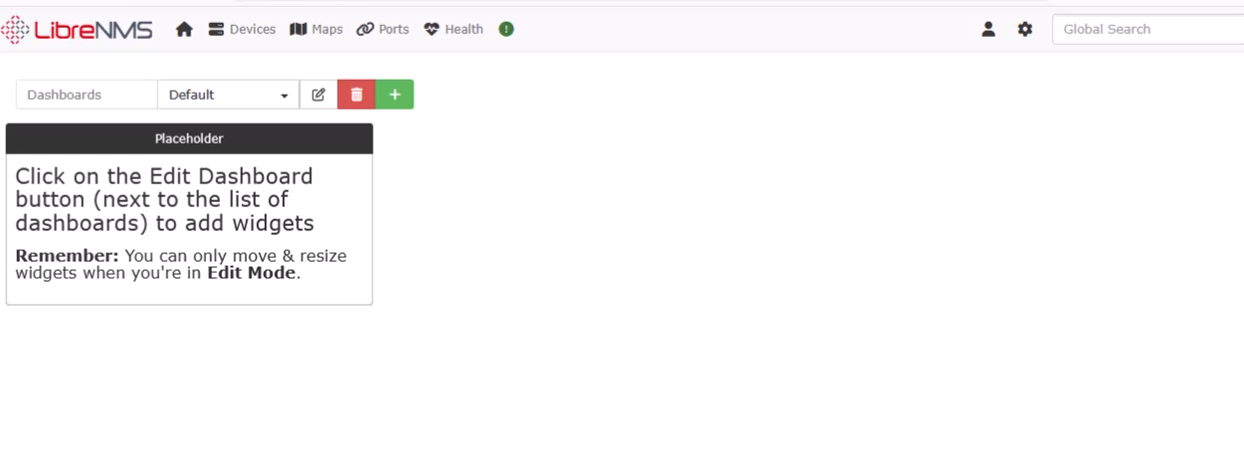
Once done, log in with your new admin credentials to access the LibreNMS dashboard.
Conclusion
You’ve successfully installed LibreNMS on Debian 12 with Nginx, PHP-FPM, MariaDB, and SNMP.
Your system can now automatically discover network devices, monitor performance, and send alerts when something goes wrong.
