
How to Install osTicket on Ubuntu 24.04 Server
osTicket is an open-source help desk and ticketing solution written in PHP. It supports multiple integrations such as email. phone numbers, and web forms. You can also set up custom fields, filters, topics, tasks, and auto-responders.
In this guide, you’ll learn how to install the osTicket open-source ticketing system on an Ubuntu 24.04 server. You’ll be installing osTicket with the LAMP Stack (Linux, Apache, MariaDB, and PHP) and securing osTicket with HTTPS through Certbot and Let’s Encrypt.
Prerequisites
To complete this guide, make sure you have the following:
- An Ubuntu 24.04 server
- A non-root user with administrator privileges
- A domain name pointed to the server IP address
Installing dependencies
osTicket is an open-source ticketing system written in PHP. To install osTicket on your Ubuntu system, you must install LAMP Stack (Linux, Apache, MariaDB, and PHP). At this time, you need PHP 8.2, so you will install it via a third-party repository.
apt install ca-certificates apt-transport-https software-properties-common lsb-release -y
add-apt-repository ppa:ondrej/php -y
Now run the command below to install the LAMP Stack dependencies on your Ubuntu system. Enter ‘Y‘ to confirm the installation.
apt install apache2 mariadb-server php8.2 libapache2-mod-php8.2 php8.2-mysql php8.2-cgi php8.2-fpm php8.2-cli php8.2-curl php8.2-gd php8.2-imap php8.2-mbstring php-pear php8.2-intl php8.2-apcu php8.2-common php8.2-bcmath php8.2-xml php8.2-zip
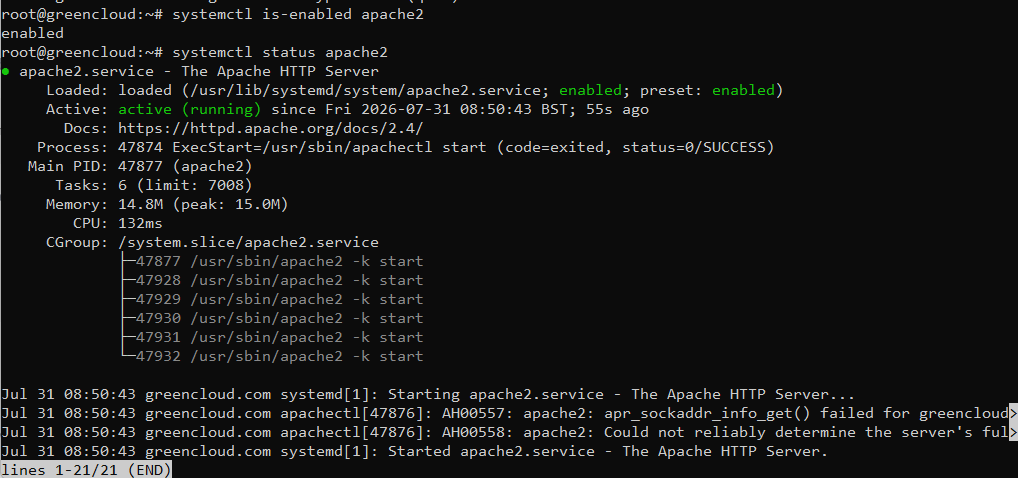
After the installation is finished, check the ‘apache2‘ service status using the following command.
systemctl is-enabled apache2
systemctl status apache2
You can see below that the Apache web server is enabled and running.
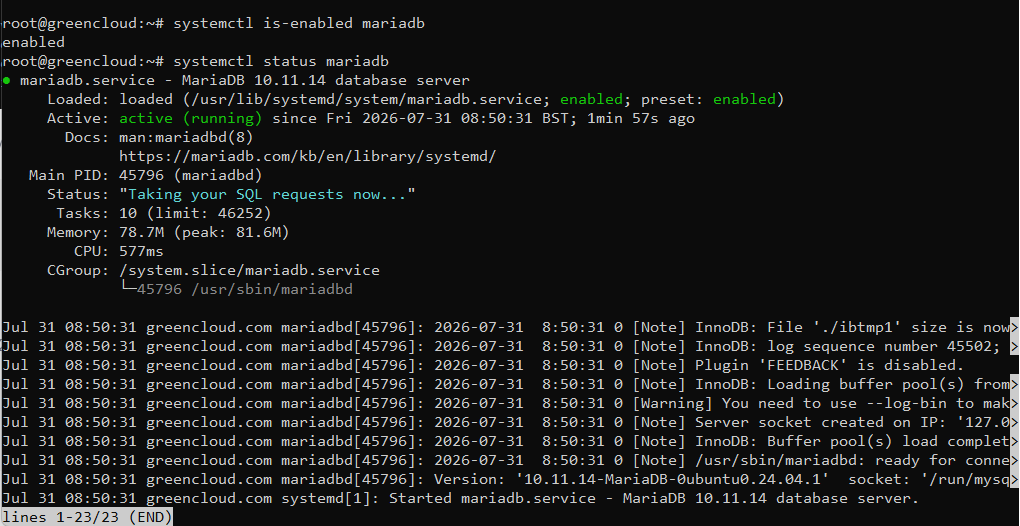
Next, check the MariaDB server status with the command below. You’ll see the MariaDB server also running and enabled on your Ubuntu system.
systemctl is-enabled mariadb
systemctl status mariadb
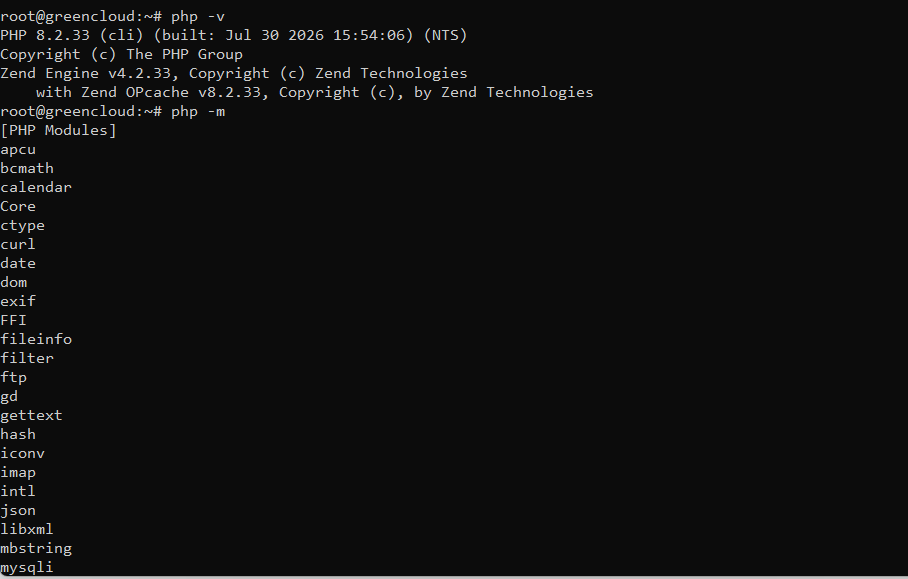
Lastly, run the command below to check the PHP version. You’ll see that PHP 8.2 is installed on your system via the PPA repository.
php -v
php -m
Configuring PHP
In this section, you’ll configure PHP by editing the default ‘php.ini’ file and restarting the Apache web server.
Open the file ‘/etc/php/8.2/apache2/php.ini‘ using the following ‘nano‘ editor.
nano /etc/php/8.2/apache2/php.ini
Change the default configuration with the following. Make sure to adjust the options ‘date.timezone‘ and ‘memory_limit‘ as needed.
date.timezone = Europe/Berlin
memory_limit = 512M
When finished, save the file and exit the editor.
Lastly, run the ‘systemctl‘ command below to restart the Apache web server and apply your new PHP configurations.
systemctl restart apache2
Configuring MariaDB server
After configuring PHP, you’ll be securing your MariaDB server installation and creating a new database and user for osTicket. You’ll be using the ‘mariadb-secure-installation’ utility to secure the MariaDB server, and then using the ‘mariadb’ client.
Execute the following ‘mariadb-secure-installation‘ to secure your MariaDB server installation.
mariadb-secure-installation
Now you’ll be asked about the following configurations:
- For the default MariaDB server installation without a root password, press ENTER when asked about the password.
- The local authentication for MariaDB root users is secured by default; input ‘n’ when asked to change the authentication method to ‘unix_socket‘.
- Input ‘Y’ to create a new MariaDB root password. Then, input the strong password for your MariaDB root user and repeat.
- When asked to disable remote authentication for the MariaDB root user, input ‘Y‘ to agree.
- The default MariaDB server installation comes with the database ‘test’ and allows an anonymous user to access it. Input ‘Y‘ for both settings to remove the default database ‘test’ and remove the anonymous privilege.
- Lastly, input ‘Y‘ to confirm reloading table privileges.
After the MariaDB server is configured and secured, you need to create a new database and user for osTicket installation.
Log in to the MariaDB server using the ‘mariadb’ client command below. Enter your MariaDB root password when prompted.
mariadb -u root -p
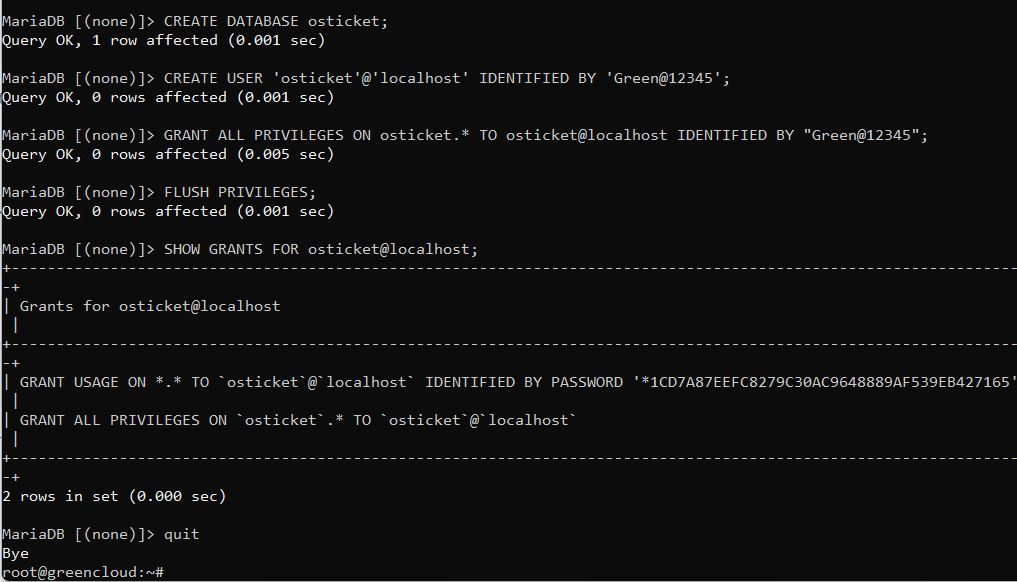
Once logged in, run the following queries to create a new database and user ‘osticket‘ with the password ‘osticketpassword’. Change the following details as needed.
CREATE DATABASE osticket;
CREATE USER 'osticket'@'localhost' IDENTIFIED BY 'Green@12345';
GRANT ALL PRIVILEGES ON osticket.* TO osticket@localhost IDENTIFIED BY "Green@12345";
FLUSH PRIVILEGES;
Now run the query below to ensure that user ‘osticket‘ can access the database ‘osticket’.
SHOW GRANTS FOR osticket@localhost;
In the following output, you can see that the ‘osticket’ database is accessible through the ‘osticket‘ user.
Lastly, type ‘quit‘ to exit from the MariaDB server.
Downloading osTicket
Now that you’ve configured the PHP and MariaDB server, you’ll be downloading the osTicket source code and setting up the installation directory.
Go to the ‘/var/www/‘ directory and download the osTicket source code using the ‘wget‘ command below.
cd /var/www
wget https://github.com/osTicket/osTicket/releases/download/v1.18.1/osTicket-v1.18.1.zip
Once downloaded, run the ‘unzip’ command below to extract the osTicket source code to the ‘osTicket‘ directory. So the osTicket installation directory will be available at ‘/var/www/osTicket‘.
apt install unzip
unzip osTicket-v1.18.1.zip -d osTicket
Now run the command below to change the ownership of the ‘/var/www/osTicket‘ directory to the user ‘www-data‘ and change the default permission to ‘0755‘.
chown -R www-data:www-data /var/www/osTicket
chmod 755 /var/www/osTicket
Lastly, run the following command to copy the osTicket configuration to ‘/var/www/osTicket/upload/include/ost-config.php‘.
mv /var/www/osTicket/upload/include/ost-sampleconfig.php /var/www/osTicket/upload/include/ost-config.php
Setting up Apache virtual host
In this section, you’ll be creating a new Apache virtual host file for osTicket. So make sure that you’ve your domain name pointed to a server IP address.
Create a new Apache virtual host file ‘/etc/apache2/sites-available/osticket.conf’ with the following ‘nano‘ editor.
nano /etc/apache2/sites-available/osticket.conf
Insert the following configuration and make sure to change the ‘ServerName‘ option with your domain name.
<VirtualHost *:80>
ServerName ticketgreencloud.example.net
ServerAdmin [email protected]
DocumentRoot /var/www/osTicket/upload

<Directory /var/www/osTicket/upload>
Require all granted
Options FollowSymlinks
AllowOverride All
</Directory>

ErrorLog ${APACHE_LOG_DIR}/osticket.error.log
CustomLog ${APACHE_LOG_DIR}/osticket.access.log combined
</VirtualHost>
When done, save the file and exit the editor.
Now run the command below to activate the ‘osticket.conf‘ file and verify your Apache syntax. If you’ve proper Apache syntax, you’ll see the output ‘Syntax is OK‘.
a2ensite osticket.conf
apachectl configtest

Lastly, run the ‘systemctl‘ command below to restart the Apache web server and apply your changes.
systemctl restart apache2
Securing osTicket with HTTPS
In this section, you’ll be securing the osTicket installation with HTTPS. For this, you’ll be installing and using Certbot for generating SSL/TLS certificates from Let’s Encrypt.
Install the ‘certbot’ and ‘python3-certbot-apache’ plugins with the following ‘apt’ command.
apt install certbot python3-certbot-apache -y
After the installation is complete, run the ‘certbot’ command below to generate SSL/TLS certificates and secure osTicket with HTTPS. Make sure to change the following email address and domain name with your information.
certbot --apache --agree-tos --redirect --hsts --staple-ocsp --email [email protected] -d ticketgreencloud.example.net
When finished, your SSL/TLS certificates will be available in the ‘/etc/letsencrypt/live/domain.com’ directory, and your osTicket installation should be secured with HTTPS.
Installing osTicket
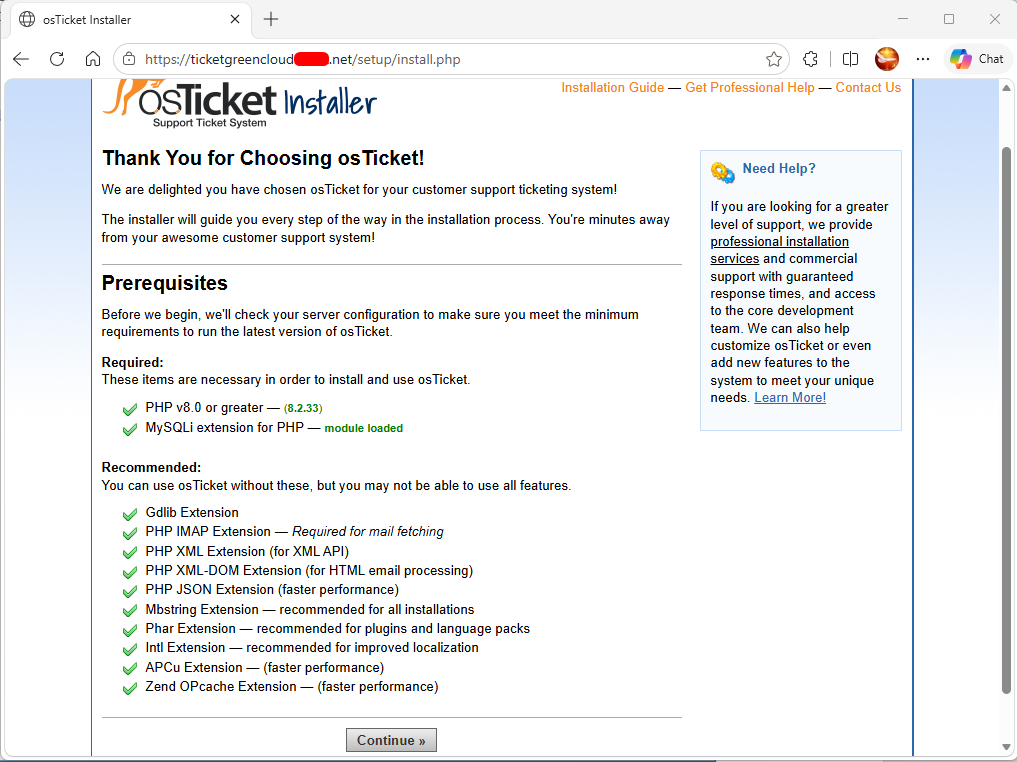
Open your web browser and visit your domain name, such as https://tiketgreencloud.example.net. If everything goes well, you’ll see the osTicket installation wizard.
Make sure every dependency for osTicket is installed and click Continue.
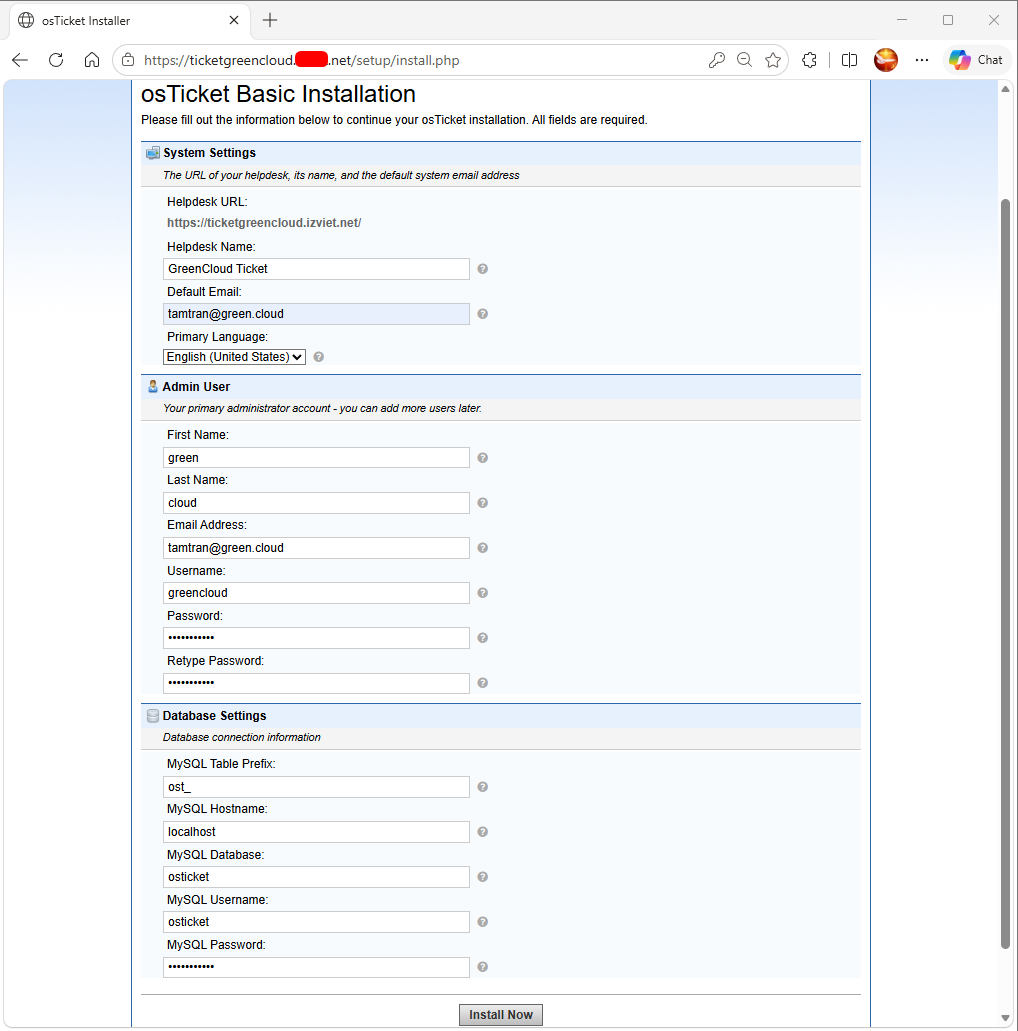
Change the basic system settings such as your domain name, then input the new admin user for osTicket, and input the database details that you’ve created.
If the installation is complete, you’ll see the following page:
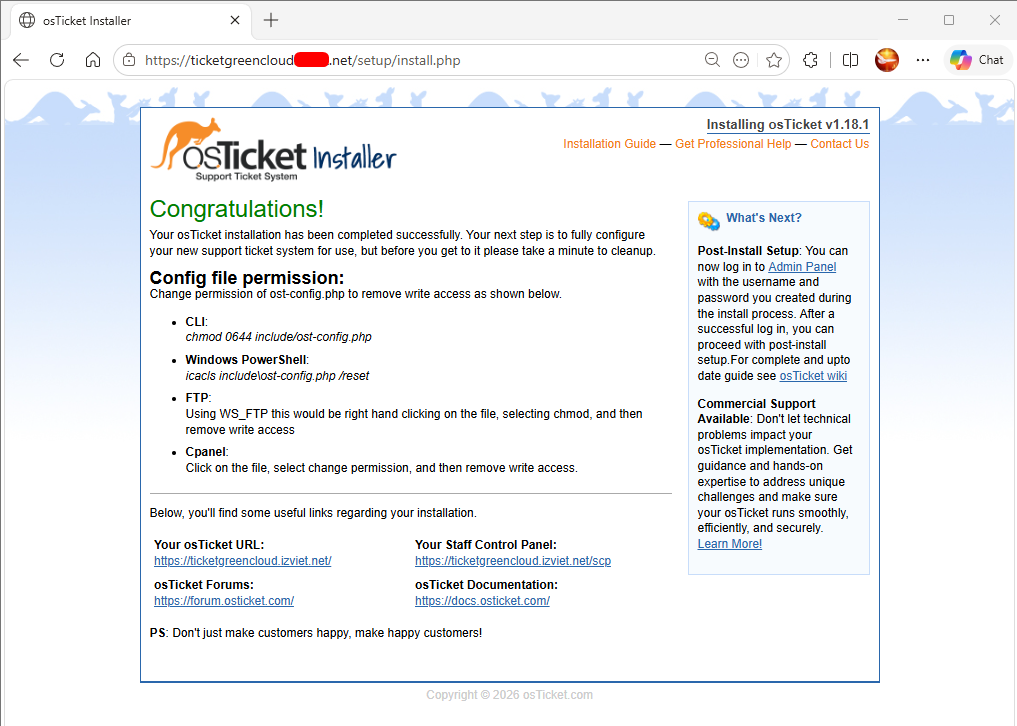
Next, go back to your server terminal and run the command below to delete the ‘setup’ directory from your osTicket installation.
rm -rf /var/www/osTicket/upload/setup
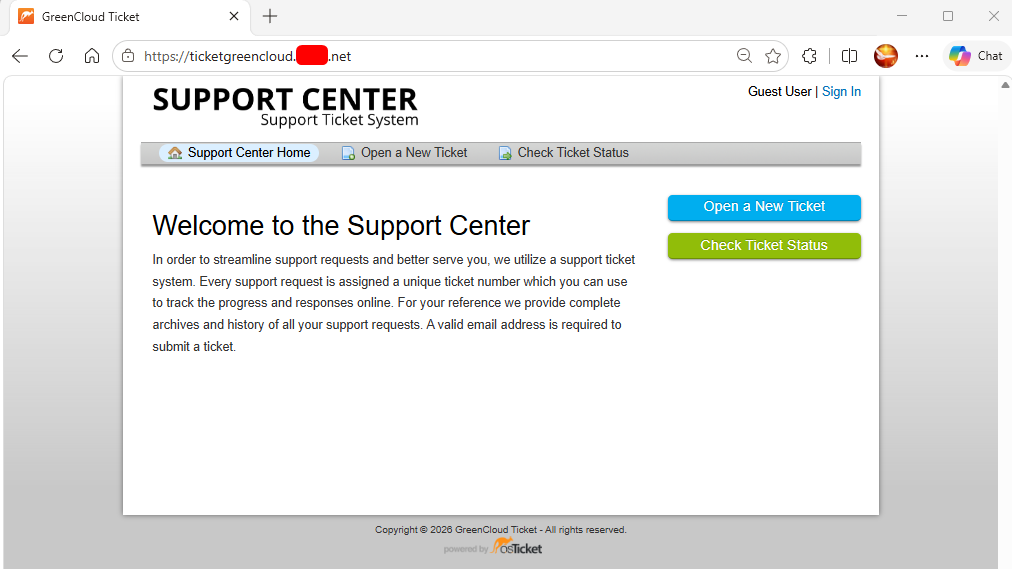
Now, if you access the osTicket homepage, you’ll get the default page like this:
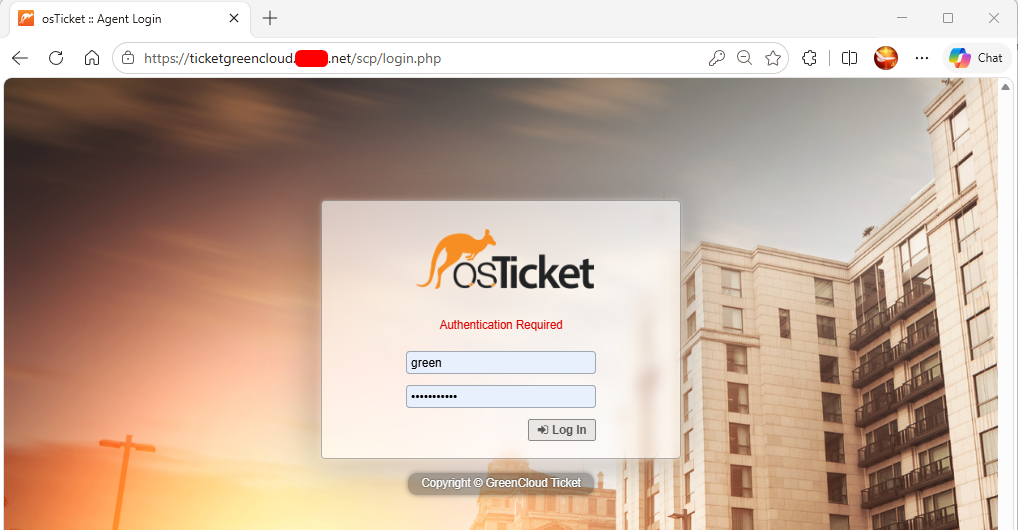
Log in to osTicket with your admin user and password.
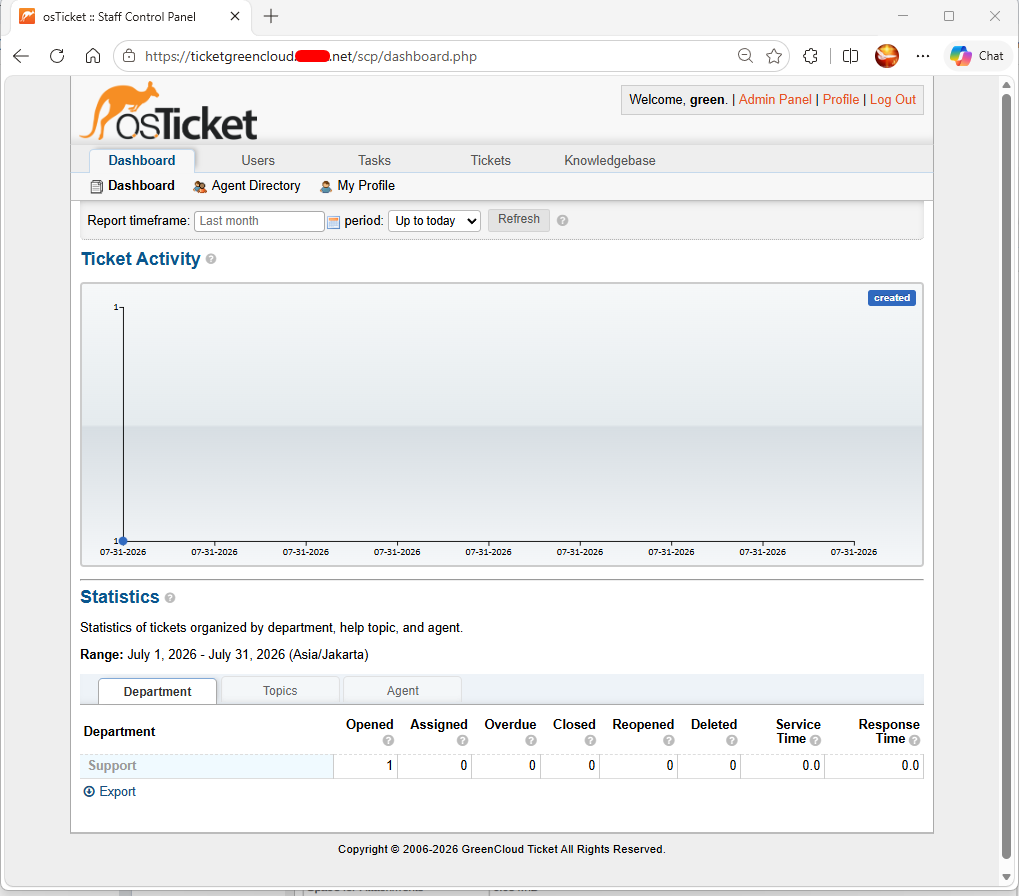
If you have the correct admin credentials, you’ll see the following osTicket Administration Dashboard.
Conclusion
Congratulations! You’ve completed the installation of osTicket on the Ubuntu 24.04 server. You’ve got osTicket up and running with the LAMP Stack (Linux, Apache, MariaDB, and PHP), and you’ve also secured osTicket with HTTPS through Certbot and Let’s Encrypt.
