How to secure your KVM VPS
This guide provides some general tips for securing a Linux-based server.
1. Update your system regularly
The first thing you should do to secure your server is to update the local repositories, upgrade the operating system, and installed applications by applying the latest patches.
This update will take place in two steps:
- Updating the package list
apt-get update
- Updating the actual package
apt-get upgrade
2. Changing the default SSH port
By default, port 22 is used to establish an SSH connection. This port is automatically configured during the installation of your operating system, therefore server hacking attempts by robots will target this port. Modifying this setting by using a different port is a simple measure to protect your server against automated attacks
To do this, modify the service configuration file:
vi /etc/ssh/sshd_config
Find the following or similar lines:
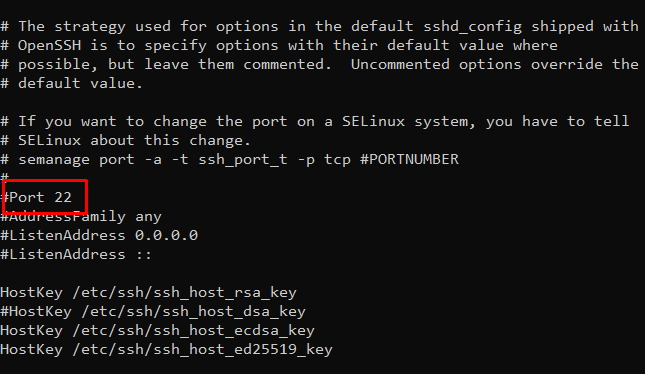
Replace port 22 with a new port. Please do not enter a port number already used on your system!
Open the firewall port
Since each server, you will use a different firewall application. So please choose the corresponding applications below to open the port.
- For servers using Firewalld
If you use Firewalld open the port and reload with the following command.
firewall-cmd --permanent --zone=public --add-port=NewPort
firewall-cmd --reload/tcp
- For servers using ufw (UIbuntu/Debian)
If you use ufw enter the following command to change the port
ufw allow NewPort/tcp
- For servers using iptables
With iptables, enter the following commands sequentially to open the port, start and check the opened port.
iptables -I INPUT -p tcp -m tcp --dport 'NewPort' -j ACCEPT
service iptables restart
iptables -L -n
Then restart your service.
systemctl restart sshd
To establish an SSH connection after this change, enter the following command:
ssh root@IP_address_of_the_server -p NewPort
3. Limit SSH access to specific clients by IP address
Linux provides two files hosts.allow and hosts.deny to allow and deny access to SSH port. You simply need to add your trusted IP addresses to hosts.allow file, and add suspicious IP addresses in hosts.deny file.
-
Allow SSH Access
Open terminal and run the following command to open hosts.allow file.
# nano /etc/hosts.allow
Add the following line to allow access from ip 192.168.0.96
sshd: 192.168.0.96
If you want to allow access from multiple IP addresses, add them in a comma-separated manner
sshd: 192.168.0.2, 192.168.0.3, 192.168.0.4
If you want to allow access from range of IP addresses use the CIDR notation to allow an IP address range. Here is an example to allow ip address 192.168.0.0-192.168.0.255 and 192.168.100.0-192.168.100.255
sshd: 192.168.0.0/24, 192.168.100.0/24
-
Restrict SSH Access
Similarly, open terminal and run the following command to open hosts.deny file.
# nano /etc/hosts.deny
Add the following line to deny access from ip 192.168.0.96
sshd: 192.168.0.96
If you want to restrict access from multiple IP addresses, add them in a comma-separated manner
sshd: 192.168.0.2, 192.168.0.3, 192.168.0.4
If you want to restrict access from range of IP addresses use the CIDR notation to allow an IP address range. Here is an example to restrict ip address 192.168.0.0-192.168.0.255 and 192.168.100.0-192.168.100.255
sshd: 192.168.0.0/24, 192.168.100.0/24
If you want to block all addresses other than the ones mentioned hosts.allow file, then add the following line in host.deny file.
sshd: ALL
This will protect your website brute force attacks and other malicious methods used by hackers.
4. Use SSH Key authentication, turn off password authentication
This configuration is highly recommended for use in securely connecting SSH to the Linux VPS/Cloud Server system. By default for each VPS/Cloud Server you will log in with the root username or regular user and the root password that the provider sent you when renting the VPS, however using a password always has 2 big risks:
- You will completely lose your VPS/Cloud Server system if your password is revealed.
- Bad guys can use Brute Force attacks to detect passwords.
Therefore, we encourage you to become familiar with SSH Key to log in to VPS/Cloud Server, as well as use it to authenticate connections from outside for more safety. So turn off the password authentication configuration and make sure to enable SSH Key authentication.
5. Maximum number of incorrect login attempts
As we often know, password sniffing, also known as Brute Force attack on an SSH service, is quite dangerous if your password is too simple. So we should limit the number of times a user can enter an incorrect password when trying to SSH login to a Linux system. Configure the section below with your desired value. If the specified number of times is exceeded, the SSH Server will disconnect the user.
Open /etc/ssh/sshd_config file and change this line:
MaxAuthTries 3
Here we assume a maximum of 3 time incorrect entries are allowed
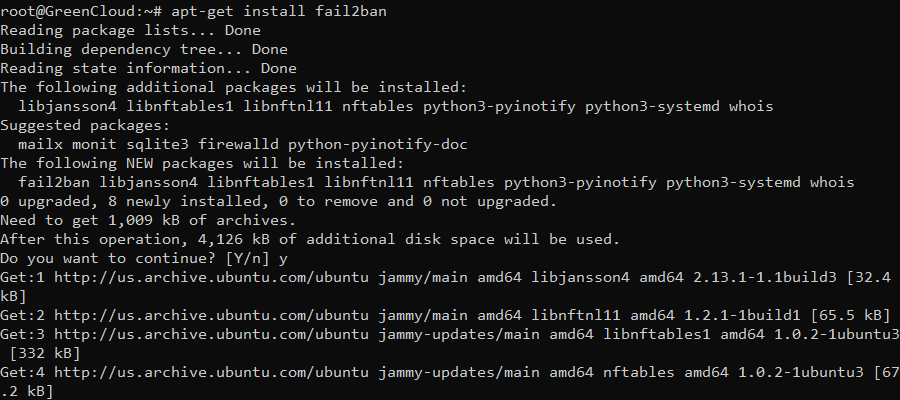
6. Install Fail2ban
Fail2ban is an application that examines server logs looking for repeated or automated attacks.
You can install Fail2ban by typing:
apt-get install fail2ban
Then copy the included configuration file:
cp /etc/fail2ban/jail.conf /etc/fail2ban/jail.conf.backup
And restart Fail2ban:
systemctl restart fail2ban
7. Utilize backups and test them regularly
Offsite backups are essential for Linux servers. In the event of an intrusion, these can ensure that critical data remains accessible. They are particularly valuable in the event of ransomware attacks.
The application rsync is a popular option for backing up data on Linux. It comes with a host of features that allows you to make daily backups or exclude certain files from being copied. It is extremely versatile, so it serves as a great option for Linux server security strategies. Feel free to use it on a local basis for backing up files.
To install rsync, use the command:
apt-get install rsync
Don’t forget to check up on the amount of storage space currently used as well as how much is still available.

