How to Install Tomcat on Ubuntu 20.04
What is Tomcat ?
Apache Tomcat is an HTTP web server developed by the Apache Software Foundation that strongly supports Java applications instead of static websites. Therefore, it can run many Java-specific versions such as Java Servlet, JavaServer Pages (JSP), Java EL, and WebSocket.
Install Tomcat trên Ubuntu
1.Install Java
-Use after command to install Java:
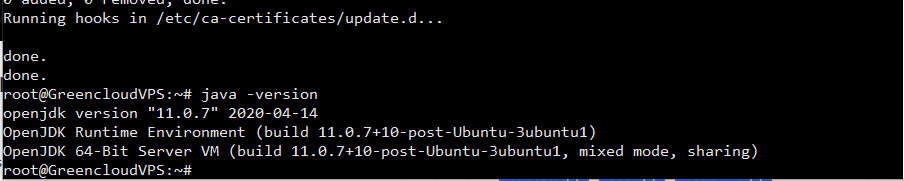
sudo apt install openjdk-11-jdk
-Check Java version:
java -version
2. Create user account for Tomcat :
-Create a user for Tomcat with the following command:
sudo useradd -m -d /opt/tomcat -U -s /bin/false tomcat
3. Download Tomcat:
-Check out Tomcat in the repository:
sudo apt-cache search tomcat
-Download the tomcat9 package and the tomcat9 admin package and its dependencies with the command:
sudo apt install tomcat9 tomcat9-admin
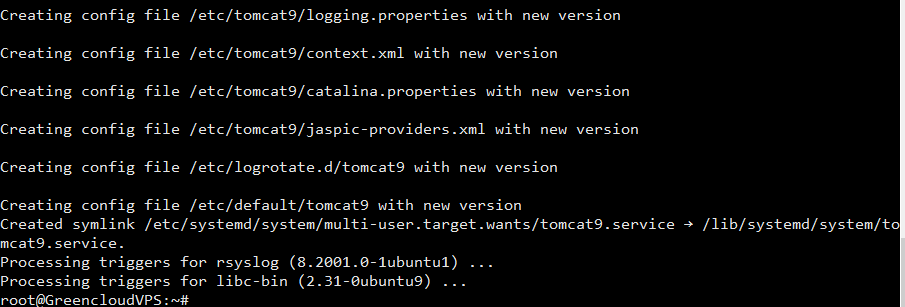
4. Install Apache Tomcat server:
When the download is complete, it will install the Apache Tomcat Server, which will start automatically. To verify, type the following command, which will show you open port number 8080, the default open port is reserved for Apache Tomcat Server:
ss -ltn

5.Change Tomcat address:
When Ubuntu OS restarts, Apache Tomcat Server will start automatically. This program setting can be changed with the following command:
sudo systemctl enable tomcat9
6. Allow access to port 8080:
To allow access from any source to the port 8080 of the Tomcat Server use the following command:
sudo apt install ufwsudo ufw allow from any to any port 8080 proto tcp

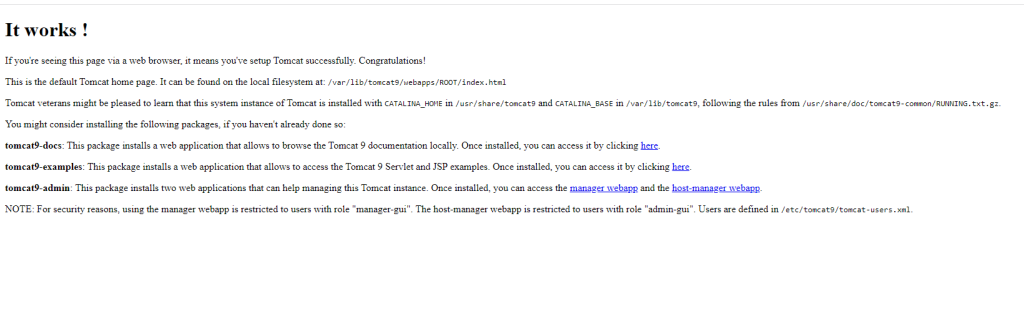
7. Check Tomcat server:
You go to the browser to enter the IP address to check: http://ip_server:8080
Good Luck!

