How to Install Remote Server Administration Tools on Windows Server 2019, 2022
Remote Server Administration Tools is a collection of server management programs. It includes Server Manager, the Microsoft Management Console (MMC) snap-in, the console, Windows PowerShell cmdlets, and some command-line tools for remotely managing Windows Server roles and functions from a computer running Windows 10, Windows 8.1, Windows 8, Windows 7, or Windows Vista.
It’s worth noting that RSAT can’t be installed on machines running Windows Home or Standard editions, and can only be installed on the Professional or Enterprise editions.
How to install Remote Server Administration Tools on Windows Server 2019, 2022
There are two options on how to install Remote Server Administration Tools on Windows Server 2019. But before starting, there’s a thing you need to know, that is, Remote Server Administration Tools are included as optional features in Windows Server 2019 and may be deployed using the Add Roles and Features dialog in Server Manager. Therefore, a Remote Server Administration Tools Windows Server 2019 download is not necessary.
Method 1. Install the RSAT via Windows features
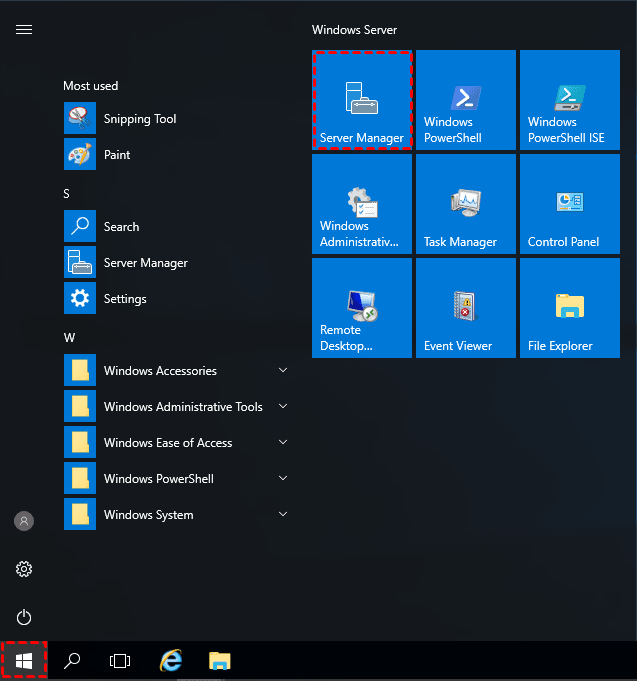
Step 1. Click Start, then find Server Manager.
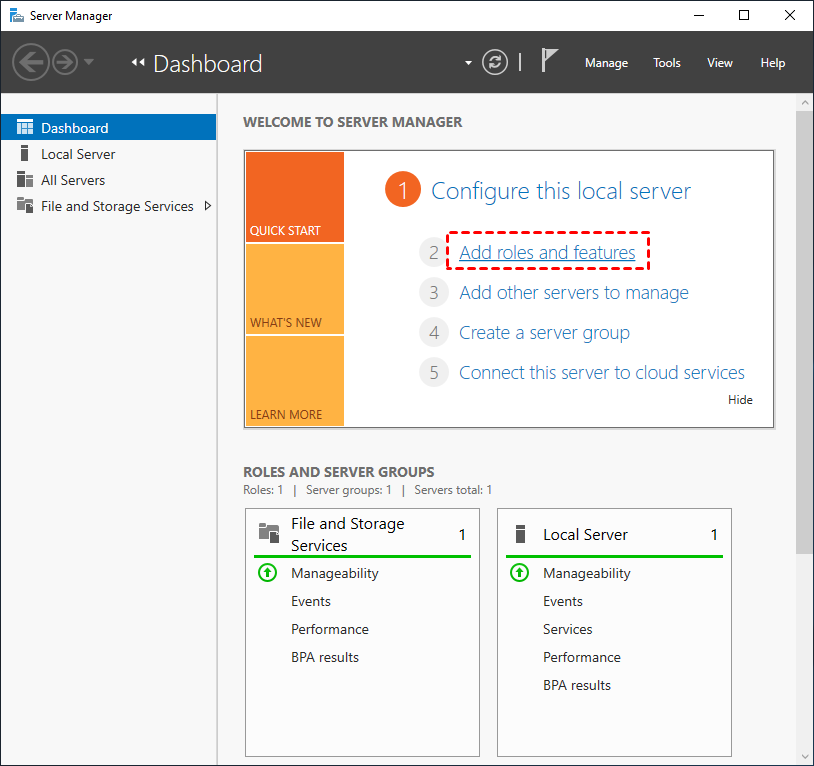
Step 2. Click Add roles and features.
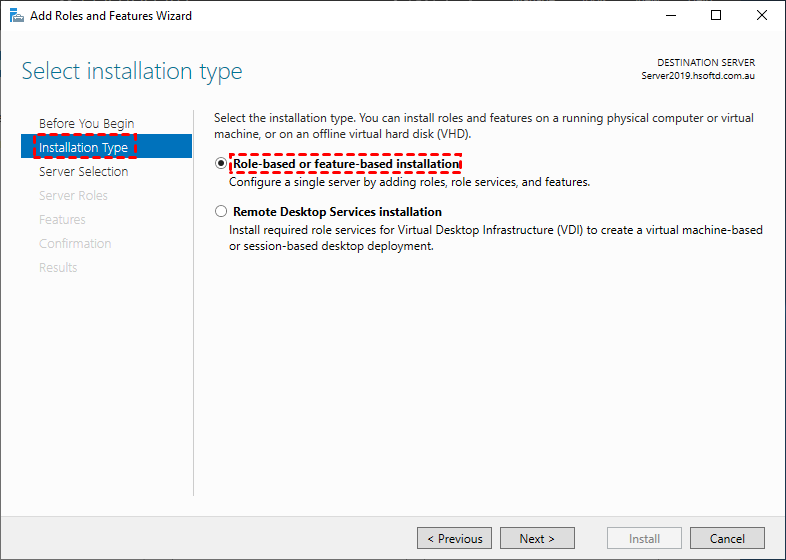
Step 3. In the Add Roles and Features Wizard, click Installation Type first. Then tick Role-based or feature-based installation.
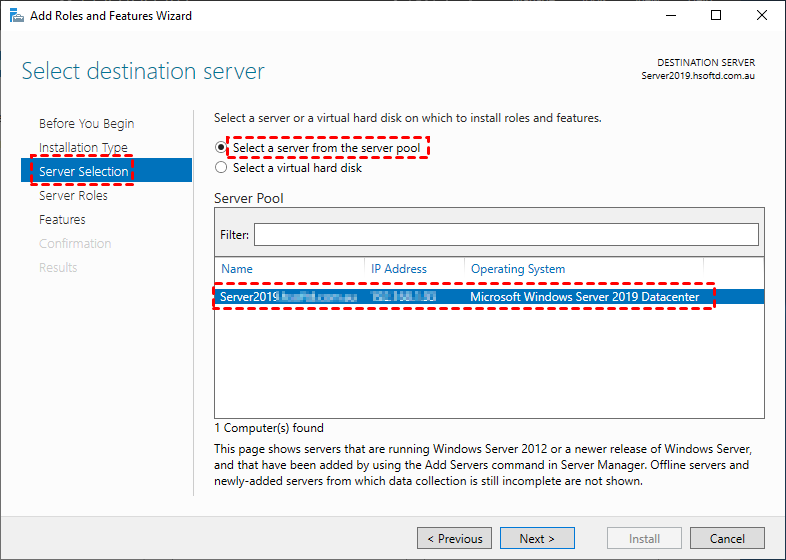
Step 4. Click Server Selection, tick Select a server from the server pool, then select the server you want to install the Remote Server Administration Tools (RSAT) on.
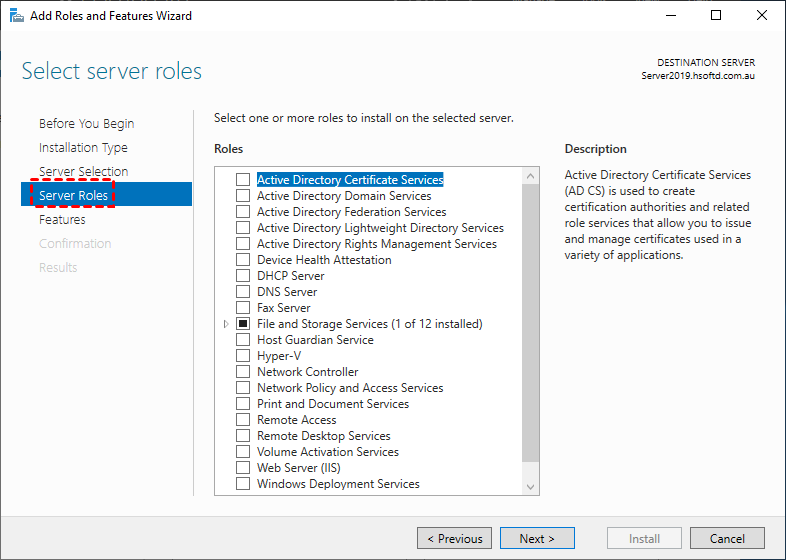
Step 5. Click Server Roles and then Next.
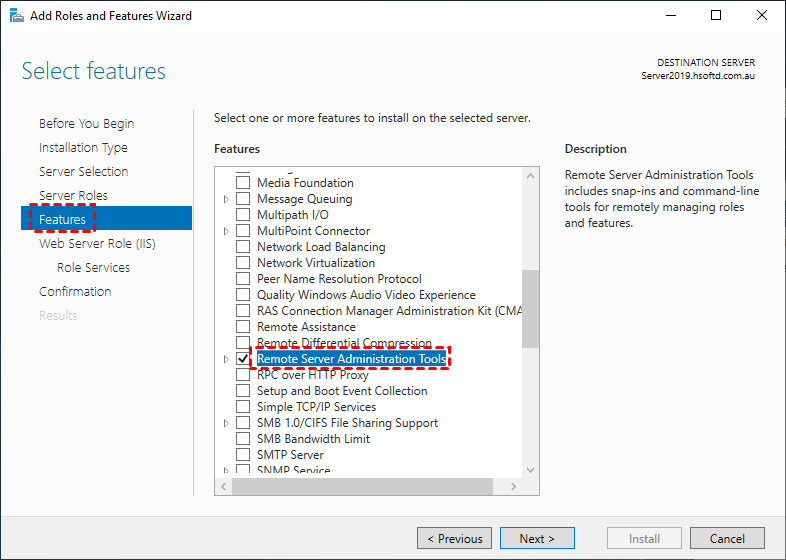
Step 6. Click Features, and then check the Remote Server Administration Tools check box.
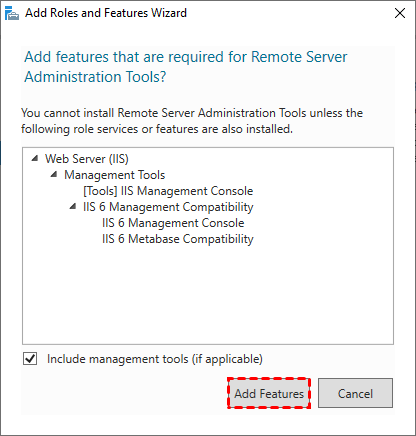
Step 7. Some required supporting features such as the Web Server (IIS) role may be required. If prompted click Add Features.
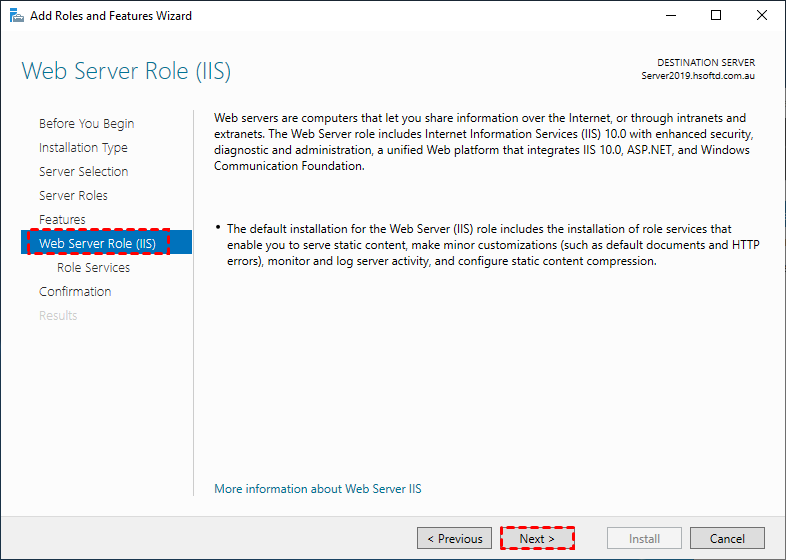
Step 8. On the Web Server Role (IIS) page, click Next.
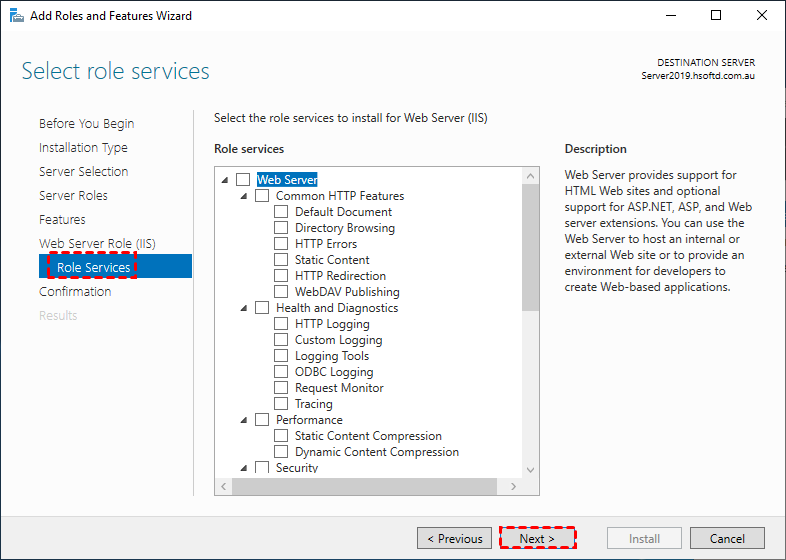
Step 9. Click Next on the Role Services page.
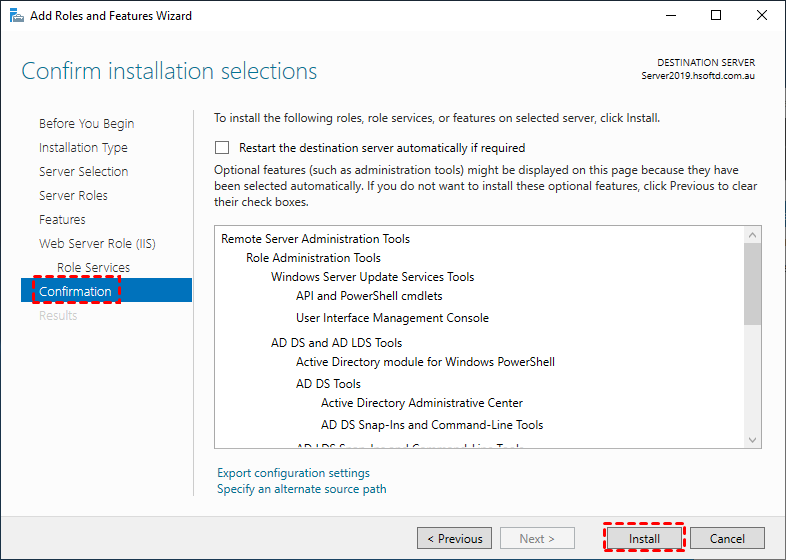
Step 10. Click Install on the Confirmation page.
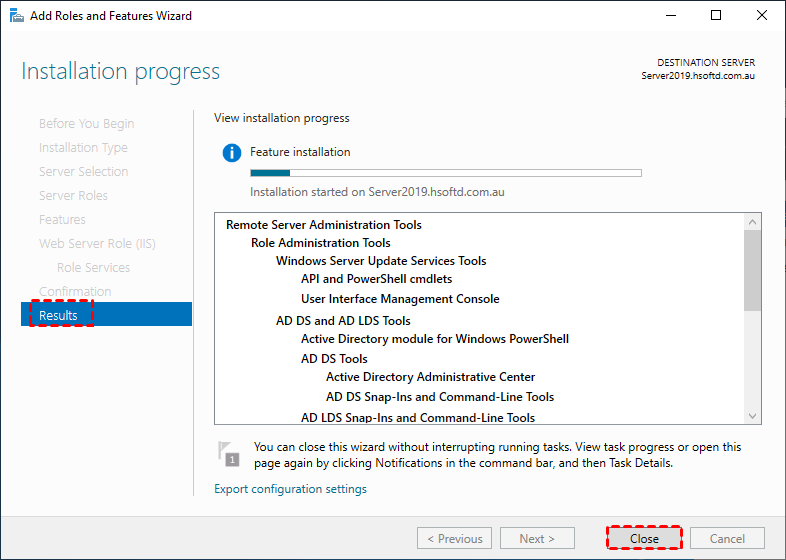
Step 11. Wait for the installation to complete.
Step 12. Then you can find the RSAT tools under the Tools menu.
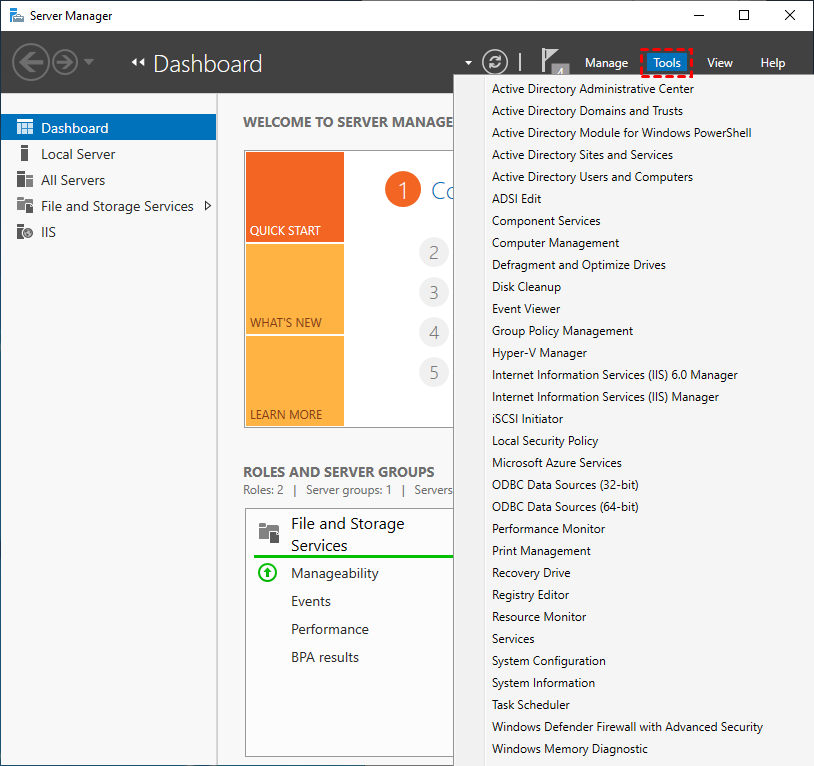
Once installation is done for the RSAT program, we can see the following Windows Administrative Tools installed :
Domain.msc : Active Directory Domains and Trusts
dsa.msc : Active Directory Users and Computers
dssite.msc : Active Directory Sites and Services
Method 2. Install the RSAT using PowerShell
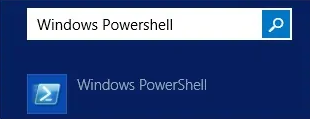
Step 1. Search for Windows PowerShell in the search box and then open it.
Step 2. Input the following cmdlet to install all tools:
get-WindowsFeature | Where-Object {$_.Name -like "RSAT-AD-Tools"} | Install-WindowsFeature

✍Note: If you just want to install specific tools, for example, Group Policy Management Console, you can input the following cmdlet:
Get-WindowsFeature | Where-Object {$_.Name -like "RSAT*"} | Install-WindowsFeature
Step 3. Once installation is done for the RSAT program, we can see the following Windows Administrative Tools installed :
Domain.msc : Active Directory Domains and Trusts
dsa.msc : Active Directory Users and Computers
dssite.msc : Active Directory Sites and Services
Conclusion
How to install Remote Server Administration Tools on Windows Server 2019? Here in this post, we provide you with two ways to install RSAT on Windows Server 2019, using Windows features and PowerShell respectively. Of course, we provide you with another option. You can use the remote access software AnyViewer to remotely manage the roles and functions of Servers.
