How to Install CyberPanel on Ubuntu 22.04
CyberPanel is a control panel designed with the main purpose of being user-friendly for non-technical users. CyberPanel is easy to learn because it uses a simple layout that most hosting companies are already familiar with. CyberPanel also has several features that most other control panels don’t have.
CyberPanel offers an advanced interface that can be used instead of using FTP or SSH to upload files via the command line from your computer. CyberPanel also provides a service script installer so you can easily install scripts such as WordPress and Joomla without having to research how each script needs to be installed individually through FTP/SSH.
CyberPanel has a fantastic feature called CSF Firewall which protects from brute force attacks, CyberPanel also allows you to manage the firewall through a dashboard along with many other management options CyberPanel offers a lot of different features that running your control panel does not come with. CyberPanel also provides an API that can be used by hosting companies or developers for custom development projects. CyberPanel works on all major platforms such as Windows, Linux, BSD, FreeBSD, and Mac OS X.
OpenLiteSpeed is a free, open-source web server designed with the main purpose of being both fast and easy to configure. CyberPanel is built on top of this web server but does require additional configuration to work properly. LiteSpeed Enterprise is CyberPanel’s paid option but includes a lot of additional features that the free version does not provide, such as the ability to manage multiple CyberPanels on different servers at once.
This tutorial will show you how to set up CyberPanel with OpenLiteSpeed on an Ubuntu 22.04 cloud server. and will also go over some basic CyberPanel configuration changes needed for CyberPanel to work properly. This tutorial should work on other Debian-based distributions, although some processes may be slightly different.
Prerequisites
- VPS server running on Ubuntu 22.04 (any LTS) with a minimum of 40GB of free disk space and a minimum of 2GB of RAM. If you have a high-traffic blog you’ll need more than 4GB of RAM so CyberPanel can run smoothly.
- Basic understanding of Linux terminal commands.
- You must have a non-root user created with sudo access on the server.
1. Update your system
# apt update
# apt upgrade
As we all know Cyberpanel is an openlitespeed or litespeed enterprise webserver, so we will uninstall Apache, MySQL, Postfix, Dovecot, and other optional packages.
# systemctl stop apache2
# systemctl stop mysql
# systemctl stop postfix
# systemctl stop dovecot
# apt remove -y apache2 mysql-server php5-mysql postfix dovecot-core
# apt autoremove -y
2. Install CyberPanel On Ubuntu 22.04
In this section, we will be installing CyberPanel and OpenLiteSpeed on Ubuntu 22.04.
Download the latest version of the CyberPanel installer script to your home directory.
# wget -O installer.sh https://cyberpanel.net/install.sh
Make the CyberPanel installer script executable.
# chmod +x installer.sh
Run the CyberPanel installation script.
# sh installer.sh
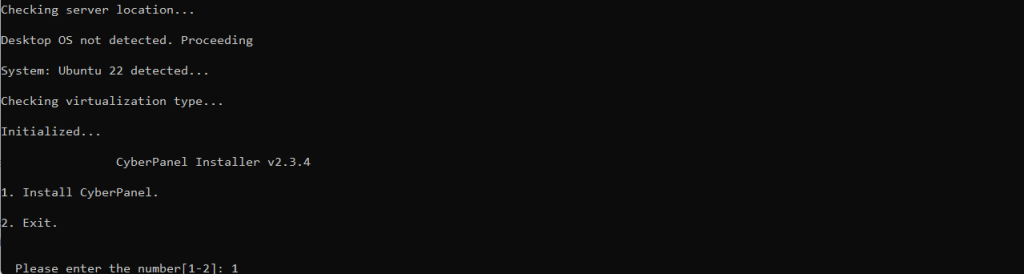
During the installation, CyberPanel will ask you a series of prompts as shown below.
Select 1 to start CyberPanel installation. The CyberPanel setup script will start installing CyberPanel in the /var/www directory.
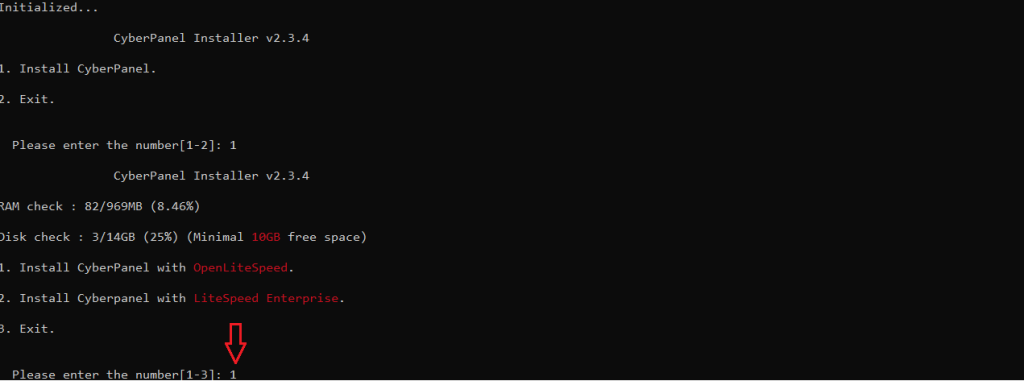
Select 1 if you wish to install CyberPanel with OpenLiteSpeed (free version). Choose 2 if you are a CyberPanel Enterprise user or CyberPanel Cloud customer. The free version is the option we are going for in this guide.
This script will then begin downloading and installing the packages that you have selected. You will be asked about Full installation or Lite installation, Full installation is to install CyberPanel with PowerDNS, Postfix, and Pure-FTPd. CyberPanel Lite installation installs CyberPanel only. We select 1 for full CyberPanel installation.

Next, you will be asked if the MySQL installation is on the same server or remote. If you want it to be on the same server, answer N. If there is such a remote instance, you have to choose Y and enter the credentials. In my case, I have answered N so the MySQL installation will be local.

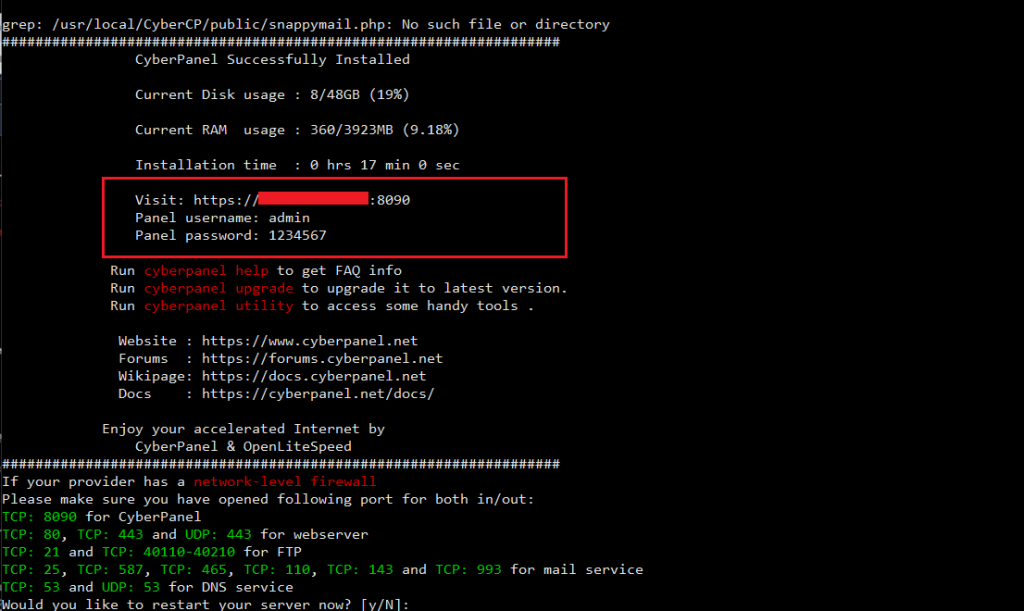
CyberPanel will request a password for the admin account. The default password is 1234567. Choose an easy-to-remember password, CyberPanel does not require an extremely secure password but it would be best to choose something harder to crack than “password” or “1234”.

We will now install the CyberPanel Memcached plugin, CyberPanel’s Memcached implementation is better than Litespeed’s implementation. This way CyberPanel can use native Memcached libraries for improved performance and security.
![]()
Redis serves as an in-memory data structure store and message broker. It’s free and open source. CyberPanel supports Redis as a cache backend for CyberPanel page caching and session management. Choose Y and CyberPanel will install and configure the CyberPanel Redis plugin.
![]()
Type Y to start WatchDog. This plugin helps CyberPanel detect corrupted database tables and alerts CyberPanel admins if there are any issues with the CyberPanel database

The script will take care of the rest for you after you answer every question in the installation wizard. CyberPanel installation will take some time like 15-30 minutes because it requires a lot of packages to be compiled and installed.
Please be patient. Do not close the Terminal window until the CyberPanel installation process is finished.
After you’ve completed the installation, your output should look similar to that shown below.
3. Configure Firewall Rules
On Ubuntu 22.04 we need to open ports 80 and 443 for HTTP and HTTPS. Open port 8090 for the CyberPanel Panel, and open 7080 port for the WebAdmin.
Install UFW if you haven’t installed it already.
# apt install ufw
If UFW is not enabled, enable it by typing
# ufw enable
Before we set up firewall rules, check whether UFW is enabled or disabled by typing:
# ufw status
After UFW is enabled, set up firewall rules by typing the following into your terminal window:
# ufw allow 80
# ufw allow 442
# ufw allow 8090
# ufw allow 7080
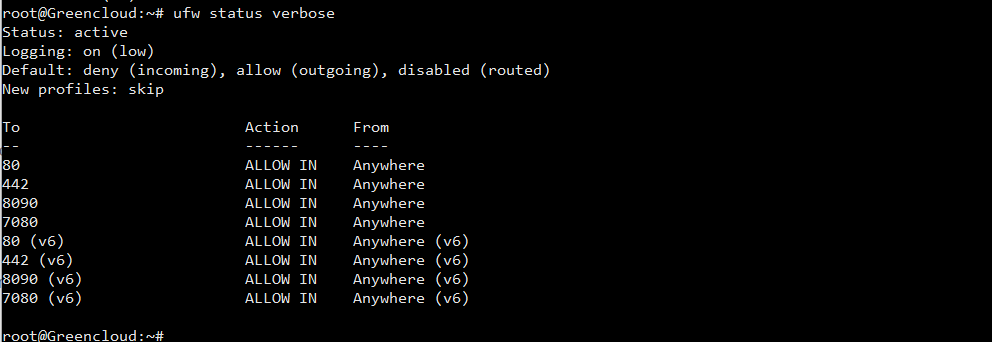
After setting up this rule, run the command below to make sure that you have made no syntax errors that would prevent you from being able to access the web server via HTTP/HTTPS.
# ufw status verbose
You can verify the status of your CyberPanel installation by running the following command.
# systemctl status lscpd.service
You should see an output similar to that shown below. Please note that there might be a few warnings at the end of your output, you can ignore those warnings.
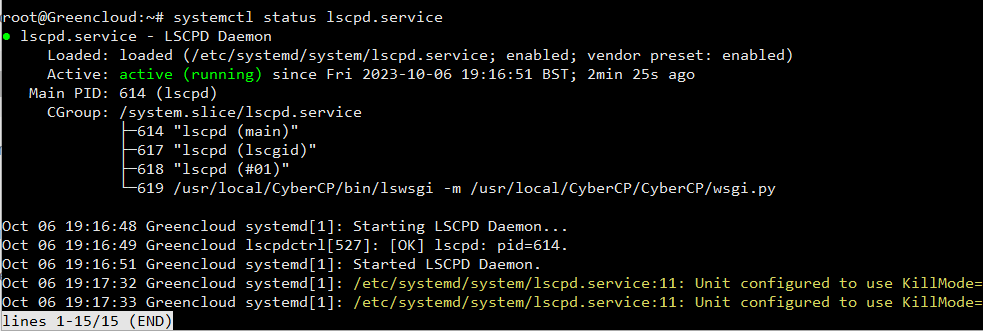
As you can see the active (running) in green, the CyberPanel daemon is running.
If you see the status of failed in red, it means there’s a problem with your installation. It would be best to check your error logs listed in the terminal window you used for installing CyberPanel and look for any errors or warnings.
4. Access the CyberPanel Web UI
Now that you have successfully installed CyberPanel, you can access CyberPanel via either of the following URLs depending on whether you are using HTTP/HTTPS
http://yourserverip:8090
Or
https://yourseverip:8090
Remember to replace “yourserverip” with your actual server IP address. Similarly, be sure to use the proper port number if it is different from 8090.
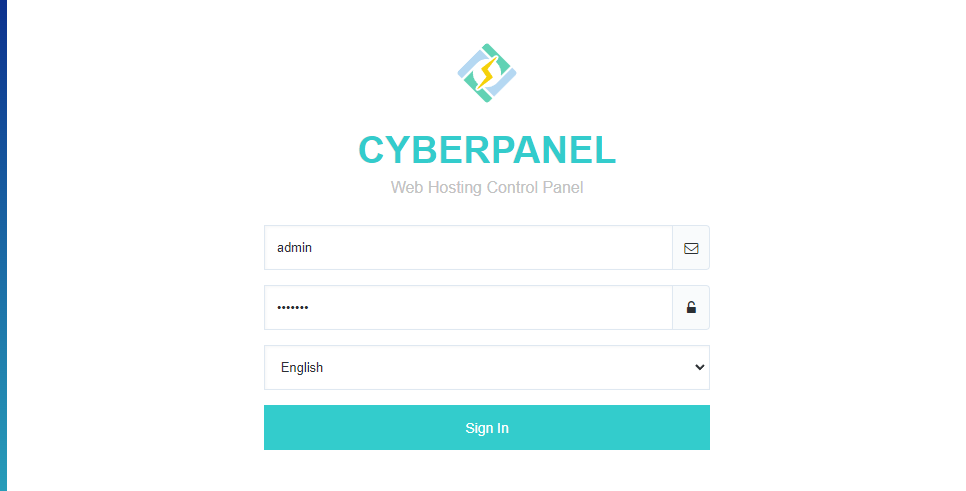
You will be greeted with the login screen.
Provide your admin username and password and click on the Sign In button. Please be patient as this might take a few seconds to log you into the CyberPanel UI. You should see the main dashboard which shows real-time server information.
On this dashboard, you can see load on the system, memory usage of processes and services, disk utilization, current users connected through WebAdmin/User Login or Admin Panel along with what they are doing at that moment, etc.
When you first log into the main dashboard, you should always install updates as soon as they are available. To do this click on the Version Management menu item which is located in the Navigation menu on your left.

That’s it! CyberPanel has been installed and configured, as well as the WatchDog/Firewall components of Ubuntu 22.04.
Conclusion
This guide should get you started with CyberPanel on a Ubuntu 22.04 VPS server. Within this guide, we showed you how to install and configure the Firewall Rule UFW to allow access for HTTP/HTTPS and WebAdmin.
We hope this guide was detailed enough to help you through the installation process. If you have any questions or issues during or after your installation, please let us know in the comments section below.

