How to Install and Use SoftEther VPN Client on Windows
As we discuss in our guide on how to configure SoftEther VPN Server, SoftEther is both a VPN client and an SSL VPN protocol.
To use the SoftEther protocol, you must connect to a SoftEther server using a SoftEther client, but you can also connect to a SoftEther server using the OpenVPN or L2TP/IPsec protocols. This article is a guide on how to install and configure the SoftEther VPN Client on Windows
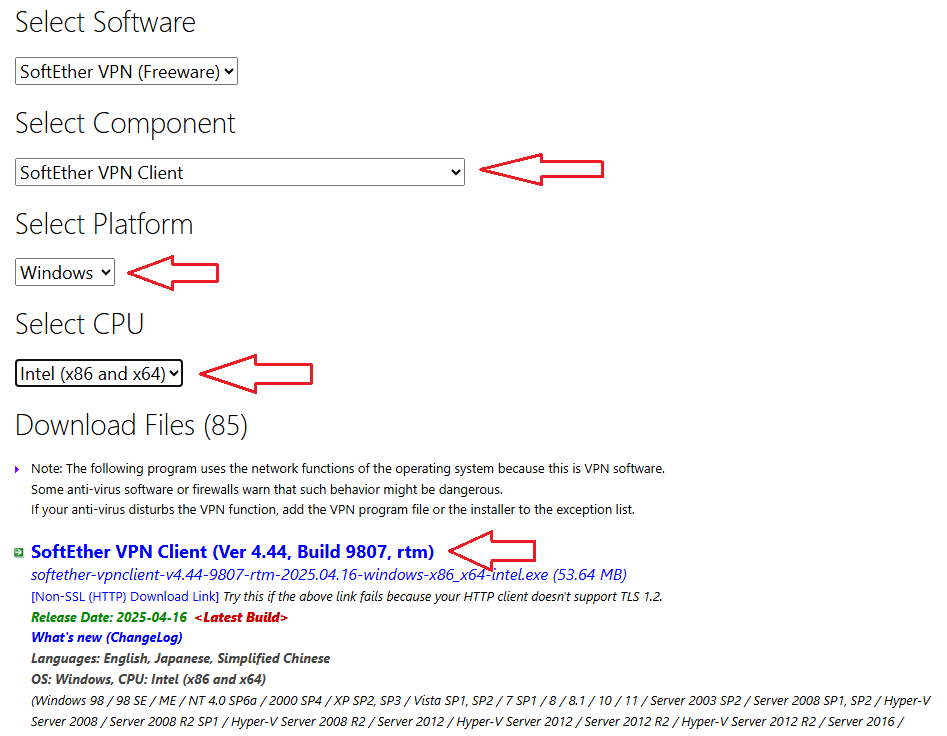
Step 1: Download SoftEther Software
Refer to the SoftEther Download Center to have the software installed on Windows. Choose the required options as you see below:
Step 2. Install SoftEther Software
Choose the SoftEther VPN Client option when prompted to install certain components.
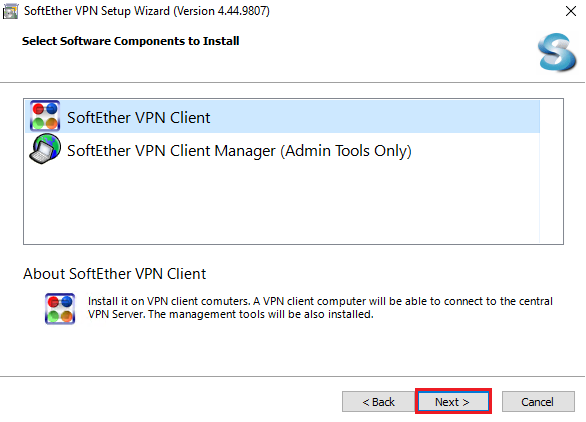
Click next to continue and complete the installation

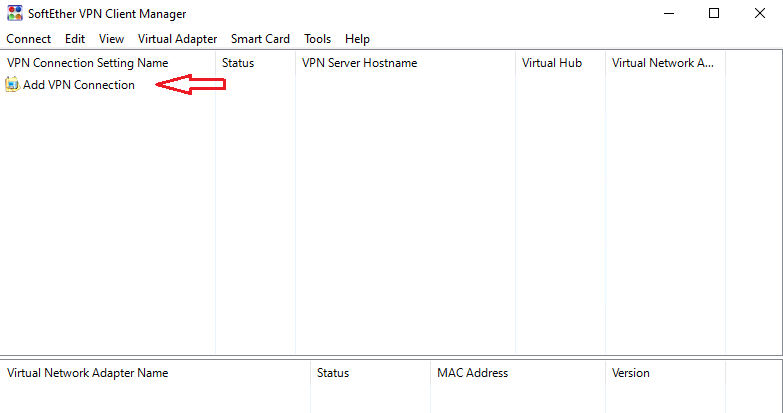
Step 3. Set up a connection using SoftEther VPN Client
When installing SoftEther is finished, double-click on Add VPN Connection.
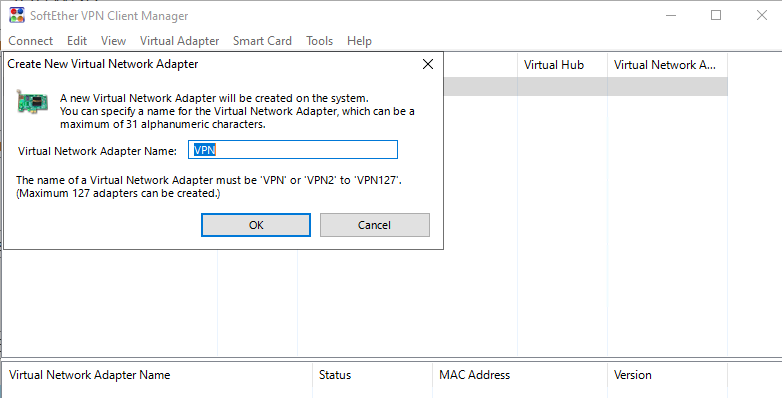
Give the new adapter a name and select “Yes” when asked if you want to create a virtual network adapter.
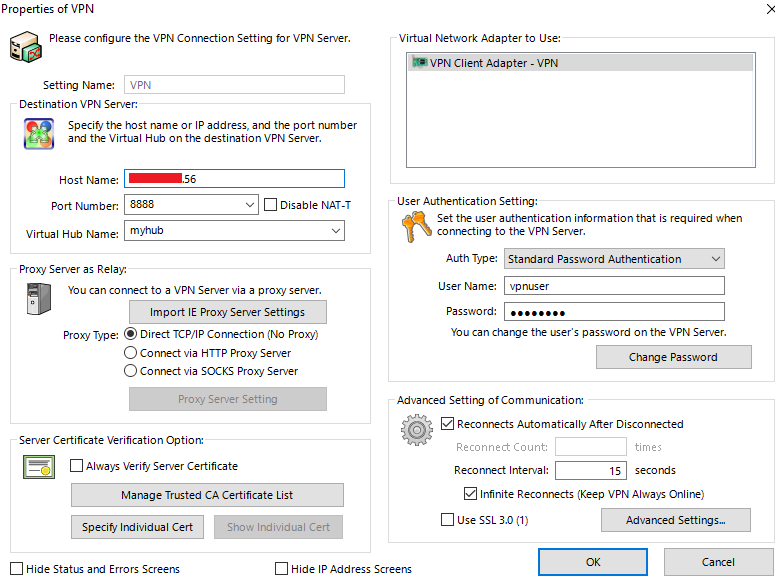
To complete the SoftEther VPN setup, you need to set up the required settings and click OK when you are finished.
- Setting Name: Name of the VPN connection, for easy recognition and management.
- Host Name: Name or IP address of the VPN server.
- Port: Port on which the connection to the VPN server is established.
- Virtual Hub Name: This parameter is automatically filled once the correct parameters have been set in the Host Name and Port fields. The predefined name that should appear is VPN.
- Auth Type: The predefined option that should be selected is Standard Password Authentication.
- User Name: User name for connecting to the VPN server.
- Password: Password for the user name.
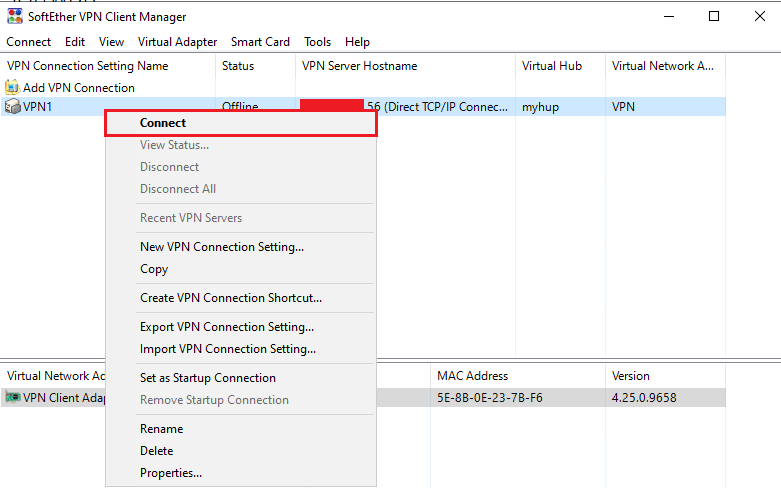
To connect, right-click on the connection you’ve set. Then press Connect.
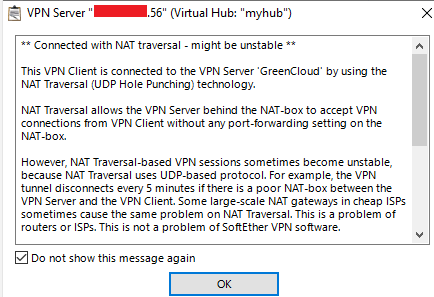
On the first connection, an informative window will pop up. Just check “Do not show this message again” and press OK.
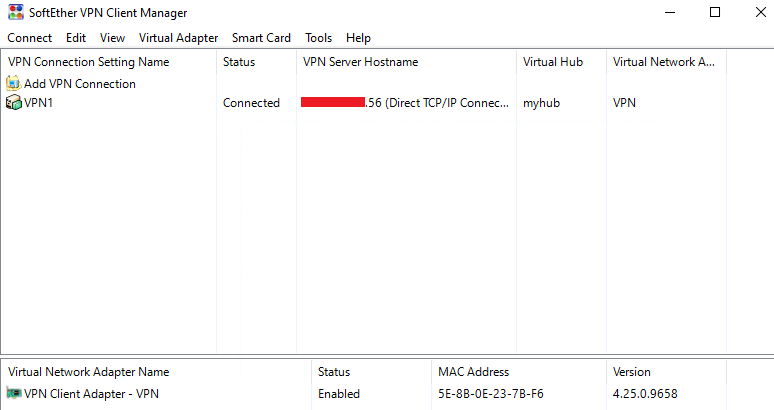
If the connection has been successfully established, it displays “Connected”.
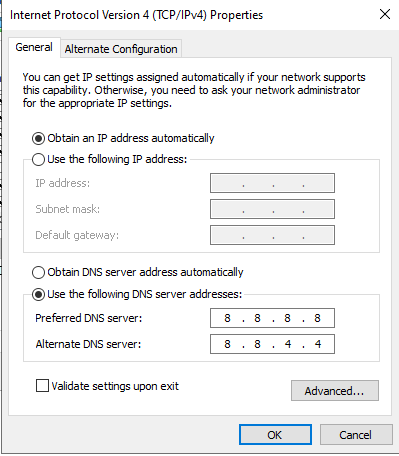
Now, if you want to specify your own DNS servers, you must edit the virtual network adapter settings within Windows.
In the Network and Sharing Center, click Change adapter settings, right-click the virtual adapter (it’ll be named something like VPN or similar), click Properties, then select Internet Protocol Version 4
Next, enter the DNS servers you want to use in the Preferred DNS server section.
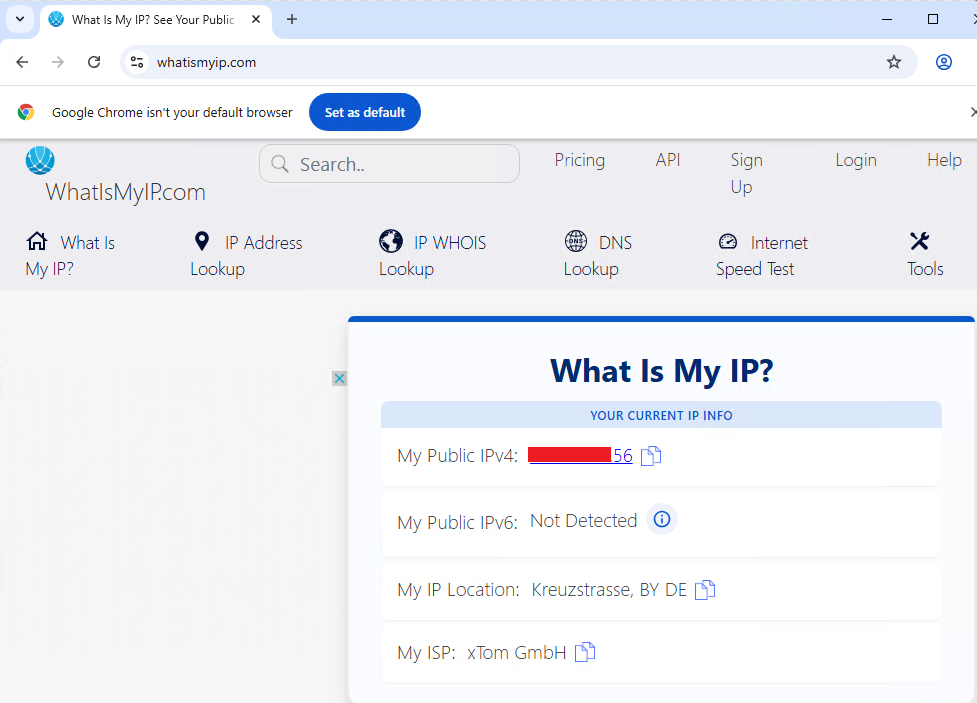
To test if the VPN has connected successfully, you can visit WhatIsMyIP and check the displayed IP address. If it matches the IP address of your SoftEther VPN server, then your client is set up correctly.
Conclusion
SoftEther VPN is a flexible and secure solution that works on various operating systems. Only the Windows client offers a proper graphical user interface. So we explained how to use the built-in L2TP/IPsec VPN client.
Good Luck!

