How to Configure Nginx as a HTTP Cache
In the world of web servers, Nginx has emerged as a popular choice among the various server software available today. It’s known for its high performance, stability, rich feature set, simple configuration, and low resource consumption.
One of the powerful features of Nginx is its ability to act as an HTTP cache, which can significantly improve the performance of your website by reducing server load and improving response times.
This tutorial will guide you through the process of configuring Nginx as an HTTP cache, step by step.
Understanding HTTP Caching
Before we dive into the configuration process, it’s important to understand what HTTP caching is and why it’s beneficial.
Imagine you’re running a news website, and you have a popular article that’s being accessed by thousands of users every minute. Every time a user requests this article, your web server has to fetch the article from the database, process it, and then send it to the user. This involves a lot of work and can put a significant load on your server, especially if you’re getting a lot of traffic on a shared hosting account.
Now, let’s say you implement HTTP caching on your server. The first time a user requests the article, your server does the usual work of fetching the article from the database and processing it. But instead of just sending it to the user, it also stores a copy of the processed article in the cache.
The next time a user requests the same article, instead of fetching it from the database and processing it again, your server simply serves the copy that’s stored in the cache. This is much faster and puts less load on your server.
So, by using HTTP caching, you’re able to serve the same article to thousands of users more efficiently. This can significantly improve the performance of your website, especially if you’re using a dedicated server, VPS server, or cloud hosting solution, where resources like CPU and memory can be a limiting factor.
Prerequisites
Before you start, you’ll need the following:
- An installed and running instance of Nginx.
- Root or sudo access to your server.
- A basic understanding of Nginx configuration files and directives.
https://green.cloud/docs/how-to-install-nginx-on-ubuntu-22-04/
https://green.cloud/docs/how-to-install-nginx-on-centos-9-stream/
1. Change the Port Your Website Listens On
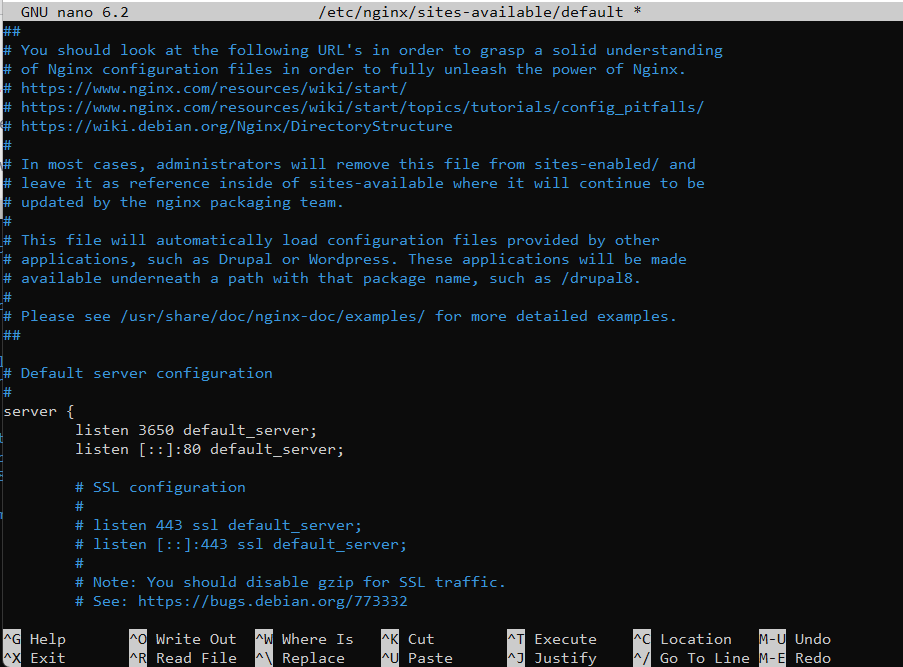
Because the caching server will handle all incoming requests, you want to have this server listening on port 80 for HTTP websites or port 443 for HTTPS websites. This means that your website will need to listen on another port.
Change the default listen port to 3650 in the appropriate Nginx configuration file for your website. This is usually a .conf file in the nano /etc/nginx/sites-available/default directory.
Restart nginx system:
systemctl restart nginx
2. Create an Nginx Reverse Proxy Server
Next, let’s set up the Nginx cache server. At its core, this will be a reverse proxy server. Create a new Nginx configuration file at nano /etc/nginx/sites-available/cache.conf.
upstream origin_server {
    server 127.0.0.1:3650;
}

server {
    listen 80;
    server_name _;

    location / {
        include proxy_params;
        proxy_pass http://origin_server;
    }
}
Notice how the upstream origin server is configured for the local IP address of 127.0.0.1 on port 3650. Recall that 3650 is the same port your website is listening on. Also, take note that proxy_pass points to the origin server.
Restart nginx system:
systemctl restart nginx
3. Configure Nginx Server Cache
With a basic reverse proxy server in place, let’s add caching capabilities. Modify cache.conf with the following highlighted changes.
proxy_cache_path /var/cache/nginx levels=1:2 keys_zone=custom_cache:10m inactive=60m;

upstream origin_server {
    server 127.0.0.1:3650;
}

server {
    listen 80;
    server_name _;

    location / {
        include proxy_params;
        proxy_pass http://origin_server;
        proxy_cache custom_cache;
        proxy_cache_valid any 10m;
        add_header X-Proxy-Cache $upstream_cache_status;
    }
}
The first line containing proxy_cache_path defines the location of the Nginx cache on the system to be at /var/cache/nginx. If this directory doesn’t exist, it will be created the next time the Nginx server is reloaded.
Notice how the keys_zone value is custom_cache. We associate custom_cache with our proxy_cache on line 14. For a full explanation of the arguments, please see the official Nginx docs.
In this example, all resources will be cached for a period of 10 minutes according to the proxy_cache_valid directive.
add_header directive.4. Apply Your Configuration Changes
Make Nginx aware of your new configuration file by symbolic-linking it from the sites-available to the sites-enabled directory.
ln -s /etc/nginx/sites-available/cache.conf /etc/nginx/sites-enabled/
Apply your changes by reloading the Nginx web server.
systemctl reload nginx
Conclusion
Configuring Nginx as a HTTP cache is a powerful way to improve the performance of your website. By storing HTTP responses and serving them for subsequent requests, you can reduce server load and improve response times.
This tutorial has guided you through the process of setting up the cache path, configuring the proxy cache, setting up cache bypass conditions, and configuring the delivery of stale content.
Remember to always test your configuration changes before applying them to your live server to ensure everything works as expected.
Happy hosting!
