How to block an application from accessing the internet in Windows server 2019, 2022
Blocking a program from accessing the internet is pretty easy on Windows using the Windows Firewall. Windows Firewall can not only protect your computer from malware and other security threats but can also be configured to block any program from accessing the internet. That too, without using any third-party software.
By following just a simple set of steps, you can block any software accessing the internet.
How to block an application from accessing the internet
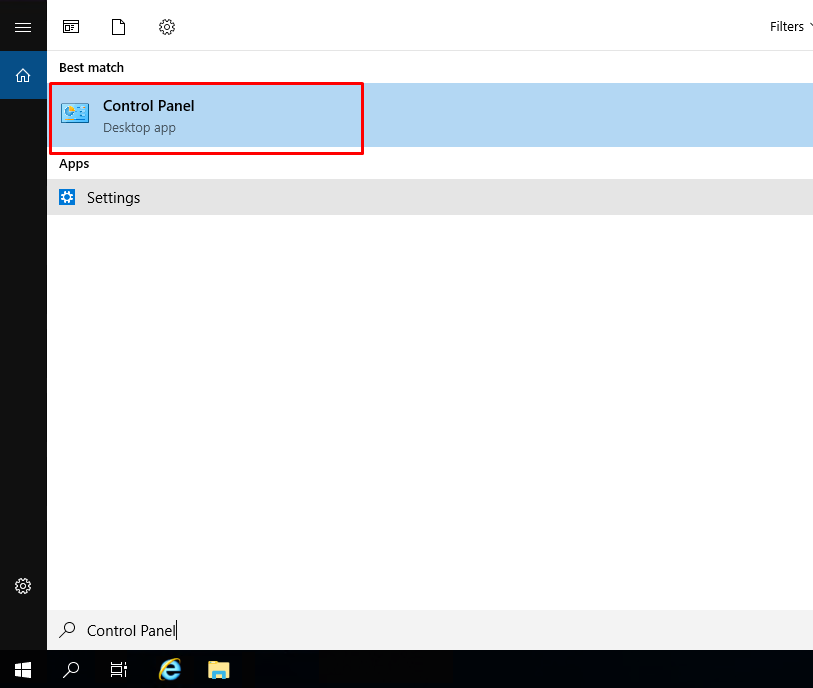
1. On your Windows server, open the Start Menu and go to Control Panel.
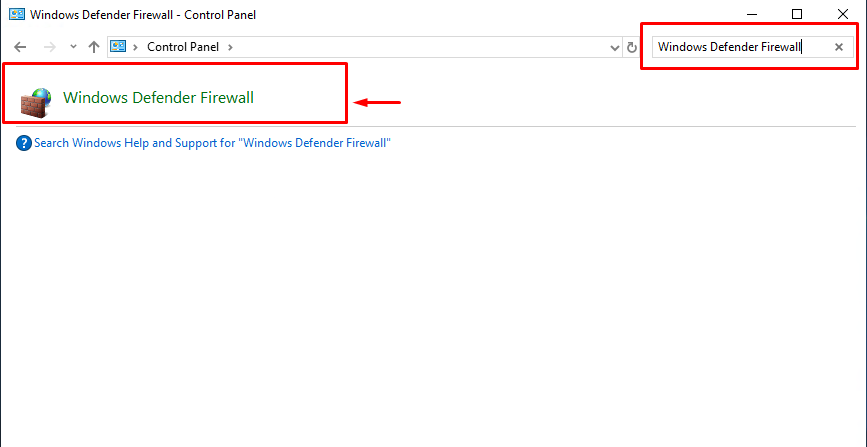
2. In the search bar in the control panel, search for “Windows Defender Firewall” and click on the first search result.
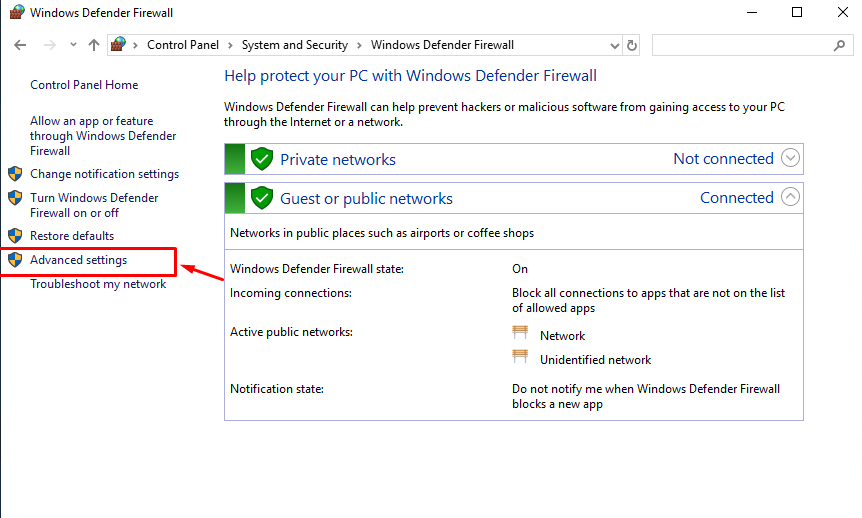
3. Click on “Advanced Settings” in the left pane of the Control Panel.
Note: There is a lot going on in the advanced interface and we encourage you follow along closely, leaving anything outside the scope of the tutorial and your experience level alone. Mucking up your firewall rules is a surefire way to a big headache.
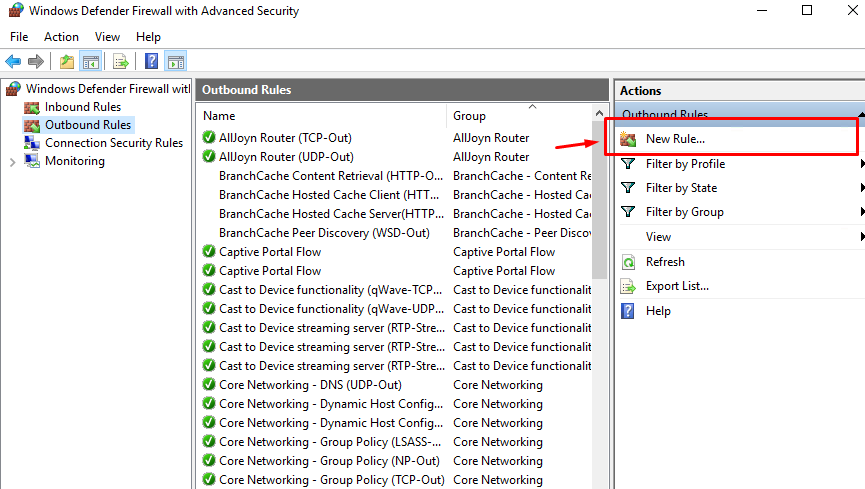
4. Click on Outbound Rules. Here you can restrict internet access for a particular app.
Instead of choosing “Inbound rules” we choose “Outbound Rules” because we are configuring rules from the server connecting to the outside

5. Under the Actions panel on the right side of the window, click on New Rule.
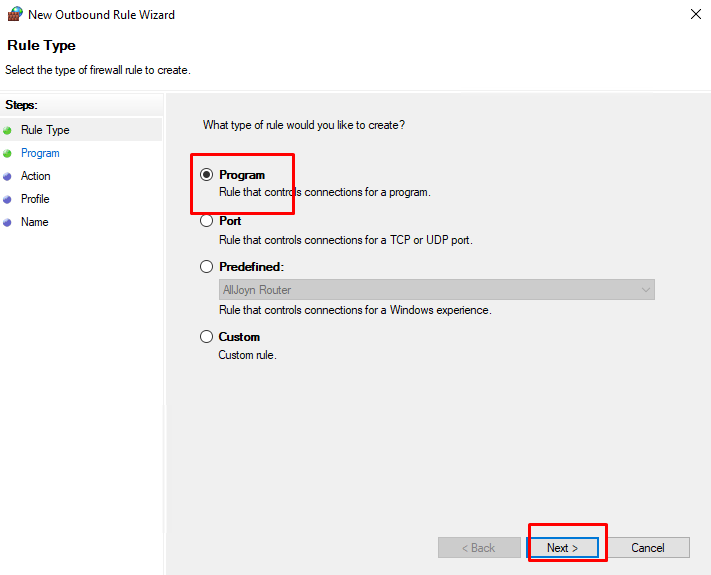
6. Click on Program and press Next.
7. Type the path where your program is installed or locate it with the Browse option. The application path is generally in the form C:Program Filesapplication.exe or C:Program Files(x86)application.exe where ‘application’ is the program’s name you want to block from having internet access.
In this tutorial we will block internet connection in firefox browser

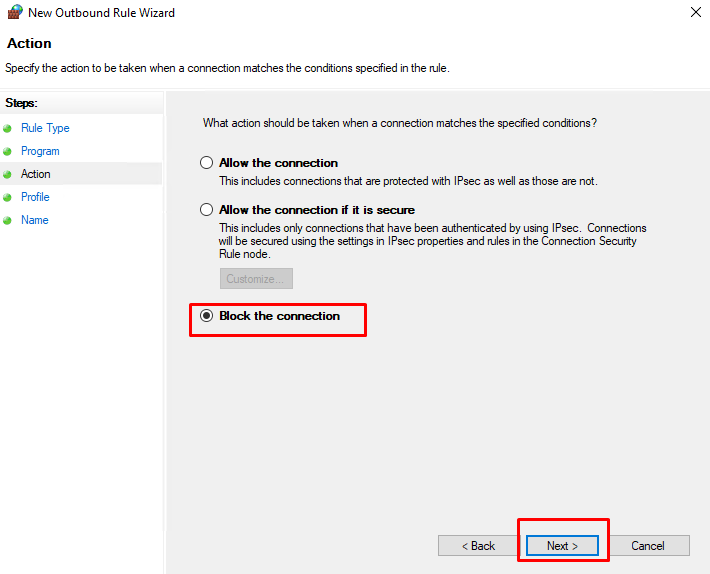
8. In the Action window, select Block the connection. Press Next.
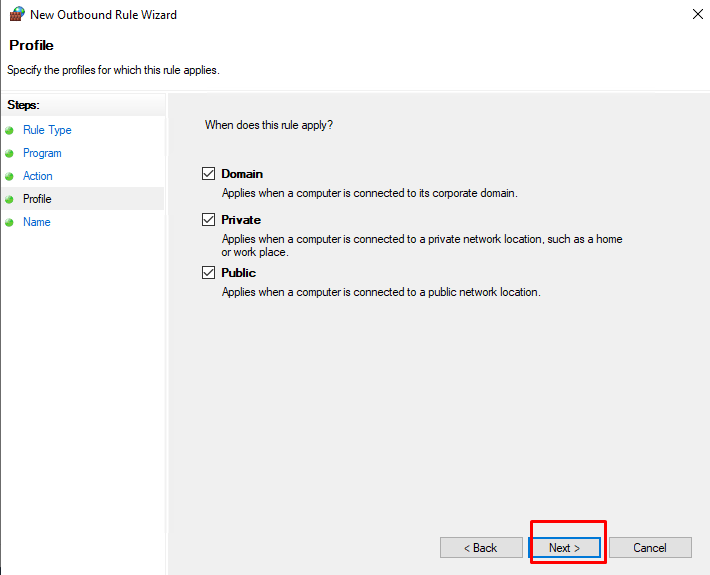
9. Select when your blocking rules apply to the program. Select all three options to cut off internet access altogether.
On the “Profile” screen, you’re asked to select when the rule applies. Here, you have three options:
- Domain: The rule applies when a computer is connected to a domain.
- Private: The rule applies when a computer is connected to a private network, such as your home or small business network.
- Public: The rule applies when a computer is connected to a public network, such as at a coffee shop or hotel.
So, for example, if you have a laptop that you use at home (a network you’ve defined as private) and at a coffee shop (a network you’ve defined as public) and you want the rule to apply to both places, you need to check both options. If you want the rule only to apply when you’re at the public Wi-Fi spot at the coffee shop, then just check Public. When in doubt, just check them all to block the application across all networks. When you’ve made your selection click “Next”.
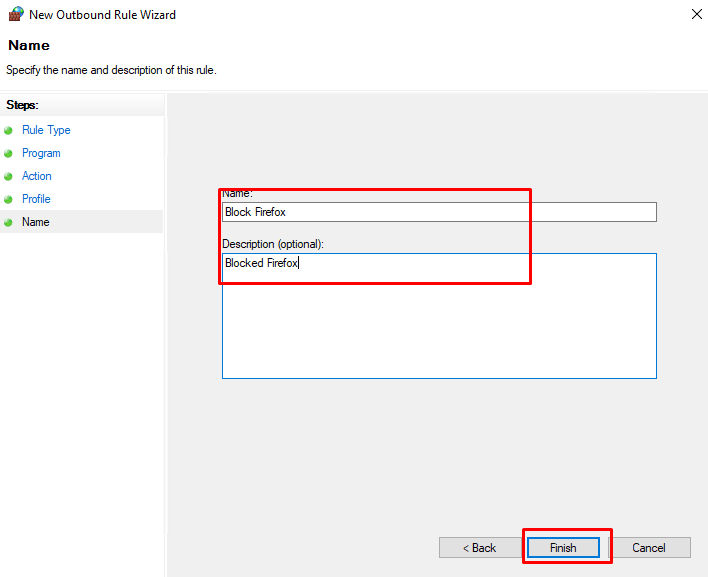
10. Give a name to the new rule you just created. You can choose any name you desire.
Now open Firefox browser and will see no network connection as shown. Other applications or software can still access the information

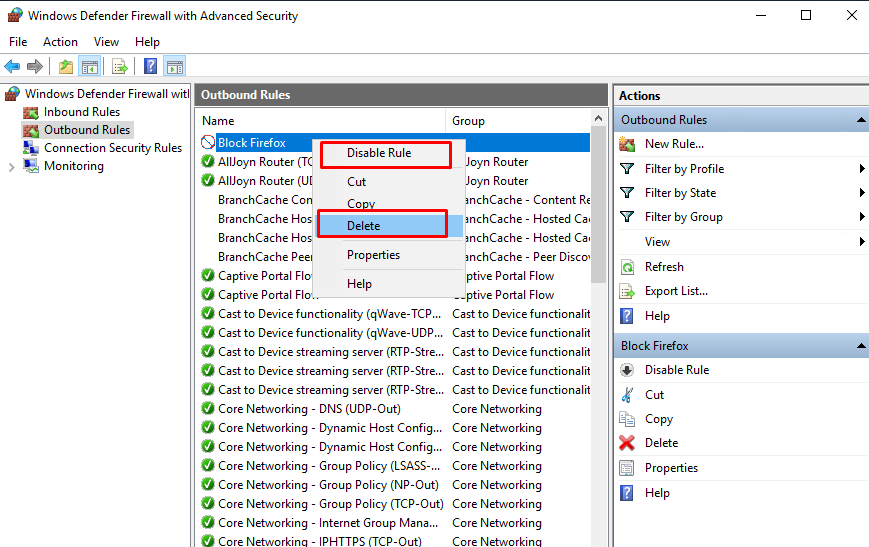
To unblock the Internet connection for the software, reopen the network connection for the selected application, go back to the main interface of Windows Firewall with Advanced Security, right-click on the newly created setting and then select Disable to disable it. temporarily, or Delete to delete it completely.
Conclusion
All operations done! It’s simple to block an application from connecting to the internet using Windows Firewall.
Hopefully this article will be useful for you. Good luck !

