How to install PostgreSQL on CentOS 9 stream
I. Introduction
PostgreSQL has made its own statement that they are “The World’s Most Advanced Open Source Database”. So what makes PostgreSQL so confident? Then in this article we will learn what Postgresql is and the outstanding features that make Postgresql so powerful around the world in the following article.
What is PostgreSQL?
PostgreSQL is a general-purpose object-relational database management system, the most advanced open source database system available today.
PostgreSQL was developed based on POSTGRES 4.2 at the Berkeley computer science department, University of California. PostgreSQL is designed to run on UNIX-like platforms. However, PostgreSQL was also dynamically adapted to run on many different platforms such as Mac OS X, Solaris, and Windows.
PostgreSQL is a free and open source software. The software’s source code is available under the PostgreSQL license, a freely open source license. Accordingly, you will be free to use, modify, and distribute PostgreSQL in any form.
PostgreSQL does not require too much maintenance because it is highly stable. Therefore, if you develop applications based on PostgreSQL, the cost of ownership will be lower than with other data management systems.
Why use PostgreSQL?
PostgreSQL has a rich set of features that help developers build applications, administrators to protect data integrity, and create fault-tolerant environments that help you manage data regardless of location. . Big or small data set. Besides being free and open source, PostgreSQL also has excellent scalability.
PostgreSQL follows the SQL standard but does not conflict with traditional features or could lead to harmful architectural decisions. Many SQL standard features are supported, but sometimes there may be slightly different syntax or functions.
Some different features of PostgreSQL
1. Data type:
- Primitives: Integer, Number, String, Boolean
- Structure: Date/Time, Array, Range, UUID
- Document: JSON/JSONB, XML, Key-value (Hstore)
- Geometry: Point, Line, Circle, Polygon
- Custom: Composite, custom style
2. Data integrity:
- UNIQUE, NOT NULL
- Main courses
- Foreign key
- Exclusion constraints
- Function key/Clear key,Recommended key/Advisory key
3. At the same time, performance:
- Cataloging: B-Tree, Multiple Columns, Expressions, Partial
- Advanced cataloging: GiST, SP-Gist, KNN Gist, GIN, BRIN, Bloom filters
- Sophisticated query planner/optimizer, index scanning, multi-column statistics.
- Transactions, Transactions in the form of groups (through save points)
- Concurrent Version Control (MVCC)
- Parallel read queries
- Table partition
- All levels of transaction independence are defined in the SQL standard, including Serializable
- Reliability, disaster recovery
- Write Ahead Logging (WAL)
- Replication: Asynchronous, synchronous, logical
- Point-in-time recovery (PITR), active standby
- Tablespace
- Security: Authentication: GSSAPI, SSPI, LDAP, SCRAM-SHA-256, Certificates and others, Robust access control system, Column and row level security
- Procedural languages: PL/PGSQL, Perl, Python (and many others)
- External data wrapper: connects to another database or stream using a standard SQL interface
- Text Search: Supports international character sets, for example via ICU collation, Full Text Search
II. Installation Instructions
To install PostgreSQL on CentOS 9 stream, you can follow these 4 steps.
Step 1: SSH into your VPS
To install PostgreSQL, we first need to SSH or access your VPS or server as root.
After SSH is successful, we continue with step 2 which is Installing PostgreSQL.
Step 2: Install PostgreSQL
First, list all available PostgreSQL server versions using the following command:
dnf module list postgresqlYou will get a list of all PostgreSQL versions in the following output:
CentOS 9 - AppStream                                                                                     6.9 MB/s | 9.7 MB     00:01
CentOS 9 - BaseOS                                                                                        8.5 MB/s | 6.7 MB     00:00
CentOS 9 - Extras                                                                                         30 kB/s |  12 kB     00:00
CentOS 9 - AppStream
Name                         Stream                   Profiles                            Summary
postgresql                   9.6                      client, server [d]                  PostgreSQL server and client module
postgresql                   10 [d]                   client, server [d]                  PostgreSQL server and client module
postgresql                   12                       client, server [d]                  PostgreSQL server and client module
postgresql                   13                       client, server [d]                  PostgreSQL server and client module

Hint: [d]efault, [e]nabled, [x]disabled, [i]nstalled- Enable PostgreSQL repository
As you can see, the latest PostgreSQL version 14 is not included in the above output. So you will need to add the PostgreSQL repository to your server.
You can install it using the following command:
dnf install -y https://download.postgresql.org/pub/repos/yum/reporpms/EL-8-x86_64/pgdg-redhat-repo-latest.noarch.rpm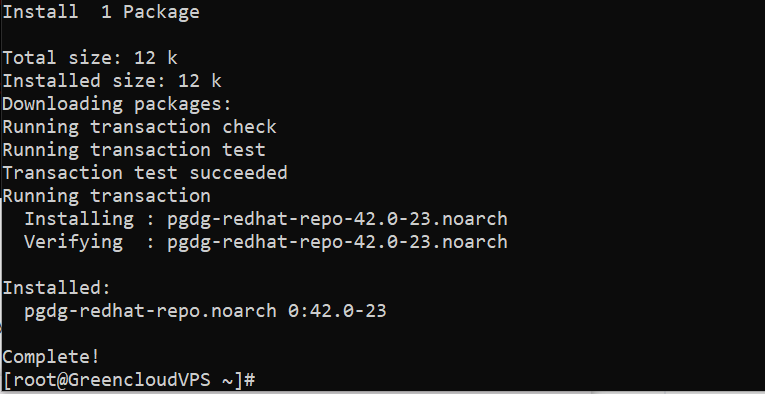
Once the repository is installed, you will need to disable the default PostgreSQL repository. The next step about to installing the PostgreSQL server on CentOS Stream 9 is to run the following command to install the latest PostgreSQL server: Once the PostgreSQL is installed, initialize the PostgreSQL database using the following command: Check the status of the PostgreSQL service using the following command: Database access in PostgreSQL is handled with the concept of Roles. A Role can represent a user or a group of users. PostgreSQL supports multiple authentication methods. The most commonly used methods are: PostgreSQL client authentication is defined in a configuration file named pg_hba.conf. By default, for internal connections ( Local ), PostgreSQL will use the Peer authentication method. The Postgres user is automatically created when you install PostgreSQL. This user is the superuser of PostgreSQL and it is equivalent to the root user in MySQL. By default, PostgreSQL listens on port 5432. You can check it with the following command: You will get the following output: To log to the PostgreSQL server as User Postgres, you need to first switch to User Postgres and then access the PostgreSQL prompt using the psql utility: The following output will appear: You can also access PostgreSQL without switching users with the sudo command: Only superusers and users with CREATEROLE privileges can create new Roles. In the following example, we will create a new Roles named technology and a database named technology_data and then grant privileges on the database. The following command will create a new Role named tech: Create a new database named technology_data with the createdb command: To grant permission to user technology on the database technology_data created in the previous step, run the following query: So in this article, We has shown you how to quickly install PostgreSQL on CenOS 7, so that you can experience the most powerful open source database management software available today.
dnf -qy module disable postgresql
dnf install postgresql14-server -y
/usr/pgsql-14/bin/postgresql-14-setup initdb
systemctl start postgresql-14
systemctl enable postgresql-14
systemctl status postgresql-14 postgresql-14.service - PostgreSQL 14 database server
Loaded: loaded (/usr/lib/systemd/system/postgresql-14.service; disabled; vendor preset: disabled)
Active: active (running) since Thu 2022-03-17 13:34:07 UTC; 5s ago
Docs: https://www.postgresql.org/docs/14/static/
Process: 1950 ExecStartPre=/usr/pgsql-14/bin/postgresql-14-check-db-dir ${PGDATA} (code=exited, status=0/SUCCESS)
Main PID: 1955 (postmaster)
Tasks: 8 (limit: 11412)
Memory: 16.8M
CGroup: /system.slice/postgresql-14.service
├─1955 /usr/pgsql-14/bin/postmaster -D /var/lib/pgsql/14/data/
├─1957 postgres: logger
├─1959 postgres: checkpointer
├─1960 postgres: background writer
├─1961 postgres: walwriter
├─1962 postgres: autovacuum launcher
├─1963 postgres: stats collector
└─1964 postgres: logical replication launcher
Mar 17 13:34:07 linux systemd[1]: Starting PostgreSQL 14 database server...
Mar 17 13:34:07 linux postmaster[1955]: 2022-03-17 13:34:07.269 UTC [1955] LOG: redirecting log output to logging collector process
Mar 17 13:34:07 linux postmaster[1955]: 2022-03-17 13:34:07.269 UTC [1955] HINT: Future log output will appear in directory "log".
Mar 17 13:34:07 linux systemd[1]: Started PostgreSQL 14 database server.Step 3: PostgreSQL Roles and Authentication Methods
ss -antpl | grep -i postmasterLISTEN 0 128 127.0.0.1:5432 0.0.0.0:* users:(("postmaster",pid=1955,fd=7))
LISTEN 0 128 [::1]:5432 [::]:* users:(("postmaster",pid=1955,fd=6))sudo su - postgres
psql
psql (14.0)
Type "help" for help.

postgres=#sudo -u postgres psql
Step 4: Create Role and PostgreSQL Database
sudo -u postgres psql
create role technology;

create database technology_data;

grant all privileges on database technology_data to technology;

III. Summary

