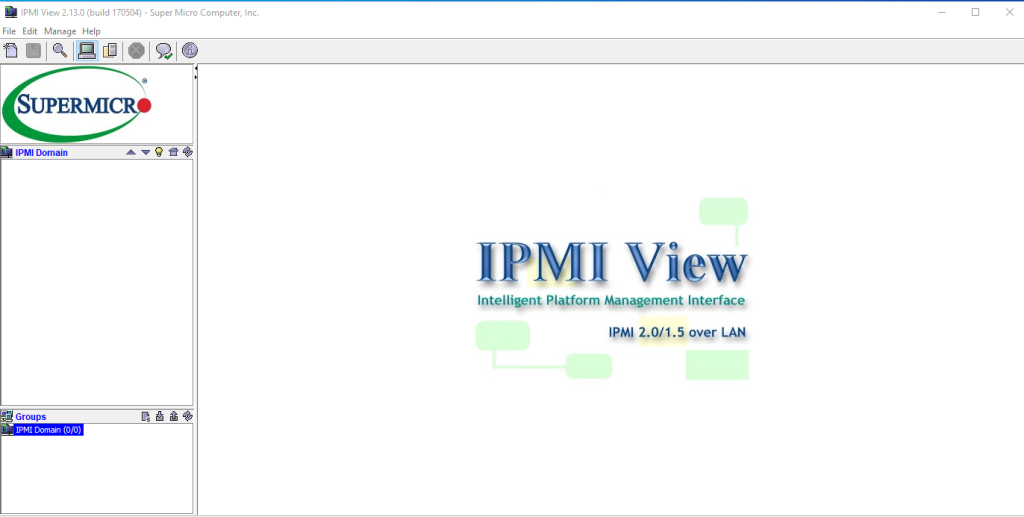
How to install and configure Supermicro IPMIView on Windows
My new lab equipment is set up in the front room of my house since it’s closest to my internet connection and I don’t have network cabling throughout the property. Relocating the equipment elsewhere would have been inconvenient. To avoid leaving a keyboard, mouse, and monitor connected to the two servers, I will utilize the dedicated IPMI (Intelligent Platform Management Interface) network port for remote management.
The IPMI interface can be accessed via a web browser, but Supermicro also provides an application called IPMIView. This Java-based application is also available for smartphones and tablets. It’s worth noting that you don’t need to install IPMIView; as mentioned, you can simply use a web browser to access the IPMI port, provided you have the necessary Java plugins installed.
Once you have installed IPMIView and any required Java components, you can launch the program and configure it.
1. Install IPMI View on Windows
First download IPMI View 2.21 from the following links and install
After Installation finished
2. Supermicro IPMIView Setup
Step 1: Go to File -> New -> System
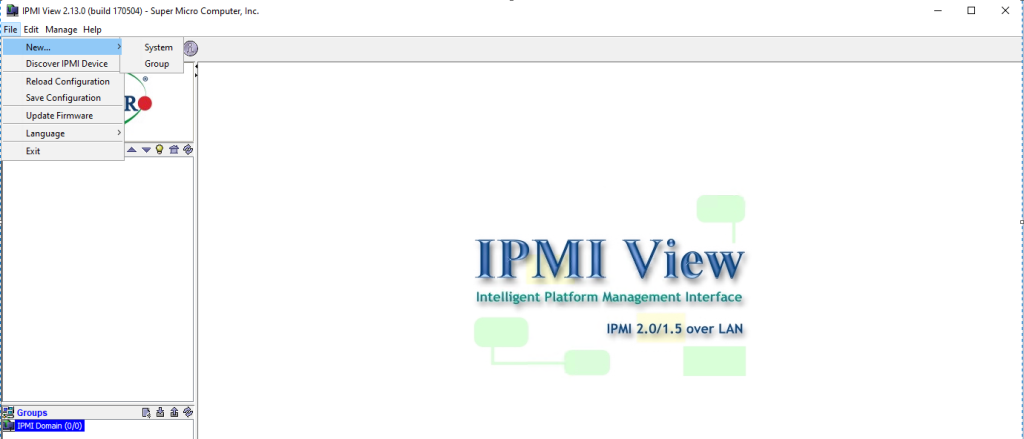
clicking on the page icon
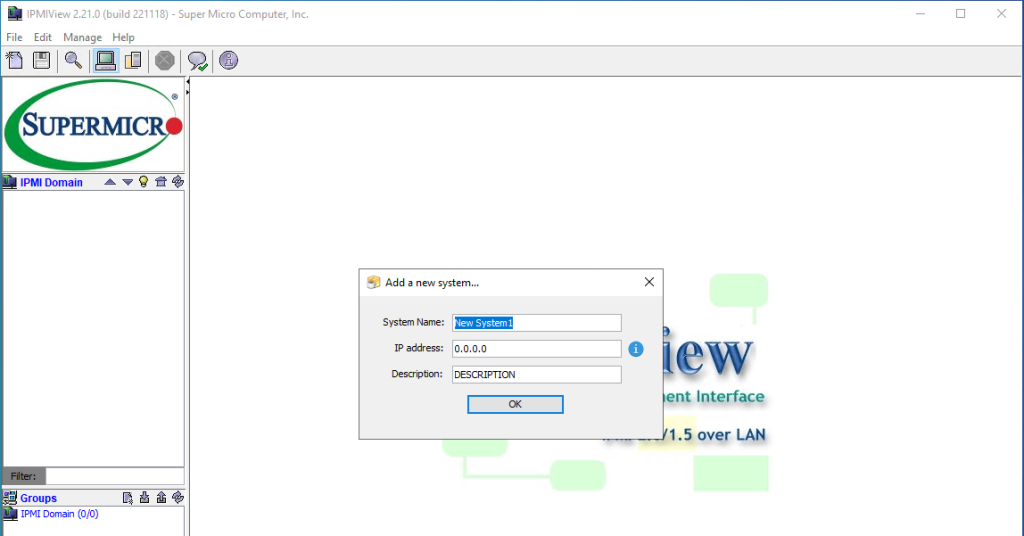
Step 2: Then Add the System Name as you like and the IP address for the server is x.x.x.x
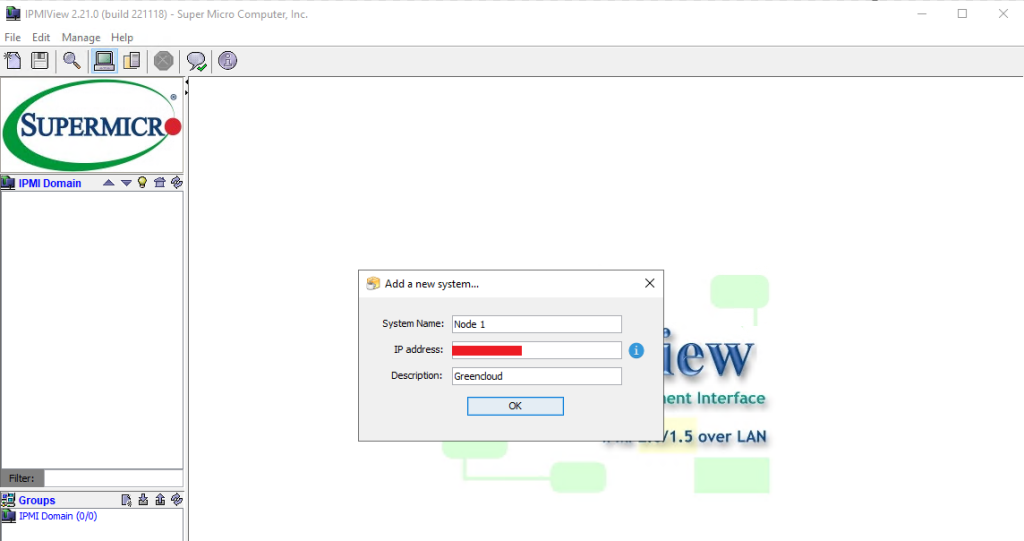
Add System Name and Description as you like. Then OK
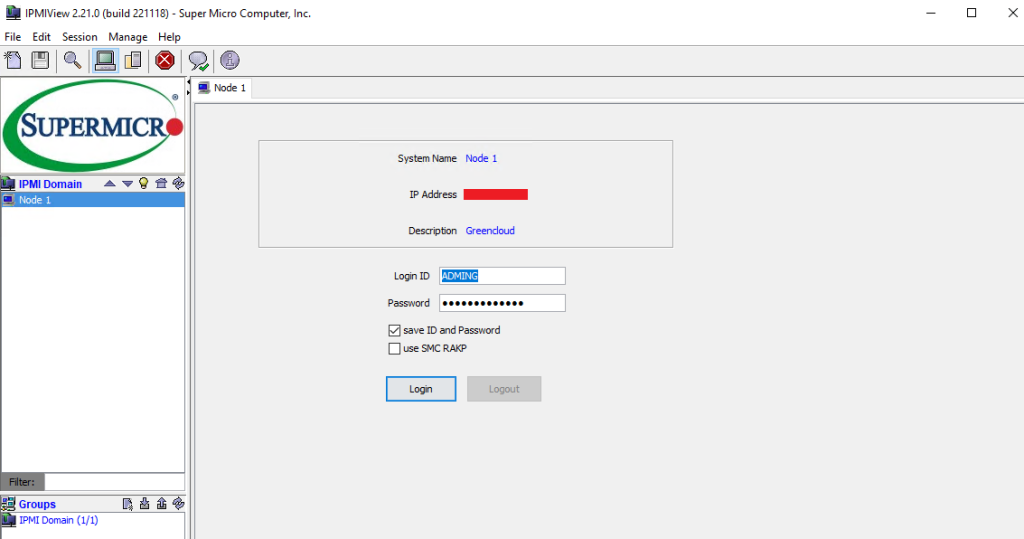
Step 3: You will see your setup name in the IPMI Domain. Double-click your setup name.
The login screen will appear and fill in the credentials as (ADMING/password). After that Login
Step 4: You can see the CONNECTED status and the following screen. After that Go to the KVM Console tab

We are now connected and can perform the various management and monitoring tasks necessary. I should also mention you can configure system groups and define login credentials for them

Bottom ToolBar
This toolbar contains function tabs to allow you to execute commands
quickly. The tabs allow you to access the following submenus: Login, Event Log, Sensors, IPMI Device,
BMC Setting, Users, Text Console, and KVM Console.
Login
Click the <Login> tab on the bottom toolbar – to show your system management information (IP address, system name, user). Once the password is confirmed, IPMIView will show a CONNECTED symbol, and all available function pages will be shown. If the password is invalid, a message will be displayed in the Status Area that reads, “Unable to activate a session, please check ID and Password.”
Event Log
Event Log screen.
All: Click this radio button to select all events.
From…to: Click this radio box to select a portion of events
Get: Click this tab to get the event logs.
Export: Click this tab to export event logs to a file.
Clear All Entries: Click this tab to clear all event log entries.
Current SEL Device Timestamp: This item displays the timestamp of the current SEL device.
Set Timestamp: Click this tab to set the timestamp for the system selected.
Refresh: Click this tab to refresh this page.
Sensors
There are 2 sensor displaying modes supported since the IPMIView 2.20.0 version. Click the right-top
combobox to switch between 2 modes. The Graphic view is the default displaying
mode. On the other hand, the user can still switch to text view if preferred.
IPMI Devices
To display the information and functionality of the BMC firmware installed in the system.
Device Information: This shows the revision levels of the BMC and IPMI firmware.
ACPI System Power State: This shows the power state of the managed system. If the managed system is in a power-off state, the green light will be off. It will be updated automatically every five seconds.
Graceful Power Control (Administrator and Operator only): Graceful power control will inform the OS running on the managed system to shut down, reboot, and reset the power cycle within a specified time.
Chassis Power Control (Available for the Administrator and Operator only) allows you to manually control the power state of a managed system’s chassis.
Power Down: This feature will power off a managed system.
Power UP: This feature will turn on the power of a managed system.
Power Cycle: This feature will turn off the power of a managed system.
Reset: This feature resets a managed system.
BMC Cold Reset (for the Administrator only): Reset the BMC.
BMC Settings
To display detailed information on the Network Configuration and SNMP trap
configuration
BMC LAN Configuration: This feature displays the BMC’s IP address, LAN MAC, Gateway IP, Gateway MAC, and Subnet Mask and allows you to modify these settings.
LAN Interface.
Dedicated: Click this radio box to use the IPMI-Dedicated LAN as the default LAN connection.
Onboard LAN1:Click this radio box to use the onboard LAN port 1 as the default LAN
connection.
Failover: Click this radio box to enable Failover support.
Update: Click this tab to update the LAN connection status.
Refresh: Click this tab to refresh the page.
Users
IPMIView supports user account and FRU information sub-page in the user tab of the IPMIView
Text Console
Which will allow you to control a remote system from a text mode console. Click the Start
button to start the text console redirection. Click the Stop button to stop the text console
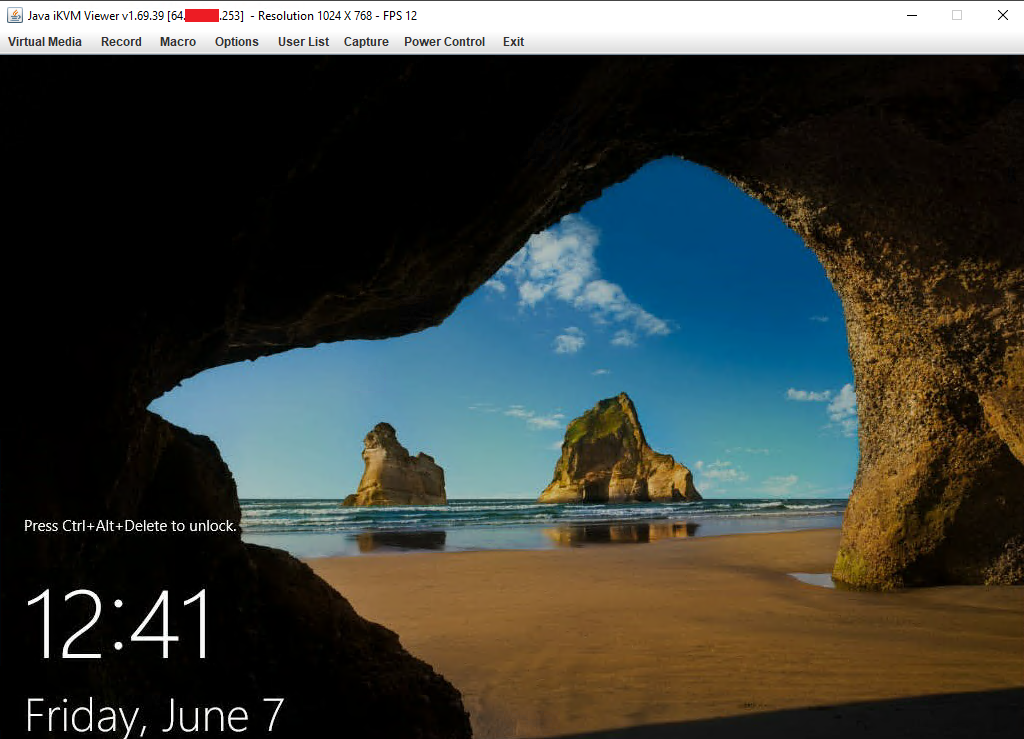
KVM Console
KVM Console Redirection is a new feature included in the Supermicro Intelligent Management (SIM)
Module. If Video Console Redirection support is enabled, the remote screen will be redirected to
IPMIView. BIOS POST, BIOS settings, DOS, Windows, or Linux OS screens can all be redirected to
IPMIView. KVM Console will be disconnected if the user performs a FW update or BIOS update.
Administrative privileges are required (Linux: sudo, Windows: Run as administrator) to perform the
virtual storage mounting function.
IPMIView support Java plug-in and HTML5 version of KVM since 2.20.
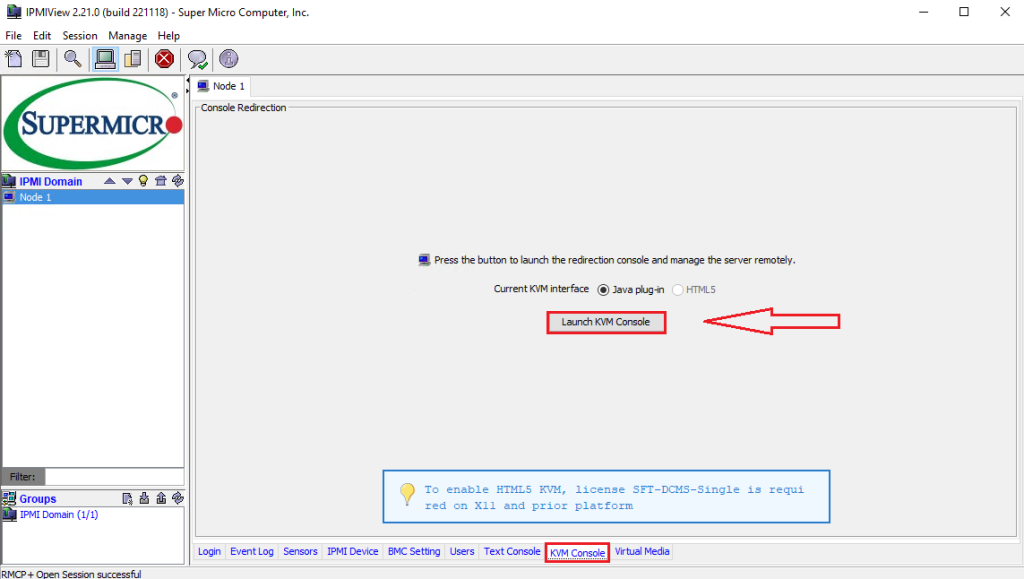
Then press “Launch KVM Console”
The IPMIview 2.0 program has been one that is known to let you run the Java iKVM client without installing Java and keeping that up-to-date. Given what we showed above, many will be surprised to find that IPMIview 2.0 works almost in the opposite way
Virtual Media
The Virtual CD-ROM with IPMIview 2.0 requires a license (SFT-DCMS-SINGLE or SFT-OOB-LIC). However, if you utilize the OpenJDK viewer, then you can get the remote iKVM and also select virtual media and mount a drive remotely using this. If you want to mount a local ISO to Supermicro IPMI and do not have a network share reachable by the hosts, and do not have a license, then using IPMIview 2.0 will allow you to get your job done without a license.
Conclusion
It is too bad that this feature is being taken away and hidden behind a paywall with the HTML5 viewer. It is one that previously set Supermicro apart from Dell, HPE, and Lenovo. While having the current functionality is OK, the price point of $130-$200 to get the feature SFT-DCMS-SINGLE for the HTML5 iKVM virtual media feels like a lot if you are not using other features. At least there are alternatives available. Usually, we pay $50-75 for a USB drive to get mounted to a server with remote hands in a data center, so that is another option if the server’s USB ports are enabled.
Good Luck!

