How to Install and Configure WireGuard Client on Windows
Prerequisites
WireGuard VPN Server has been installed
My WireGuard Server:
IP Address: 204.44.64.66
Listen Port: 3650
Range IP VPN : 192.168.6.0/24
Public and Private key is ready
How to configure WireGuard Client on Windows
1. Download and install the Windows MSI package from the WireGuard website.
2. Configure WireGuard Client on Window
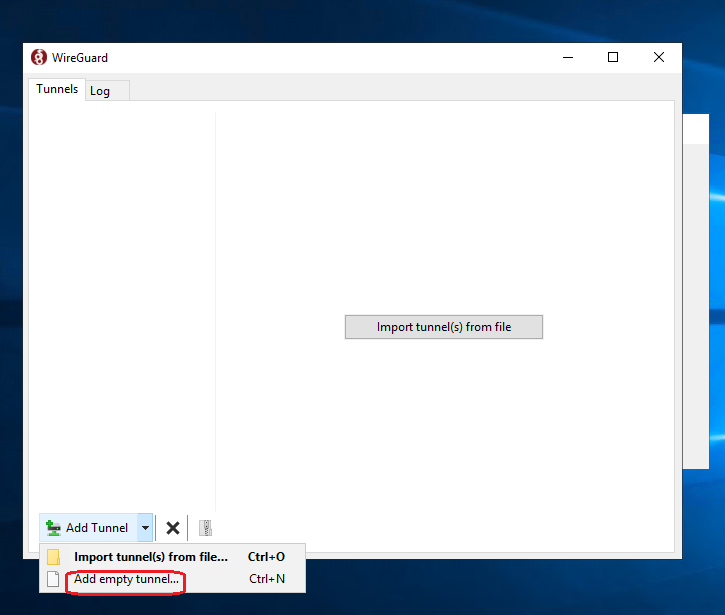
Once installed, open the WireGuard application and click on “Add Tunnel” -> “Add empty tunnel…” as shown on the image below:
A publickey pair is automatically created .Enter a name for the tunnel and edit the configuration as follows:
[Interface]
Address = IP_VPN_of_Client
DNS = 8.8.8.8, 8.8.4.4
[Peer]
PublicKey = Public_key_of_the_WireGuard_Server
Endpoint = IP_of_the_WireGuard_Server:Port_VPN_of_the_Server
AllowedIPs = Allow all traffic via VPN
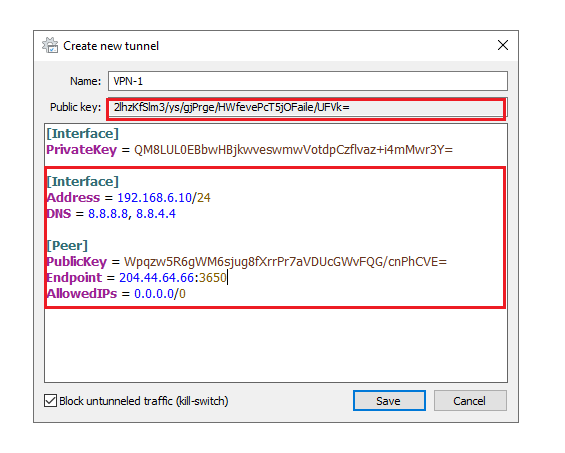
Once done, click on the “Save” button.
3. Configure on the Wireguard Server
- Add the client’s public key and IP address to the server. To do that, run the following command on the Ubuntu server:
# wg set wg0 peer PublicKey_of_the_Client allowed-ips IP_VPN_of_Client
![]()
Make sure to change the CLIENT_PUBLIC_KEY with the public key you generated on the client machine (cat /etc/wireguard/publickey) and adjust the client IP address if it is different. Windows users can copy the public key from the WireGuard application.
- Add the following lines to the file /etc/wireguard/wg0.conf :
[Peer]
## Desktop/client VPN public key ##
PublicKey = Client VPN public key
## client VPN IP address (note the /32 subnet) ##
AllowedIPs = 192.168.6.10/32
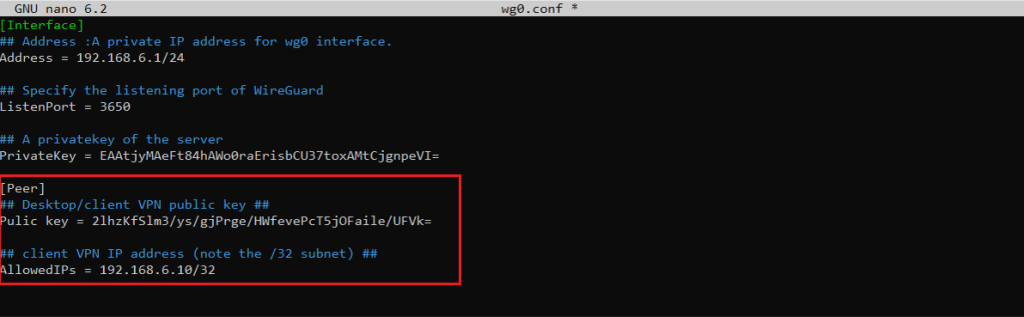
Save and exit
Once done, go back to the client machine and bring up the tunneling interface.

On windows Clients
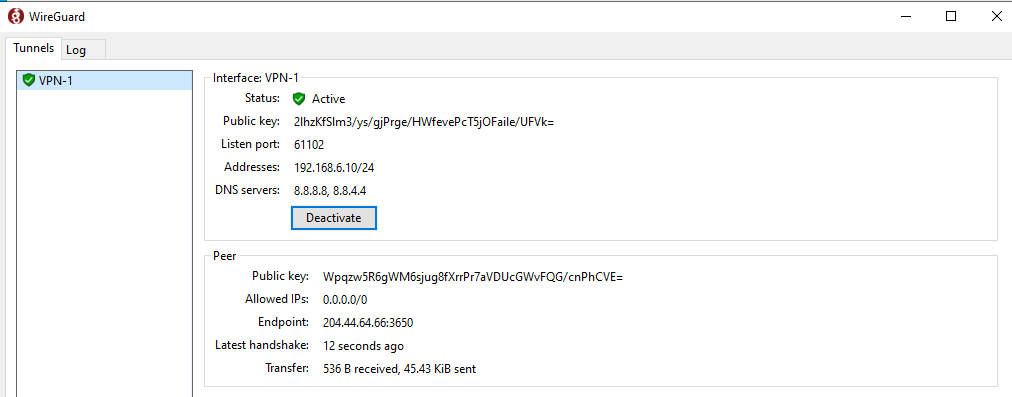
click on the “Activate” button. Once the peers are connected, the tunnel status will change to Active:
Please note: By this step your VPN is enabled on the client so it will lose connection to the client IP now. You need to temporarily deactivate Wireguard on the Window client then configure NAT on the Wireguard Server as the steps below to allow WireGuard Client to access the Internet
4. Configure NAT on the Wireguard Server
We need to configure NAT to allow WireGuard Client to access the Internet. Here we will use IPtables to configure NAT rule so that the WireGuard VPN client side can go to the internet using the Public IP of the WireGuard VPN Server.
For IPv4, we set the following Linux kernel variables to accept incoming network packets on wg0, which are routed to another network interface eth0 . The following should be done
# sysctl -w net.ipv4.ip_forward=1
- Setting up NAT firewall rules
# iptables -t nat -I POSTROUTING 1 -s {sub/net} -o {interface} -j MASQUERADE
iptables -t nat -I POSTROUTING 1 -s 192.168.6.0/24 -o eth0 -j MASQUERADE
- Accept all traffic created by wg0 interface
Allow all traffic on wg0 interface:
# iptables -I INPUT 1 -i {interface} -j ACCEPT
# iptables -I INPUT 1 -i wg0 -j ACCEPT
The above rules allows for packets destined to wg0.
- Configuring FORWARD rules
We must allow for packets being routed through the WireGuard server by setting up the FORWARD rule. The syntax is:
# iptables -I FORWARD 1 -i eth0 -o wg0 -j ACCEPT
# iptables -I FORWARD 1 -i wg0 -o eth0 -j ACCEPT
- Open WireGuard UDP port # 3650
# iptables -I INPUT 1 -i eth0 -p udp --dport 3650 -j ACCEPT
Here is how to list and display all NAT IPTables rules using the iptables command to verify that those rules are working when your wireguard client connect to the server:
# iptables -t nat -L -n -v
# iptables-save -t nat
- Reload all changes and turn on NAT routing
# systemctl restart [email protected]
5. Test the VPN connection on Client Window
Check if the IP after connecting to the VPN is the public IP of WireGuard Server VPN
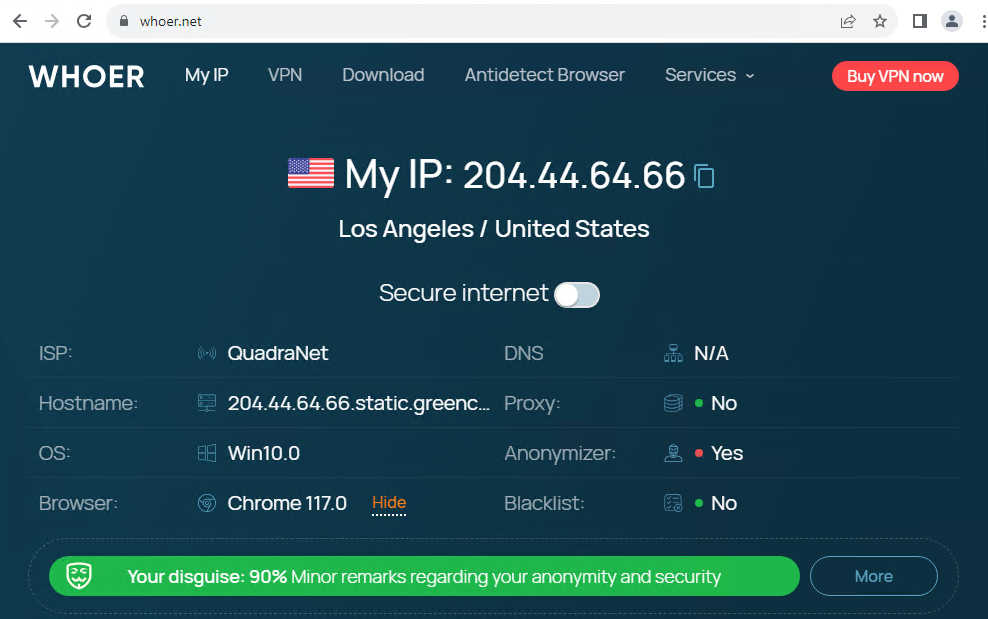
This is the public IP of the WireGuard Server, so the NAT configuration process is successful, your entire connection going out to the Internet will be transmitted encrypted and securely to the WireGuard VPN Server and then out to the Internet, so when When accessing the Internet, you will only leave a trace: the Public IP address of WireGuard VPN Server and the real Public IP address of your home Internet connection will be hidden.
Good luck!

