How to Install Nagios Open Source Monitoring on Debian 11
Nagios is an open-source monitoring system for computers. It runs on Linux and can monitor devices that are running Linux, Windows, and UNIX operating systems. The Nagios software checks critical parameters of application, network, and server resources periodically.
Advantages of Nagios:
- It is free, open-source, scalable and secure.
- The Nagios aids in increasing the availability of services, servers, applications, and processes, allowing users to monitor the network.
- The tool helps to locate protocol failures, network outages and server outages so that they may be quickly identified and resolved.
- The server failure is easily detectable and can send a warning to the user informing them of the difficulties.
- Flexible tool for multi-user access at the same time.
- Easily integrates with third-party applications.
In this article, we will guide you to install, and learn about Nagios, its features, and its benefits on Debian 11
How to Install Nagios Open Source Monitoring on Debian 11
Run the following commands to upgrade all installed packages on your VPS
apt update
apt upgrade
Install Apache, PHP
apt install apache2 libapache2-mod-php php
Install the following system dependencies by using the below command
apt install wget unzip zip autoconf gcc libc6 make apache2-utils libgd-dev
After installing all of the packages, start the Apache service and set it to start automatically on the system boot.
systemctl start apache2
systemctl enable apache2
Install Nagios on Debian 11
Debian default repository does not come with the current version of the Nagios package. As a result, it is advised to install Nagios from the source.
So the first step is to use the following command to download the most recent version of Nagios.
wget https://assets.nagios.com/downloads/nagioscore/releases/nagios-4.4.6.tar.gz
Next, use the following command to extract the downloaded file.
tar -xvzf nagios-4.4.6.tar.gzCreate Nagios system user and group and add Nagios account to the Apache www-data user, by using following commands.
useradd nagios
usermod -a -G nagios www-data
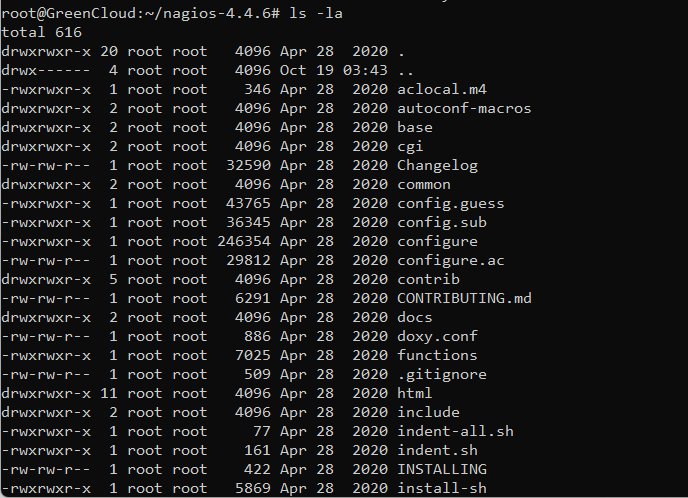
Change the Nagios directory and long list the directory by using the below commands
cd nagios-4.4.6/
ls -la
You should get the following output:
Now, start to compile Nagios from sources by issuing the below command
./configure --with-httpd-conf=/etc/apache2/sites-enabled
In this step, build Nagios files by issuing the below command.
make all
Now, install Nagios binary files, CGI scripts and HTML files by issuing the below command.
make installNext, install Nagios daemon init and external command mode configuration files and make sure you enable Nagios daemon system-wide by using the below command.
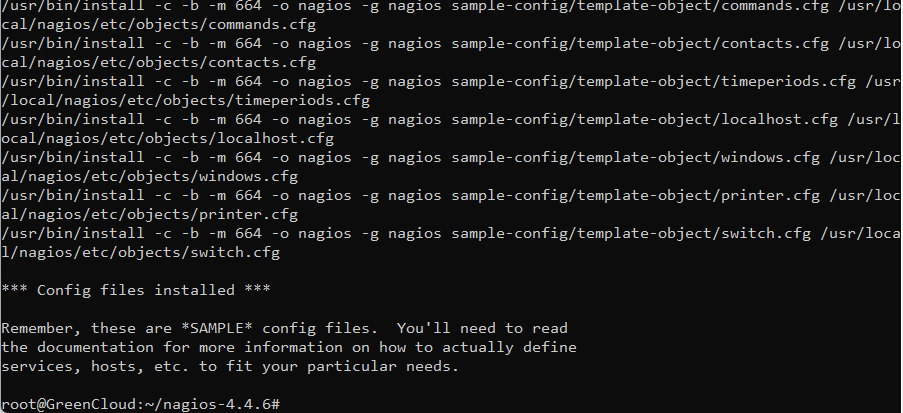
make install-initmake install-commandmodesystemctl enable nagios.serviceNext run the Nagios configuration files by using the below command.
make install-configYou should get the following output:
Install Nagios configuration file for Apacahe web server, which can be found in /etc/apacahe2/sites-enabled/ directory, by executing the below command.
make install-webconfCreate a Nagios Admin User
It is advised to safeguard Nagios using password based authentication for security reasons. You can establish a Nagios admin account and configure its password using the following command:
htpasswd -c /usr/local/nagios/etc/htpasswd.users GreenCloud
Enable the nagios cgi services by using the below command.
a2enmod cgiNext restart, start enable the Nagios service by using the below commands.
systemctl restart apache2
systemctl start nagios
Access the Nagios Web Interface
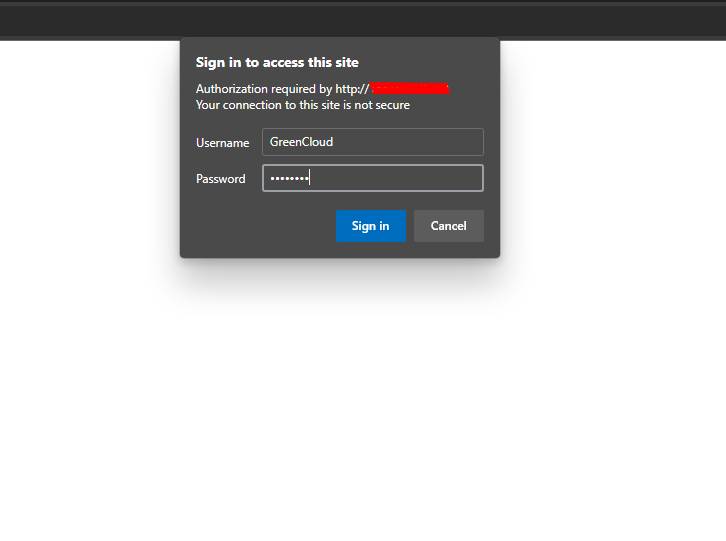
Now that Nagios is installed and configured on your server, you can now access it by entering http://your-server-ip/nagios into your browser.
You will be prompted for a username and password. The username, as you may recall, is the one configured to be “GreenCloud”.
This is the dashboard page for Nagios.
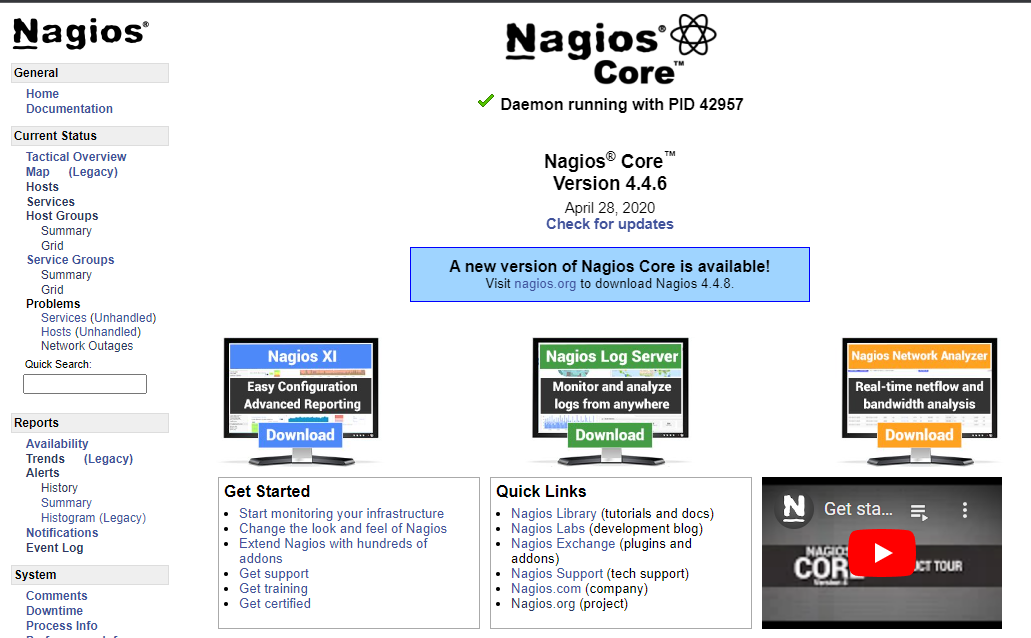
In the left panel, navigate to Hosts and Services to see your local server, server related information, and the status of all active services.
That’s it for How to install Nagios open source monitoring on Debian 11 server.
Conclusion:
In this guide, you have learned how to install Nagios source monitoring along with its essential components on a Debian 11
Furthermore Nagios has evolved to become one of the leading monitoring tools on the market today. It monitors computer networks, installed as part of the operating system on most UNIX-like systems. It runs on Unix, Linux, and BSD systems, and is used to monitor the availability of computer resources.
Finally Nagios can be used to monitor both physical and virtual servers. It has many features, including alerting, graphing, trend analysis, and much more.
