How to install Nextcloud on CloudPanel
I. Overview
What is Nextcloud?
Nextcloud is open source and a program for storing and synchronizing data on the cloud platform. With Nextcloud you can build for individuals or businesses a data storage and synchronization platform like Google Drive, Dropbox, One Drive. Nextcloud uses Nextcloud’s open source code and builds a Data Storage and Sync service for individuals and businesses
You can find more information from NextCloud ‘s homepage at the link below.
Why use Nextcloud?
Nextcloud supports a lot of popular platforms – mobile platforms as well as desktops. It provides native apps for most operating systems, allowing you or your team to work from any device or location. That means, there are no infrastructure costs.
Nextcloud integrates many features that make it a great private cloud solution. Some of its standout features include:
- Self-hosted solution – You can control Nextcloud almost anywhere – home or office, data center or hosting provider. It gives you full control over data storage.
- Sharing feature – Nextcloud allows sharing files securely. You can share files with anyone on or off the cloud using a password-protected link, and they can also upload files.
- Prioritize Security – Nextcloud has standard security practices including end-to-end encryption. It supports popular authorization schemes, controls, and authentication schemes.
- Lots of integrations – Nextcloud comes with built-in support – apps and services to extend the functionality of the cloud. For example, you can manage tasks, edit files in Markdown, and perform many other tasks.
II. Steps to take
Note: Before installing the Website, you need to make sure that your Domain has been successfully pointed to the server IP.
To install Nextcloud on CloudPanel, you can do it quickly with the following 3 steps:
Step 1: Add website to CloudPanel
First you need to access the user containing the website to be installed by following the link: https://IP:8443/, you can use the User Admin created in the CloudPanel installation step or the User created to create more websites. If you don’t know how to install CloudPanel. Please refer to the following instructions:
After successful Login, you can add Website by accessing: Domains (1) => Add Domain (2).
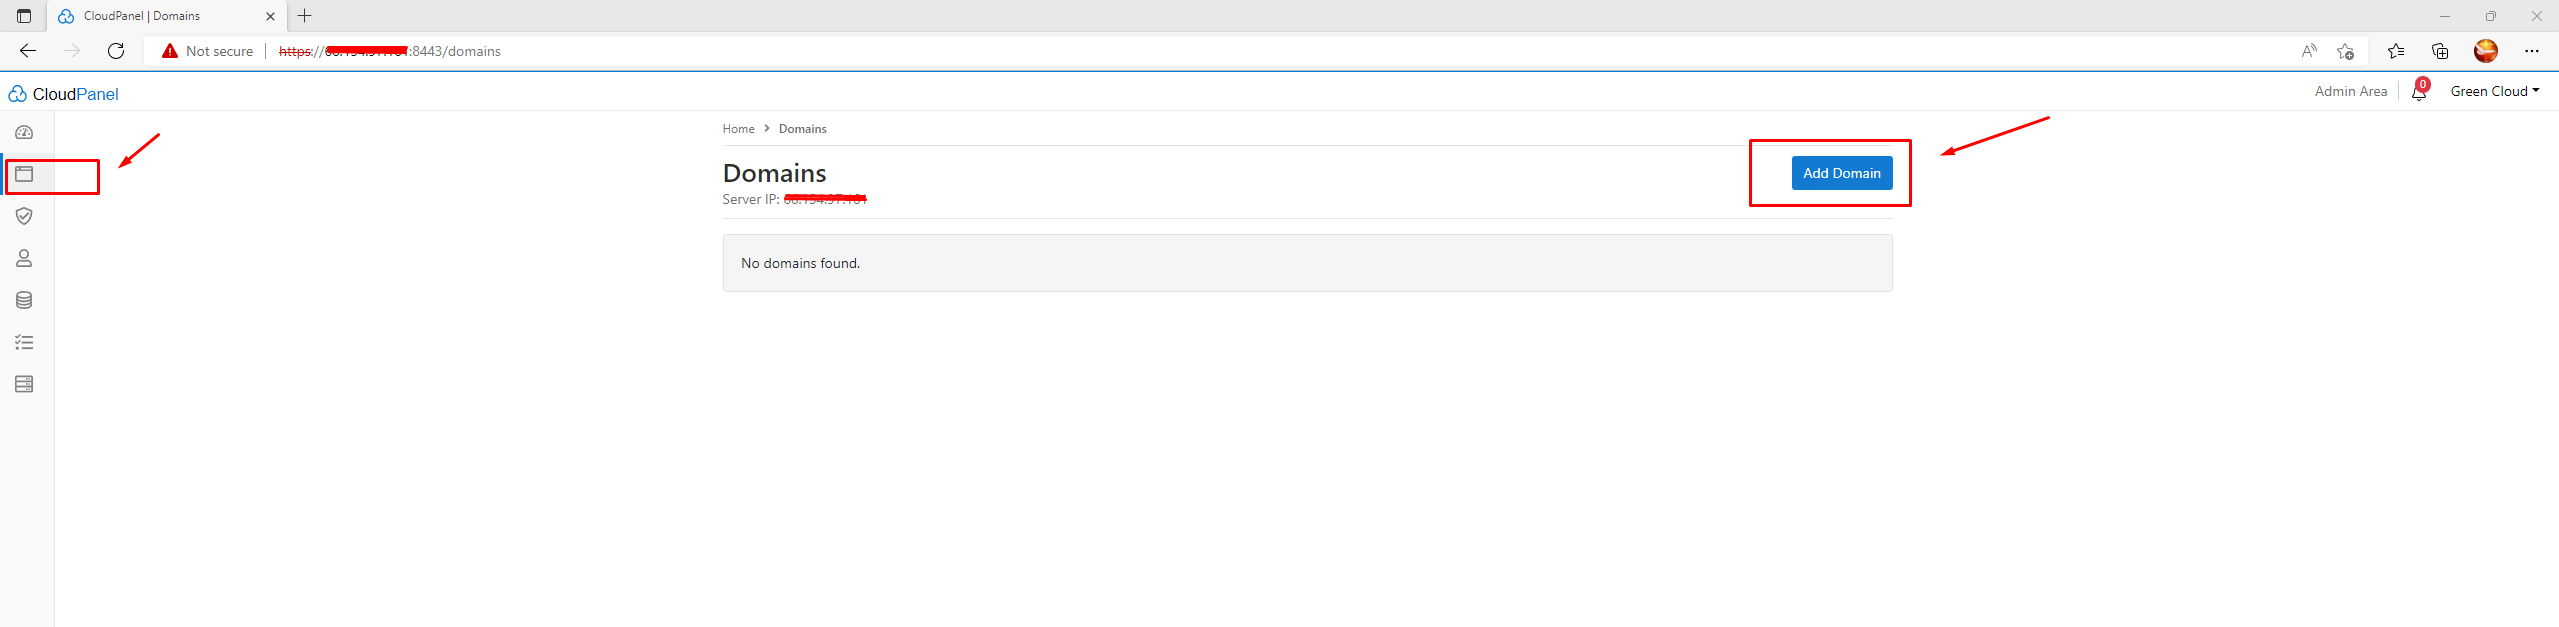
Next in the New Domain section, you need to fill in the website information as follows.
In there:
- Domain Name : Enter the website name to add
- Document Root : The path contains the website source code
- Vhost Template : Here you choose
- PHP Version : Here you choose the PHP version for the website (7.1 => 8.1)
- When you’re done, click Add Domain to add a website.

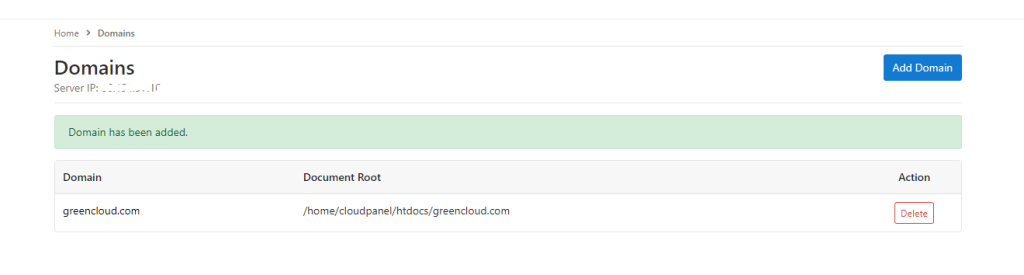
Successfully adding the website, you will receive the message Domain has been added and at the same time display the website in the list as shown.
Step 2: Install Nextcloud on the added website.
With CloudPanel , currently we cannot directly install the source code from the admin page, but you need to SSH into the VPS to install. If you do not know how to SSH, you can check out the instructions below.
Login via SSH to the server e.g. with Greencloud-ssh and go to the users tmp directory: cd ~/tmp
Successful SSH you need to run the following commands:
curl -sLo nextcloud.zip https://download.nextcloud.com/server/releases/nextcloud-22.1.1.zip && unzip nextcloud.zip -d nextcloud
ls
cp -R nextcloud/nextcloud/* /home/cloudpanel/htdocs/greencloud.com/
cd /home/cloudpanel/htdocs/ && clpctl system:permissions:reset greencloud.com 775
Command comment
- Command 1 : Download Nextcloud source code from the homepage & extract the file.
- Command 2 : Check if the File has been downloaded and decompressed successfully (Seeing the folder named nextcloud is successful).
- Command 3 : Move files to the htdocs directory of the domain
- Command 4 . Assign permissions to access the website folder (you replace greencloud.com with your website name).
In addition to how to get the Nextcloud source code directly to VPS as above. You can also download the source code Nextcloud from the home page to your computer. then upload the source code to VPS via Filezilla
Step 3: Create a database for the website (Database)
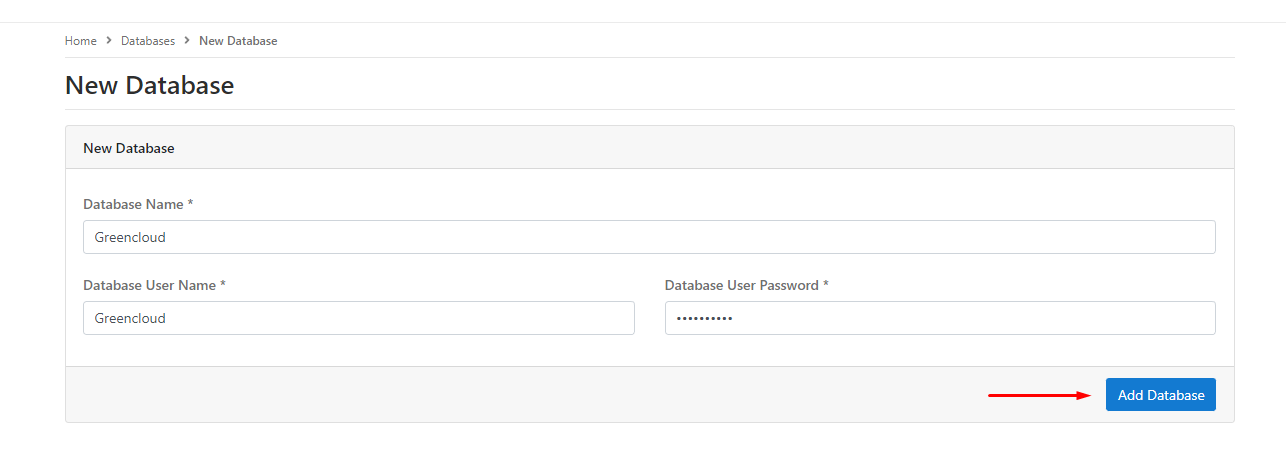
To create a Database, you access: Databases (1) => Add Database (2)

Here you fill in the following information.
In there:
- Database Name: Database Name
- Database User Name: User Database
- Database User Password: Password User Database
Fill in the complete information, click Add Database .
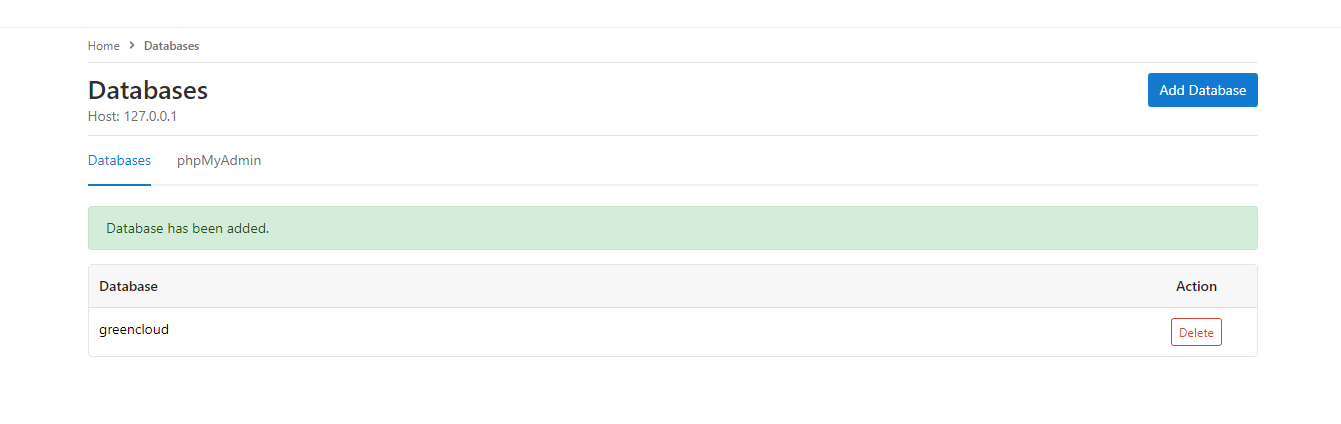
Successfully creating Database, you will receive a message as shown.
Step 4: Set up Nextcloud
After you have downloaded the Nextcloud source code and created the Database, now it’s time to set up your website. You go to the browser and type the name of your website, now the Nextcloud setup interface will display as shown.
Fill in the information and click Finish setup
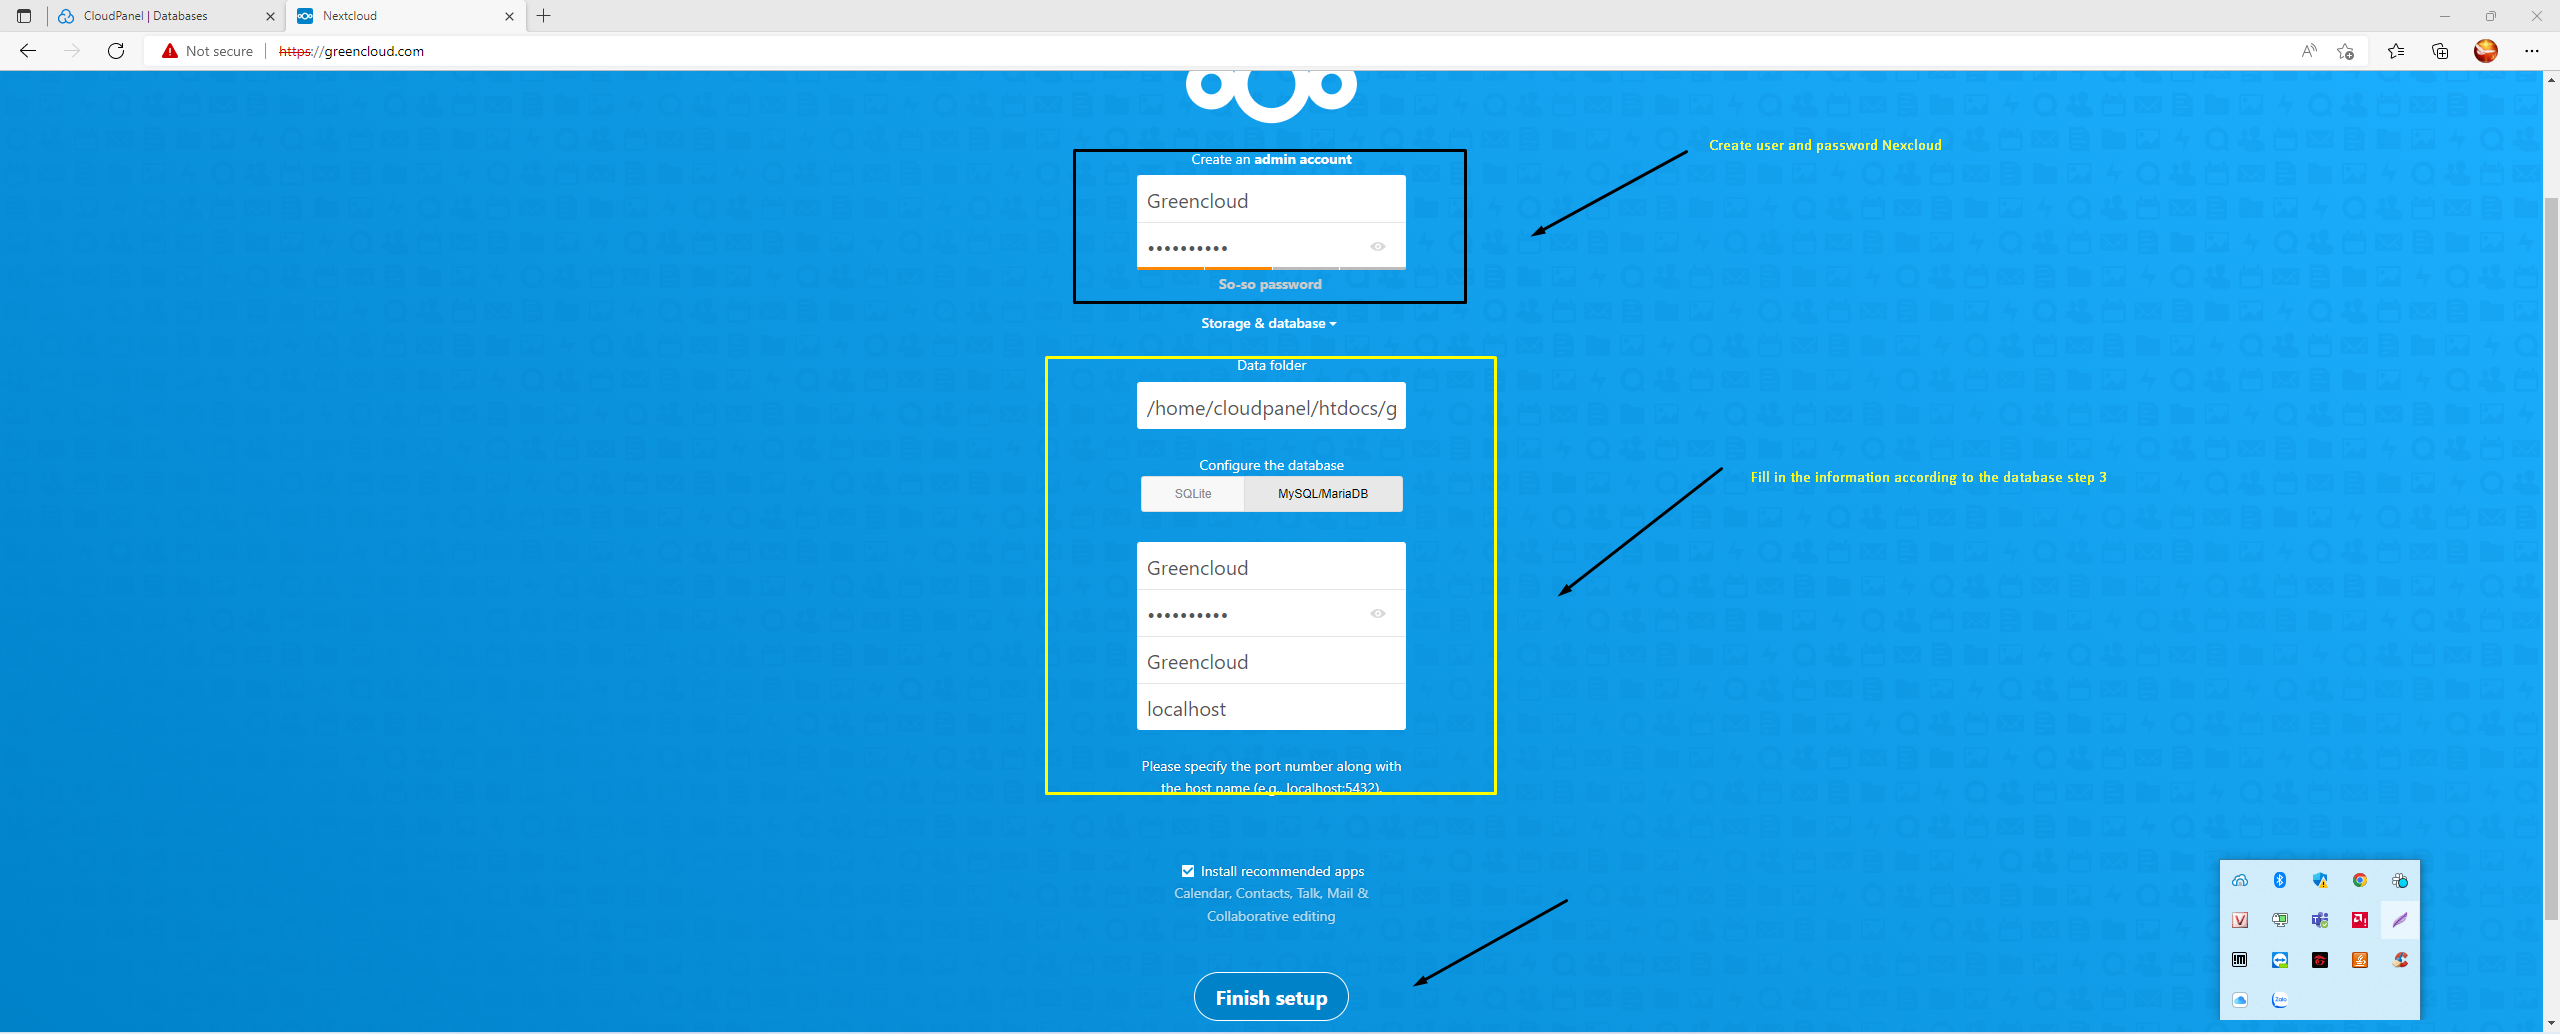
Setup will take a few minutes
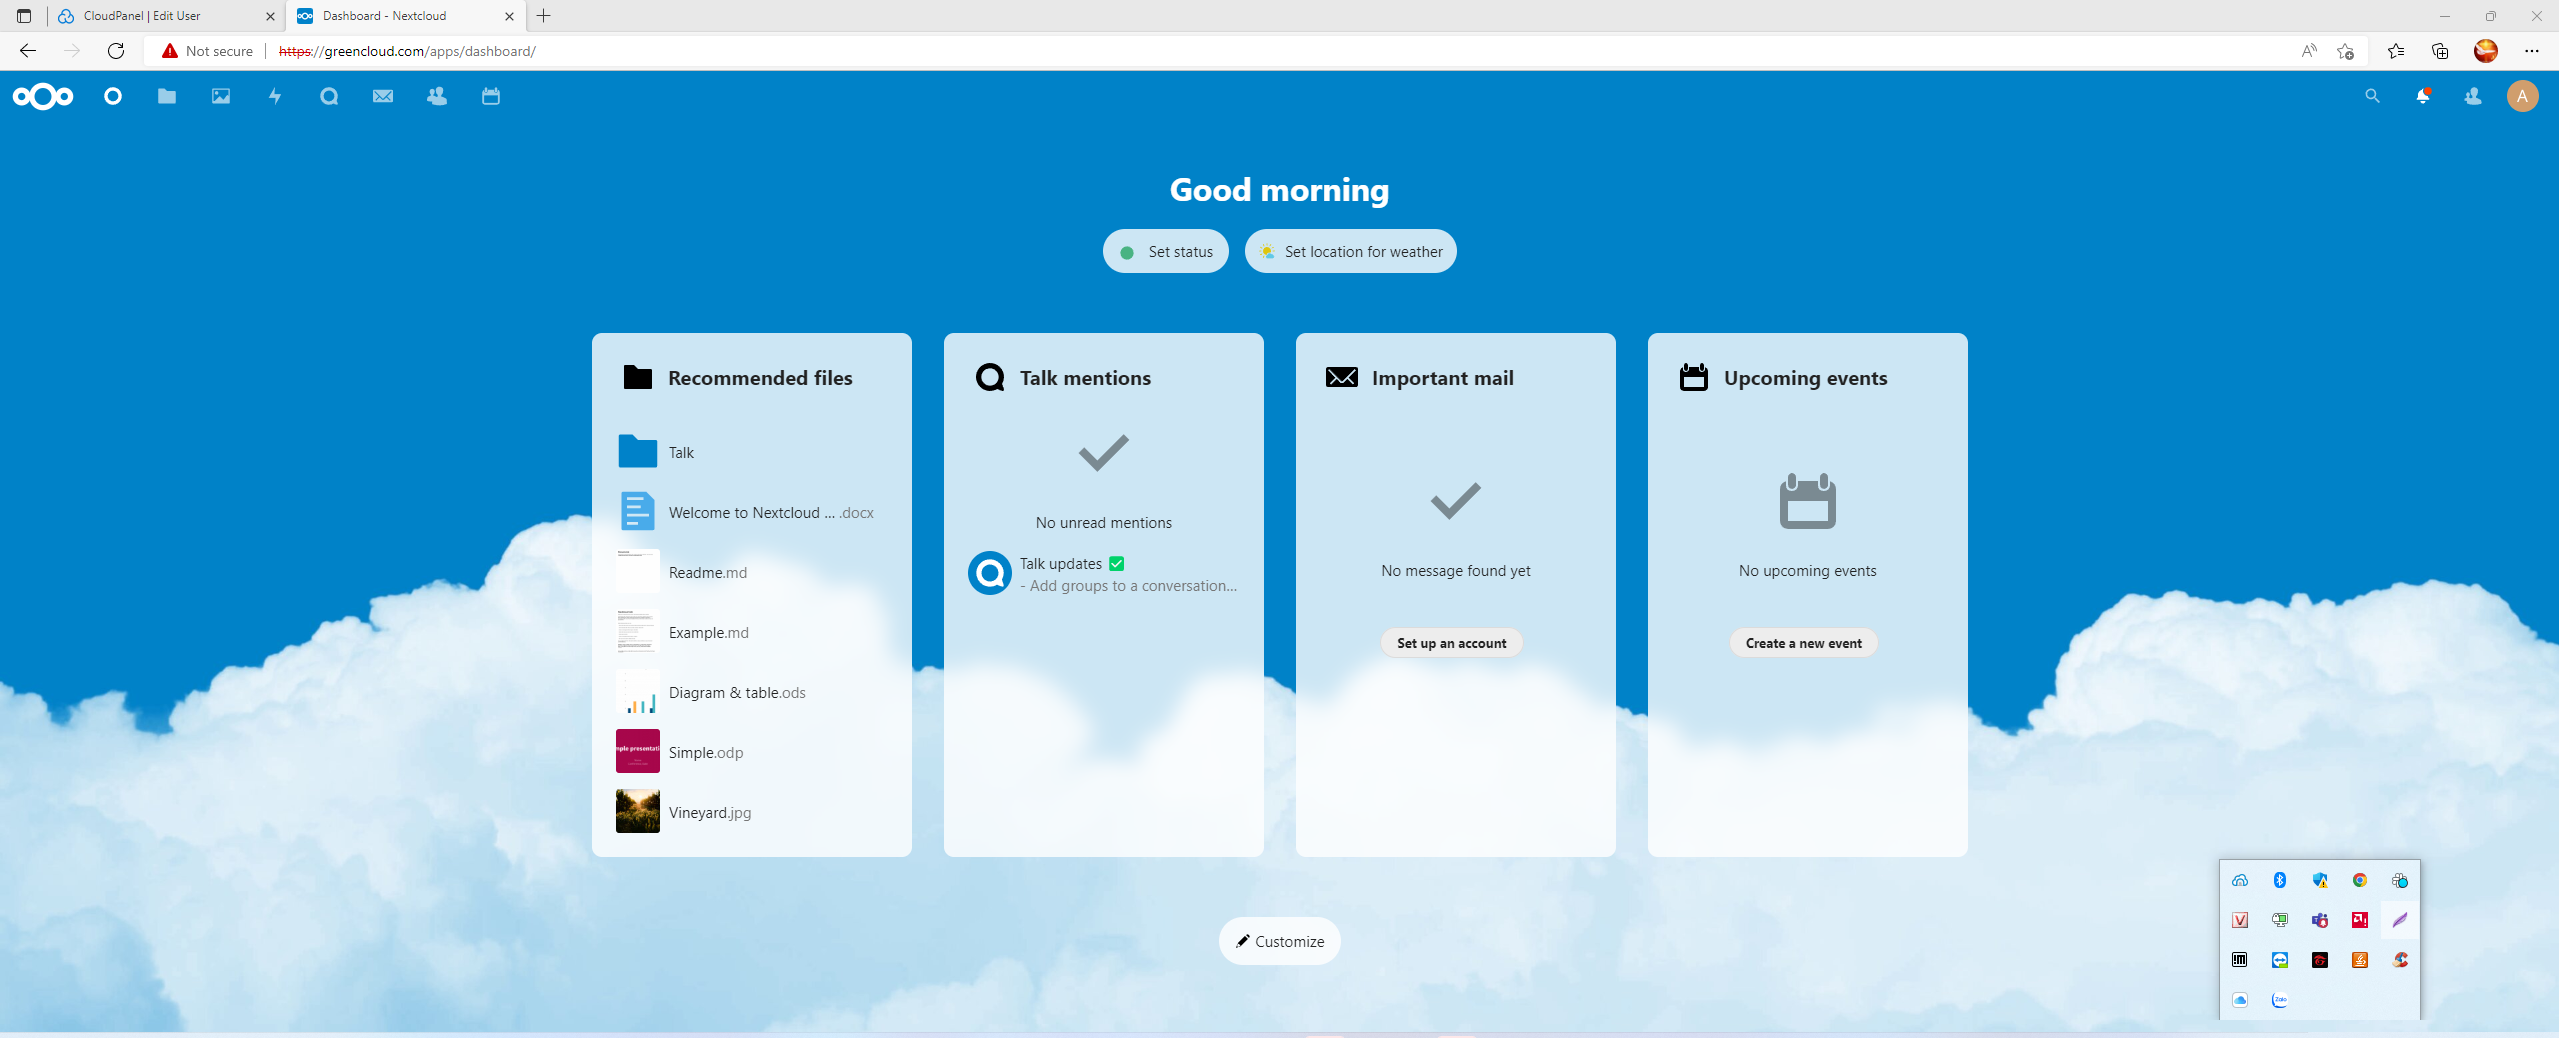
And so Nextcloud has been successfully installed, the interface will look like below.
III. Summary
Thus, in this article, We have shown you how to install Nextcloud on a website using CloudPanel in the most detail. With Nextcloud you can use it for the purpose of storing, sharing, and synchronizing personal or business data quickly and conveniently. And especially Nextcloud is free and open source, so it’s easy for it to gain favor and trust from users.
If you find the article useful, please share it with everyone.

Support 24/24h with coupon code: 1DOLLAROFF 10% discount. Click now! 👆
