How to Install and Configure Memcached on Ubuntu
Memcached is a free, open-source, and general-purpose distributed memory-caching system used to cache database data. It is a high-performance memory caching system used to speed up dynamic web applications by reducing the database load. Memcached is made from four components that allow the client and the server to work together in order to deliver cached data as efficiently as possible. It offers API integration for all the major languages like PHP, Java, C/C++, Python, Ruby, Perl, etc.
This tutorial will show you how to install the Memcached server on the Ubuntu 22.04 server and how to use it with PHP.
Requirements
- A server running Ubuntu 22.04.
- A root password is configured on your server.
Install Memcached on Ubuntu 22.04
By default, the Memcached package is included in the Ubuntu default repository. You can install it easily using the following command:
apt install memcached libmemcached-tools -y
Once Memcached is installed, start the Memcached service using the following command:
systemctl start memcached
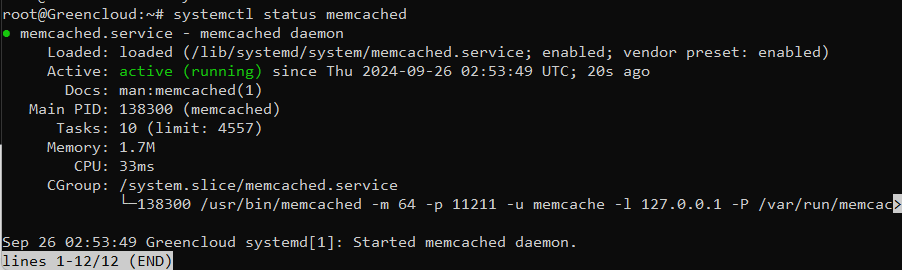
You can check the status of the Memcached with the following command:
systemctl status memcached
You should get the following output:
To verify the Memcached version, run the following command:
memcached -V
You will get the following output:

By default, Memcached listens on port 11211. You can check it with the following command:
ss -plunt | grep memcache
You should see the following output:

Install PHP Memcached Extension
In order to use the Memcached with PHP-based applications. You will need to install the PHP Memcached extension to your server. You can install it with Apache using the following command:
apt install apache2 php libapache2-mod-php php-memcached php-cli -y
Next, create a sample PHP test page to verify the Memcached:
nano /var/www/html/info.php
Add the following code:
<?php
phpinfo();
Save and close the file then restart the Apache service to apply the changes:
systemctl restart apache2
Next, open your web browser and access the PHP page using the URL http://your-server-ip/info.php. You should see the Memcached on the following screen:

Next, create another PHP test page to verify whether the Memcached works or not.
nano /var/www/html/test.php
Add the following code:
<?php

try

{
$memcached = new Memcached();
$memcached->addServer("127.0.0.1", 11211);
$response = $memcached->get("key_cache");

if($response==true)
{
echo "Result coming from caching";
echo $response;
}

else

{
echo "Cache is not created yet, reload again to see changes";
$memcached->set("key_cache", "Hooray! Memcache is working now ...") ;
}
}
catch (exception $e)
{
echo $e->getMessage();
}
?>
Save and close the file then open your web browser and access the PHP test page using the URL http://your-server-ip/test.php. You should see the following screen:

Next, reload the page again. This time the page load from the cache memory as shown below:

Secure Memcached with Authentication
It is recommended to use Simple Authentication and Security Layer (SASL) to secure the Memcached with user-based authentication. To do so, you will need to install the sasl2-bin package on your server.
apt install sasl2-bin
Next, create a directory and configuration file for SASL authentication:
mkdir -p /etc/sasl2
nano /etc/sasl2/memcached.conf
Add the following lines:
log_level: 5
mech_list: plain
sasldb_path: /etc/sasl2/memcached-sasldb2
Save and close the file then create a SASL database with user credentials:
saslpasswd2 -a memcached -c -f /etc/sasl2/memcached-sasldb2 user1
Set your password as shown below:

Next, change the ownership of the Memcached database:
chown memcache:memcache /etc/sasl2/memcached-sasldb2
Next, verify the Memcached using the following command:
memcstat --servers="127.0.0.1"
You should get the following output:
Server: 127.0.0.1 (11211)
pid: 781
uptime: 1417
time: 1727325982
version: 1.6.14
libevent: 2.1.12-stable
pointer_size: 64
rusage_user: 0.105239
rusage_system: 0.054130
max_connections: 1024
curr_connections: 1
total_connections: 4
rejected_connections: 0
connection_structures: 2
response_obj_oom: 0
response_obj_count: 1
response_obj_bytes: 49152
read_buf_count: 6
read_buf_bytes: 98304
read_buf_bytes_free: 32768
read_buf_oom: 0
reserved_fds: 20
cmd_get: 2
cmd_set: 1
cmd_flush: 0
cmd_touch: 0
cmd_meta: 0
get_hits: 1
get_misses: 1
get_expired: 0
get_flushed: 0
delete_misses: 0
delete_hits: 0
incr_misses: 0
incr_hits: 0
decr_misses: 0
decr_hits: 0
cas_misses: 0
cas_hits: 0
cas_badval: 0
touch_hits: 0
touch_misses: 0
store_too_large: 0
store_no_memory: 0
auth_cmds: 0
auth_errors: 0
bytes_read: 118
bytes_written: 93
limit_maxbytes: 67108864
accepting_conns: 1
listen_disabled_num: 0
time_in_listen_disabled_us: 0
threads: 4
conn_yields: 0
hash_power_level: 16
hash_bytes: 524288
hash_is_expanding: 0
slab_reassign_rescues: 0
slab_reassign_chunk_rescues: 0
slab_reassign_evictions_nomem: 0
slab_reassign_inline_reclaim: 0
slab_reassign_busy_items: 0
slab_reassign_busy_deletes: 0
slab_reassign_running: 0
slabs_moved: 0
lru_crawler_running: 0
lru_crawler_starts: 7
lru_maintainer_juggles: 1799
malloc_fails: 0
log_worker_dropped: 0
log_worker_written: 0
log_watcher_skipped: 0
log_watcher_sent: 0
log_watchers: 0
unexpected_napi_ids: 0
round_robin_fallback: 0
bytes: 103
curr_items: 1
total_items: 1
slab_global_page_pool: 0
expired_unfetched: 0
evicted_unfetched: 0
evicted_active: 0
evictions: 0
reclaimed: 0
crawler_reclaimed: 0
crawler_items_checked: 1
lrutail_reflocked: 0
moves_to_cold: 1
moves_to_warm: 0
moves_within_lru: 0
direct_reclaims: 0
lru_bumps_dropped: 0
Next, edit the Memcached configuration file:
nano /etc/memcached.conf
Add the following lines:
-S
-vv
Save and close the file then restart the Memcached service to apply the changes:
systemctl restart memcached
Next, verify the SASL support using the following command:
journalctl -u memcached |grep SASL
If everything is fine, you will get the following output:

Verify Memcached Authentication
First, try to check connectivity to Memcached again without authentication:
memcstat --servers="127.0.0.1"
The command should not produce output. Type the following shell command to check its status:
echo $?
You should receive the following status code means the memcstat command failed.
1
Next, run the Memcached command again by specifying the username and password:
memcstat --servers="127.0.0.1" --username=user1 --password=password
Install Memcached for Python
If you want to integrate Memcached with Python-based web applications, then you will need to install the Memcached extension for Python. You can install it with the following command:
apt install python3-pip
pip install pymemcache
pip install python-memcached
Conclusion
In this post, we explained how to install the Memcached server on Ubuntu 22.04. We also explained how to secure the Memcached with SASL-based authentication. I hope you can now integrate Memcached with your application to speed up the application performance. Feel free to ask me if you have any questions.
