How to Install 3X-UI VPN on Ubuntu 22.04
3X-UI is a user-friendly VPN management panel for managing and configuring VPN servers. It provides an intuitive web interface that simplifies VPN setup, configuration, and monitoring. This guide will walk you through the process of installing 3X-UI VPN on Ubuntu 22.04.
Update Your System
Before installing 3X-UI, it’s important to ensure that all existing packages on your system are up to date. Run the following command:
apt update && apt upgrade -yInstall Necessary Dependencies
You will need certain dependencies, such as curl and unzip, for the installation process. Install them using the command:
apt install curl unzip -yDownload and Install 3X-UI
To install 3X-UI, use the official installation script provided by its developers. Run the following command:
bash <(curl -Ls https://raw.githubusercontent.com/mhsanaei/3x-ui/master/install.sh)During the installation process, the script will prompt you to decide whether you want to customize the port settings. You can respond with ‘Y’ if you wish to configure the panel port or ‘N’ to accept the default settings. If you choose to customize the port, you’ll have to enter the desired port number for accessing the 3X-UI panel.
After this step, the script will automatically generate a username and password for accessing the panel, which will be displayed on the screen along with the panel’s base URI.
For example:
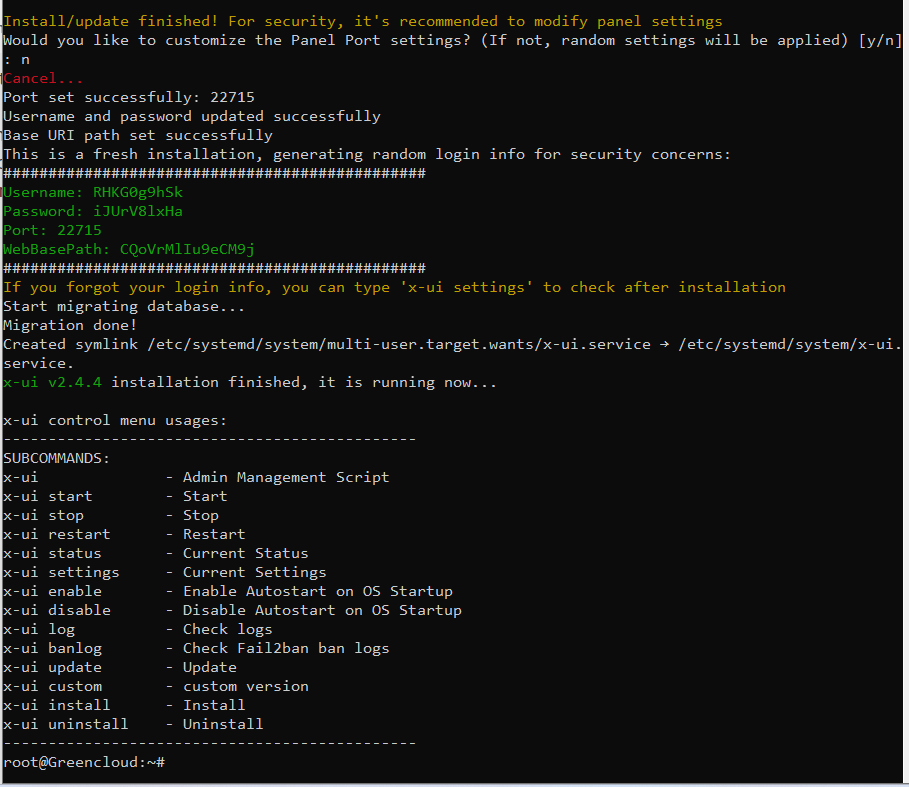
Make sure to securely store the Username, Password, Port, and WebBasePath, as you will need these details to access the panel.
Start and Enable the 3X-UI Service
Once the installation is complete, you need to start and enable the 3X-UI service so that it runs in the background. Use the following commands:
systemctl start x-ui
systemctl enable x-ui
Access the 3X-UI Web Interface
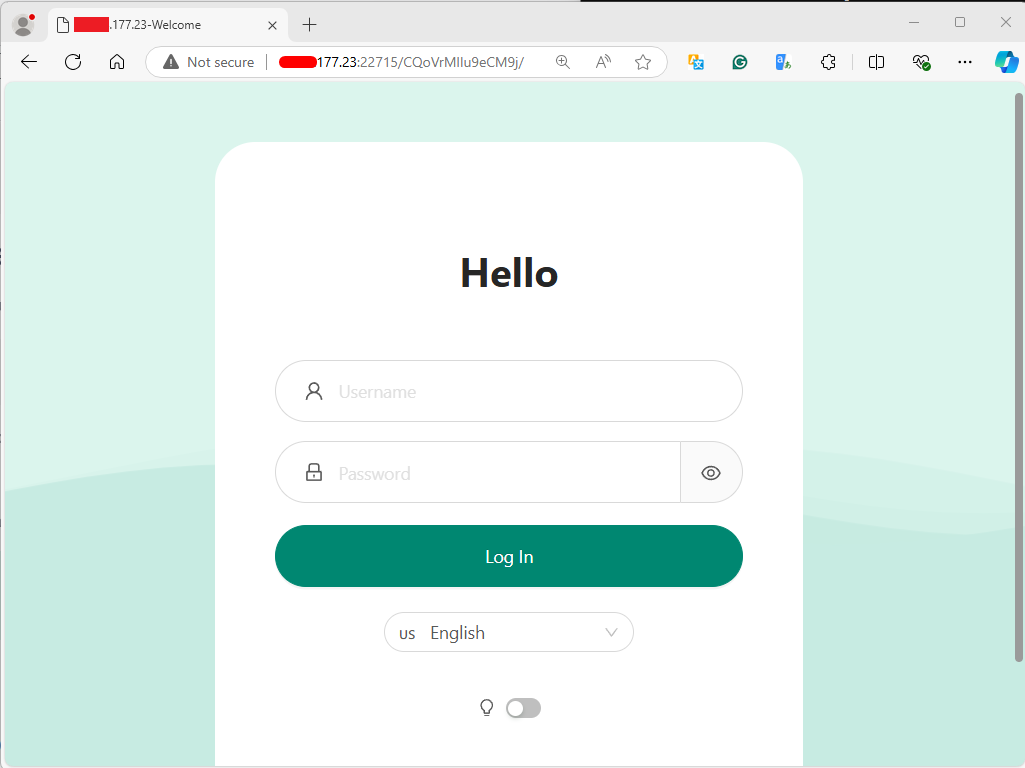
You can access the 3X-UI VPN management interface through your web browser by visiting the following URL:
http://serverip:port/web-pathNote: Replace serverip, port and web-path with the actual IP Address and Port, and WebBasePath which have been provided during the installation.
Login Page
After navigating to the URL, you will be prompted with the login page. Use the default username and password provided during the installation.
Once logged in, you will be taken to the 3X-UI dashboard, where you can manage your VPN settings and users.
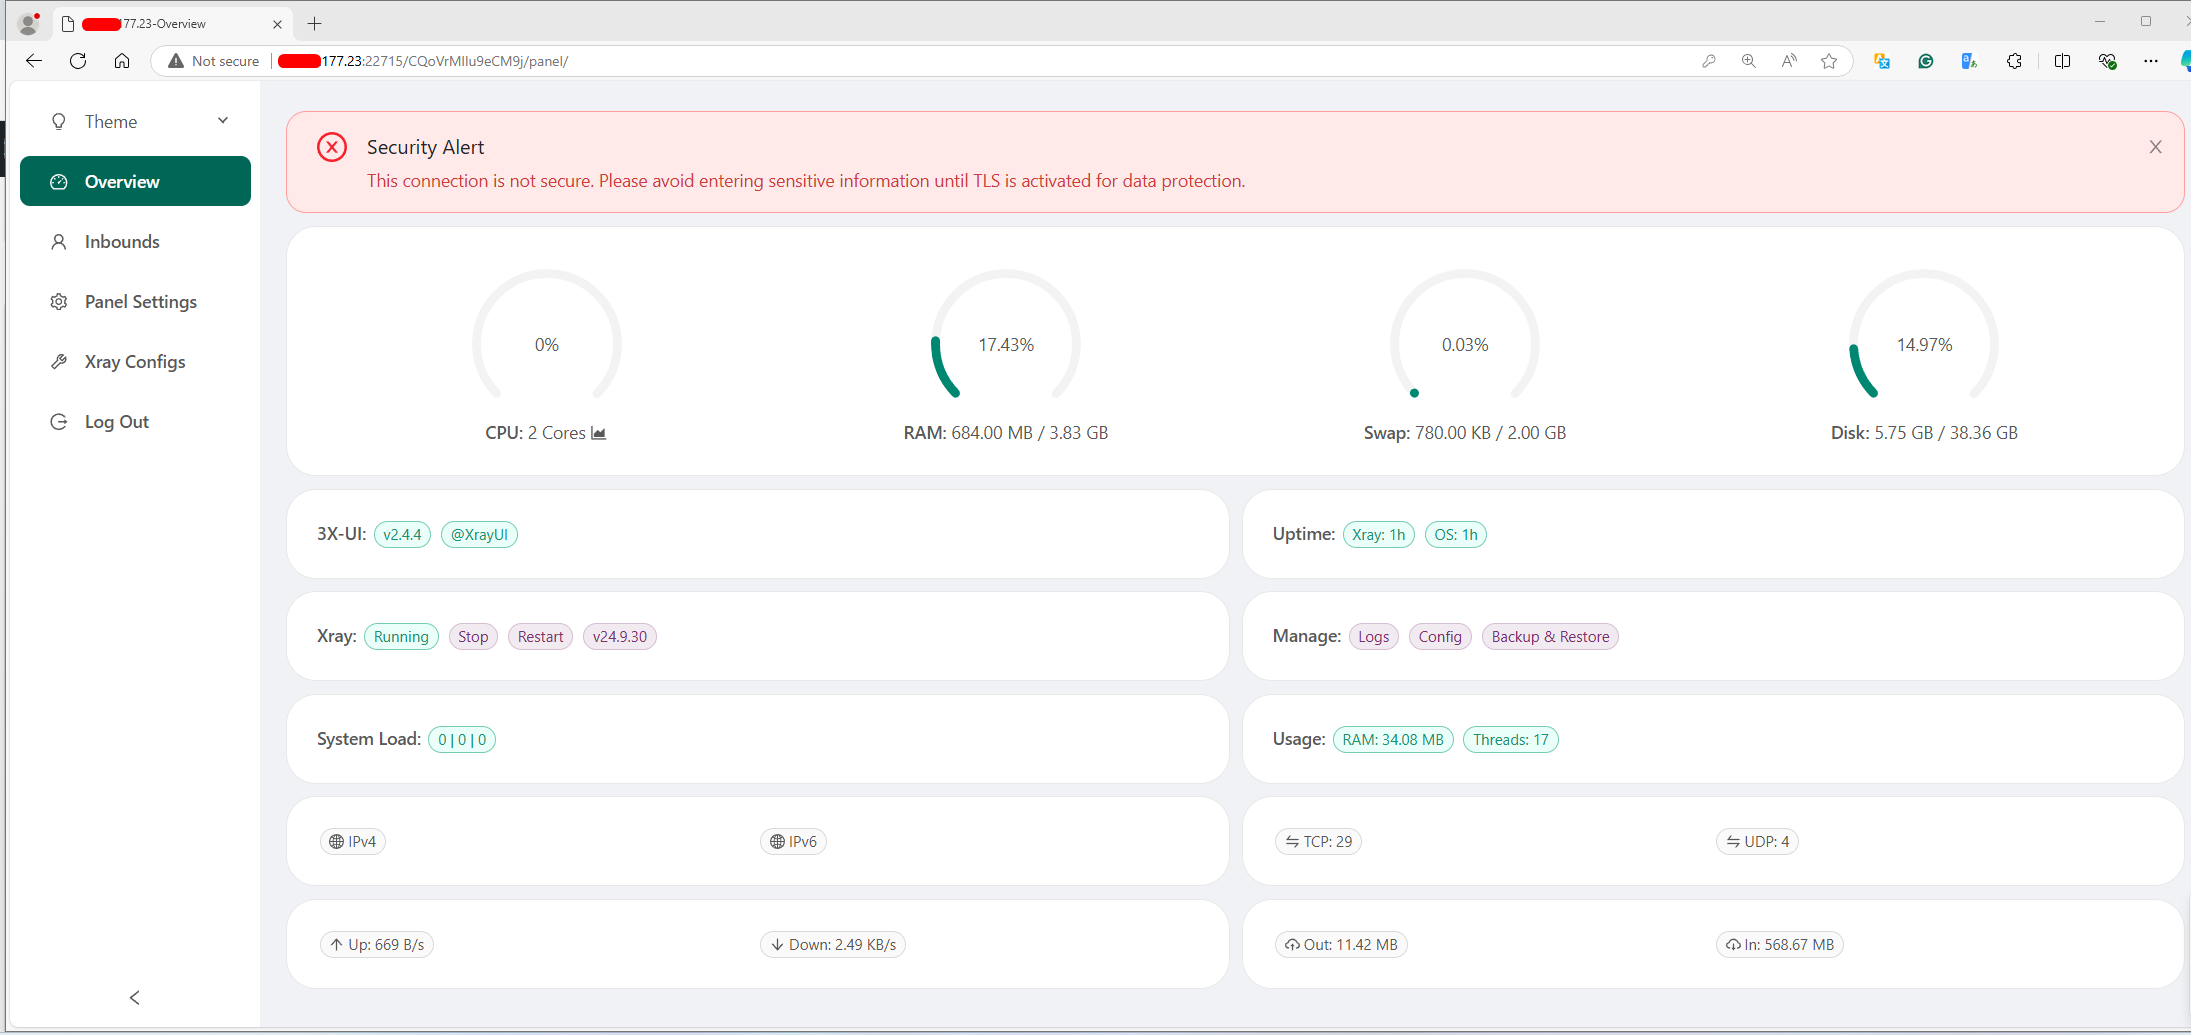
Upon accessing the 3X-UI interface, after logging in with the default credentials. Make sure to change the default username and password immediately for security purposes.
Done, you have successfully installed and set up 3X-UI VPN on Ubuntu 22.04. You can now manage your VPN services through the web interface, making the entire process more streamlined and user-friendly.
