How to Install Zabbix server on Centos 8 stream
About Zabbix
Zabbix is an enterprise-class open source distributed monitoring solution that can be used to monitor and track the performance and availability of network servers, devices, and other IT resources. It supports distributed and WEB monitoring, auto-discovery, and more.
Prerequisites
Before installing Zabbix, we should have installed and configured the LAMP stack. To install and configure the LAMP server On CentOS 9, refer to the following link: How To Install The LAMP Stack On CentOS 9 stream
Install Zabbix Server
Install and configure the Zabbix server for your platform:
1. Install the Zabbix repository
dnf -y install php-mysqlnd php-gd php-xml php-bcmath php-ldap
dnf -y install https://repo.zabbix.com/zabbix/6.0/rhel/8/x86_64/zabbix-release-6.0-1.el8.noarch.rpm
2. Install the Zabbix server, frontend, and agent
# dnf -y install zabbix-server-mysql zabbix-web-mysql zabbix-apache-conf zabbix-sql-scripts zabbix-selinux-policy zabbix-agent
3. Create an initial database
Make sure you have the database server up and running.
Run the following on your database host.
# mysql -uroot -p
password
mysql> create database zabbix character set utf8 collate utf8_bin;
mysql> create user zabbix@localhost identified by 'password';
mysql> grant all privileges on zabbix.* to zabbix@localhost;
mysql> quit;
On the Zabbix server host, import the initial schema and data. You will be prompted to enter your newly created password.
# zcat /usr/share/doc/zabbix-server-mysql*/create.sql.gz | mysql -uzabbix -p zabbix
4. Configure the database for the Zabbix server
Edit file /etc/zabbix/zabbix_server.conf
DBHost=localhost
DBPassword=password
5. Start Zabbix server and agent processes
Start Zabbix server and agent processes and make it start at system boot.
# systemctl restart zabbix-server zabbix-agent httpd php-fpm
# systemctl enable zabbix-server zabbix-agent httpd php-fpm
6. Configure Zabbix frontend
Connect to your newly installed Zabbix front end: http://server_ip_or_name/zabbix
The first page you come to is a welcome page. Click on the Next step: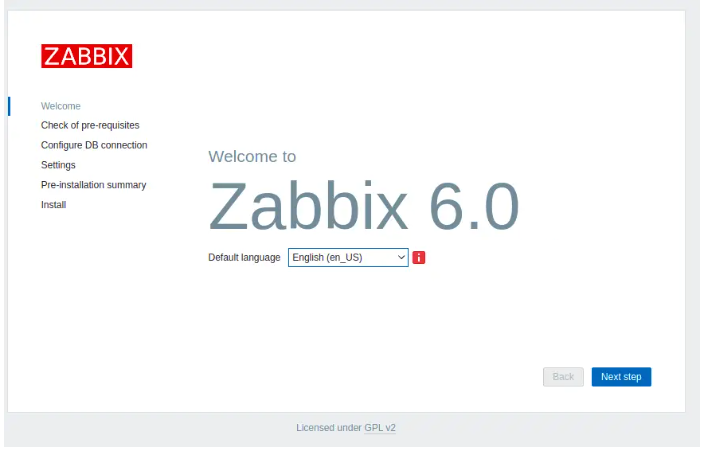
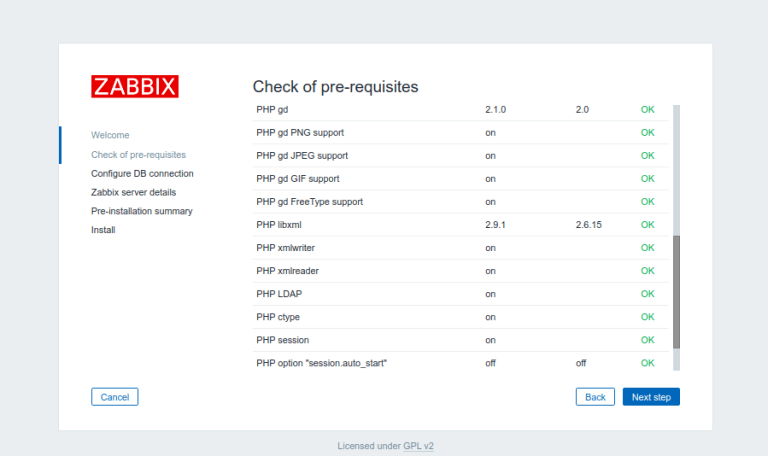
Next, Zabbix will run through a list of prerequisites. You should see all OK statuses as you scroll down the list. At this point, you will see if the edits you made earlier are correct. If they are not, the setup wizard will not proceed until you make the corrections in your configuration files. If everything is correct and documented, click on the Next step:
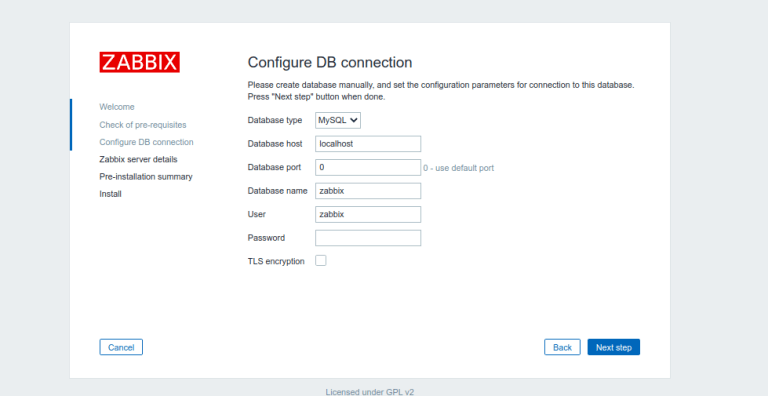
Now supply the database connection info to the web front end. Be sure to change the Database Port (if you did not use the default MySQL port 3306) and enter the database user password you configured when setting up the Zabbix database. If everything is correct and documented, click on the Next step:
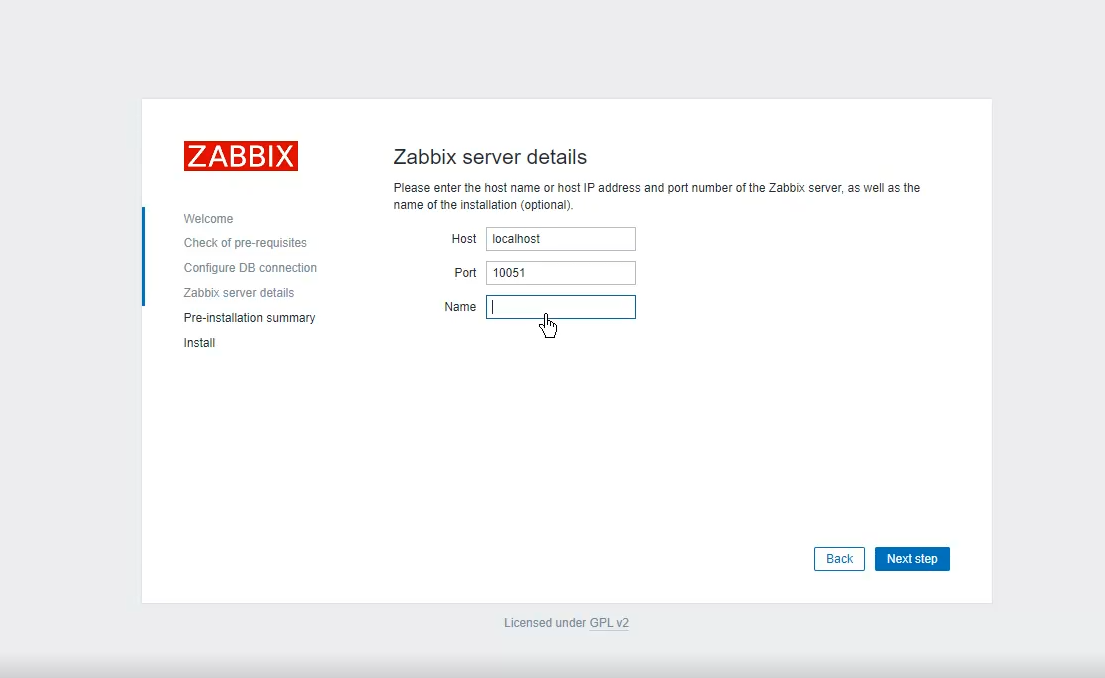
Lastly, give the Zabbix server a Name and leave the default values for Host and Port. Any name will work, this is just a way to label your Zabbix server in the Zabbix UI. As a best practice though, try to use the actual hostname of your server. When satisfied, click on the Next step:
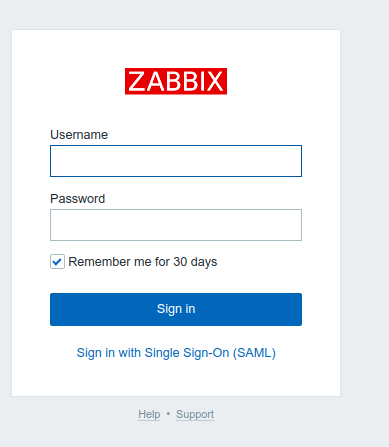
The installation is now complete. Click on Finish. You will now be returned to the Zabbix server login page. The default credentials to log in are case-sensitive. Every time you install a new instance of Zabbix, the default credentials are Admin / Zabbix :
 Your Zabbix server installation on Centos 7 is now complete.

