How to use the Rescue Mode in Virtfusion
Introduction
Rescue mode, or LiveOS, is a Linux environment equipped with tools to support accessing your data. You will have access to all your disks and will be able to resolve the issue or back up data before performing a reinstallation.
In this article, we will show you how to use the Rescue Mode to take a backup of the data in the Virtfusion Control Panel.
Prerequisites:
- An active KVM VPS
- Access to the Virtfusion VPS control panel
Method 1: Boot directly into the available Rescue mode.
1. Create a rescue mode session
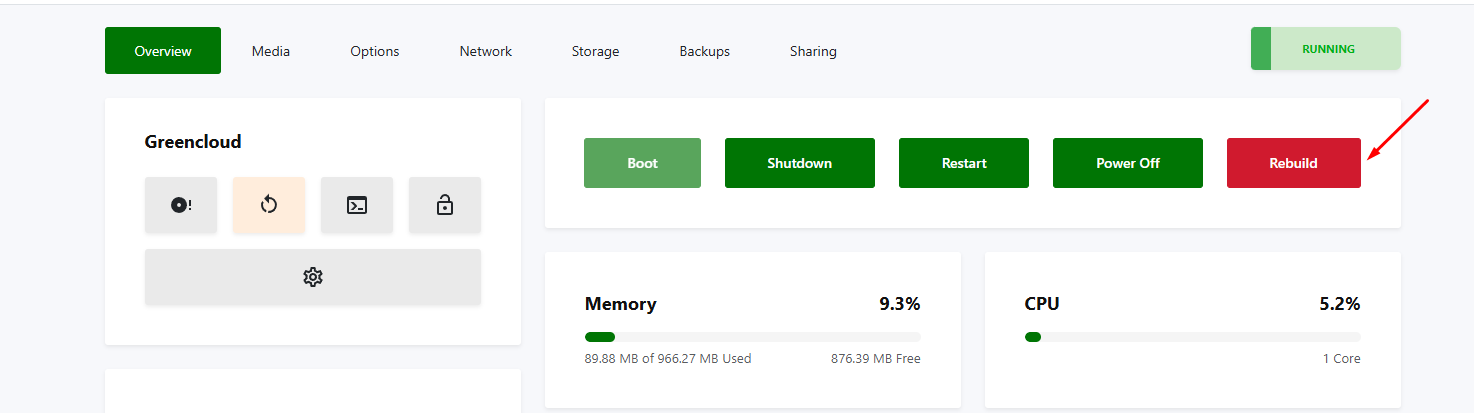
- Upon logging into Virtfusion, choose the virtual machine that needs to be booted into rescue mode -> click on “manage”

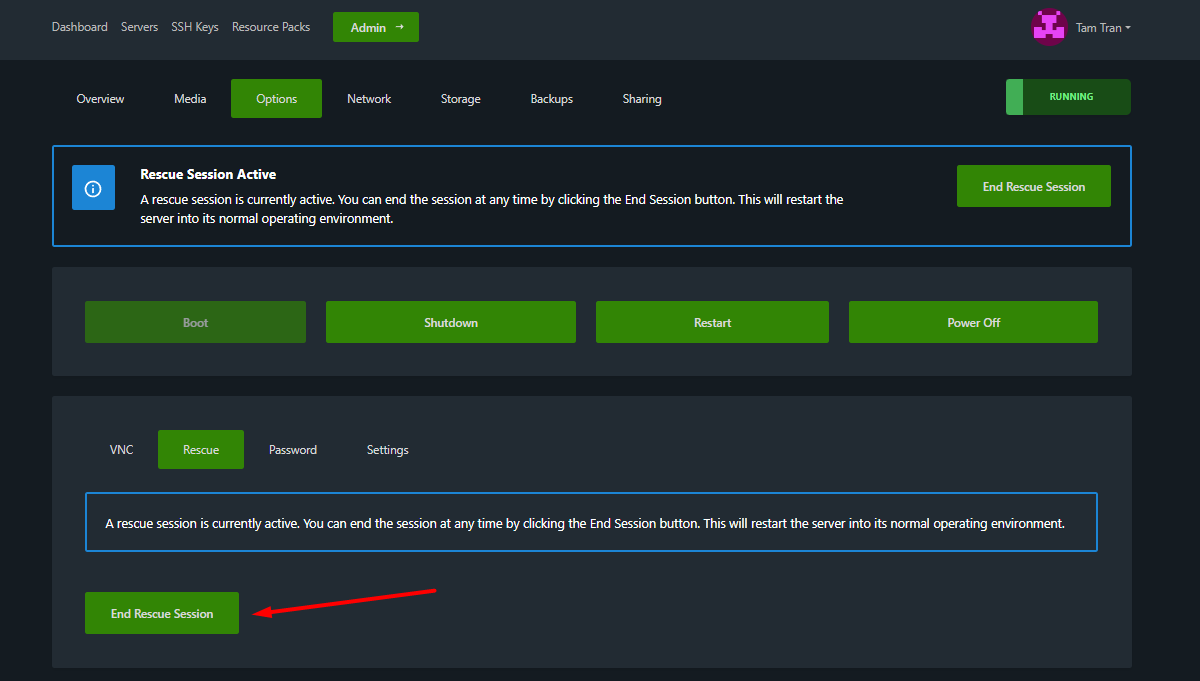
After selecting the virtual machine, click Option -> Rescue -> Create rescue session in the control panel.

Please wait a few minutes; the login information for VPS via rescue mode will be sent to your Virtfusion account email.
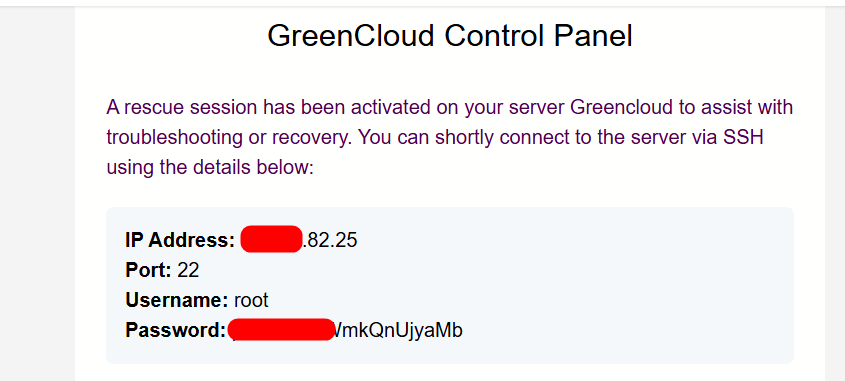
2. SSH to your virtual machine using the above information
You can access your VPS using a free, simple SSH client program called Putty or BitviseSSH, located at:
https://www.bitvise.com/ssh-client-download
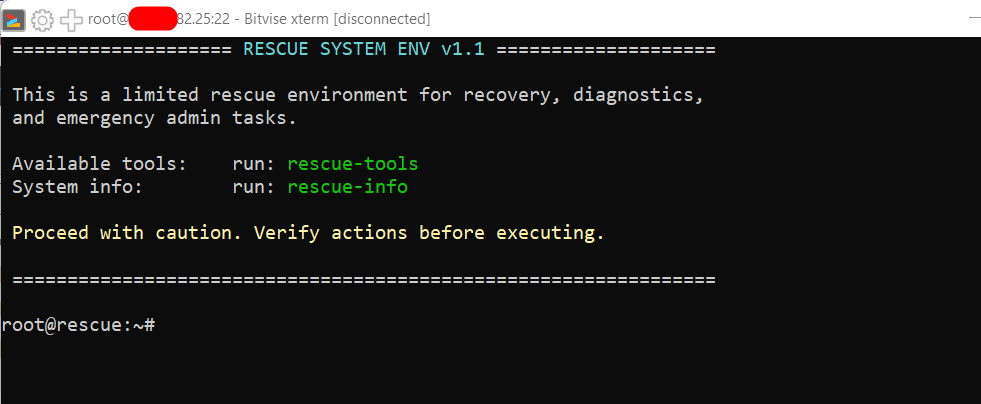
List your partitions to retrieve the name of the partition you need to mount.
fdisk -l

You can mount the partitions you want to mount using the mount command in SSH:
mount /dev/vda1 /mnt/
Your partition will now be mounted.
3. Backup your data
- You can use the SFTP protocol via BitviseSSH to take a backup of your data

- Once opened, you can create a folder on your PC
- On the right-hand side, locate /mnt
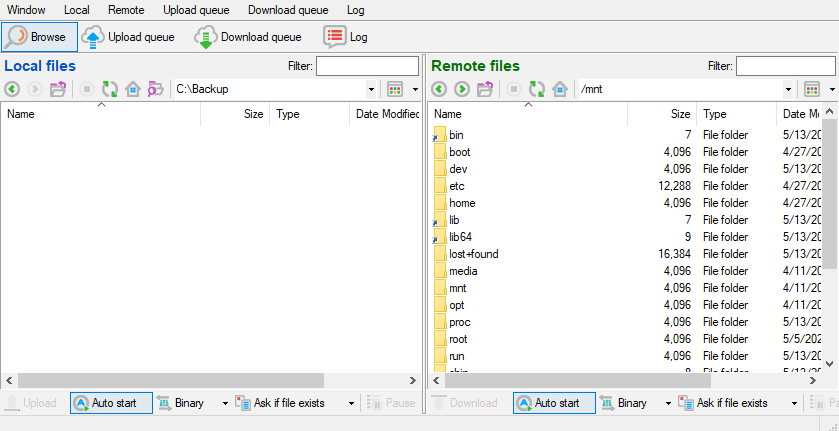
- Now, drag and drop the data that you need to the left
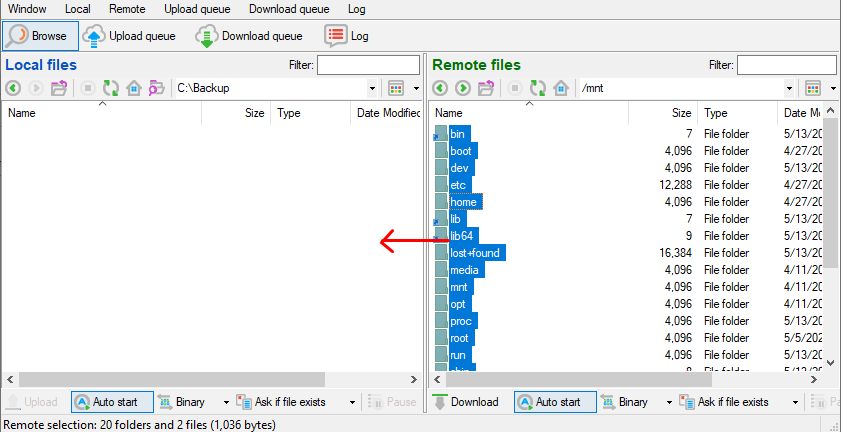
- Wait until it finishes.
4. Exit rescue mode
Once you are done with the backup, you can now disable rescue mode. Upon disabling rescue mode, the virtual machine will be rebooted into your primary operating system.
5. Reinstall your VPS
You can reinstall your VPS by clicking on “reinstall” in the Virtfusion control panel
Method 2: Boot into rescue mode using an ISO file from a CD.
.Upon logging into Virtfusion, choose the virtual machine that needs to be booted into rescue mode -> click on “manage”
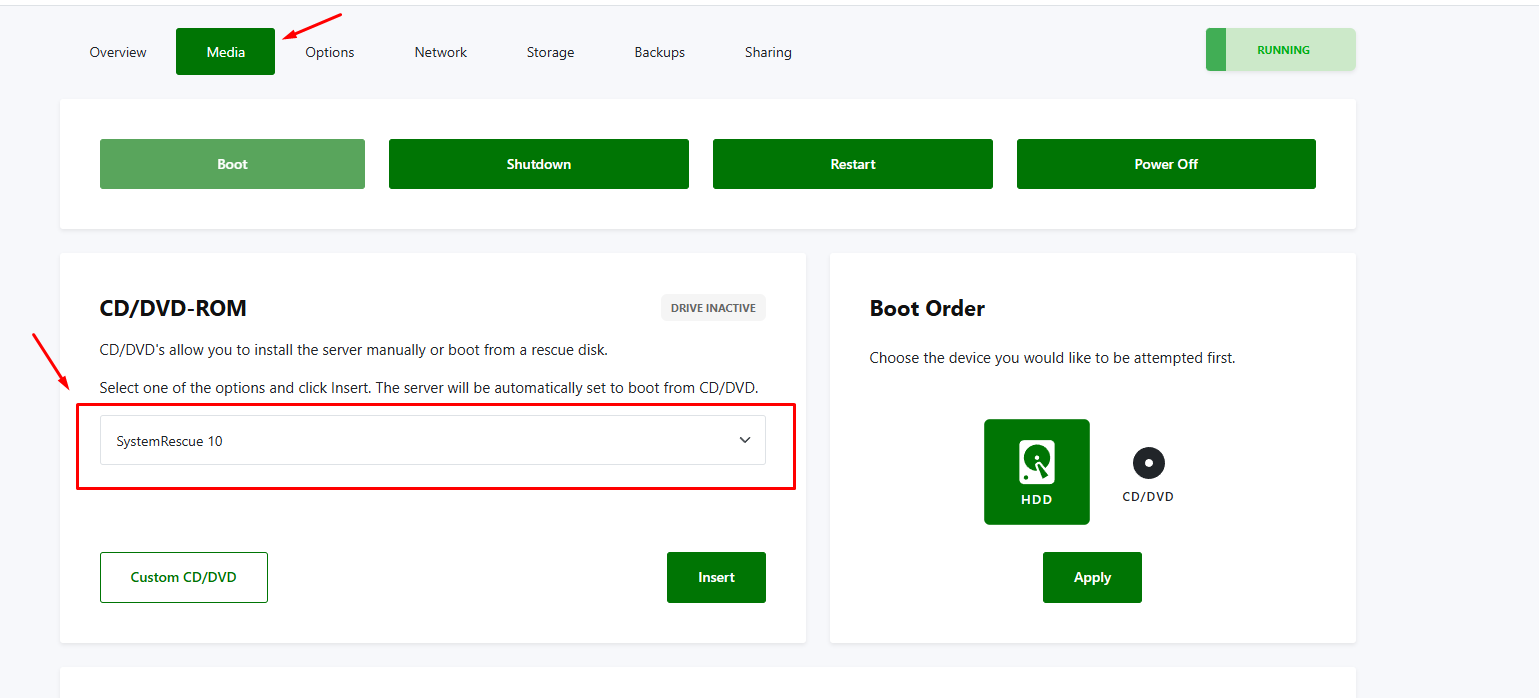
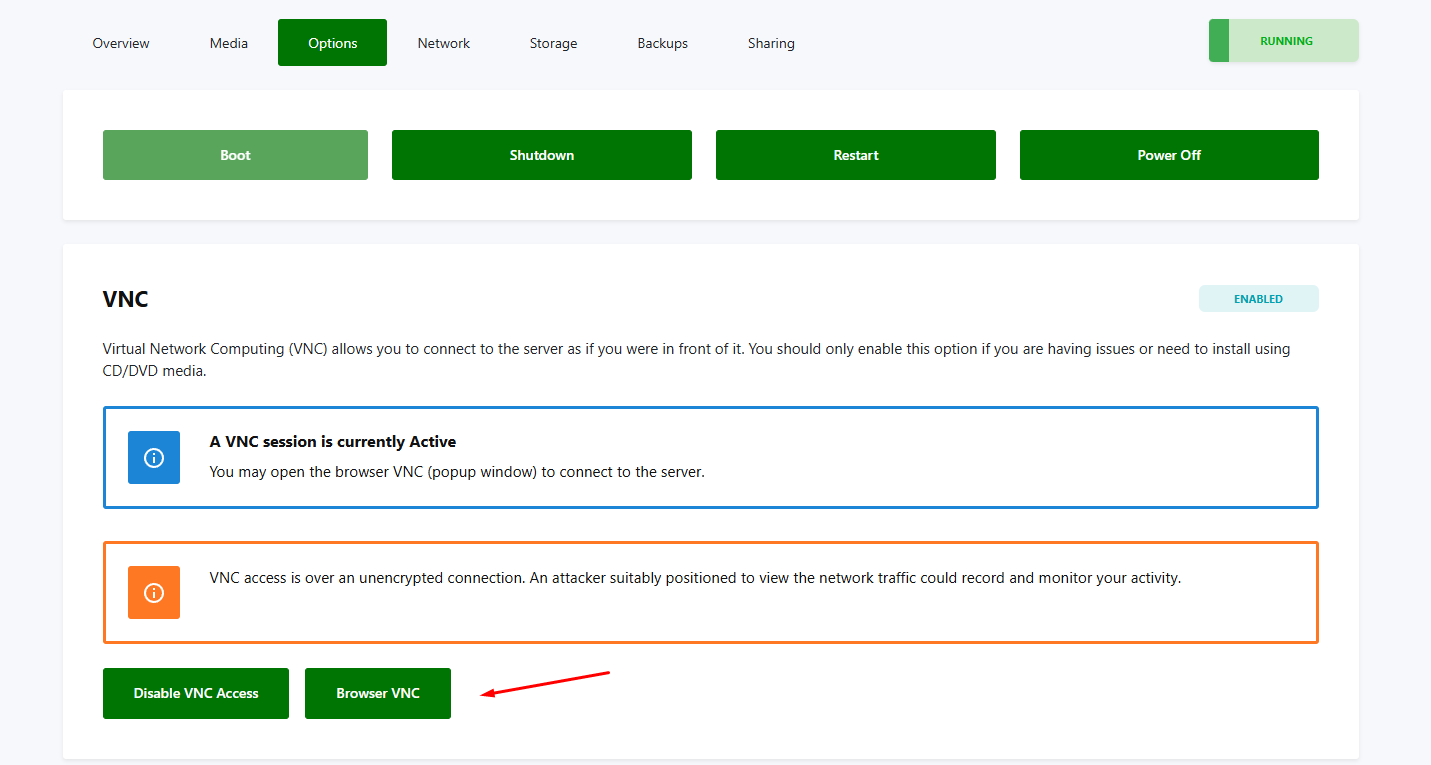
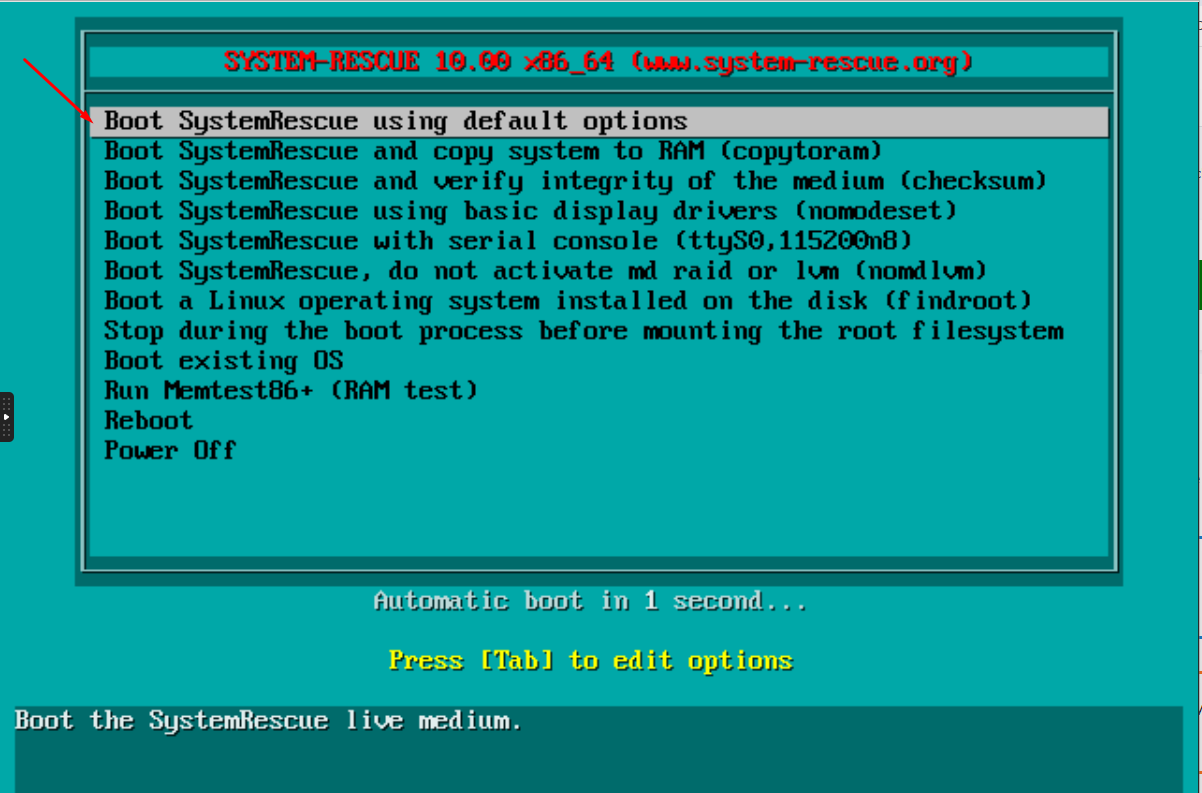
- After selecting the virtual machine, click Media in the control panel. Under CD/DVD-ROM, select SystemRescue 10. Then click Insert. In the Boot Order section, select CD/DVD, and click Apply.
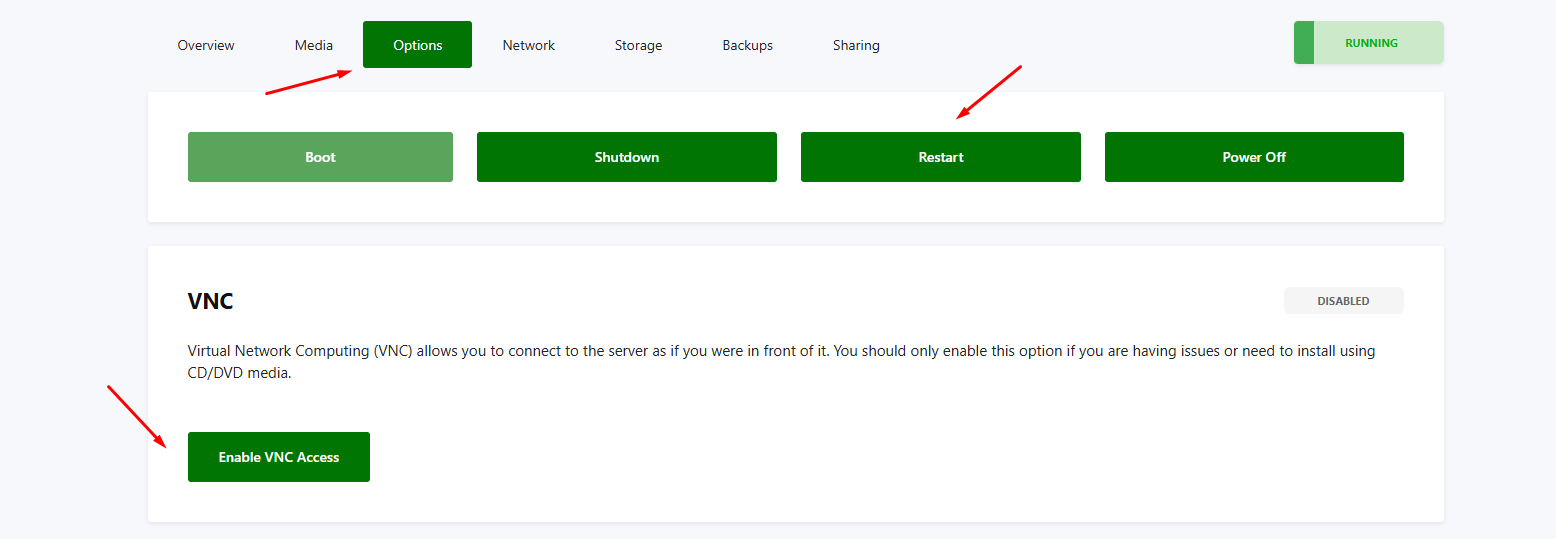
- Next, restart your VPS in the control panel. Then go to the Options section and click Enable VNC Access
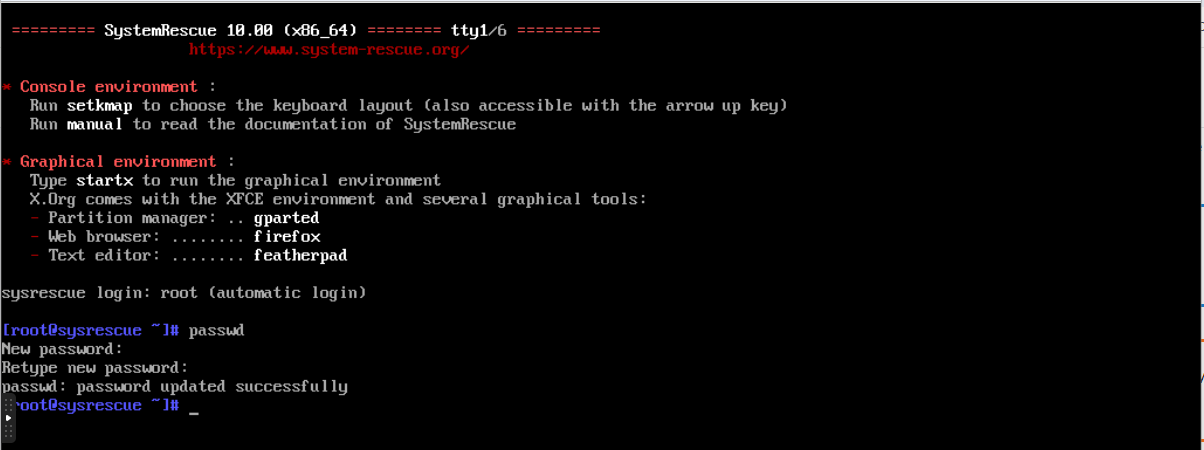
- Then click on Browser VNC and leave it as the default. After connecting to the VPS via VNC, you can change the VPS password.

Next, configure the network so that the VPS can access SSH. You can run the following command:
ip addr add <your_ip_address>/<subnet_mask> dev ens3
ip route add default via <gateway_ip>
systemctl stop iptables
The continue steps are similar to Method 1, starting from item 2 onward.
That’s all! Enjoy GreenCloudVPS services!
