How to Install and Configure HAProxy on Ubuntu 22.04
HAProxy or High Availability Proxy, is a well-known open-source TCP/HTTP load balancer and proxy solution which is able to handle a lot of traffic. HAProxy consumes a very low amount of memory, and it is commonly used to improve the performance of servers by distributing the workload across multiple servers to handle a large number of concurrent connections. If you have busy websites, you can install and configure HAProxy as the reverse proxy to your webservers.
In this tutorial, we will show you how to install and configure HAProxy on Ubuntu 20.04, one of the most popular operating systems in the world.
Prerequisites
- 3 Ubuntu 22.04 VPS, one for HAProxy and we will use the other two as the webservers.
- SSH root access or a normal SSH user with sudo privileges
Step 1. Login and Update the System
Log in to your Ubuntu 22.04 VPS as a root user or as a regular user with sudo privileges. In this tutorial, we will use a root user
Run this command to check whether you have the proper Ubuntu version installed on your server:
# lsb_release -a
You should see this output:
No LSB modules are available.
Distributor ID: Ubuntu
Description: Ubuntu 22.04.1 LTS
Release: 22.04
Codename: jammy

Now, run the following command to update all installed packages to the latest available version.
# apt update && apt upgrade
Step 2. Install HAProxy
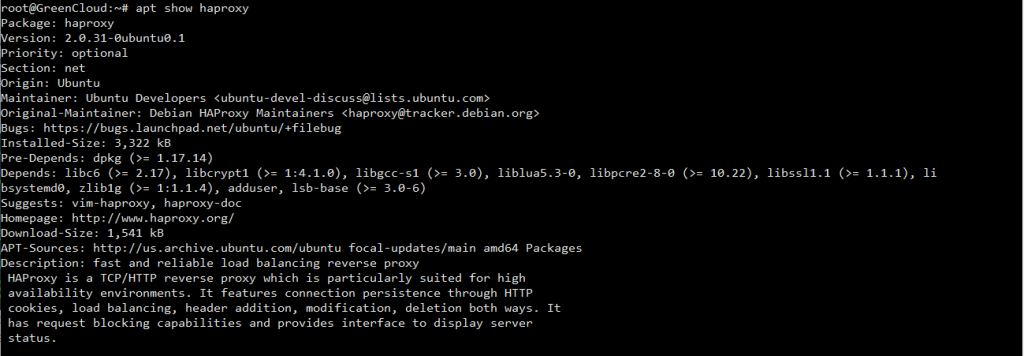
HAProxy is available on the default Ubuntu 22.04 repository. However, the available package is not the most recent stable version. Let’s check the HAProxy version if we want to install it from Ubuntu 22.04 repository.
# apt show haproxy
You can check the latest stable version at http://www.haproxy.org/#down. In this article, we are going to install HAPproxy 2.8, let’s run the following command to proceed with the installation.
# apt install software-properties-common
The software-properties-common package is probably already installed on your server, but there will be no issue if you run this command again.
# add-apt-repository ppa:vbernat/haproxy-2.8
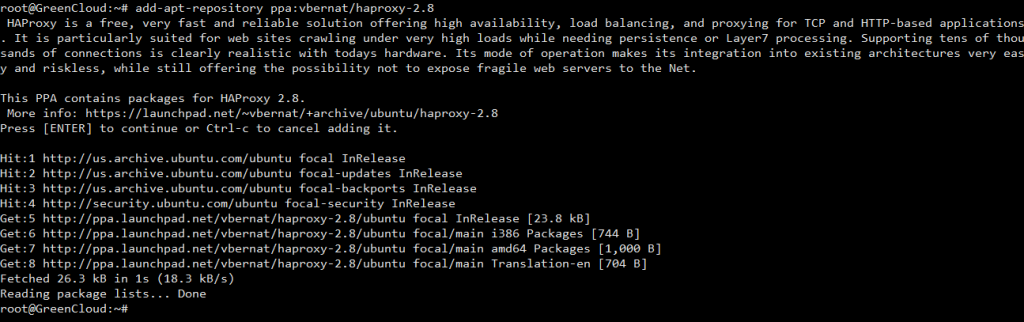
This command puts the Personal Package Archive (PPA) into the list of apt sources. After adding the PPA to our APT source list, we can run the command below to complete the installation. You can replace the version number in the command above if you want to use another version of HAProxy.
# apt update
# apt install haproxy
Once installed, we can check the version by running this command:
# haproxy -v
You should see this output:

Step 3. Configure HAProxy
By default, HAProxy is not configured to listen on a port number. In this step, since we are going to configure it as a reverse proxy and load balancer, we are going to make changes to the default HAProxy configuration.
# cp -a /etc/haproxy/haproxy.cfg{,.orig}
The command above will copy the file /etc/haproxy/haproxy.cfg to /etc/haproxy/haproxy.cfg.orig
Now. let’s edit the file.
# nano /etc/haproxy/haproxy.cfg
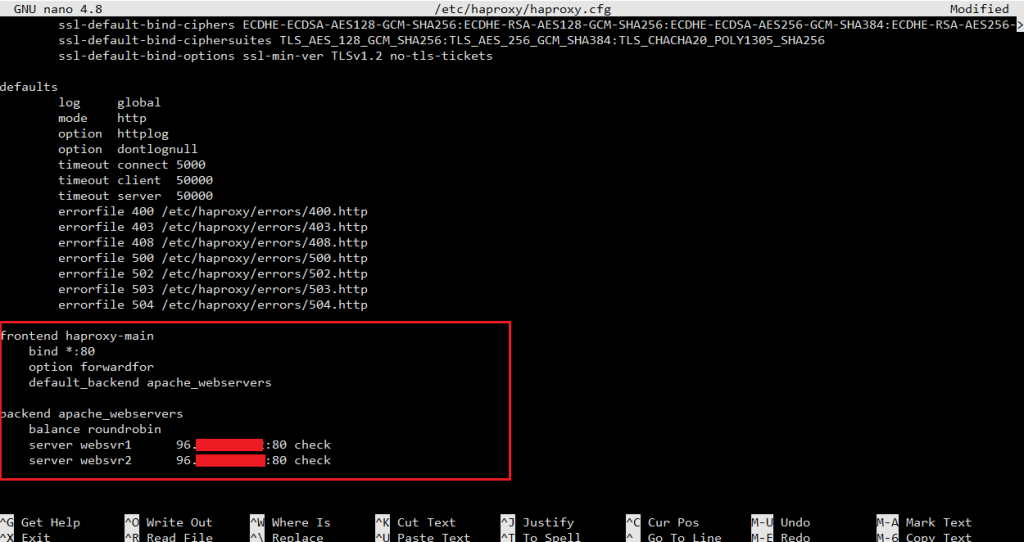
And append these lines:
frontend haproxy-main
    bind *:80
    option forwardfor
    default_backend apache_webservers

backend apache_webservers
    balance roundrobin
    server websvr1	10.0.0.10:80 check
    server websvr2	10.0.0.20:80 check
Make sure to replace 10.0.0.10 and 10.0.0.20 with your actual webserver IP addresses. Save the file then exit.
Now, log in to your other two servers and install apache on the servers then create a default index file by running these commands.
# apt update
# apt install apache2 -y
- On websvr1, run this command:
# echo "<H1>Apache on backend server 1 is running </H1>" |sudo tee /var/www/html/index.html
- On websvr2, run this command:
# echo "<H1>Apache on backend server 2 is running </H1>" |sudo tee /var/www/html/index.html
Save the files then exit.
- On your HAProxy server, restart the service:
# systemctl restart haproxy
The HAProxy server is now ready to accept and distribute the workload across the two apache servers. You can verify this by invoking a one-liner command in your HAProxy server.
# while true; do curl localhost; sleep 1; done

As seen in the picture, the website is loaded both from websvr1 and websvr2.
If you want to see the statistics and see the information through the GUI, we can configure HAProxy and enable the monitoring function.
Open HAProxy configuration file.
# nano /etc/haproxy/haproxy.cfg
Then append these lines.
listen stats
    bind :8800
    stats enable
    stats uri /
    stats hide-version
    stats auth username:password
    default_backend apache_webservers
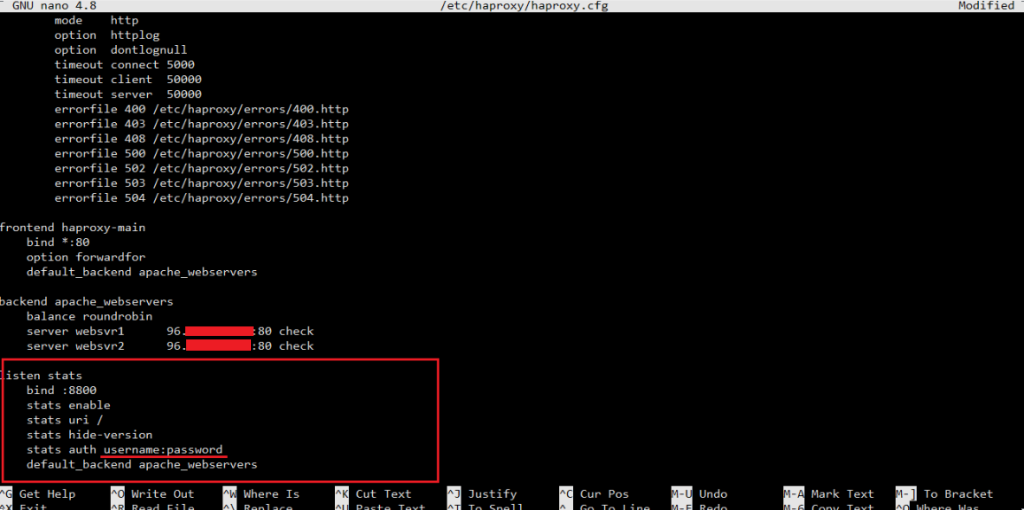
Pay attention to the stats auth part. This is where you specify the login name and password. Change the login name and password to a stronger password. Save the file, exit and restart HAProxy
# systemctl restart haproxy
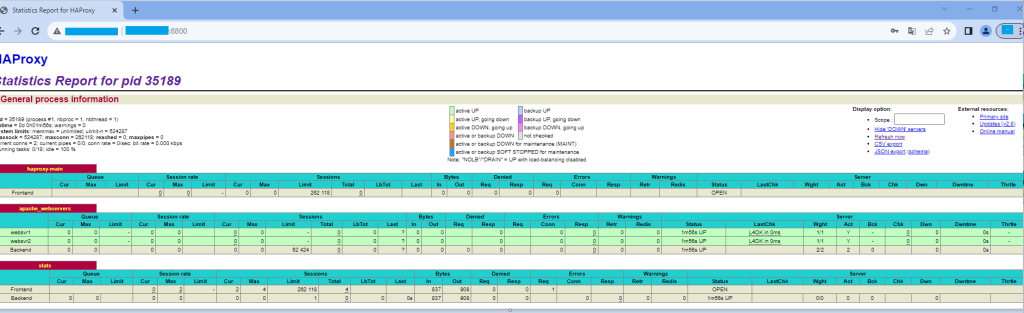
Now, you can navigate to http://YOUR_HAPROXY_IP_ADDRESS:8800 to see the statistics, you will be asked for the username and password you specified earlier in /etc/haproxy/haproxy.cfg.
That’s it. You have successfully installed HAProxy on your VPS Ubuntu 22.04 . For more information about HAProxy, please refer to the HAProxy website.
Conclusion
In this post, we showed you how to install and configure the HAProxy server to distribute load across two Apache web servers. on Ubuntu 22.04. You can now implement HAProxy in the production environment to increase your web application performance and availability.

