How to install and configure a FileZilla Server to transfer files data (newest version)
Introduction
FileZilla is a software that supports data transfer between 2 VPS or Servers over the internet using FTP protocol. FileZilla includes FileZilla Server and FileZilla Client
Here are the steps to set up FileZilla Server.
1. Download and install Filezilla Server at: https://filezilla-project.org/download.php?type=server
2. Open FileZilla Server and connect with the default set (port 14148)

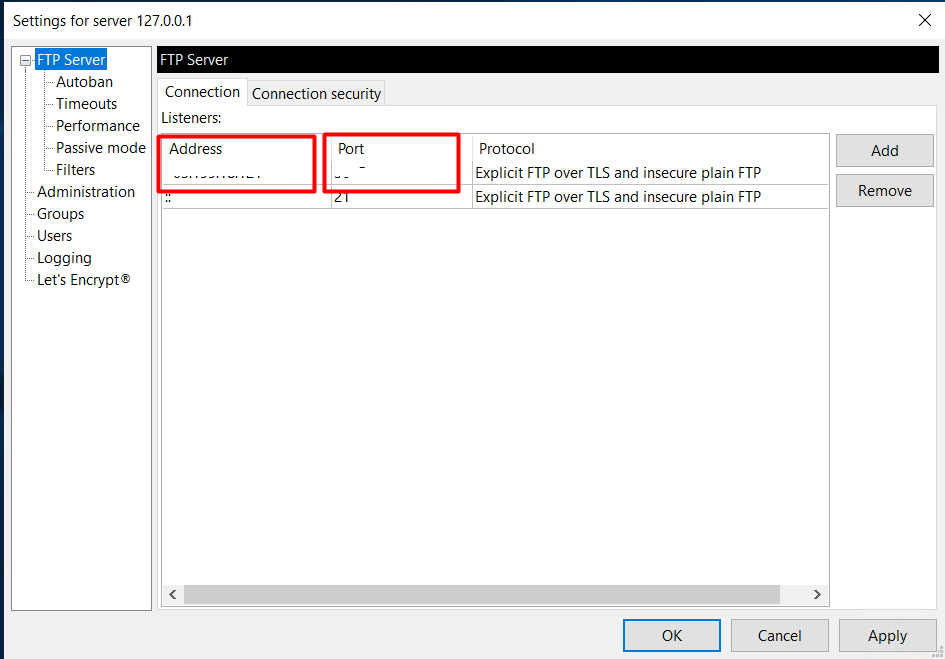
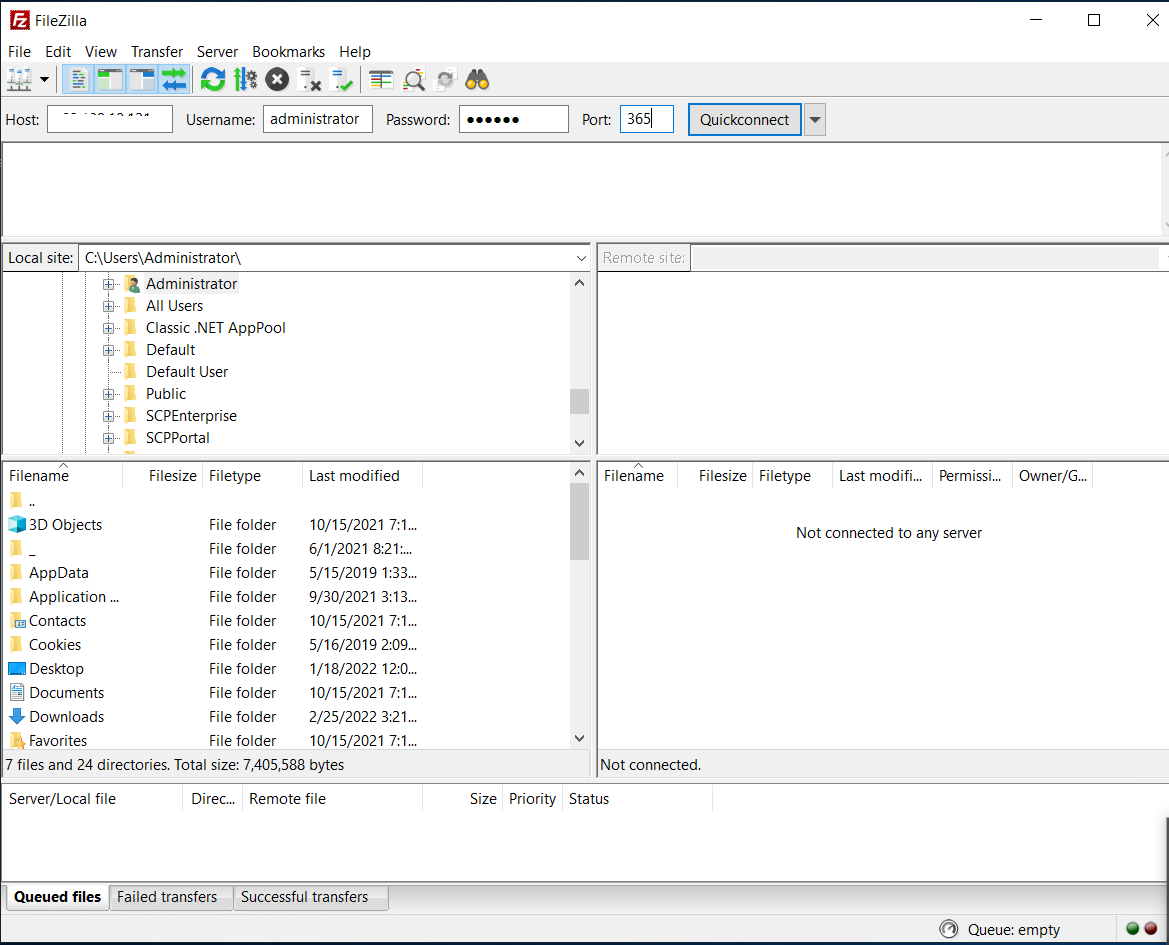
3. Select the Server -> Configure section: Then enter the IP address information of VPS/server and port FTP. Example port: 365
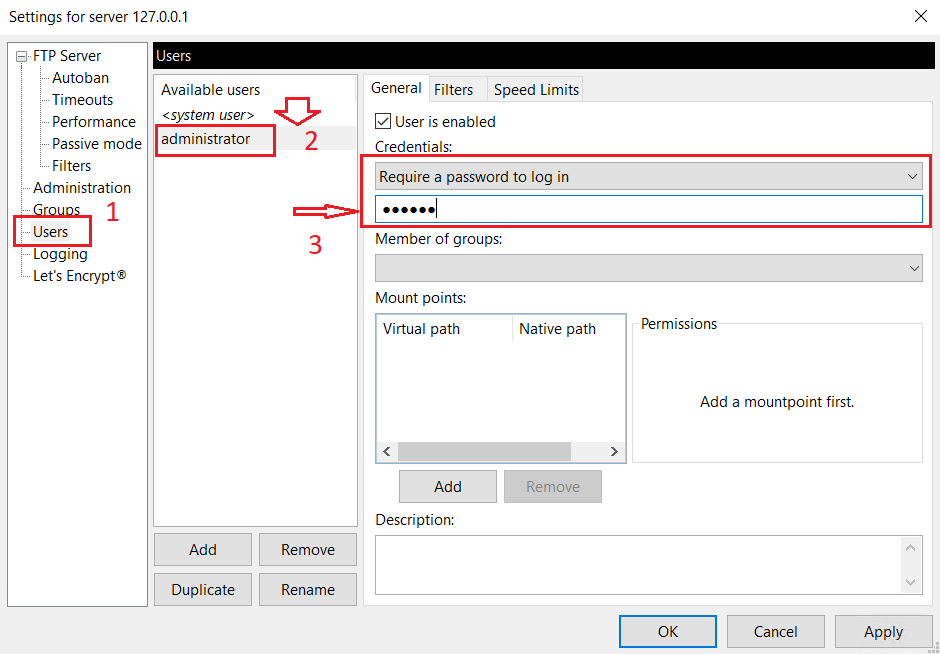
4. Select User -> Add -> enter user (Default here is Administrator) and enter the password
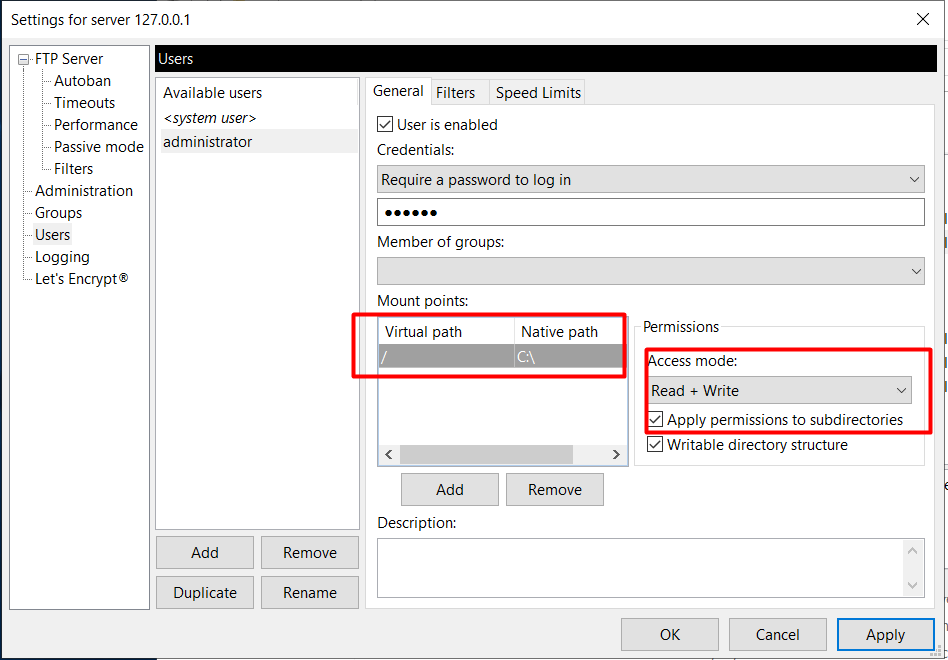
5. Then select the Mount points section to share Folders -> Add -> Select the folder where the VPS/data need to be moved as shown below -> press Ok
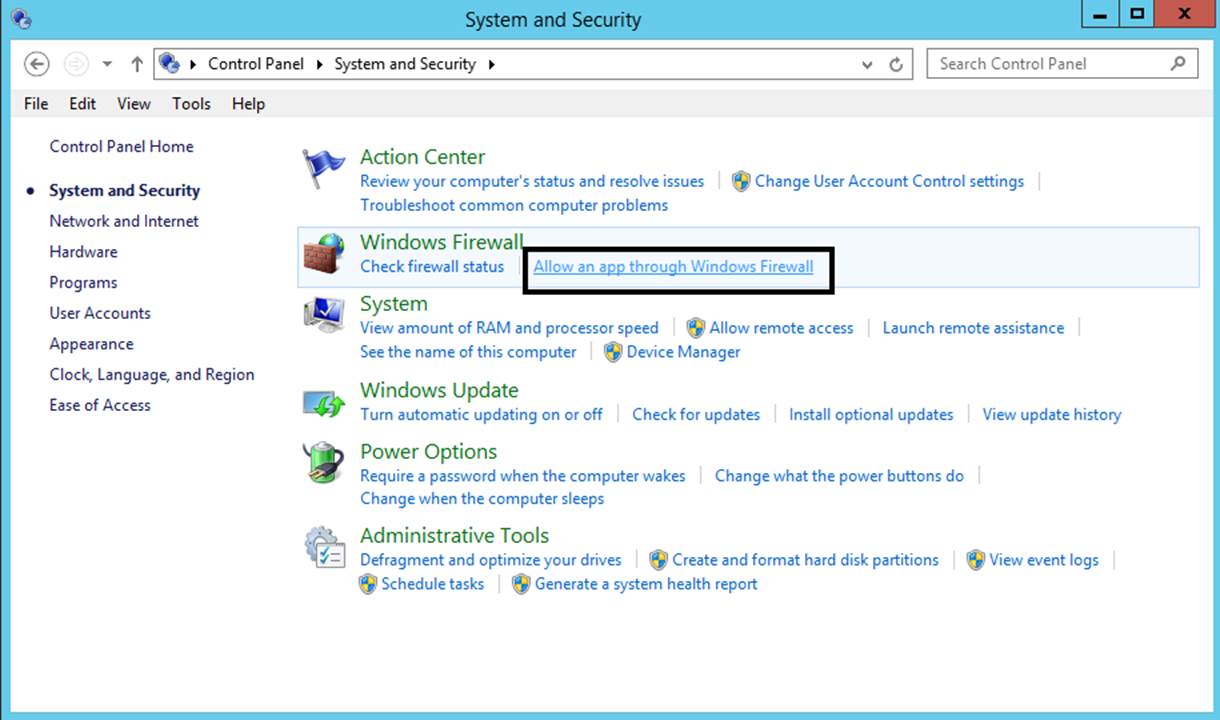
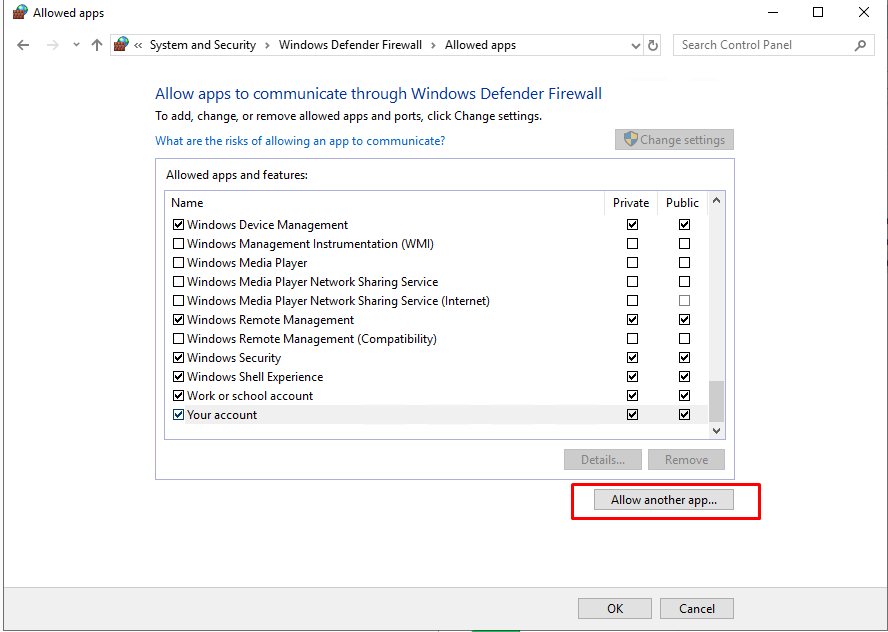
6. After setting up, open the firewall to add 1 rule for FTP -> open Control Panel -> System and Security – > Windows Firewall and hit on Allow an app through Windows Firewall.
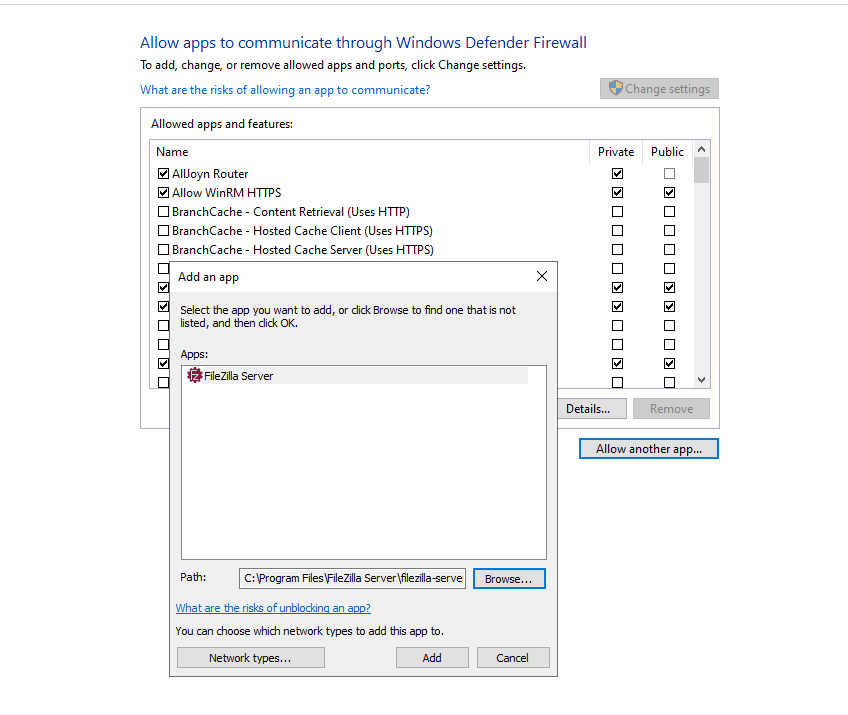
8. Next, click on Allow another app button, and a new window should open. Use the Browse button to navigate and add the Filezilla agent executable file, then hit on Add button to add the service
Add Filezilla
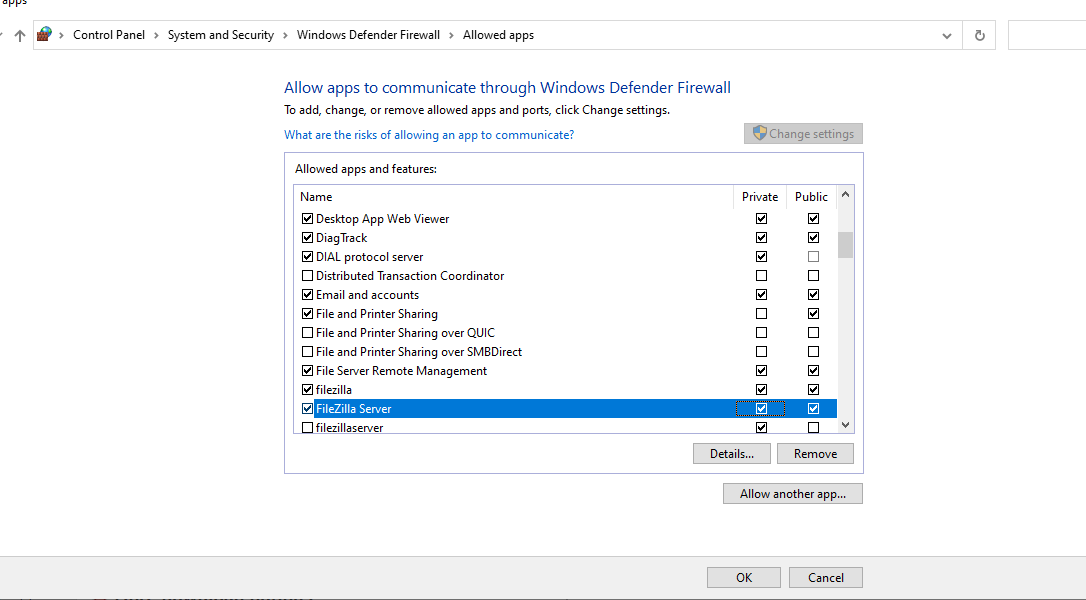
9. Next, make sure you check and open the firewall rule on the network segment where the FileZilla server is located in your network and hit the OK button to finish and apply the configuration.
10. Where VPS/Server needs to transfer data to, download and install File Zilla client https://filezilla-project.org/download.php?type=client.Then open FileZilla Client
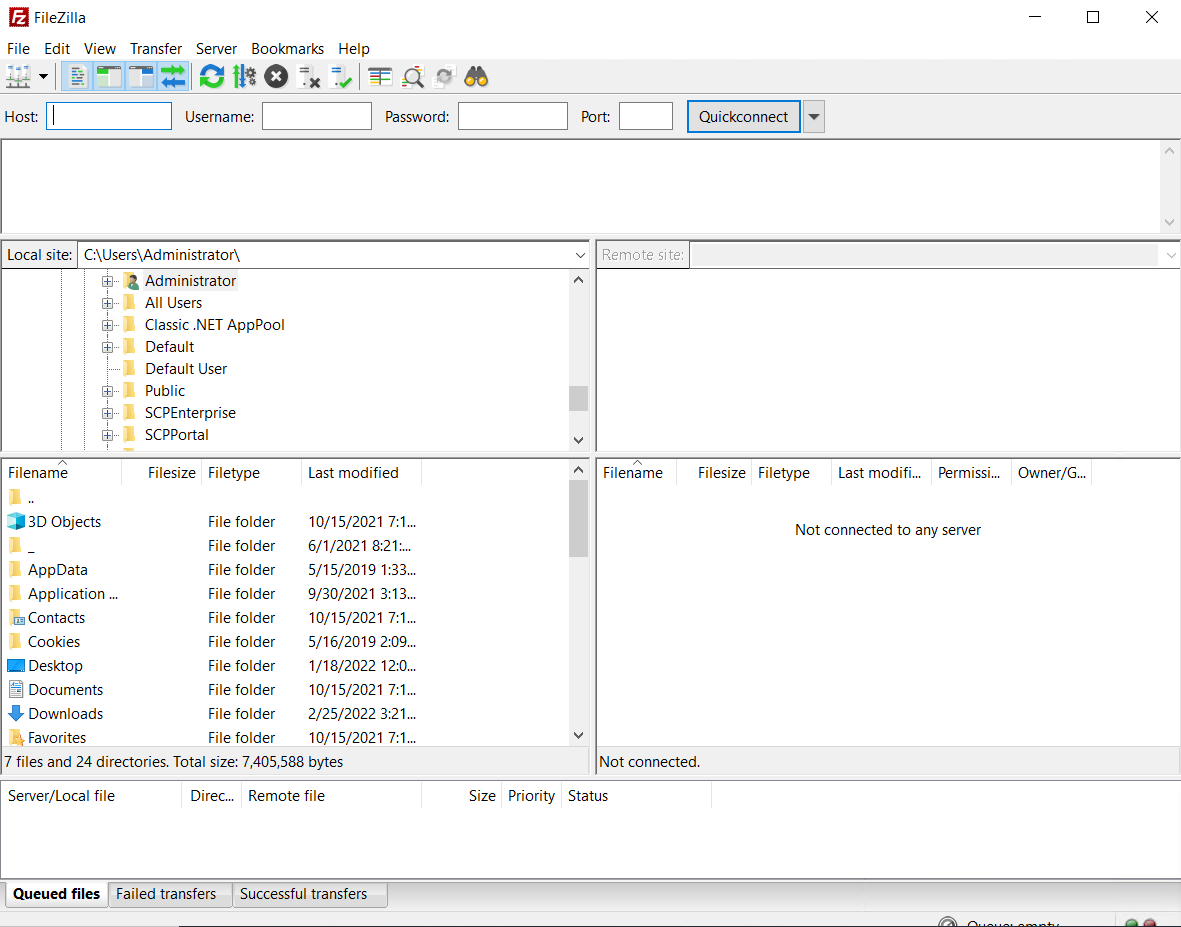
11. Enter the IP address in the Host section and enter the username, password, and port of the Server/VPS to install the Filezilla server that was initially set up -> Quick connect
12. Finish Setup and transfer data from one VPS to another by dragging and dropping folder.
Support 24/24h with coupon code: 1DOLLAROFF 10% discount. Click now! 👆
