How To Fix BusyBox (initramfs) Error on Boot (Debian)
Introduction:
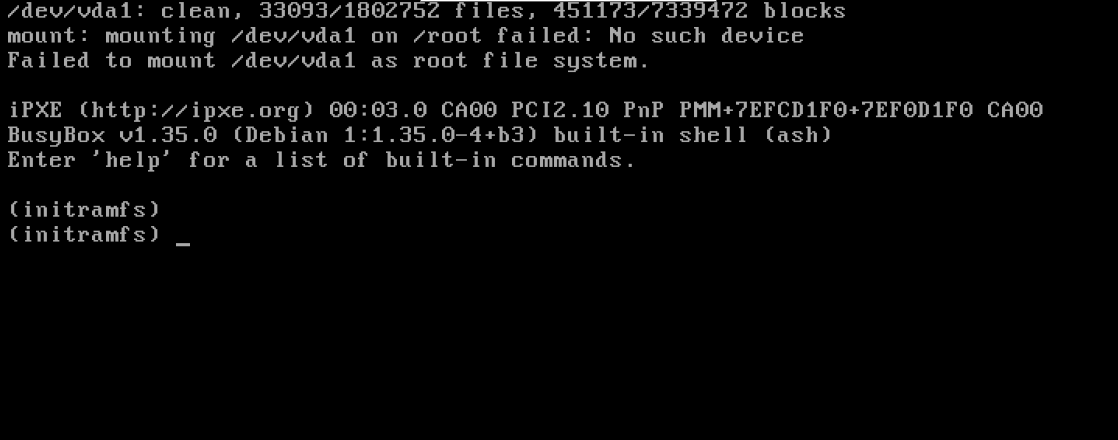
The error that drops you into BusyBox with a (initramfs) prompt during boot on Debian usually occurs when the system cannot mount the root filesystem. This is a common issue on KVM-based VPSs using VirtIO disks or when the system is abruptly powered off, misconfigured, or the kernel is corrupted.
Common Causes of Initramfs Errors
- Disk not detected due to missing VirtIO drivers (on KVM, disks are typically /dev/vda)
- Filesystem corruption caused by sudden shutdowns, hard resets, or host issues
- UUID mismatch in fstab/GRUB/initramfs after disk cloning or filesystem corruption.
- Broken kernel, missing modules in initramfs, or incorrect resume/GRUB configuration
Before Proceeding: Log in to SolusVM & Backup Your Data
✅ Access VPS Management via SolusVM To access rescue mode, use the console, or interact with your system, log in to SolusVM:
🔗 How to manage your KVM VPS via SolusVM
✅ Backup Data Before Making Changes Some of the steps below will involve changes to your system disk (e.g., running fsck, reinstalling the kernel, editing UUIDs, writing GRUB…), so you should always back up your data first to prevent unwanted loss.
🔗 How to use rescue mode in SolusVM
Case 1: Disk Not Detected Due to Missing Driver (VirtIO)
On KVM VPSs, the disk is often presented as /dev/vda. If the kernel or initramfs lacks VirtIO drivers, the disk won’t be detected, and the system won’t be able to mount it.
Check with:
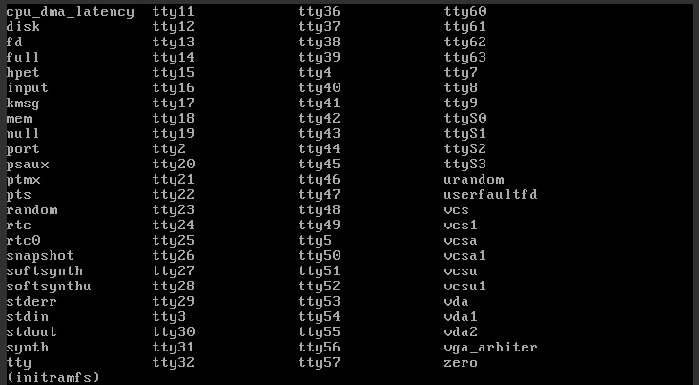
ls /dev
blkid
If you see /dev/vda1, /dev/vda2, etc., the disk is detected and the issue is not driver-related.
Case 2: Filesystem Corruption
This usually happens due to:
- Sudden shutdown or restart
- Disk or host failure
- Improper shutdown (not using poweroff or shutdown)
Fix with:
fsck -y /dev/vda1
Case 3: Incorrect UUID in fstab, GRUB, or Initramfs
If the UUID in configuration files doesn’t match the actual disk UUIDs, the system can’t mount the root partition and will drop to (initramfs).
Before continuing, enter your system through rescue mode and mount the root filesystem:
mount /dev/vda1 /mnt
mount --bind /dev /mnt/dev
mount --bind /sys /mnt/sys
mount --bind /proc /mnt/proc
chroot /mnt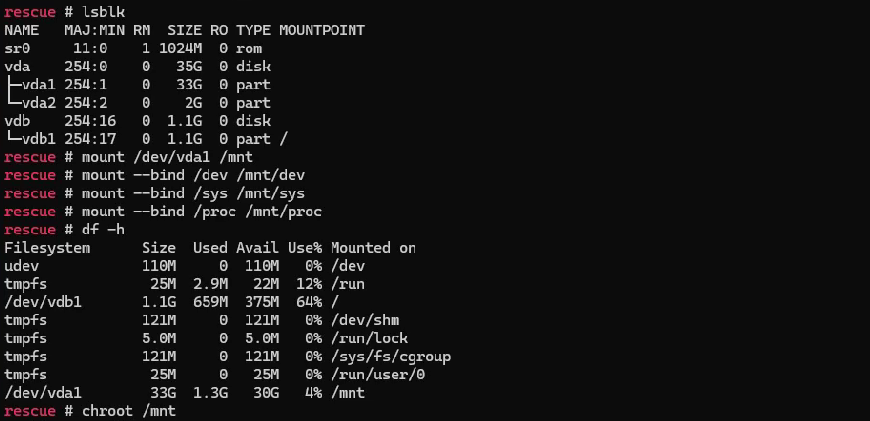
First, run blkid to get the actual UUIDs of your partitions:
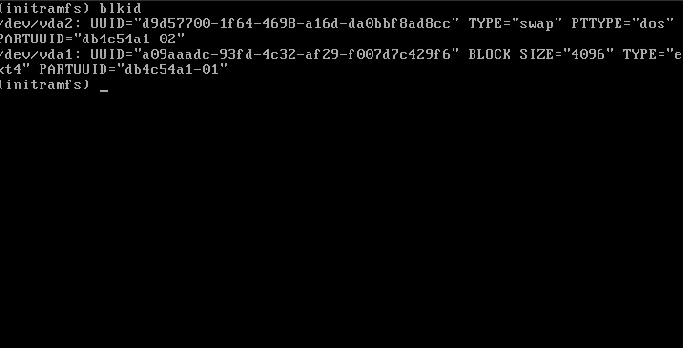
blkid

Example output:
/dev/vda2: UUID="d9d57700-1f64-4698-a16d-da0bbf8ad8cc" TYPE="swap" PTTYPE="dos" PARTUUID="db4c54a1-02"
/dev/vda1: UUID="a09aaadc-93fd-4c32-af29-f007d7c429f6" BLOCK_SIZE="4096" TYPE="ext4" PARTUUID="db4c54a1-01"
Next, check the config files:
cat /etc/fstab
cat /boot/grub/grub.cfg | grep 'linux'
In /etc/fstab, update the UUIDs so they match what you saw from blkid.
Example:
UUID=a09aaadc-93fd-4c32-af29-f007d7c429f6 /       ext4    defaults    1 1
UUID=d9d57700-1f64-4698-a16d-da0bbf8ad8cc none    swap    swap         0 0
You can also use device names instead :
/dev/vda1 / ext4 defaults 1 1
/dev/vda2 swap swap defaults 0 0

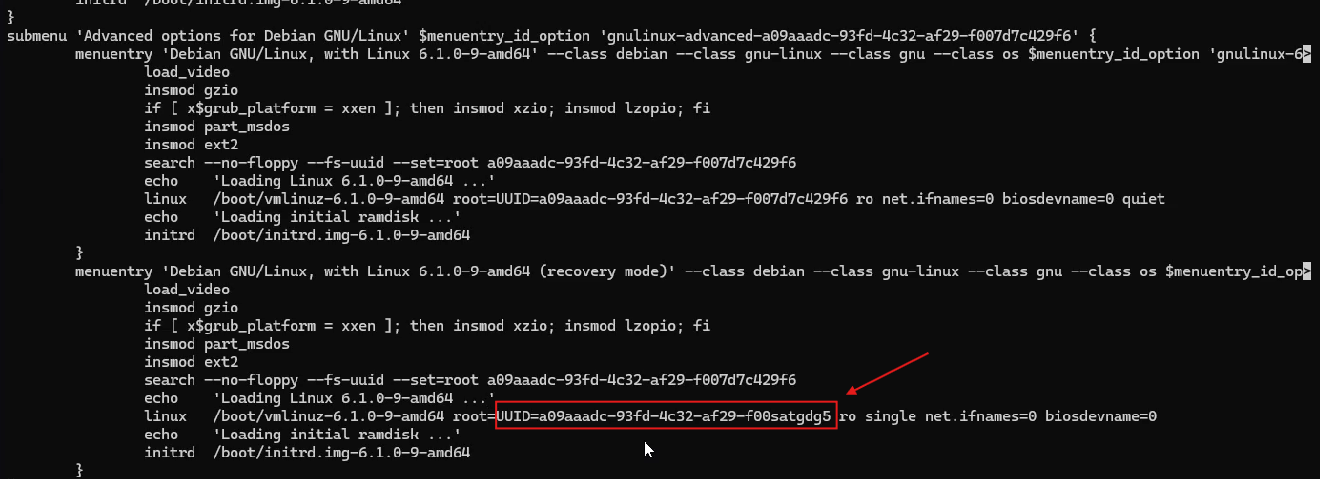
Check if GRUB is using the correct root UUID with:
cat /boot/grub/grub.cfg | grep 'linux'
If the root=UUID=... value doesn’t match /dev/vda1, then regenerate GRUB:
update-grub
Finally, update initramfs to reflect all changes:
update-initramfs -u

After everything is corrected, exit rescue mode and reboot:
reboot
✅ If all UUIDs are correct and there are no other issues, the VPS should now boot normally.
Case 4: Broken Kernel, Missing Initramfs Modules, or Resume/GRUB Misconfiguration
This is the most complex case and may involve multiple issues:
- Missing or broken kernel
- Initramfs lacks required modules
- Resume file points to a non-existent swap UUID
- GRUB is corrupted or overwritten
4.1 Restore the Current Kernel Version from Debian Snapshot
🔹 Access the System via Rescue Mode
Before performing any of the following recovery operations, enter the system using rescue mode:
✅ Step 1: Access the System in Rescue Mode and Chroot into Your Disk
mount /dev/vda1 /mnt
mount --bind /dev /mnt/dev
mount --bind /sys /mnt/sys
mount --bind /proc /mnt/proc
chroot /mnt
✅ Step 2: Check Available Kernel Versions
ls -lh /boot/vmlinuz-*
✅ Step 3: Check and Fix the Resume File (Swap UUID)
The file /etc/initramfs-tools/conf.d/resume must reference the UUID of your active swap partition. If it doesn’t match, you’ll get warnings during update-initramfs, and suspend/resume functionality may break.
blkidexample:
/dev/vda2: UUID="d9d57700-1f64-4698-a16d-da0bbf8ad8cc" TYPE="swap" PTTYPE="dos" PARTUUID="db4c54a1-02"
In this case, /dev/vda2 is your swap partition.
Open the resume config file:
nano /etc/initramfs-tools/conf.d/resume
Ensure the UUID matches the swap partition UUID (in this example, /dev/vda2):

If you don’t have a swap partition, either:
Comment out the line:
✅ Step 4: Rebuild:
update-initramfs -u
update-grub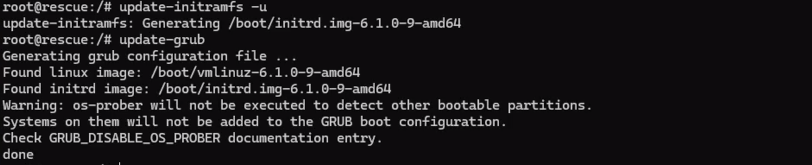
🔹Reinstall Kernel from Snapshot (If Missing or Corrupted)
If your system is missing a valid kernel or you’re encountering boot issues, you can reinstall a known working kernel version from the Debian Snapshot archive.
⚠️ Important: Check your current kernel version first. Before installing, make sure you’re using the correct version. To check your current kernel (if the system is bootable or accessible via chroot), run:
ls -lh /boot/vmlinuz-*
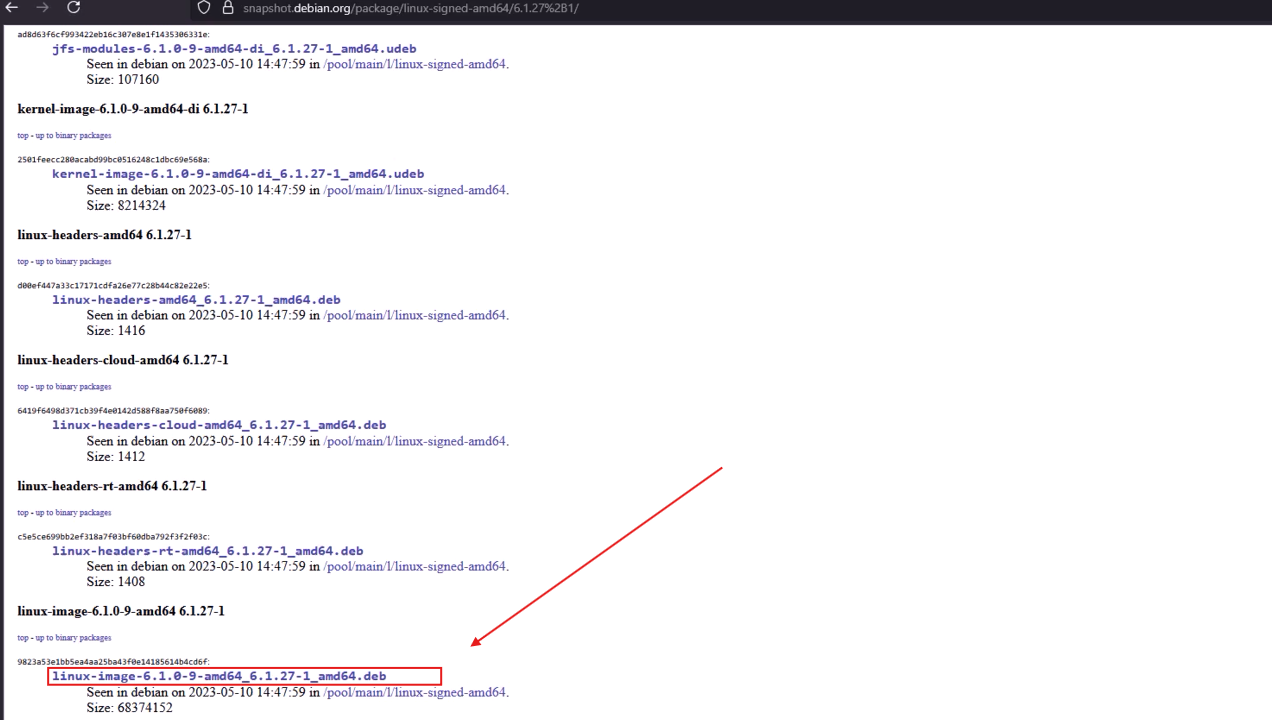
If you’re using a different version than 6.1.0-9-amd64, find and download the appropriate version from:
🔗
For systems using our default Debian 12 OS template
If you’re running a standard Debian 12 setup with the default kernel (6.1.0-9-amd64), and you haven’t manually changed or upgraded it, you can reinstall this kernel version as a reliable fallback.
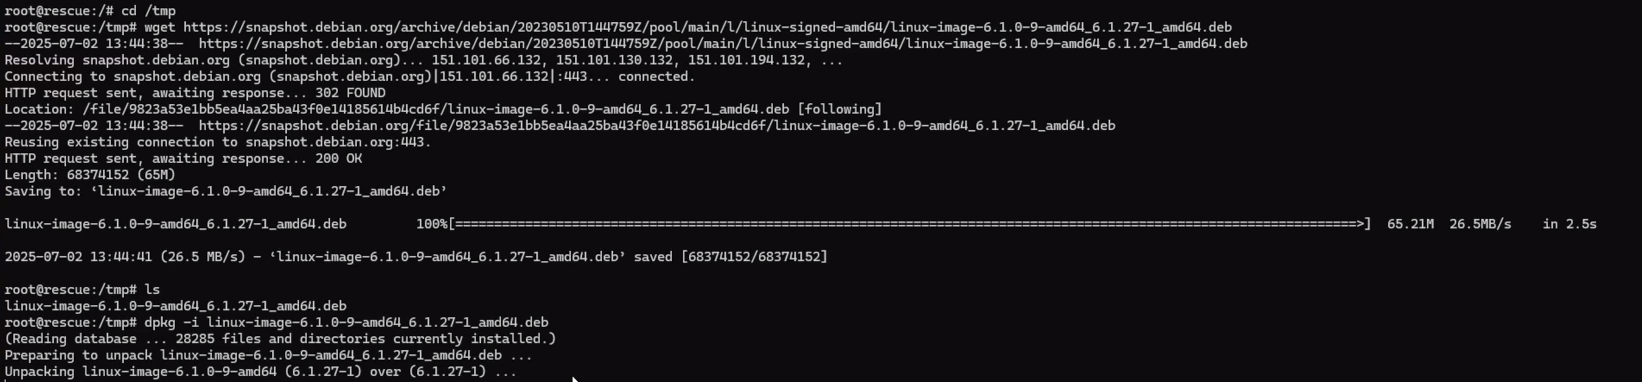
- Move into the temporary directory
cd /tmp - Download the Debian kernel
.debpackage from Snapshot
wget https://snapshot.debian.org/archive/debian/20230510T144759Z/pool/main/l/linux-signed-amd64/linux-image-6.1.0-9-amd64_6.1.27-1_amd64.deb
- Install the downloaded kernel package
dpkg -i linux-image-6.1.0-9-amd64_6.1.27-1_amd64.deb
- Regenerate the initramfs image for the installed kernel version
update-initramfs -u -k 6.1.0-9-amd64- Update GRUB to recognize the kernel
update-grub
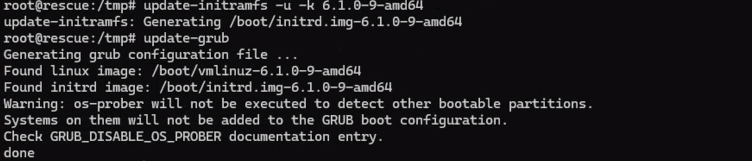
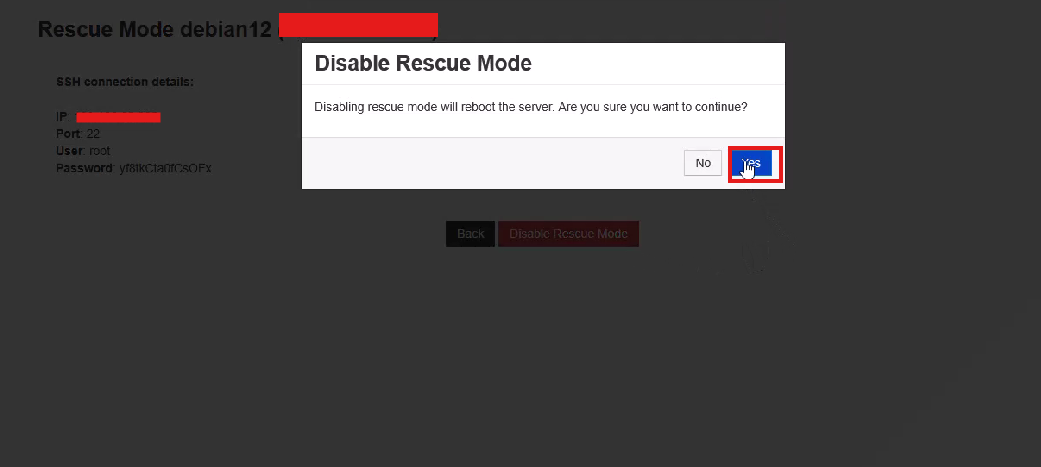
✅ Disable Rescue Mode and your system should now boot normally into the installed and configured kernel.
4.2 Final Fix: Install the Latest Kernel from Backports (Highly Recommended)
If your VPS still can’t boot after fixing UUIDs, reinstalling GRUB, or updating initramfs, the issue may come from an outdated or broken kernel lacking necessary drivers (e.g., VirtIO). Installing the latest kernel from Debian backports is a reliable way to restore full system functionality.
🔹 Step 1: Access the OS via Rescue Mode
First, chroot into your system:
mount /dev/vda1 /mnt
mount --bind /dev /mnt/dev
mount --bind /sys /mnt/sys
mount --bind /proc /mnt/proc
chroot /mnt
🔹 Step 2: Enable Backports & Install the Latest Kernel
This installs the newest kernel available for Debian 12 (Bookworm):
echo "deb http://deb.debian.org/debian bookworm-backports main" >> /etc/apt/sources.list
apt update -y
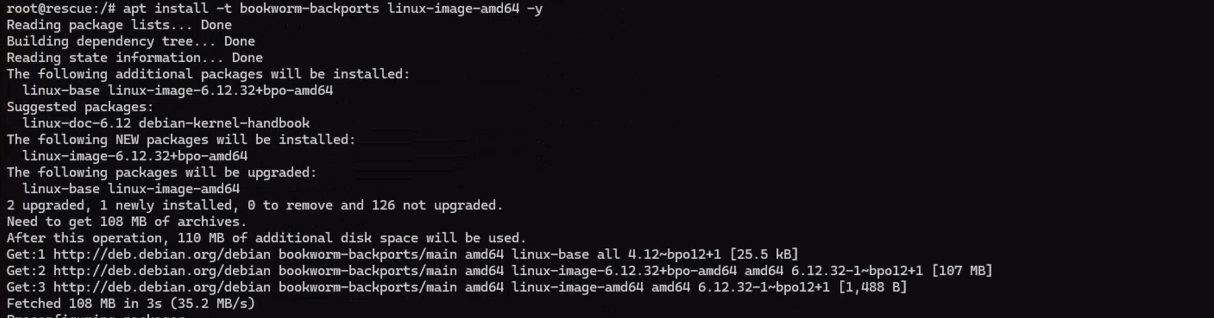
apt install -t bookworm-backports linux-image-amd64 -y
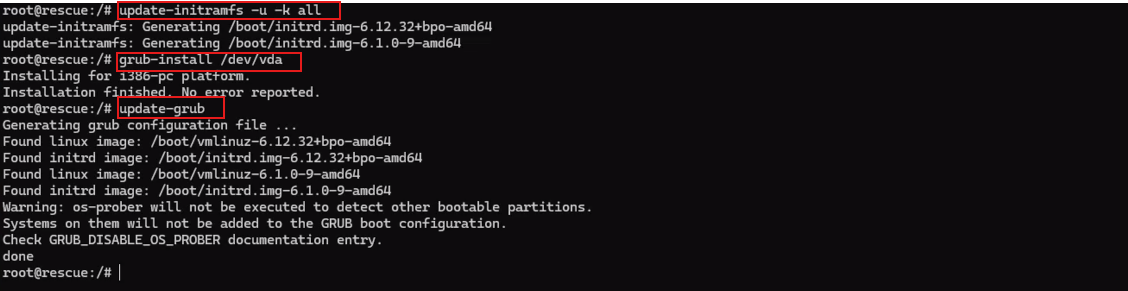
‘🔹 Step 3: Rebuild initramfs Reinstall GRUB Bootloader and Update GRUB
ls /boot/vmlinuz-*
update-initramfs -u -k all
grub-install /dev/vda
update-grub

🔹 Final Step: Exit Rescue Mode and Reboot
✅ This method resolves most kernel or driver-related boot issues, especially on KVM VPS using VirtIO disks. It is the most reliable fix if earlier recovery attempts didn’t work.

✅ Conclusion
Initramfs/BusyBox errors are common on Debian/Ubuntu VPSs due to many reasons: undetected disks, corrupted filesystems, incorrect UUIDs, or broken kernel/initramfs. However, as long as you identify the cause and use rescue mode properly, it is entirely possible to recover the system without reinstalling the OS.
Always back up your data before performing disk or kernel modifications. Keep this guide handy—it’s especially useful for managing multiple VPSs, cloud servers, or KVM-based systems.
